

Issue
- ESET Remote Administrator (ERA) 6.x Certificate Migration to a secondary server
Solution
- Export the Certificate Authority from the existing ERA Server
- Export the Peer Server Certificate from the existing ERA Server
- Import the Certificate Authority (CA) .der file to the secondary ERA Server
- Import the Peer Server Certificate .pfx file to the secondary ERA Server
I. Export the Certificate Authority from the existing ERA Server, Server One in this example
- Open ESET Remote Administrator Web Console (ERA Web Console) in your web browser and log in.
- Click Admin
 → Certificates and select Certification Authorities.
 - Click ERA Certification authority and select Export Public Key.
- The file is saved with a
.derextension.
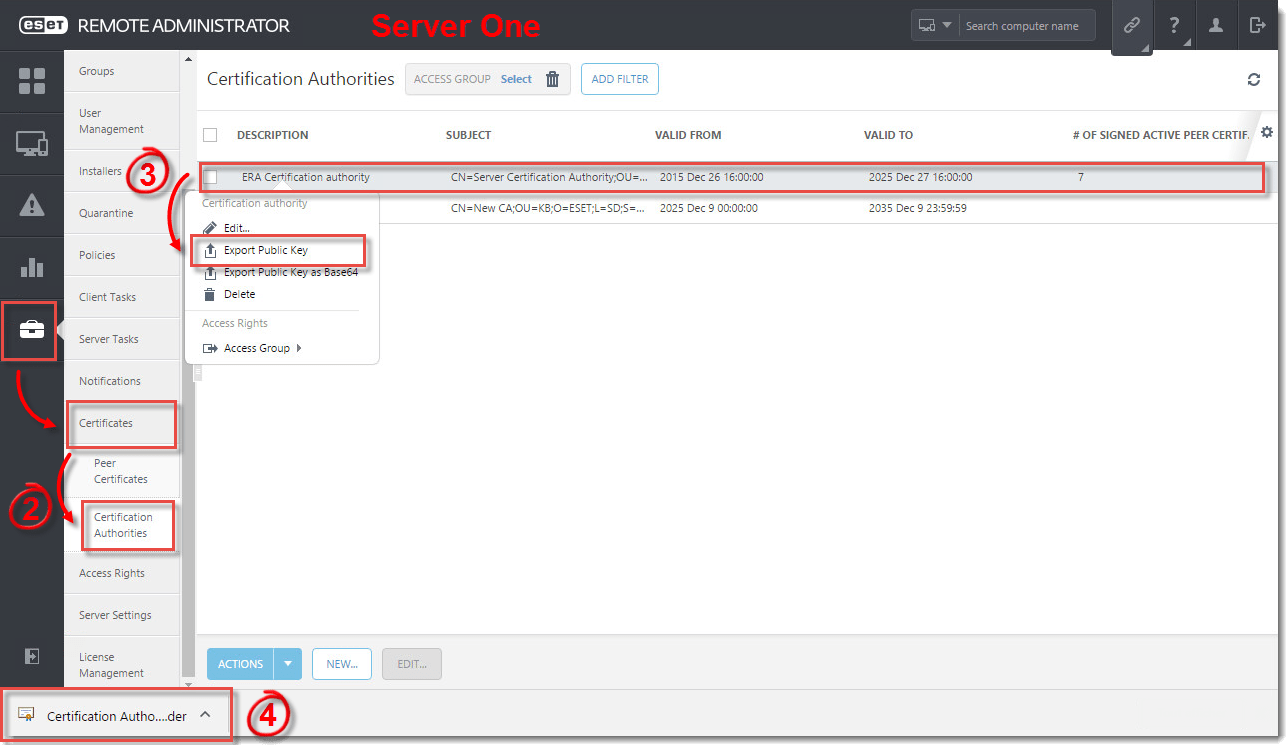
Figure 1-1
Click the image to view larger in new window
II. Export the Peer Server Certificate from the existing ERA Server, Server One in this example
- Click Admin → Certificates.
- Click Server certificate and select Export.
- The file is saved with a .pfx extension.
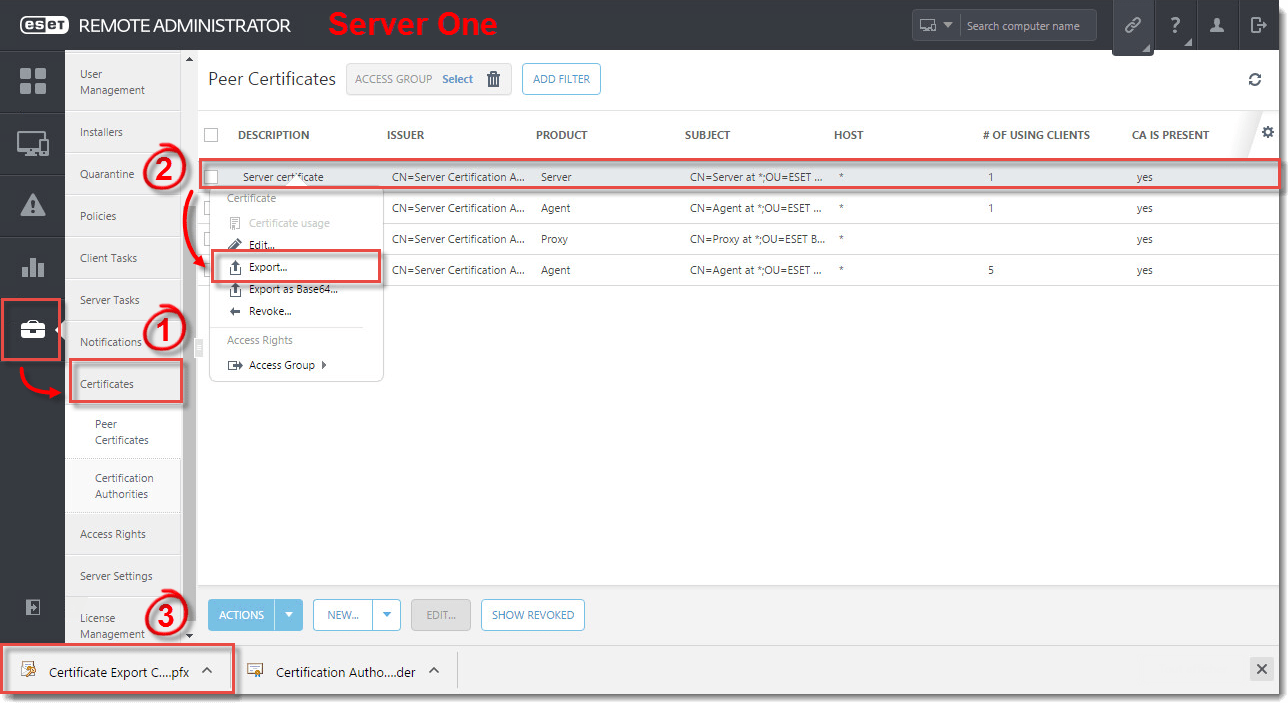
Figure 2-1
Click the image to view larger in new window
- Save the .pfx and .der files to a shared location that is accessible from Server Two.
III. Import the Certificate Authority (CA) .der file to the secondary ERA Server, Server Two in this example
- Open ESET Remote Administrator Web Console (ERA Web Console) in your web browser and log in.
- Click Admin → Certificates → Certification Authorities.
- Click Actions and select Import Public Key.
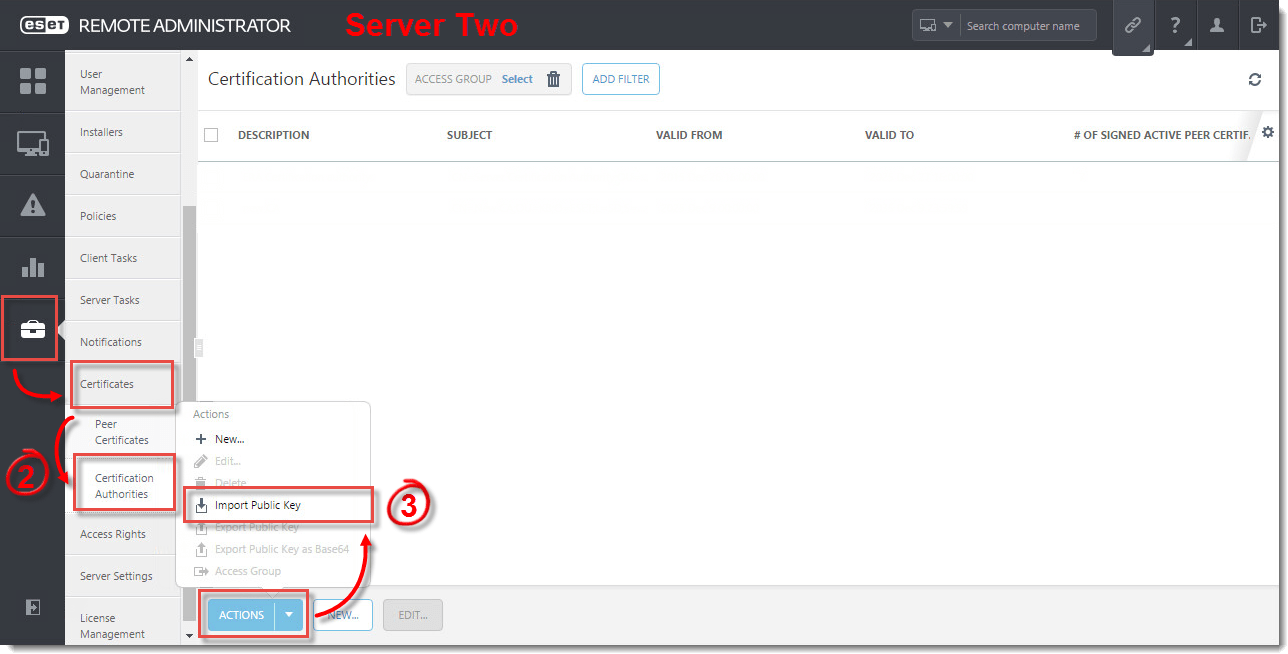
Figure 3-1
Click the image to view larger in new window
- Click Choose File. Navigate to the shared location where you saved the Certificate Authority (CA) .der file. Select the file and click Open.
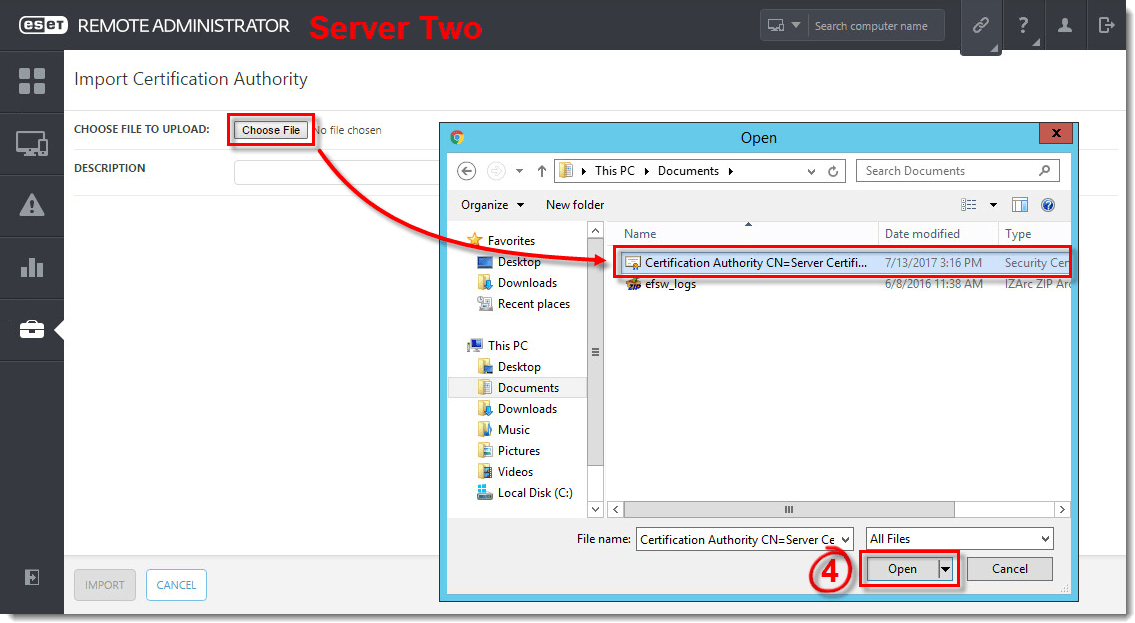
Figure 3-2
Click the image to view larger in new window
- Type in a Description and click Import.
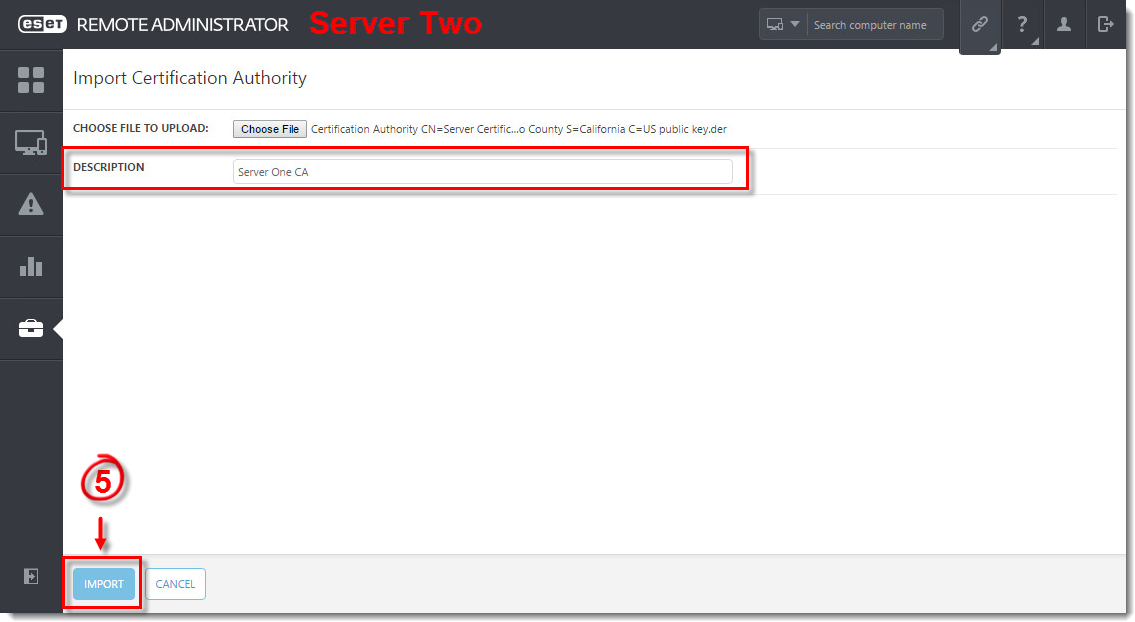
Figure 3-3
Click the image to view larger in new window
- After the Certificate has been successfully imported, click Close. The Certification Authority from Server One is now in the Certification Authorities list on Server Two.
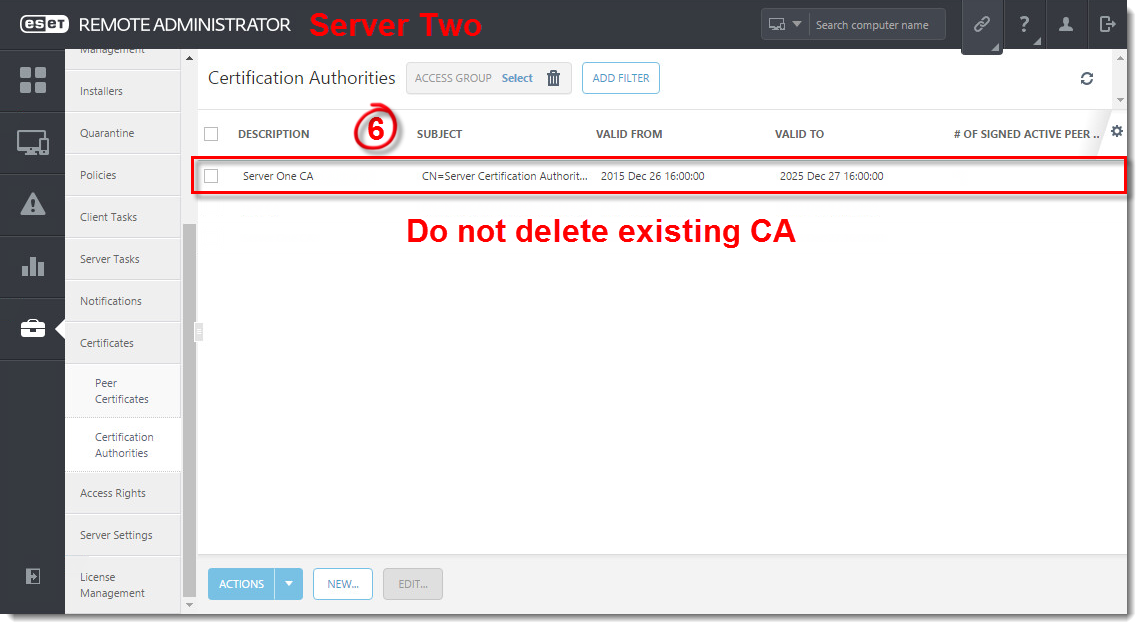
Figure 3-4
Click the image to view larger in new window
IV. Import the Peer Server Certificate .pfx file to the secondary ERA Server, Server Two in this example
- Click Admin → Server Settings → Change certificate.
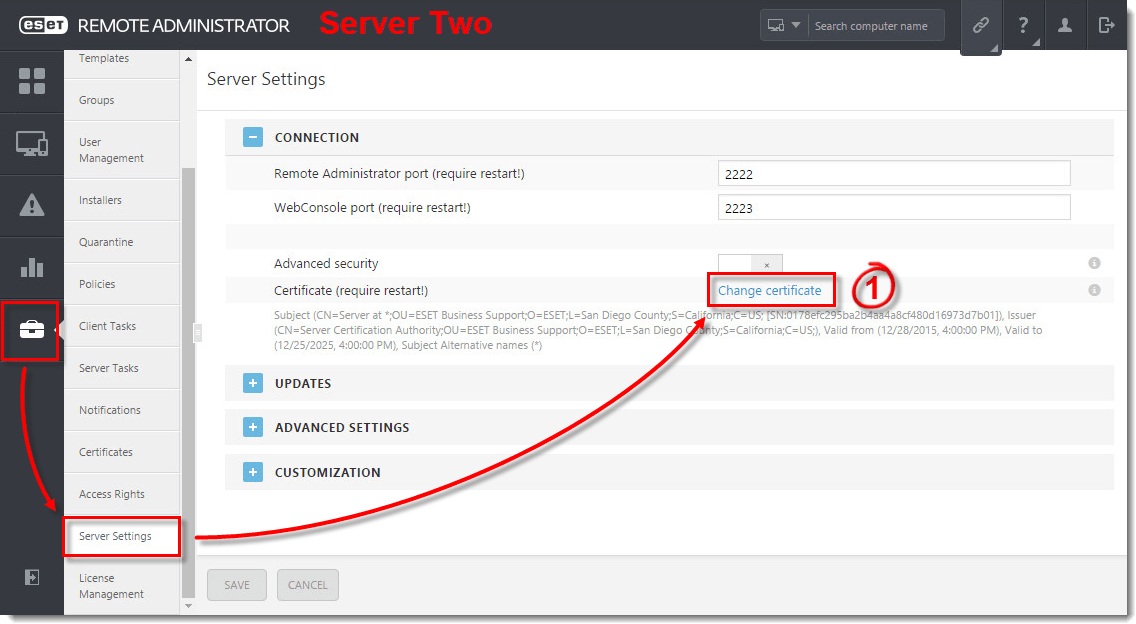
Figure 4-1
Click the image to view larger in new window
- Select Custom certificate in the Certificate window and click the choose file icon.
- Navigate to the shared location where you saved the Peer Server Certificate .pfx file from Server One. Select the file and click Open.

Figure 4-2
Click the image to view larger in new window
- Click OK → Save.
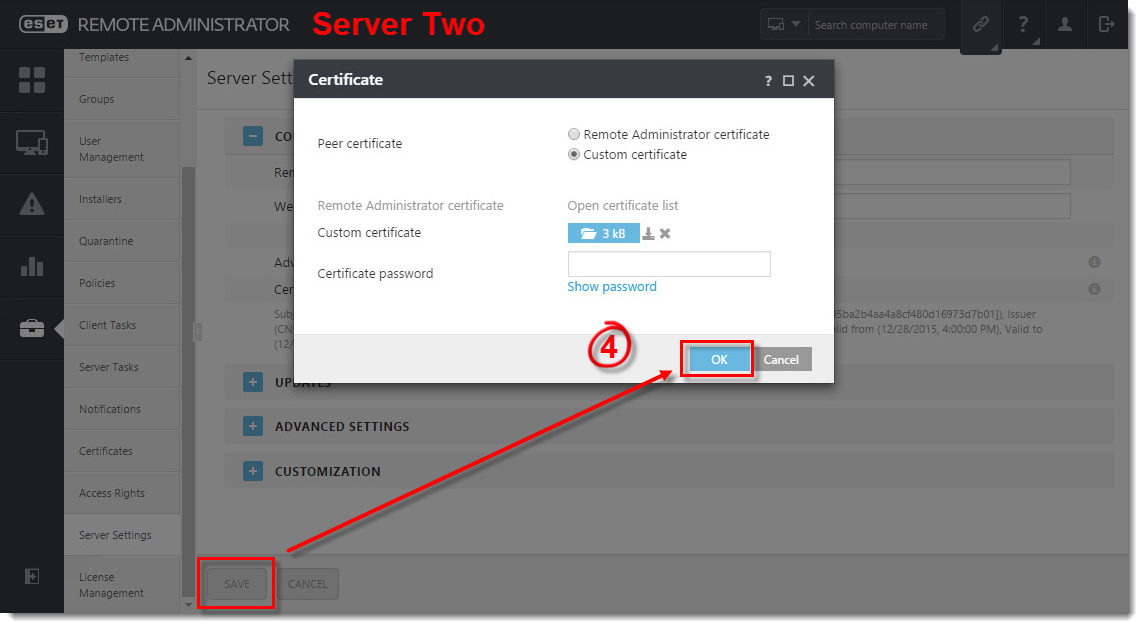
Figure 4-3
Click the image to view larger in new window
To complete the certificate change, restart the ERA Server service. To restart the service:
- Press the Windows key
 + R, type
 services.mscin the Open field and click OK. - Right-click ESET Remote Administrator (ERA) Server and select Restart.
With your certificates successfully migrated to the new server, you are ready to migrate Client Computers from Server One to Server Two.
Last Updated: Jul 20, 2021
(Visited 21 times, 1 visits today)