

Issue
- Migrate client computers from the existing ESMC server to the new ESMC server using an agent policy
Solution
I. Install the new ESET Security Management Server
- Install ESMC Server using the All-in-one package installer (Windows) or choose another installation method (Windows manual installation, Linux or Virtual Appliance).
- Import all required ESET licenses to ESMC.
II. Export the Certificate Authority from the new ESMC Server, Server One in this example
- On your new ESMC server, open ESET Security Management Center Web Console (ESMC Web Console) in your web browser and log in.
- Click More → Certificates and select Certification Authorities.
- Click ERA Certification authority and select Export Public Key.
- The file is saved with a .der extension.

Figure 1-1
Click the image to view larger in new window
III. Export the Agent Certificate .pfx file from the new ESMC Server
- On your new ESMC server,open ESET Security Management Web Console (ESMC Web Console) in your web browser and log in.
- Click More → Peer Certificates.
- Click Agent certificate and select Export.
- The file is saved with a .pfx extension.

Figure 2-1
- Save the .pfx and .der files to a shared location that is accessible from Server Two.
IV. Import the Certificate Authority (CA) .der file to the existing ESMC Server (Server Two in this example)
- On your existing ESMC server, open ESET Security Management Center Web Console (ESMC Web Console) in your web browser and log in.
- Click More → Certificates → Certification Authorities.
- Click Actions and select Import Public Key.
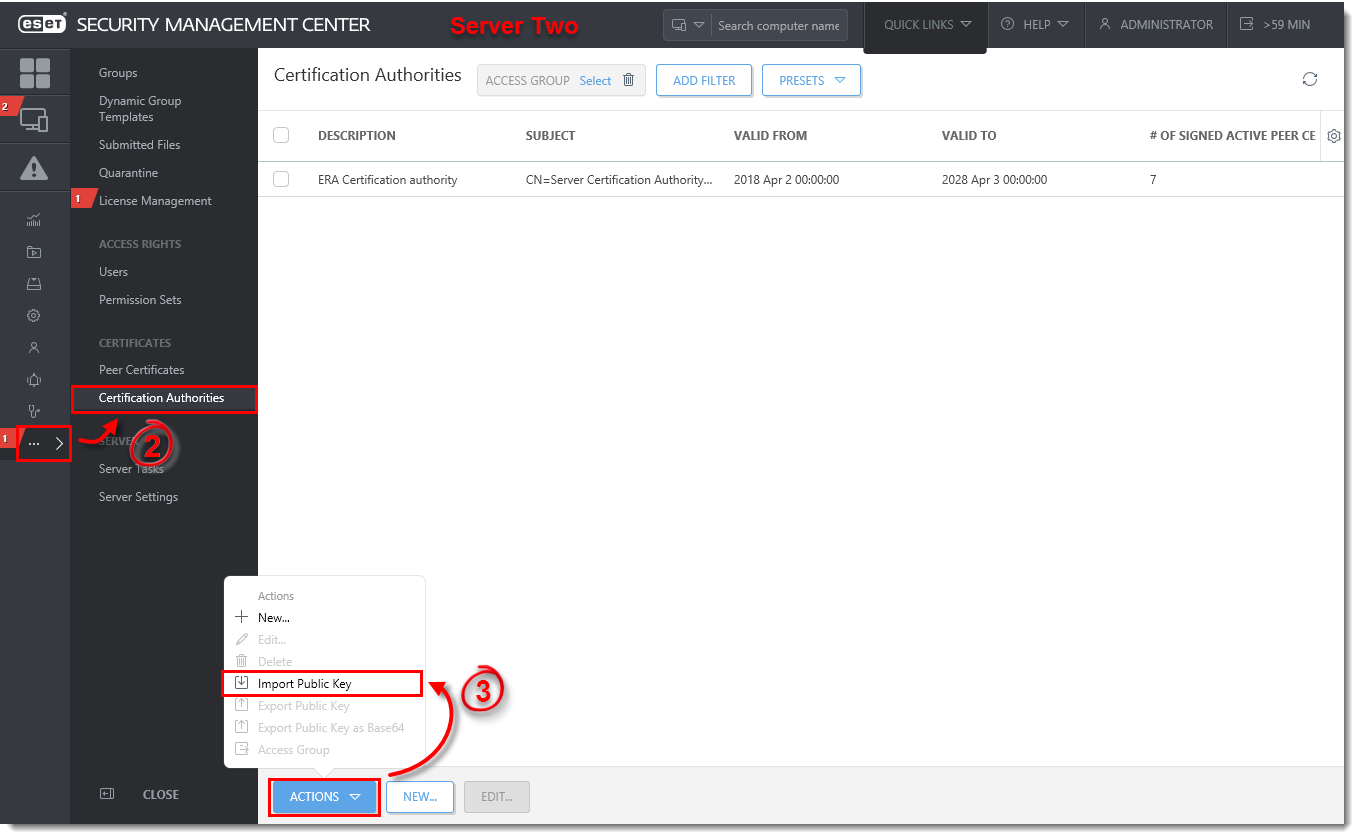
Figure 3-1
Click the image to view larger in new window
- Click the Browse button. Navigate to the shared location where you saved the Certificate Authority (CA) .der file. Select the file and click Open.
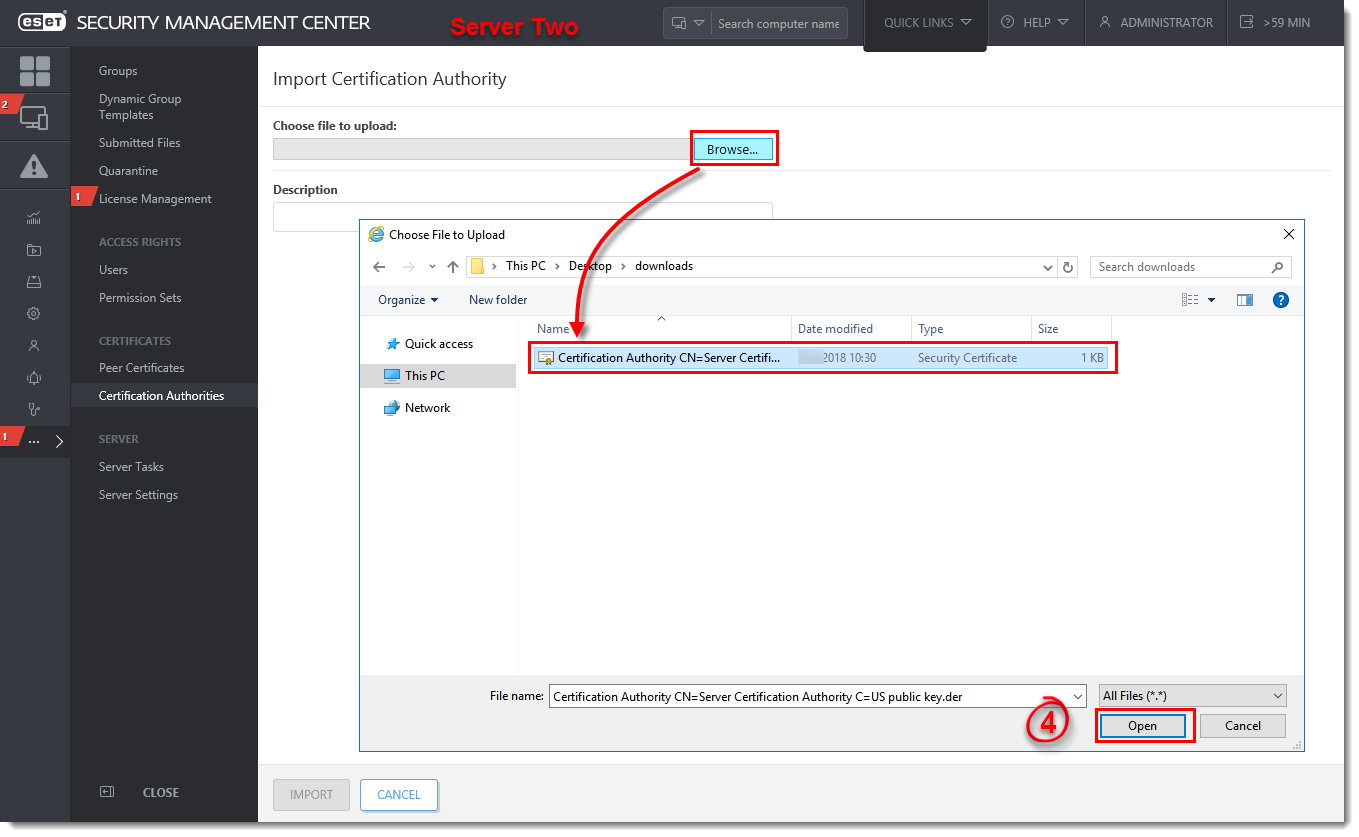
Figure 3-2
Click the image to view larger in new window
- Type in a Description and click Import.
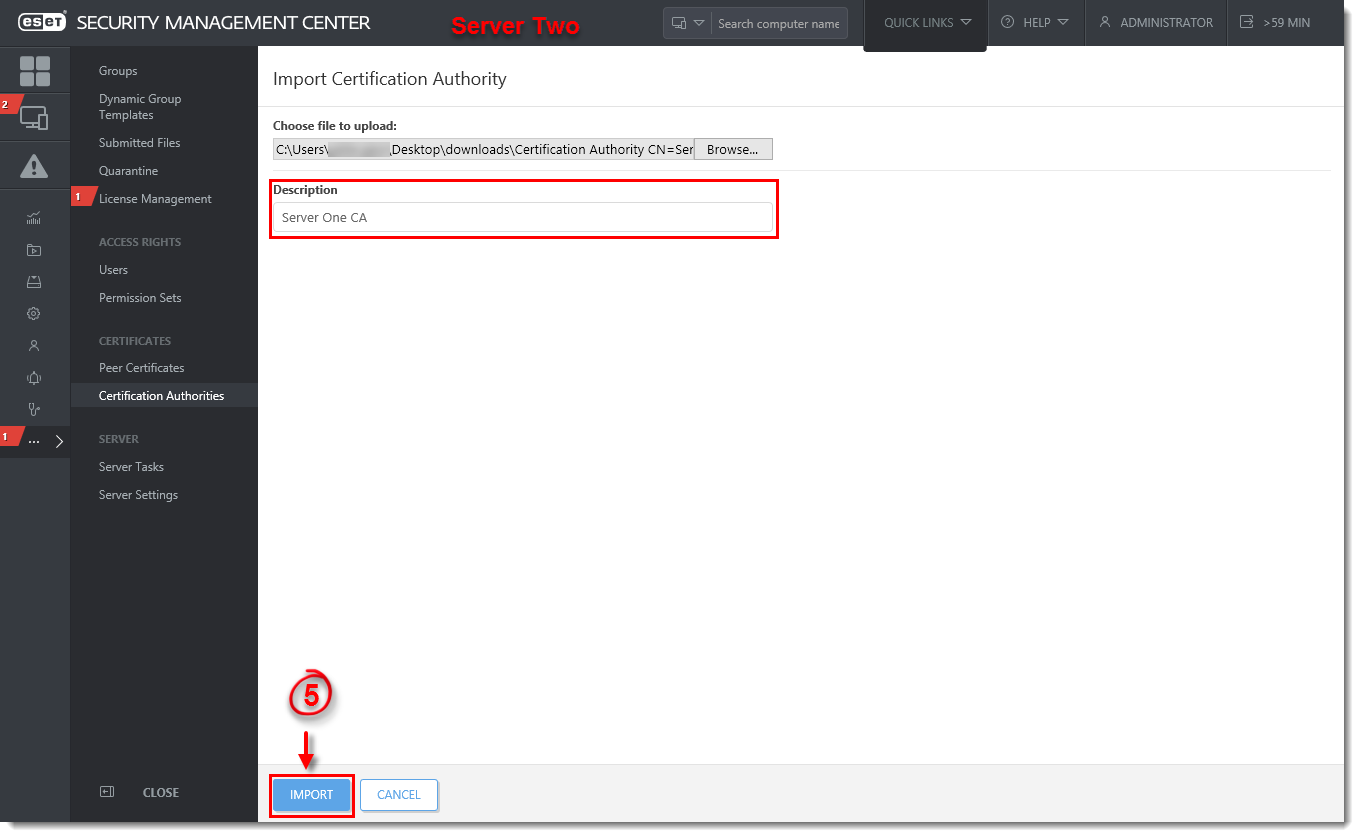
Figure 3-3
Click the image to view larger in new window
- After the Certificate has successfully imported, click Close. The Certification Authority from Server One is now in the Certification Authorities list on Server Two.
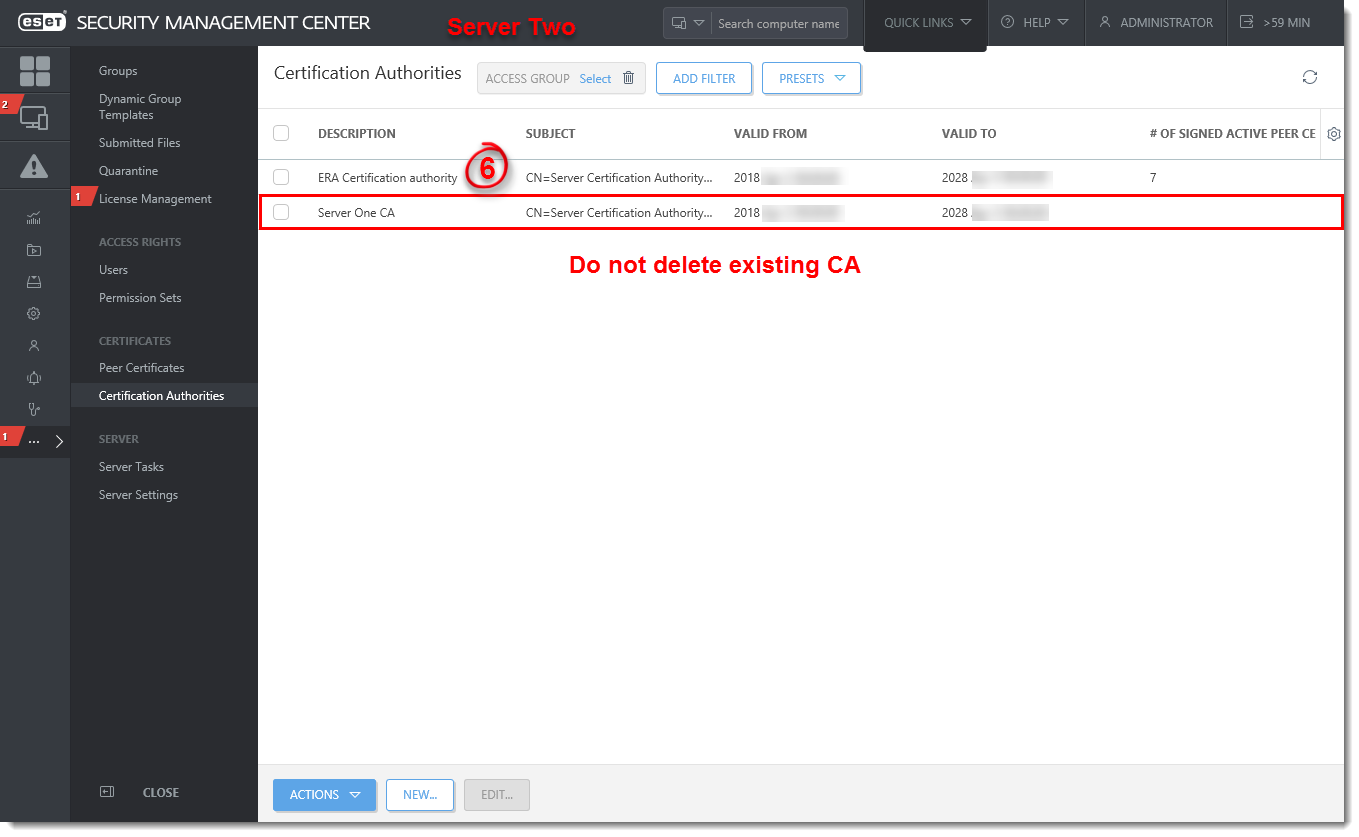
Figure 3-4
Click the image to view larger in new window
Make sure the exported Agent certificate .pfx file is accessible to the existing ESMC Server (Server Two) and continue to migrate client computers from the existing ESMC Server to the new ESMC Server.
V. Migrate client computers
- On your existing ESMC server, open ESET Security Management Center Web Console (ESMC Web Console) in your web browser and log in.
- Click Policies.
- Click Policies → New.
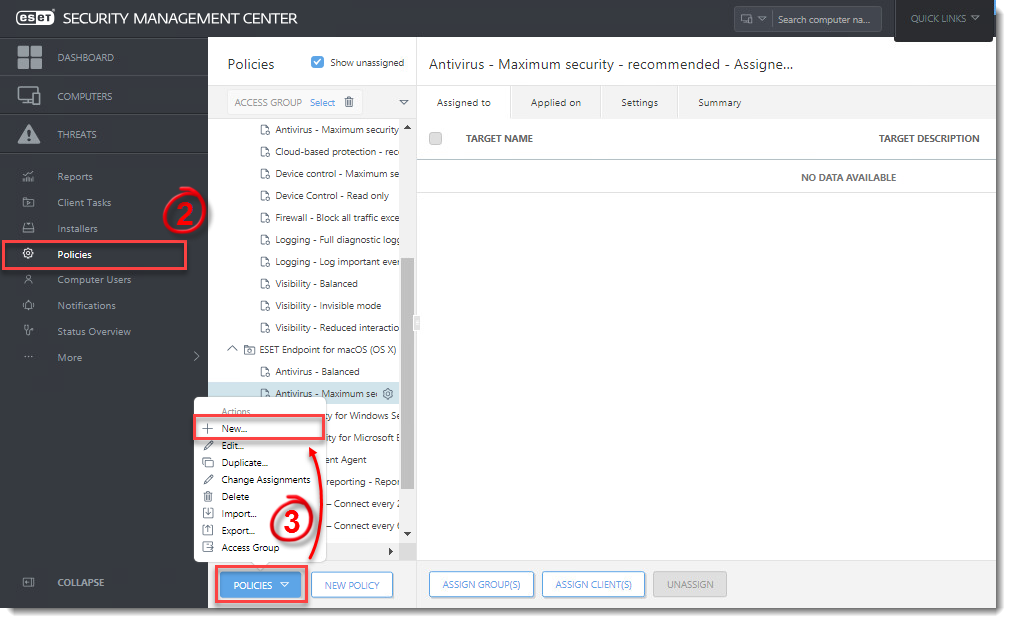
Figure 4-1
Click the image to view larger in new window
- Type a Name and optional Description for the policy in the appropriate fields.
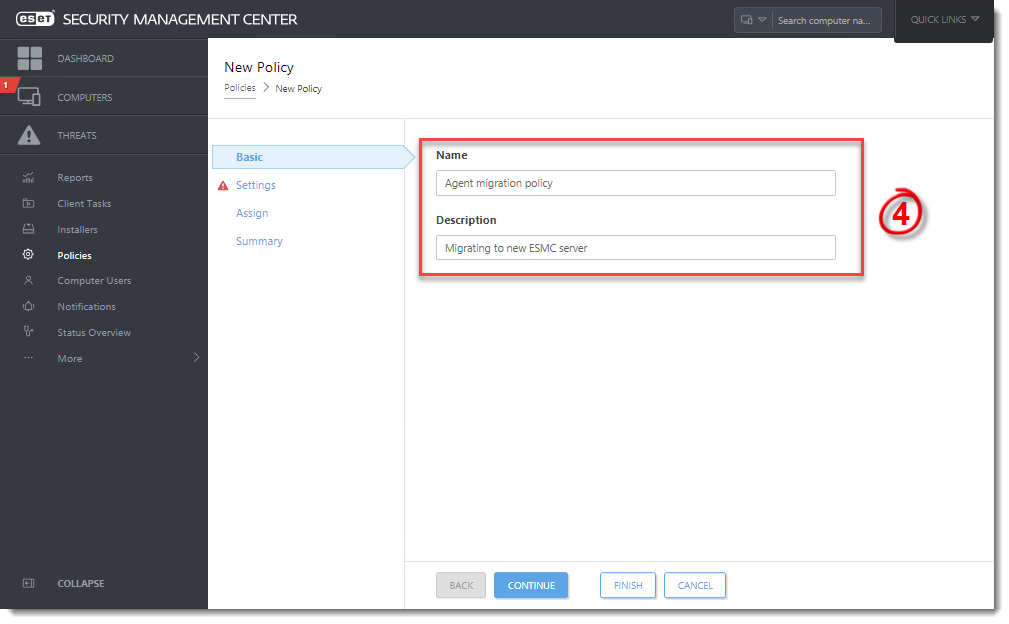
Figure 4-2
Click the image to view larger in new window
- Click Settings, select ESET Management Agent from the drop-down menu and click Edit server list.
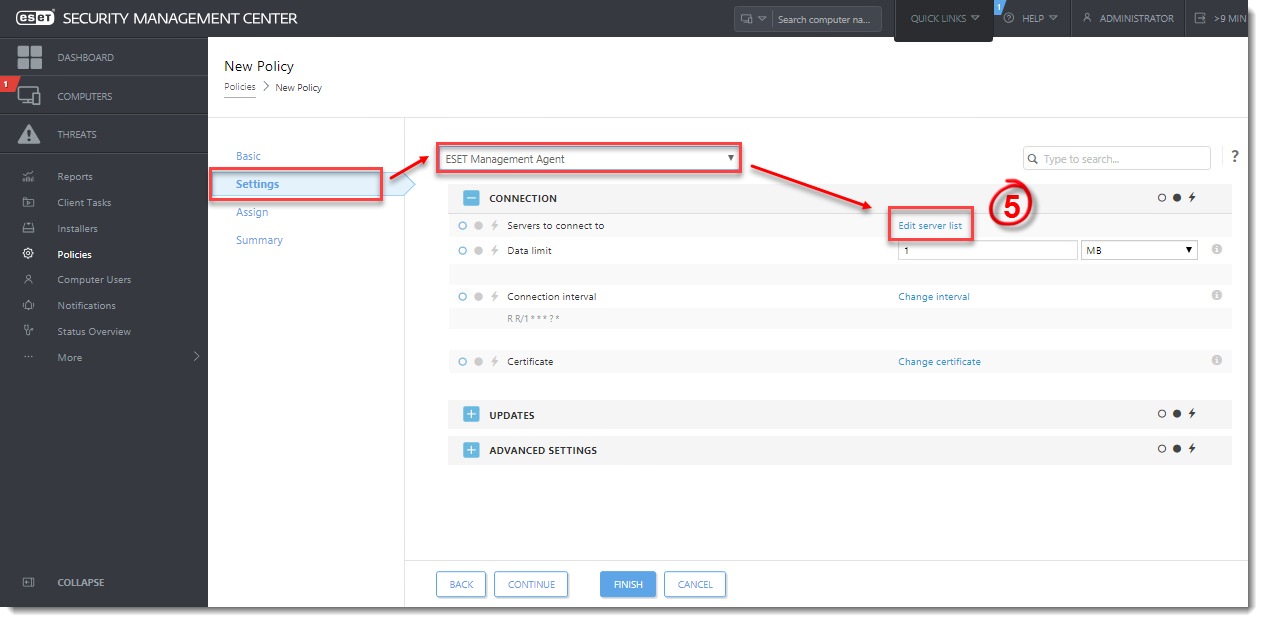
Figure 4-3
Click the image to view larger in new window
- Click Add. Type the FQDN / IP address of the new server in the Host field and click Ok.

Figure 4-4
Click the image to view larger in new window
- Verify the FQDN / IP address for the new server is correct and click Save.

Figure 4-5
- Click Change certificate.
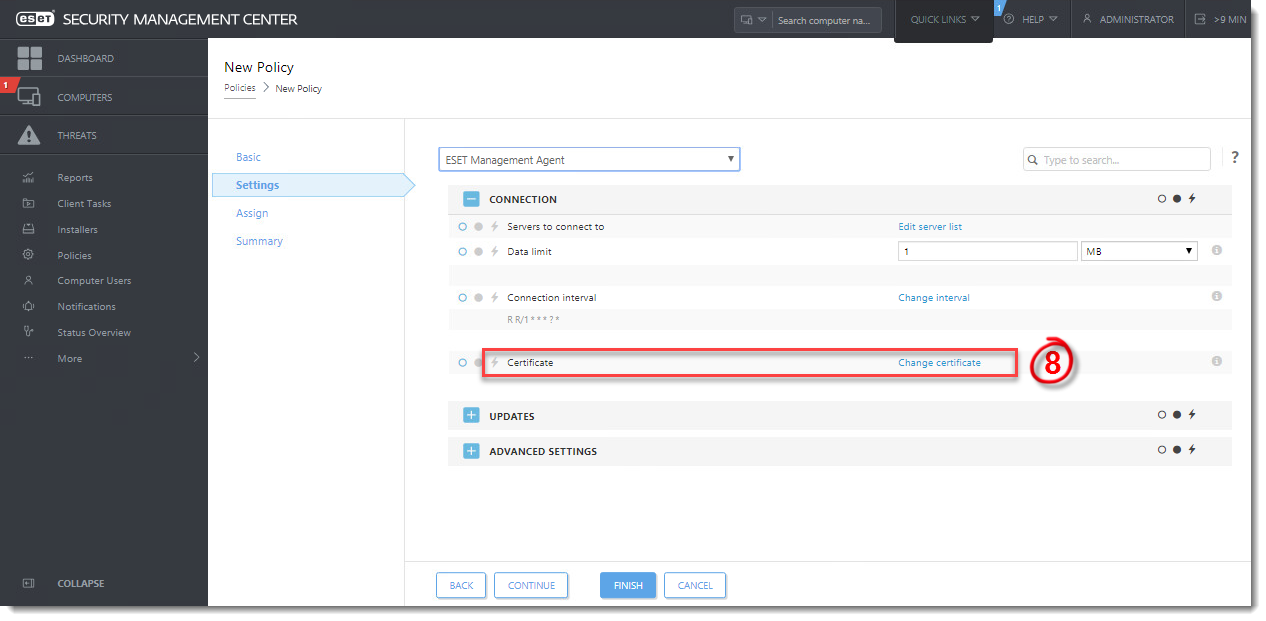
Figure 4-6
Click the image to view larger in new window
- Select Custom certificate and click the folder icon.
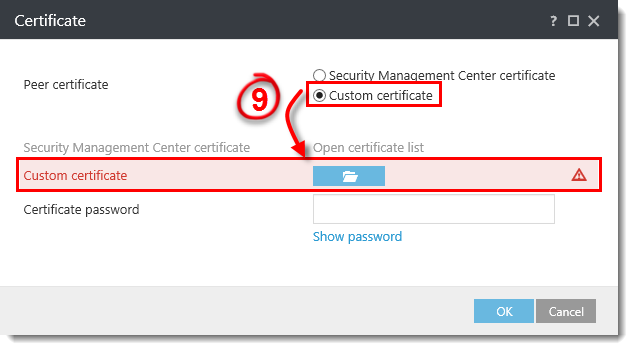
Figure 4-7
- Navigate to the Agent Certificate .pfx file exported from the new ESMC Server, select the file and click OK.
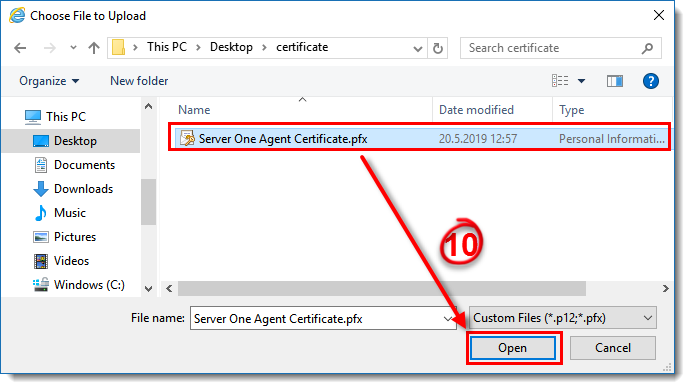
Figure 4-8
- The Agent certificate is in the policy.

Figure 4-9
Click the image to view larger in new window
- Select Assign → Assign. Select a client computer to migrate to the new server. Only select one client computer to start. Click OK.
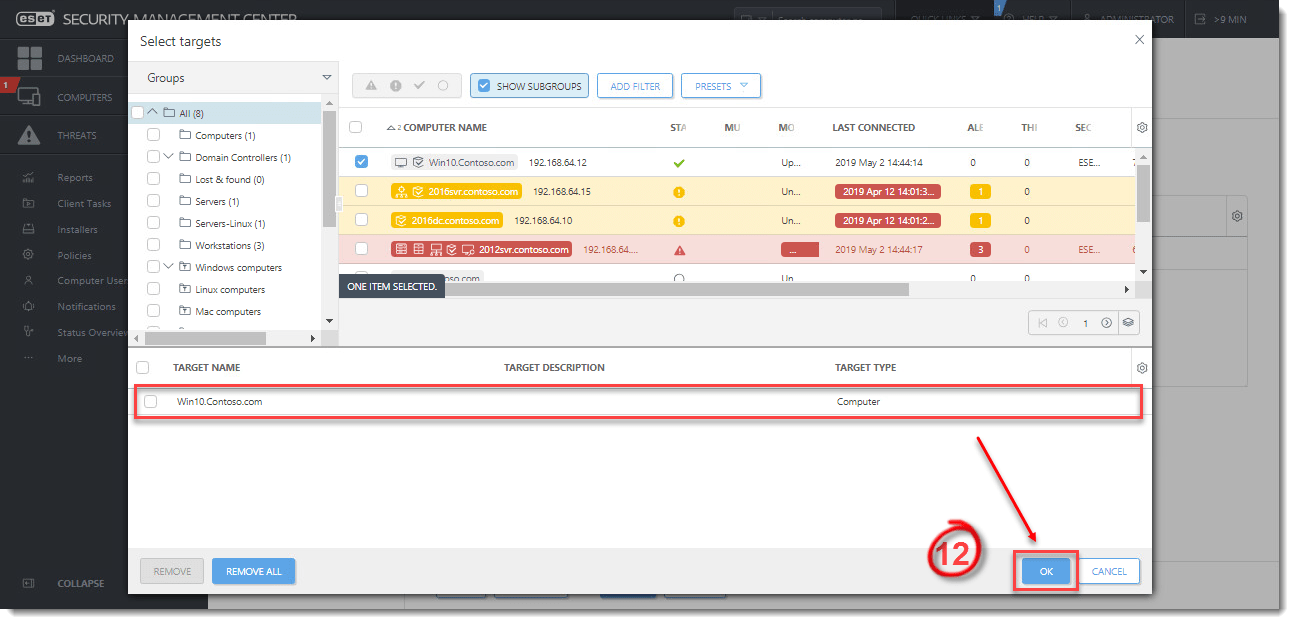
Figure 4-10
Click the image to view larger in new window
- Click Finish.
- Verify the test client computer is now connected to the new ESMC Server and the Agent policy has the correct certificate.
- After a successful migration of the test client computer, assign the new policy you created to the rest of your client computers to complete the migration to the new ESMC Server.
- Client computers should now connect to your new ESMC Server. If clients are not connecting, see Problems after upgrade/migration of ESMC Server.
-
Once you have everything running correctly on your new ESMC Server, carefully decommission your old ESMC Server.