Issue
ESET business product no longer supported
This article applies to an ESET product version that is currently in End of Life status and is no longer supported. The content in this article is no longer updated.
For a complete list of supported products and support level definitions, review the ESET End of Life policy for business products.
- Add ESET License Keys or security admin credentials to ESET Remote Administrator
- Add a License Key
- Assign Security Admin credentials
- Sync your Security Admin account with ESET Remote Administrator
- Cannot add license troubleshooting
Solution
- Open ESET Remote Administrator Web Console (ERA Web Console) in your web browser and log in.
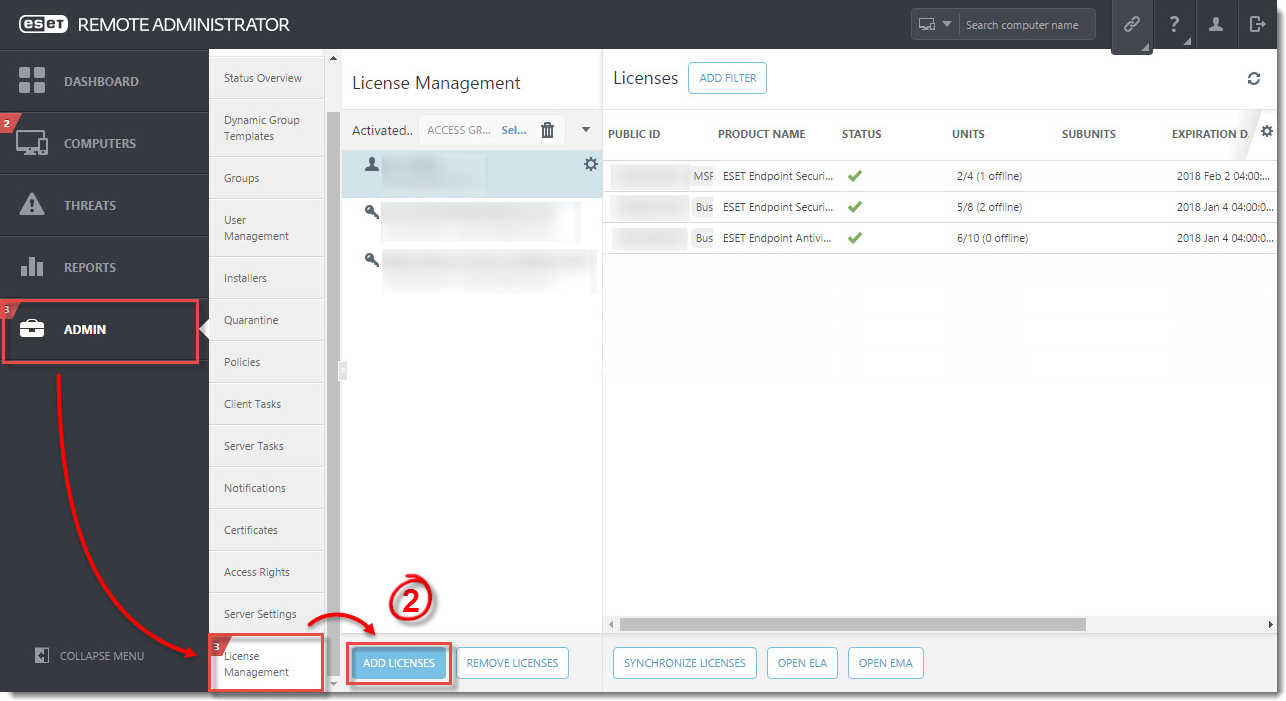
- Click Admin
 → License Management → Add Licenses.
Figure 1-1
Click the image to view larger in new window
- You can add a license to ESET Remote Administrator (ERA) three ways — click the appropriate link below to view instructions for each method:
- License Key
- Assign Security admin credentials
- Offline license files (for use with legacy server products)
Add a License Key
As a license owner, you can add your license using the License Key that was emailed to you following the purchase of your ESET product (if you do not know your License Key, click here to retrieve it). Expand License Key, type the License Key that you want to add into the blank field and click Add Licenses.

Figure 2-1
Assign Security Admin credentials
Using ESET License Administrator (ELA), a license owner can delegate the management of multiple licenses to Security Admins.
- Licenses cannot be divided into smaller derivations, assigning a license to a Security Admin will grant them the ability to manage all units included in that license.
- A license owner can assign multiple licenses to a single Security Admin. After creating a Security Admin account, the Security Admin can synchronize the licenses in their ELA account with ESET Remote Administrator to allow for the remote activation of ESET products.
- ELA only allows a license owner to view one license at a time, so we recommend that license owners create a Security Admin account for themselves to make management of multiple licenses easier, and for use when activating products using ESET Remote Administrator.
To authorize a Security Admin
- Navigate to ESET License Administrator, type your License Key in the field and click Manage License.
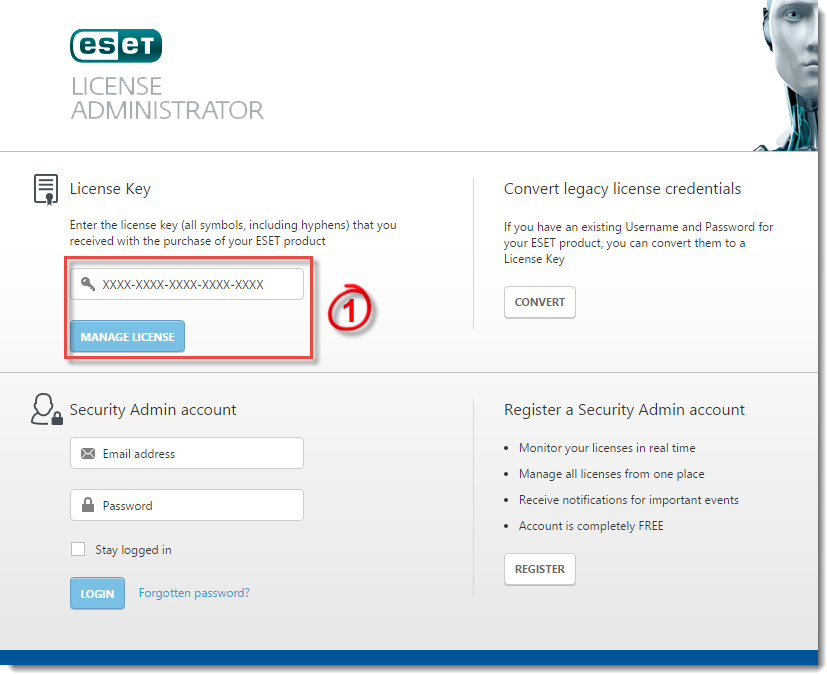
Figure 3-1
- Type the ESET License Administrator password for your license in the field (located in the ESET License Administrator email) and click Authenticate.
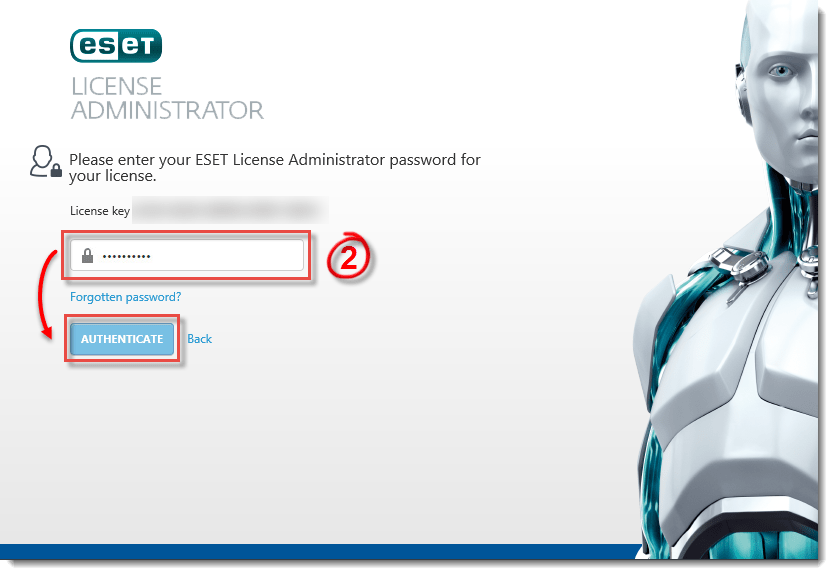
Figure 3-2
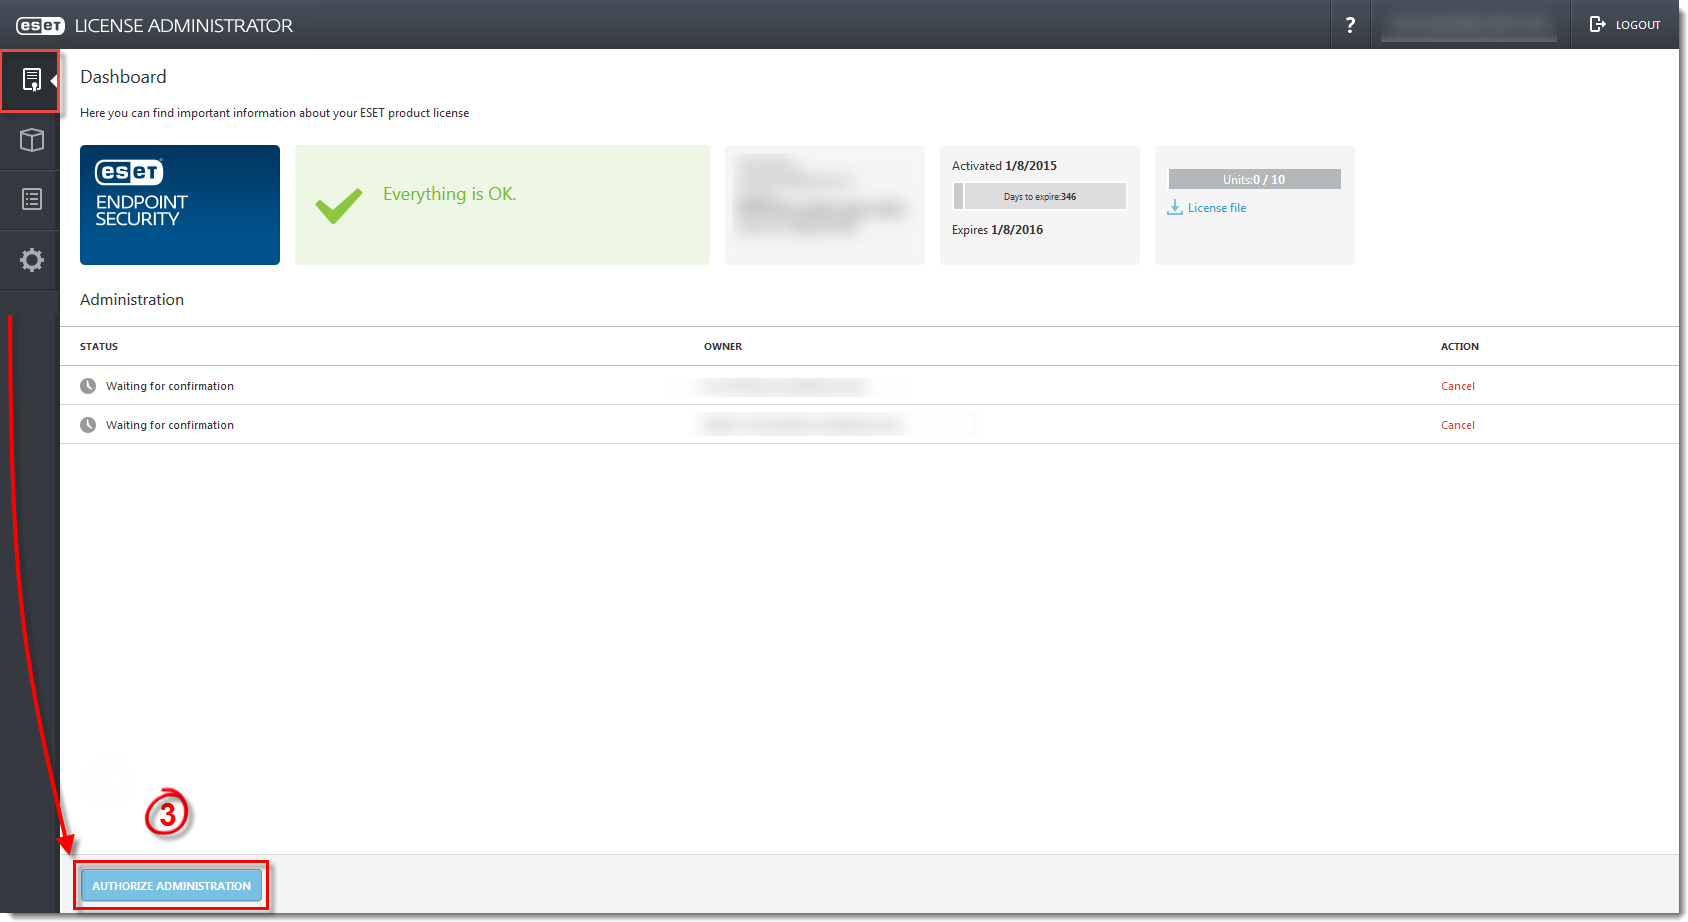
- Click License → Authorize Administration.
Figure 3-3
Click the image to view larger in new window
- Type the email address for the user that you want to authorize into the Security Admin E-Mail field and click Authorize Administrator. An email will be sent to the address you specified with instructions for the Security Admin to activate their account.
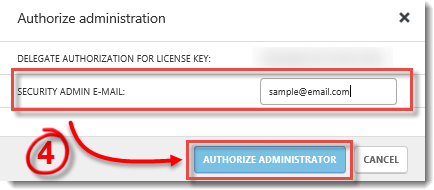
Figure 3-4
- After receiving their Security Admin email from ELA, the new Security Admin should click Click here to create an account and accept this request.
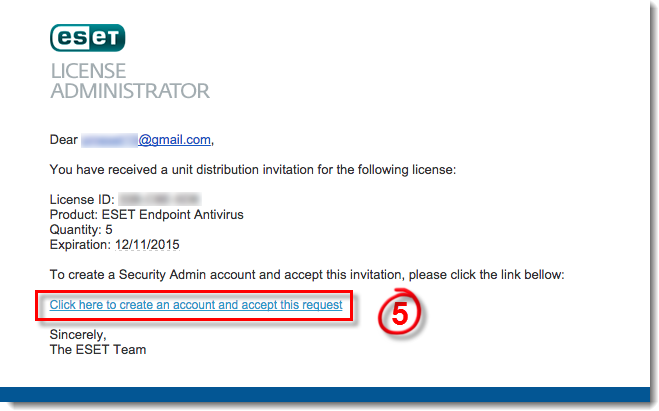
Figure 3-5
- The new Security Admin should complete the fields in the account creation form, select the check box next to I agree to the ESET Terms of use and then click wp-signup.php. If a Security Admin already has an account, only a notification email will be sent when they are assigned additional licenses.
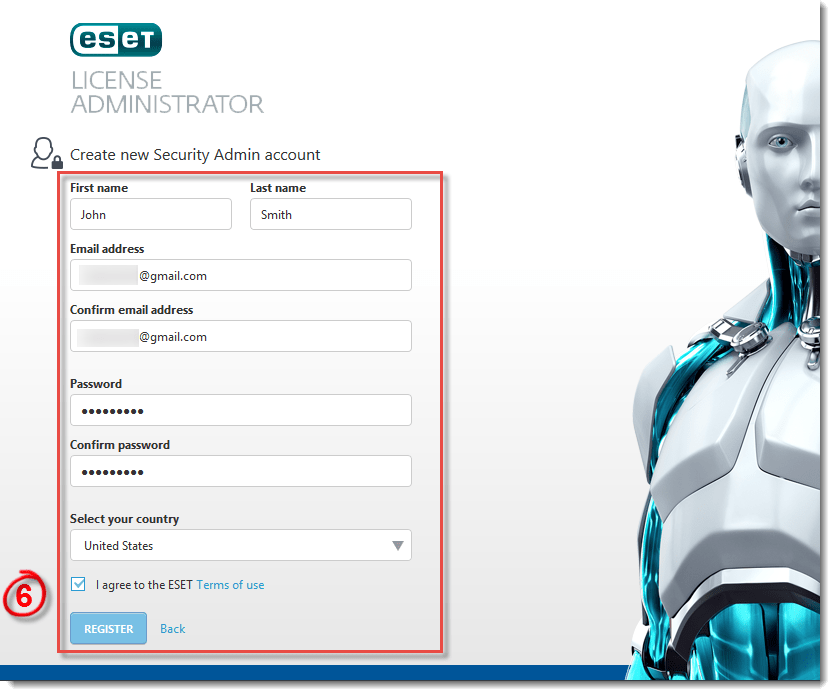
Figure 3-6
- Continue to the next section below for instructions to sync a Security Admin account in ERA.
Sync your Security Admin account with ESET Remote Administrator
- After receiving your Security Admin email and creating a Security Admin account, open ESET Remote Administrator Web Console (ERA Web Console) in your web browser and log in. How do I open ERA Web Console?
- Click Admin
 → License Management → Add Licenses.
Figure 4-1
Click the image to view larger in new window
- ExpandSecurity Admin Credentials, type your Security Admin Login and Password into the appropriate fields and click Add Licenses.
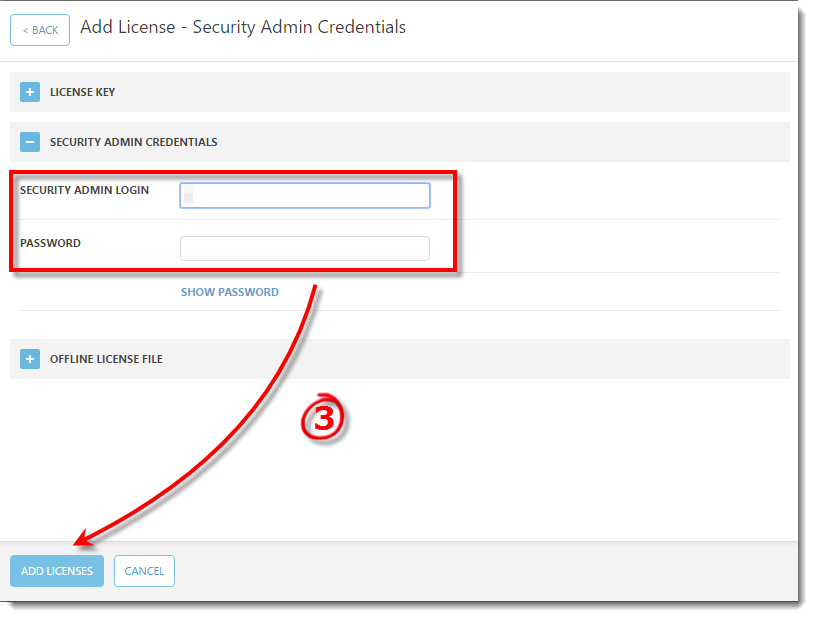
Figure 4-2
Troubleshooting
If you cannot add a license in ESET Remote Administrator, the cause might be related to the proxy settings on your ESET Remote Administrator Server (ERA Server). To troubleshoot this issue, follow the steps below:
- Open ESET Remote Administrator Web Console (ERA Web Console) in your web browser and log in.
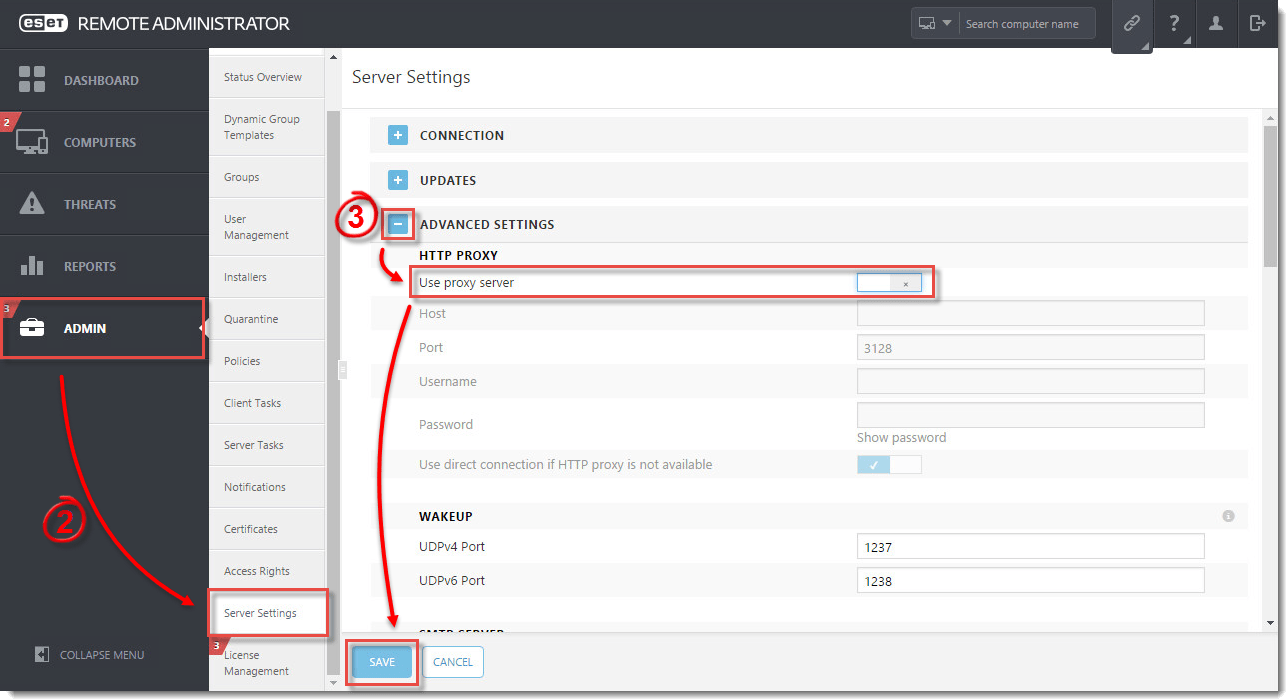
- Click Admin → Server Settings.
- Expand Advanced Settings and click the slider bar next to Use proxy server to disable it. Click Save.
Figure 5-1
Click the image to view larger in new window
- Try to add the license again.
If you are successful, it might indicate a problem with your proxy settings. See the following Knowledgebase resources for further assistance:
Related articles:
- Add product licenses in ESET Security Management Center (7.x)
- Convert your Username and Password into a License Key using ESET Business Account
- Convert your Username and Password into a License Key using ESET License Administrator
Source : Official ESET Brand
Editor by : BEST Antivirus KBS Team
How useful was this post?
Click on a star to rate it!
Average rating 0 / 5. Vote count: 0
No votes so far! Be the first to rate this post.


