A network connection error may occur when activating a Kaspersky application.
Cause
The error may occur if proxy server details are set incorrectly or the activation server is unavailable.
Solution
- Try activating the application again after a short while (e.g. in an hour). The activation server may be temporarily unavailable.
- Make sure your computer has latest updates installed or install the latest Windows updates using the Windows Update service. For instructions, see the Microsoft support site.
- Disable proxy in the Kaspersky application. See the guide below.
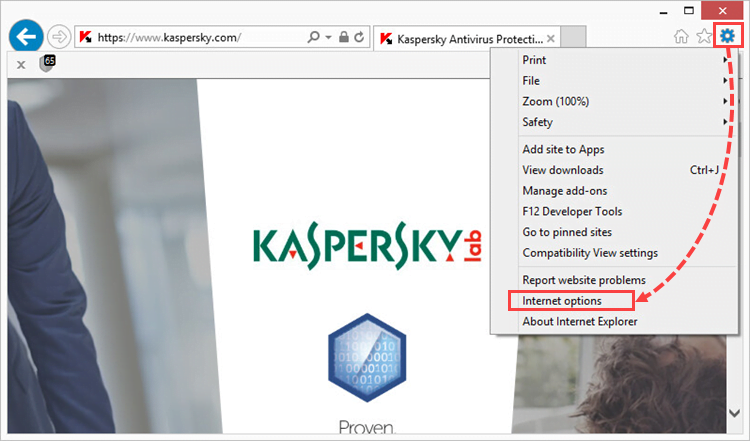
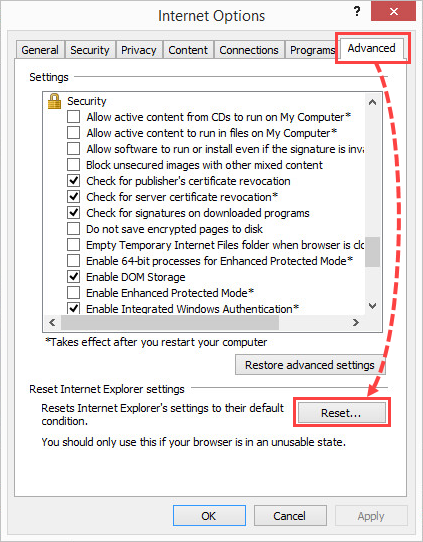
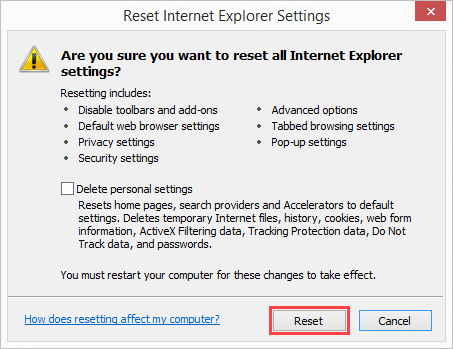
- Reset Internet Explorer settings. See the guide below.
- Configure DNS server. See the guide below.
How to disable a proxy server in a Kaspersky application
- Click
 in the lower-left corner of the main window.
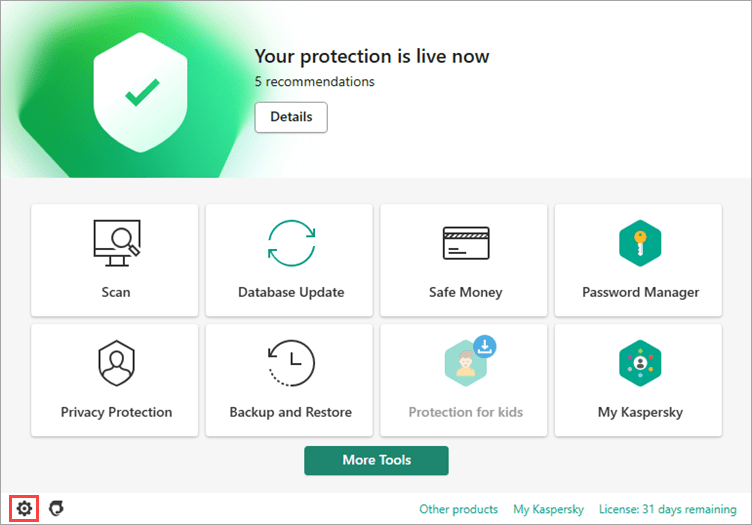
- For the guide on opening the application window, see this article.
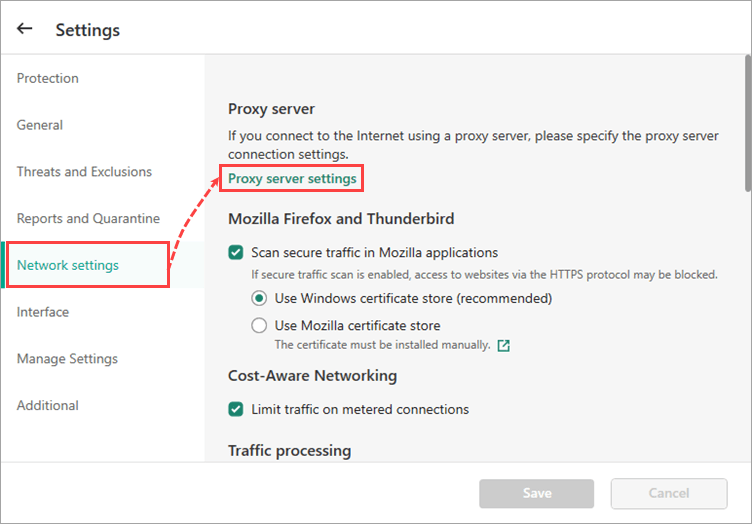
- Go to the Network settings section and click Proxy server settings.
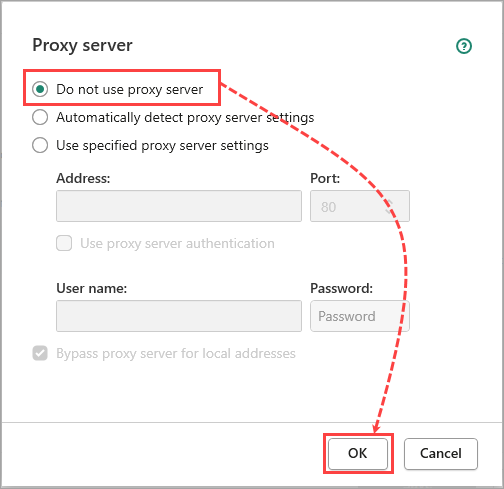
- Select Do not use proxy server and click OK.
- Click Save.
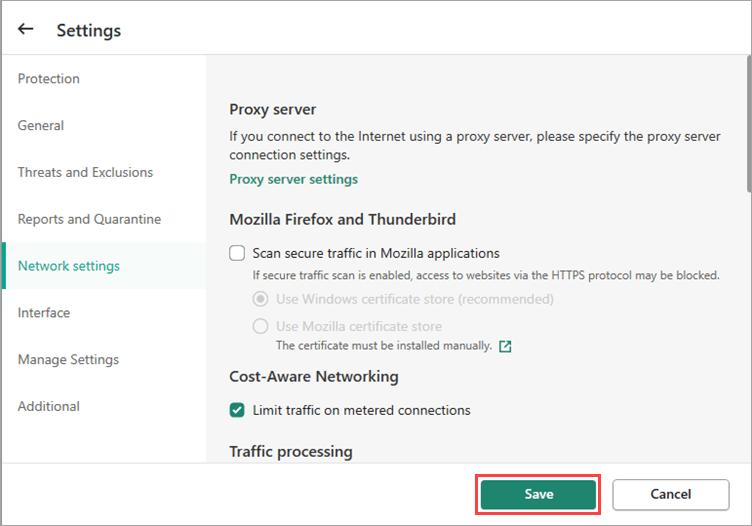
Use of proxy server will be disabled.
If the proxy server settings are not available, install the latest version of your Kaspersky application: Kaspersky Internet Security, Kaspersky Anti-Virus, Kaspersky Total Security, Kaspersky Small Office Security.
How to configure the DNS server
- Click
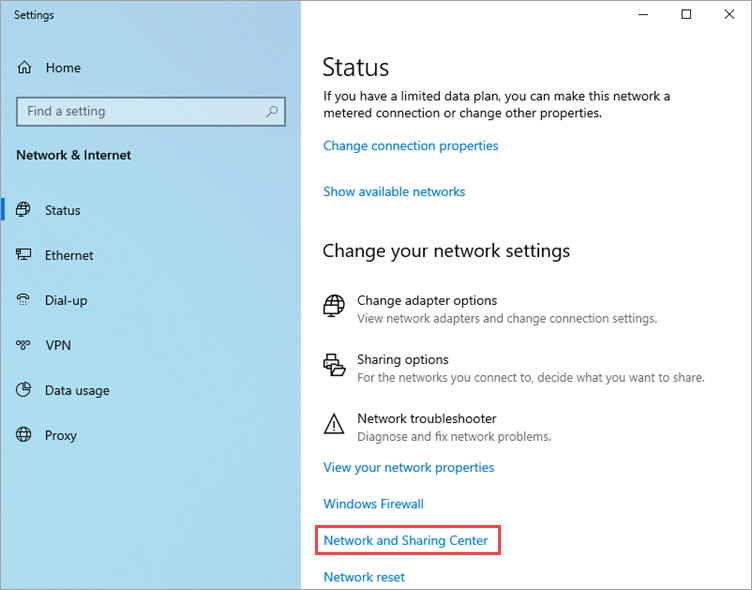
 and select Network & Internet settings.
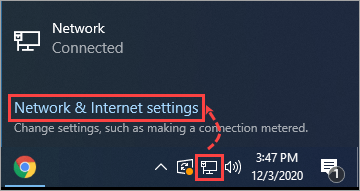
- Select Network and Sharing Center.
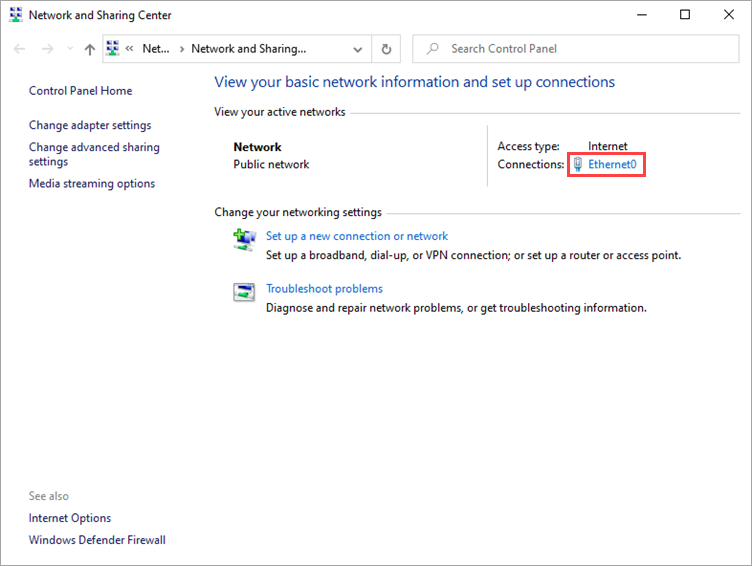
- Select the active network connection.
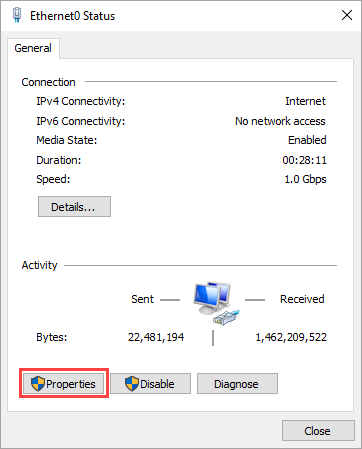
- Click Properties.
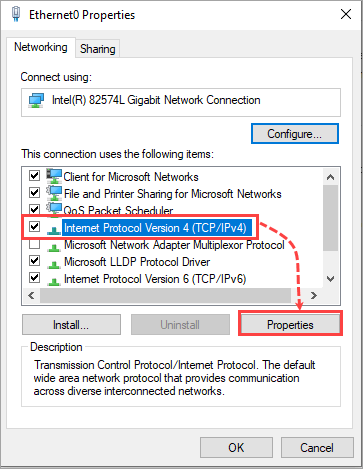
- Select Internet Protocol Version 4 (TCP/IPv4) or IP version 4 (TCP/IPv4) and click Properties.
- Select the Use the following DNS server addresses checkbox.
- Enter the addresses for the Google Public DNS (8.8.8.8 and 8.8.4.4) or other DNS servers you use.
- Select the Validate settings upon exit checkbox and click ОK.
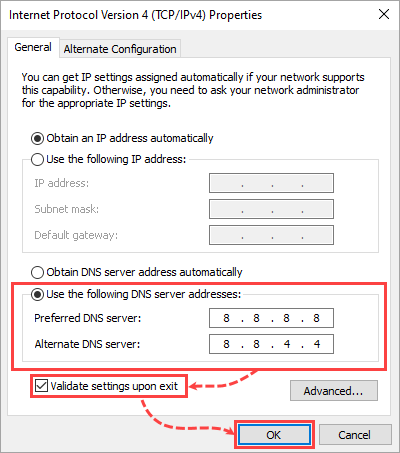
DNS server settings will be changed.
What to do if the solution did not help
If the solution didn’t help, contact Kaspersky technical support by choosing the topic and filling out the form.
Source : Official Kaspersky Brand
Editor by : BEST Antivirus KBS Team


 and select Internet options.