

Issue
- Use ESET Remote Administrator (ERA) 5.3 and later to deploy the ERA Agent for 6.x endpoint products.
- Migrate from ERA 5.3 to ERA 6.x using ERA 5.3 to deploy the ERA 6.x Agent.
Solution
- Generate the ERA Agent Live Installer package from ERA 6.x
- Create a policy in ERA 5.x
To deploy the ESET Remote Administrator (ERA) 6.x Agent to client computers using ERA 5.x, follow the instructions below:
I. Generate the ERA Agent Live Installer package from ERA 6.x
- Open ESET Remote Administrator Web Console (ERA Web Console) in your web browser and log in.
- Click Quick links → Deploy ERA Agent.
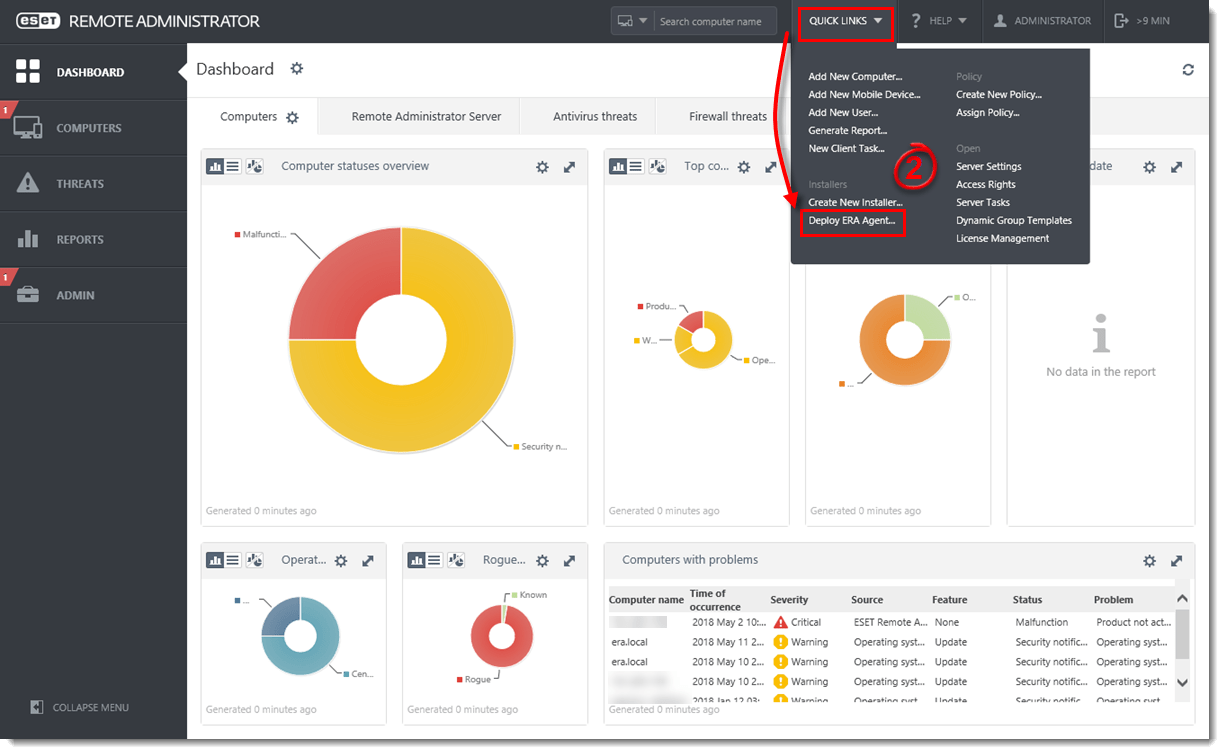
Figure 1-1
Click the image to view larger in new window - Click Create Installer under Create Agent Live Installer.
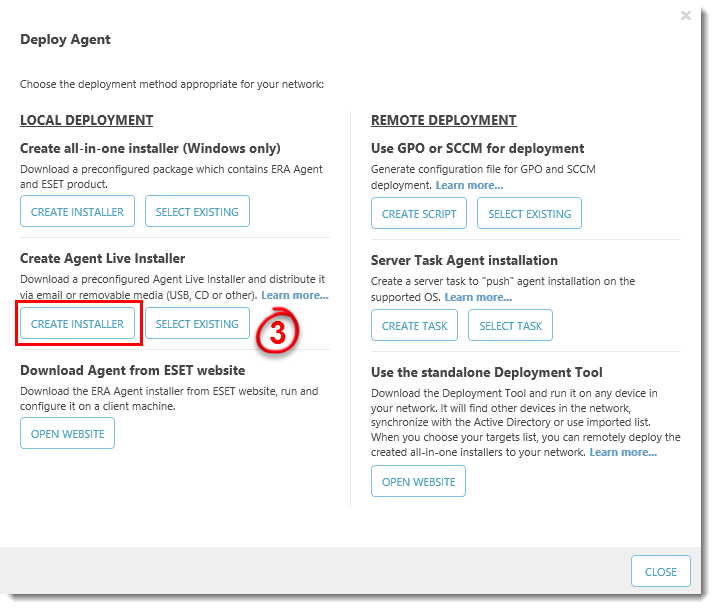
Figure 1-2
- In the Certificate section, select an ERA Certificate or Custom Certificate and Certificate Passphrase (optional).
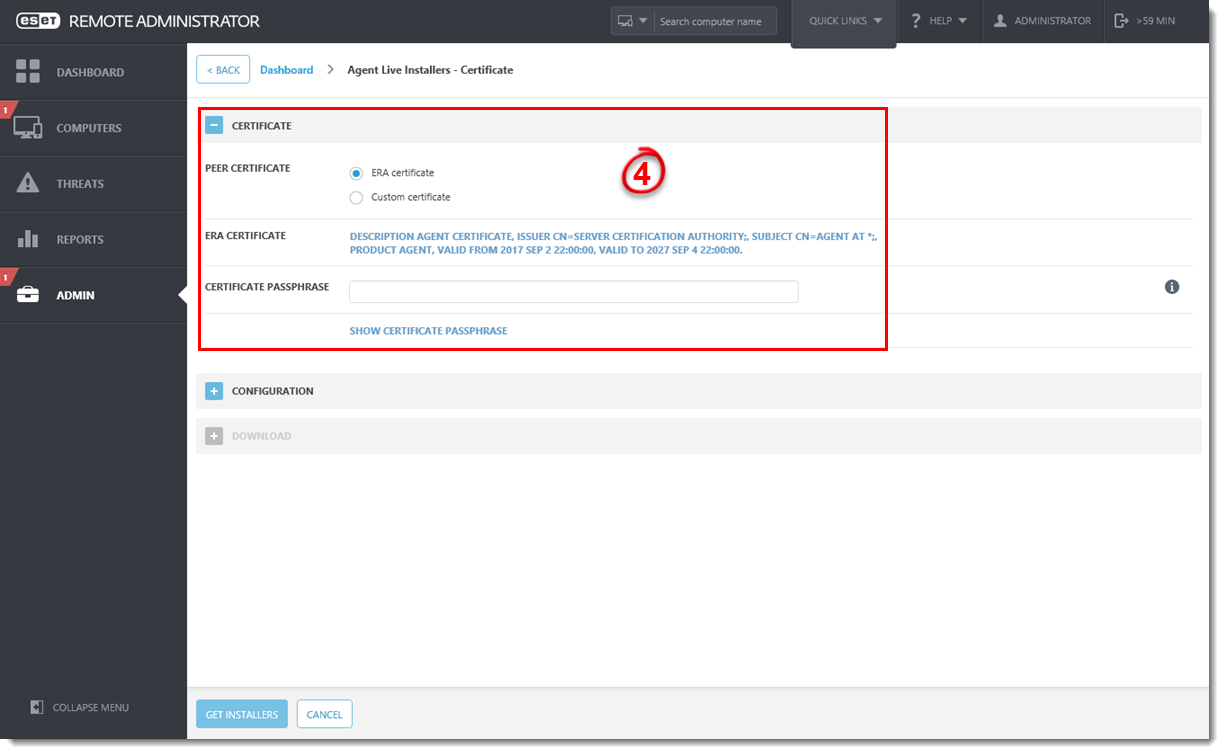
Figure 1-3
Click the image to view larger in new window - Expand Configuration and type the installer Name, installer Description (optional), Server Hostname (optional) and Parent Group (optional).
- Click Get Installers.
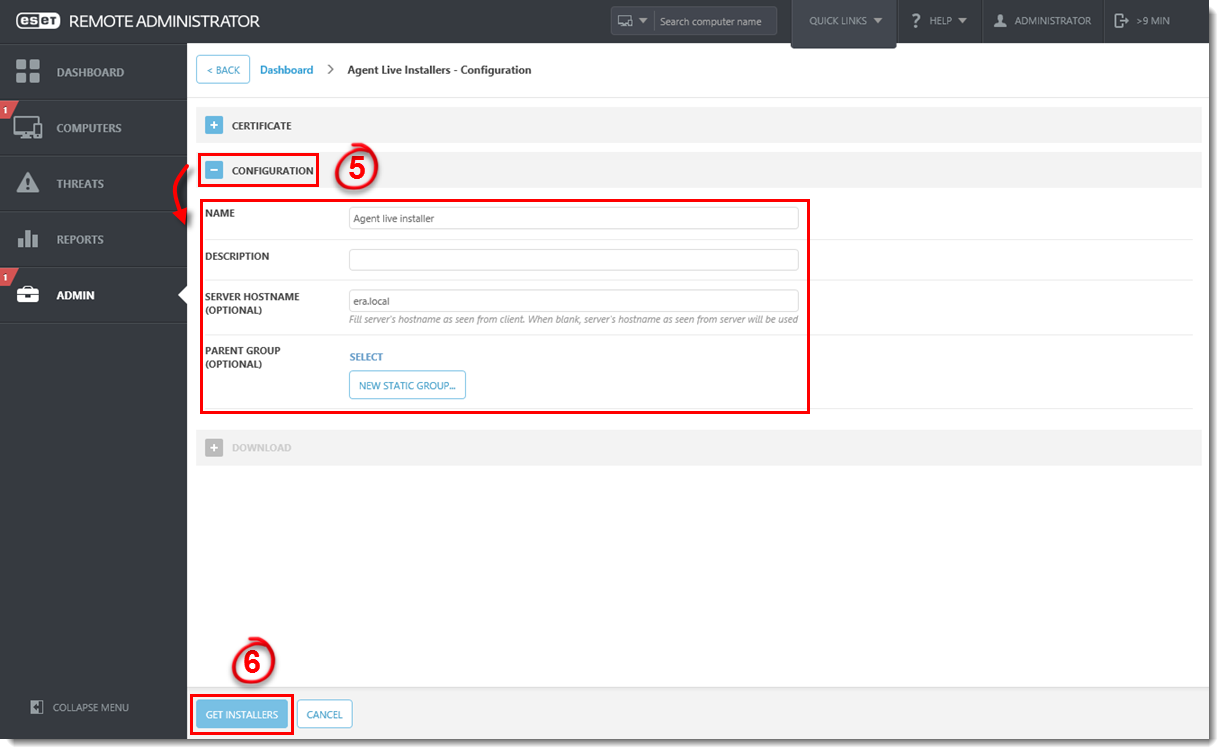
Figure 1-4
Click the image to view larger in new window - Click Download next to Agent Installer for Windows.
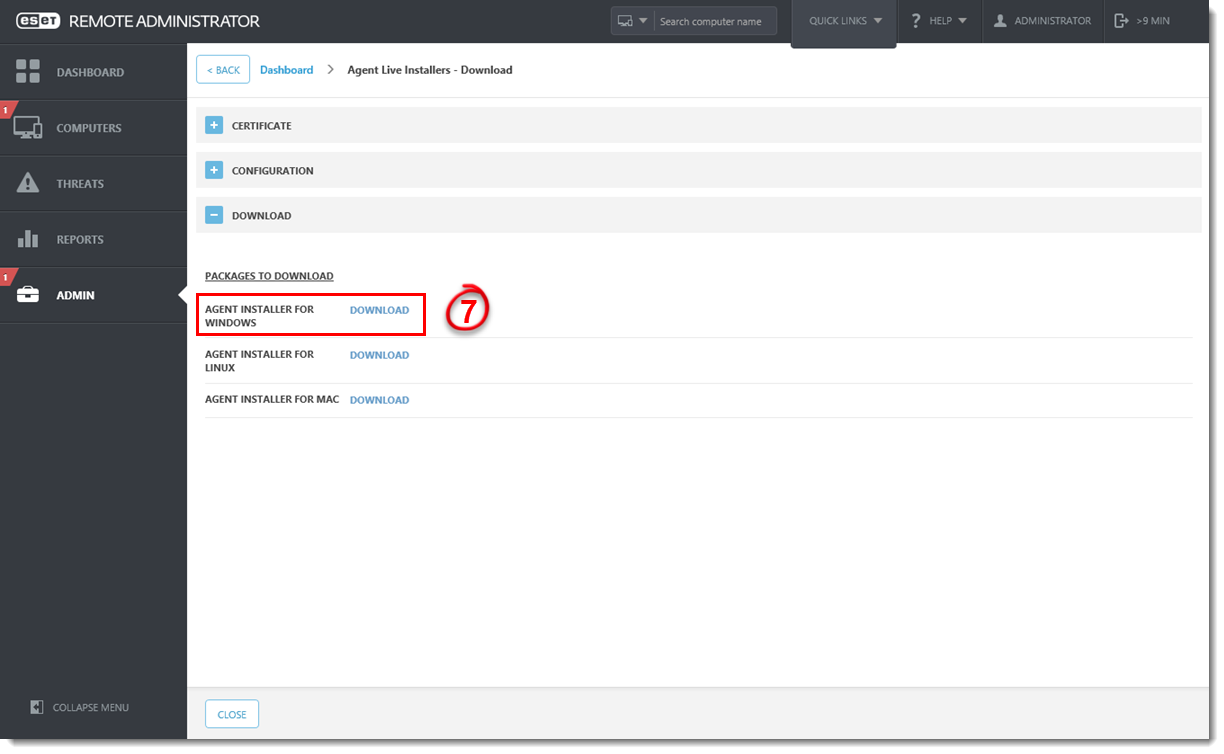
Figure 1-5
Click the image to view larger in new window - The browser will display the
EraAgentInstaller.zipfile. Download the file and extractEraAgentInstaller.bat. - Place
EraAgentInstaller.batinto a local or a public repository accessible by the client workstation.
II. Create a policy in ERA 5.x
- Open ESET Remote Administrator Console (5.x).
- In the menu bar, click Tools and select Policy Manager from the drop-down menu.
- Click Add New Policy inthe Actions section of Policy Manager.
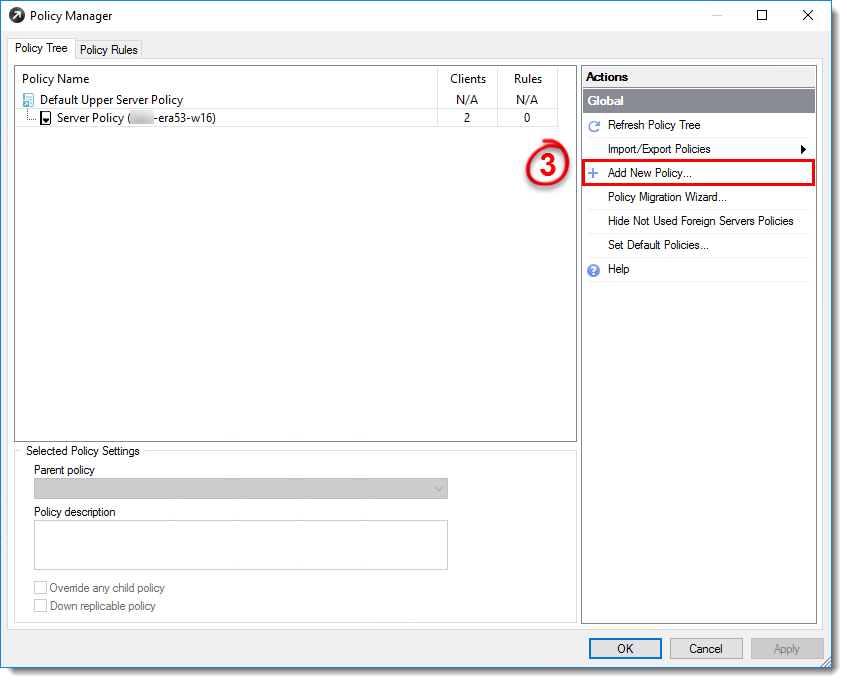
Figure 2-1
Click the image to view larger in new window - In the Create New Policy window, type the name of the policy and click OK.
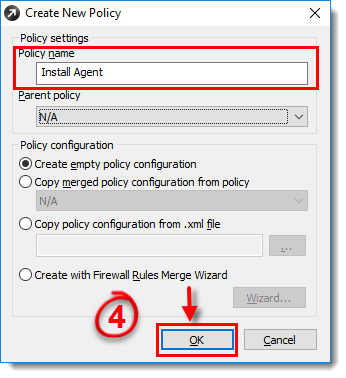
Figure 2-2
- Select the newly created policy and click Add/Show Clients and add the client computers where the policy will be applied.
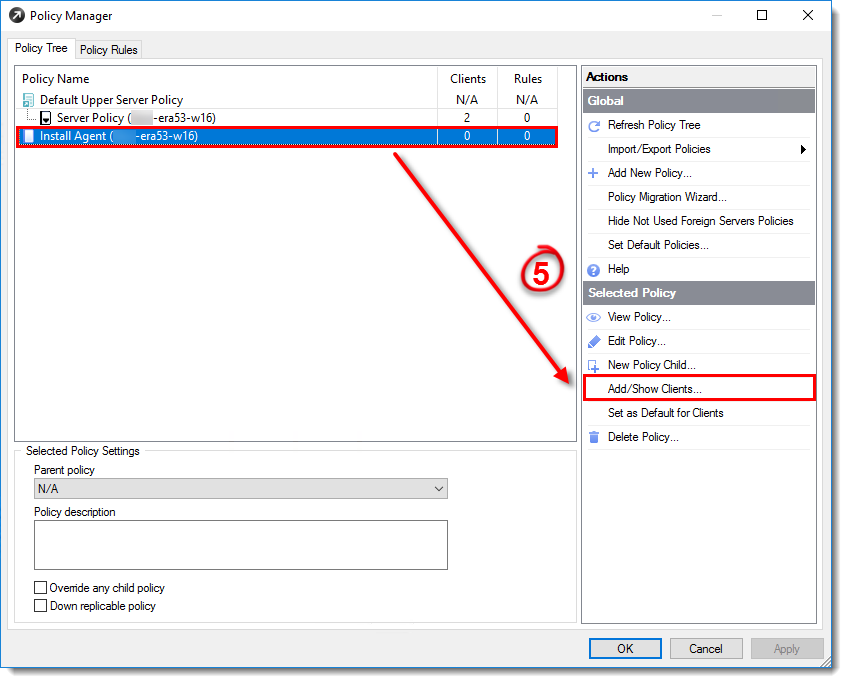
Figure 2-3
Click the image to view larger in new window - Select the newly created policy and click Edit Policy to edit its settings.
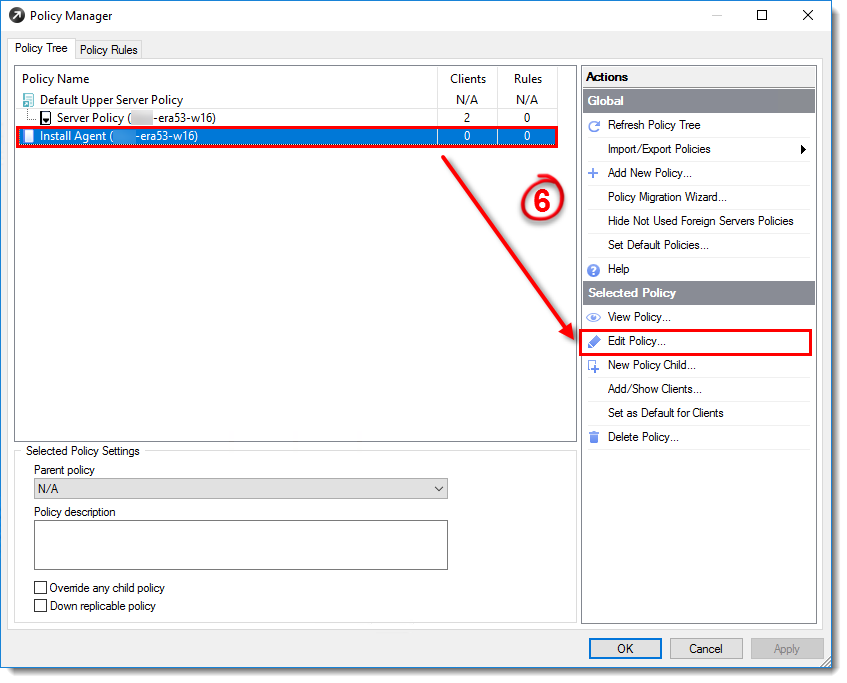
Figure 2-4
Click the image to view larger in new window - In Configuration Editor, expand Windows desktop v5 → Kernel → Settings → Scheduler/Planner and double-click Scheduler/Planner.
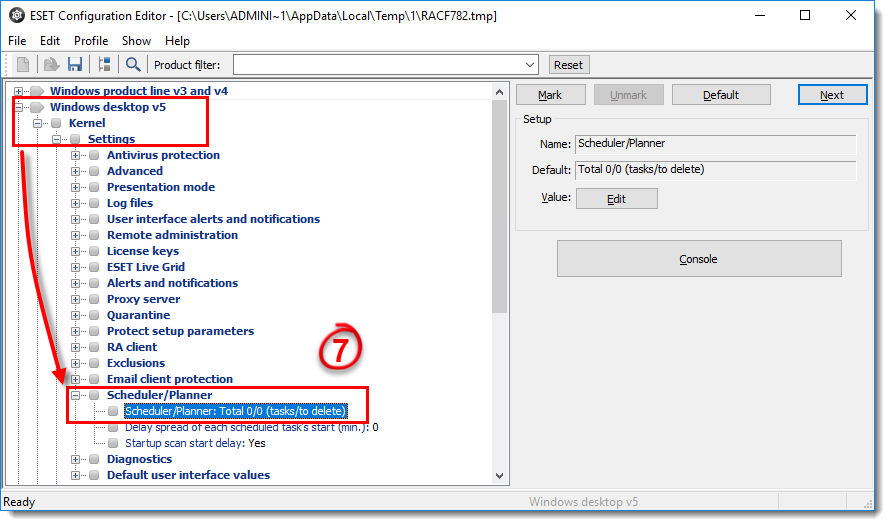
Figure 2-5
Click the image to view larger in new window - Create a task to download the Agent installer file (for example,
ERAAgentInstaller.bat):- In the Scheduled tasks window, click Add.
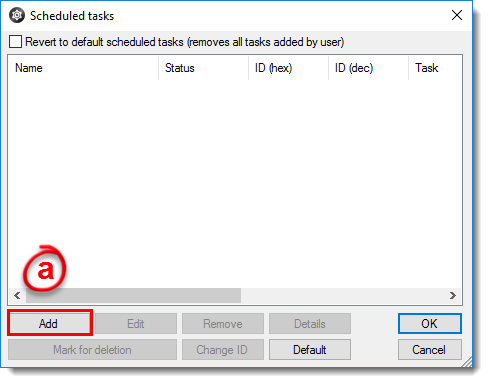
Figure 2-6
- Select Run external application and click Next. Enter a Task name (for example, ‘Download the installer’) and then follow the instructions in the Wizard to create the task.
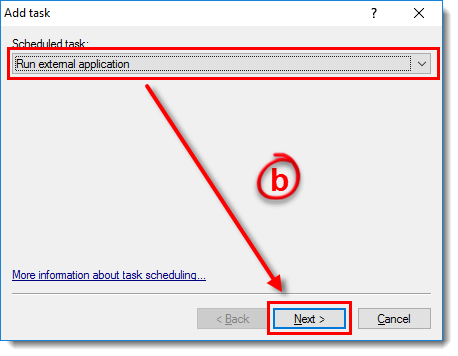
Figure 2-7
- In the Special Settings window, type or copy/paste in the following values for File, Work directory, and Command line. These values must be entered as one line.
- In the Scheduled tasks window, click Add.
Click Next after each value is entered.
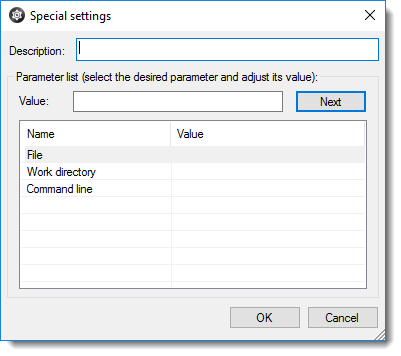
Figure 2-8
- File:
C:\Windows\System32\WindowsPowerShell\v1.0\powershell.exe - Work directory:
C:\ProgramData\ESET - Command line:
(New-Object System.Net.WebClient).DownloadFile(‘https://website.domain/ERAAgentInstaller.bat’, ‘C:/ProgramData/ESET/ERAAgentInstaller.bat’);(Start-process ‘C:\ProgramData\ESET\ERAAgentInstaller.bat’)
- Click OK to exit the Special settings window.
- Click OK in the Scheduled tasks window and close the ESET Configuration Editor window. Yes when asked ifyou want to save changes.
- Once the created client tasks are triggered, Windows PowerShell will download and execute the ERA Agent Live Installer on 5.x client workstations.
Last Updated: Jul 16, 2021
(Visited 80 times, 1 visits today)