

Issue
- Upgrade ESET Remote Administrator and ESET endpoint/server products from version 5.x to version 6.x
Solution
Prerequisites
- On the server where ESET Remote Administrator 5.x is installed, download and install Microsoft Visual C++ 2015 Redistributable Package (x86) using the link below:
Download Microsoft Visual C++ 2015 Redistributable Package (x86)
(this package is included in the Migration Tool Bundle from ERA version 6.5) - Click the appropriate link below to view instructions for your specific upgrade scenario:
-
- Upgrade to ESET Remote Administrator 6 on a new server
-
- Upgrade to ESET Remote Administrator 6 on your existing server
Upgrade to ESET Remote Administrator 6 on a new server
- On your new server, install ESET Remote Administrator 6.
- On the server where ERA 5.x is currently installed, follow the steps below to back up the database from your existing ERA installation:
- Click the link below to download the ESET Remote Administrator Migration Tool (ERA Migration Tool). You will need your existing ESET-issued Username and Password to download the tool. If you do not have your Username and Password, you can recover them here.
Download the ESET Remote Administrator Migration Tool - When the download is finished, extract the Win32 folder. Right click on the MigrationTool.exe and select Run as administrator. (if you receive a System error, ensure that you have installed the Microsoft Redistributable Package mentioned in the prerequisites).
- Select Export and click Next.
- Click the link below to download the ESET Remote Administrator Migration Tool (ERA Migration Tool). You will need your existing ESET-issued Username and Password to download the tool. If you do not have your Username and Password, you can recover them here.
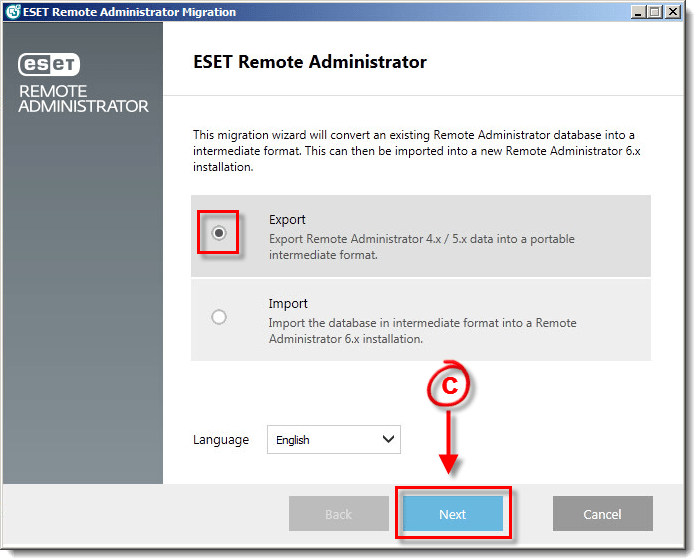
Figure 1-1
- Select I accept the terms in the license agreement if you agree and click Next.
- Select the check boxes next to the data you want to export and click Next.
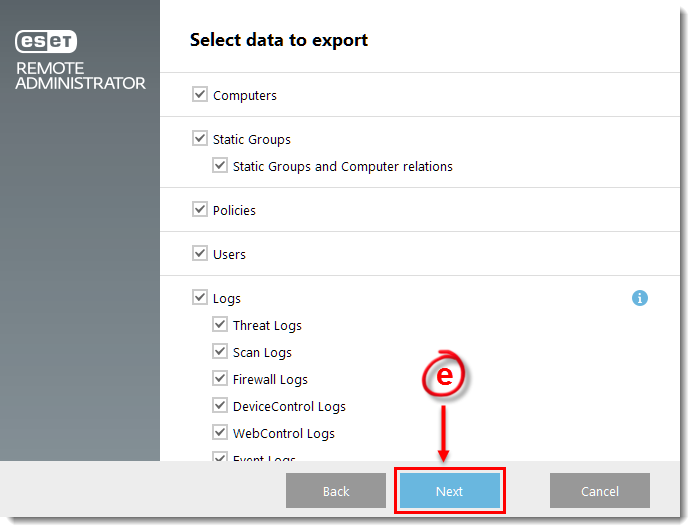
Figure 1-2
- Create a new folder on your Desktop named ERA 5 database. In the ERA Migration Tool, click Browse, navigate to the folder you just created, type ERA 5 database in the File name field, click Save and then click Next.

Figure 1-3
- The ERA Migration Tool will display the progress of the database export. Click Finish when all exported data shows as complete.
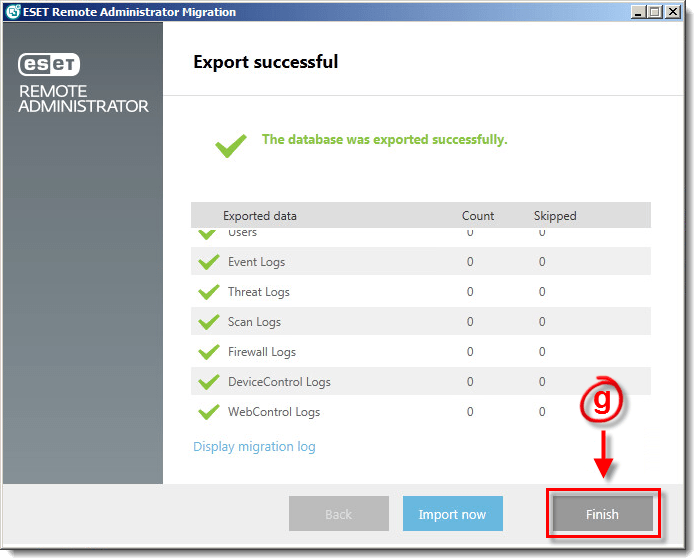
Figure 1-4
- Transfer the file that you exported using the ERA Migration Tool to the new server where ERA 6 is installed.
- On your new server where ERA 6 is installed, click the link below to download the ESET Remote Administrator Migration Tool. You will need your existing ESET-issued Username and Password to download the tool. If you do not have your Username and Password, you can recover them here.
Download the ESET Remote Administrator Migration Tool - Double-click the ERA Migration Tool to run it. Select Import, and click Next.
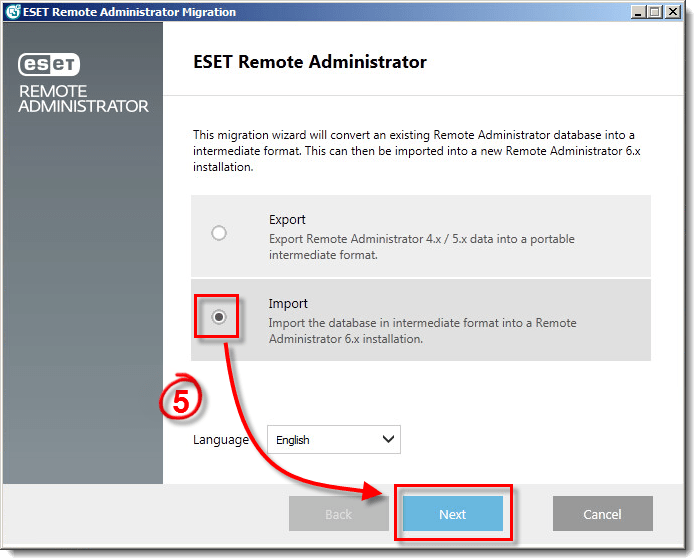
Figure 1-5
- Select I accept the terms in the license agreement if you agree and click Next.
- Type the IP address of your new server (where ERA 6 is installed) into the Host field and type the port number used to connect to the ERA Server (the default is 2223) into the Port field.
- Type the Administrator username and password for your ERA 6 Administrator account into the Administrator username and Password fields and then click Next.
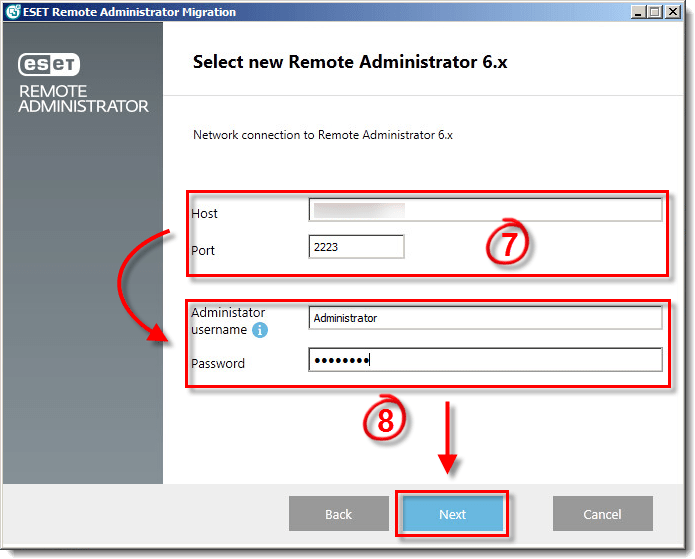
Figure 1-6
- Click Browse, navigate to the ERA database file that you exported in step 2 and then click Next.

Figure 1-7
- The ERA Migration Tool will notify you if any settings in ERA will be changed to allow for the importation of your database. Select the check boxes next to the items you want to allow and click Next.
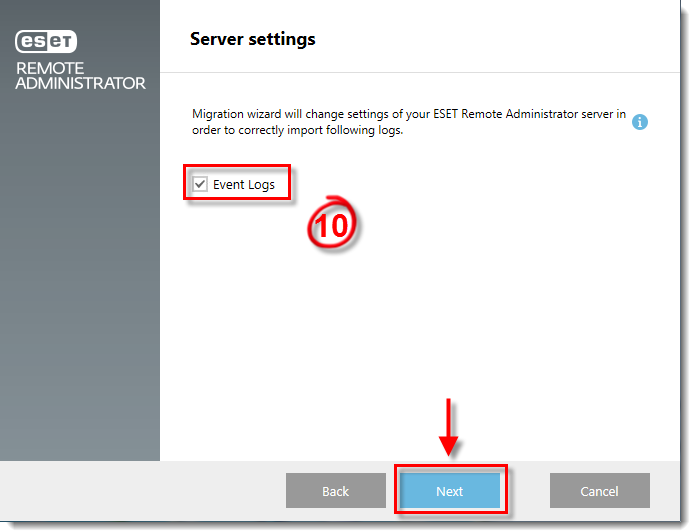
Figure 1-8
- The ERA Migration Tool will display the progress of the database export. Click Next when all imported data shows as complete.

Figure 1-9
- If you chose to migrate users, user passwords are reset and replaced with randomly generated passwords. Click Save passwords to export a CSV file containing the newly generated passwords for ERA users.
- The ERA Migration tool can export a script that you can run on client computers to align their settings with those migrated to ERA. Click Save script next to the appropriate operating system(s) to export a script for your client computers. When you are finished, click Finish.
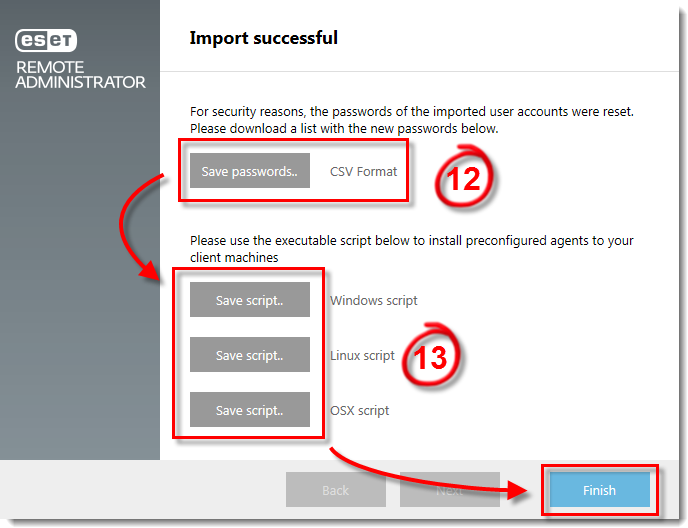
Figure 1-10
- Make a note of any group info, tasks or policy settings that you currently use on client workstations before uninstalling.
- Open ESET Remote Administrator Web Console and configure your policy for clients to use ESET servers instead of your mirror server:
- Click Tools → Policy Manager.
- Select your policy for endpoints and click Edit Policy.
- Expand Windows desktop v5 → Update → Profile → Settings.
- Change the value of Update Server from the IP address or name of your mirror server to Choose automatically.
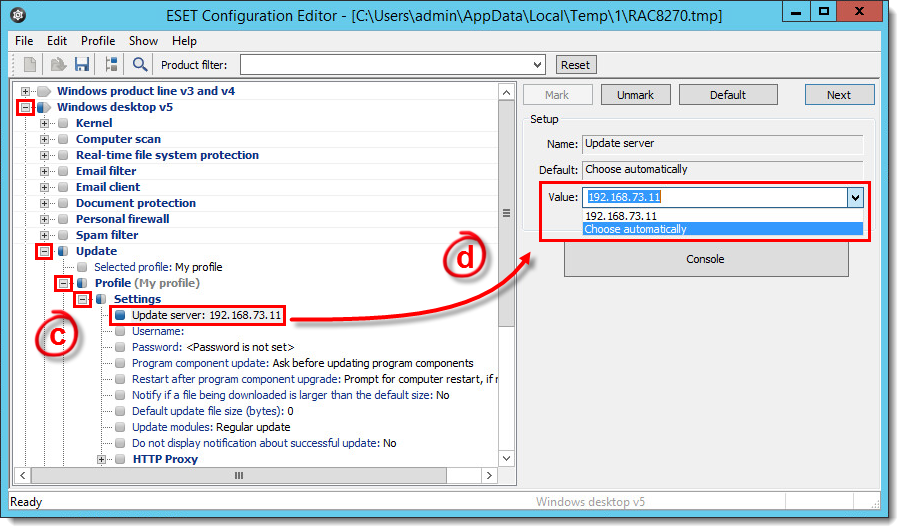
Figure 1-11
Click the image to view larger in new window
- We recommend that you also remove any settings passwords set on client endpoints. This setting is located under Windows desktop v5 → Kernel → Settings → Protect setup parameters. Click Set Password and delete the existing entries to remove the password.
- Click Console to save your changes. Wait for clients to check in and then verify that the changes have been made on clients.
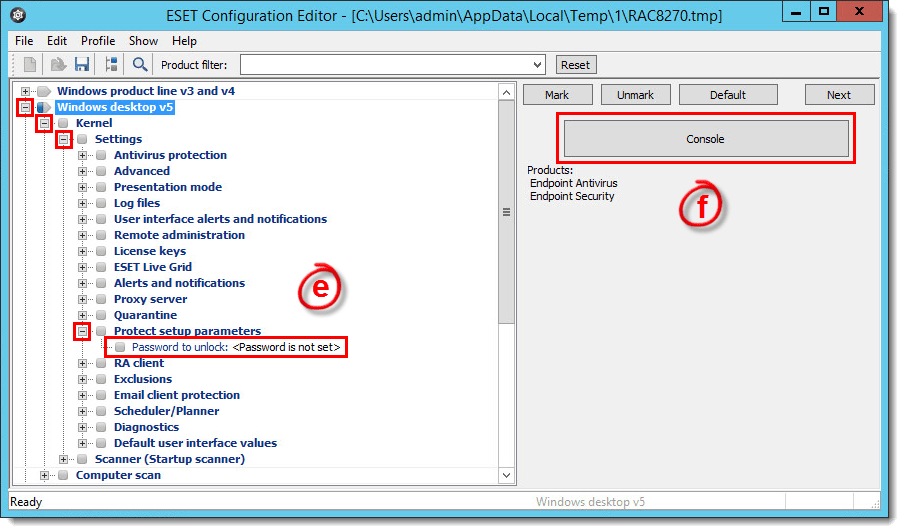
Figure 1-12
- Add your client computers in ERA 6.
- Deploy the ERA Agent to client computers.
- Run an uninstall task to remove version 5 or earlier ESET solutions on client computers.
- Push ESET endpoint solutions out to client computers. After push installation is complete, you can use the script you generated in step 13 to update client computers with your saved data.
Upgrade to ESET Remote Administrator 6 on your existing server
- Click the link below to download the ESET Remote Administrator Migration Tool (ERA Migration Tool). You will need your existing ESET-issued Username and Password to download the tool. If you do not have your Username and Password, you can recover them here.
Download the ESET Remote Administrator Migration Tool - When the download is finished extract the Win32 folder. Right click on the MigrationTool.exe and select Run as administrator. (if you receive a System error, ensure that you have installed the Microsoft Redistributable Package mentioned in the prerequisites).
- Select Export and click Next.

Figure 2-1
- Select the check boxes next to the types of data that you want to export and click Next.
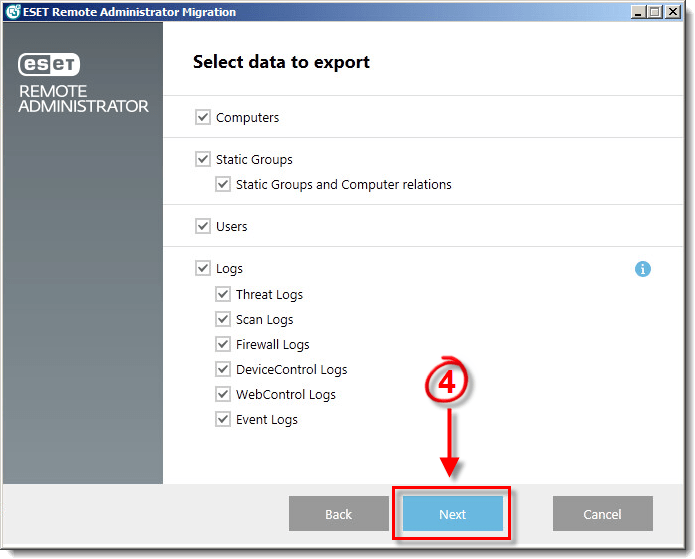
Figure 2-2
- Create a new folder on your Desktop named ERA 5 database. In the ERA Migration Tool, click Browse, navigate to the folder you just created, type ERA 5 database in the File name field, click Save and then click Next.
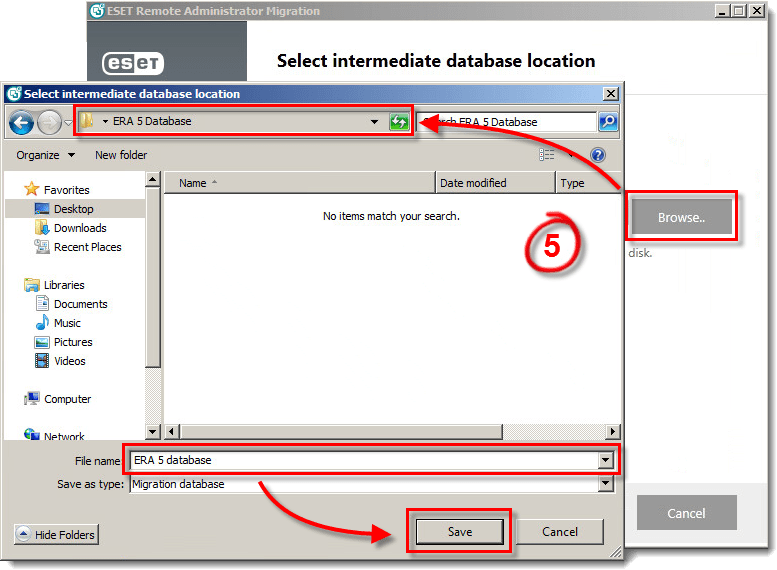
Figure 2-3
- ClickFinish once the data export is complete.
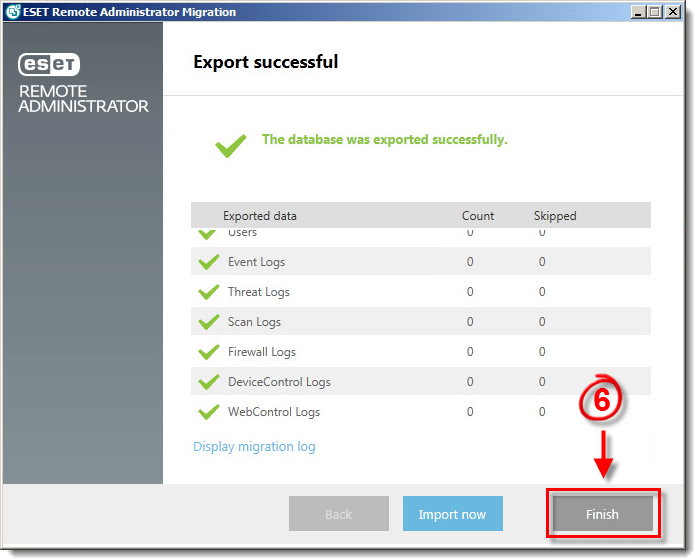
Figure 2-4
- Make a note of any group info, tasks or policy settings that you currently use on client workstations before uninstalling.
- Using ERA 5.x, uninstall ESET endpoint solutions on client computers.
- Click Start → All Programs → ESET → ESET Remote Administrator Console → Uninstall. Follow the on-screen instructions to uninstall ESET Remote Administrator 5.x Console.
- Click Start → All Programs → ESET → ESET Remote Administrator Server → Uninstall. Follow the on-screen instructions to uninstall ESET Remote Administrator 5.x Server.
- Install ESET Remote Administrator 6.
- Double-click the ERA Migration Tool to run it. Select Import, and click Next.
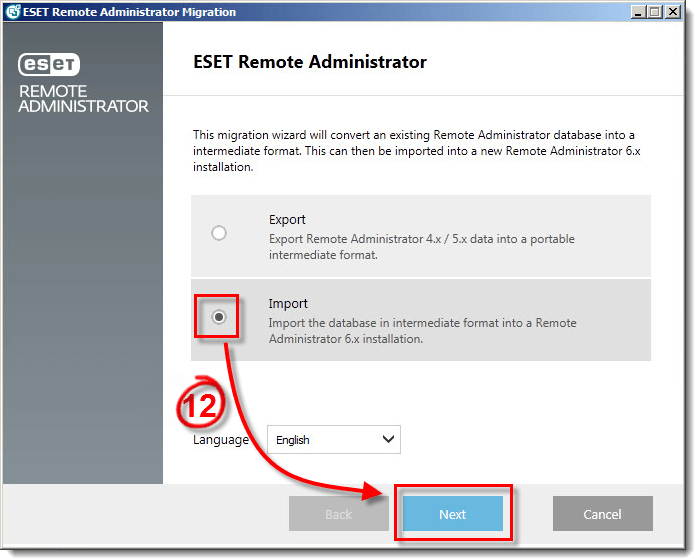
Figure 2-5
- Select I accept the terms in the license agreement if you agree and click Next.
- Type the IP address of your new server where ERA 6 is installed into the Host field and type the port number used to connect to the ERA Server (the default is 2223) into the Port field.
- Type the Administrator username and password for your ERA 6 Administrator into the Administrator username and Password fields and then click Next.
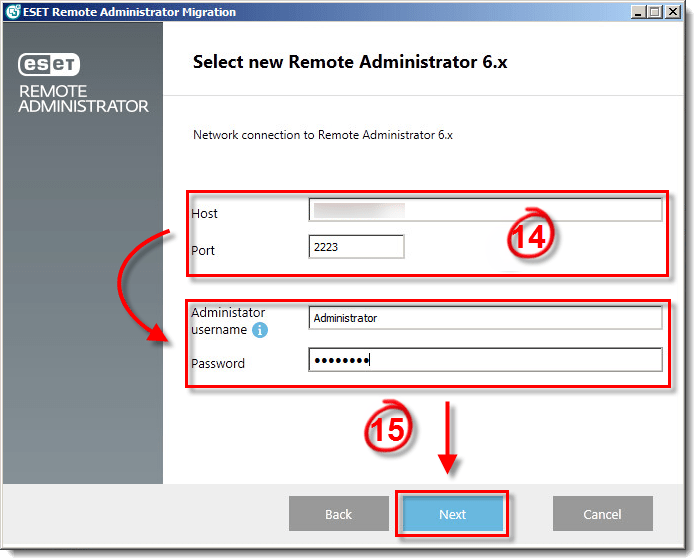
Figure 2-6
- Click Browse, navigate to the ERA database file that you exported in step 6 and then click Next.
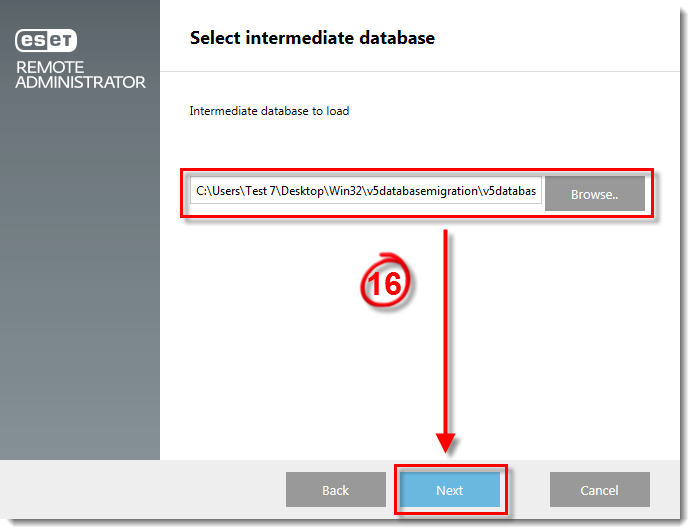
Figure 2-7
- The ERA Migration Tool will notify you if any settings in ERA will be changed to allow for the importation of your database. Select the check boxes for items you want to allow and click Next.

Figure 2-8
- The ERA Migration Tool will display the progress of the database export. Click Next when all imported data shows as complete.
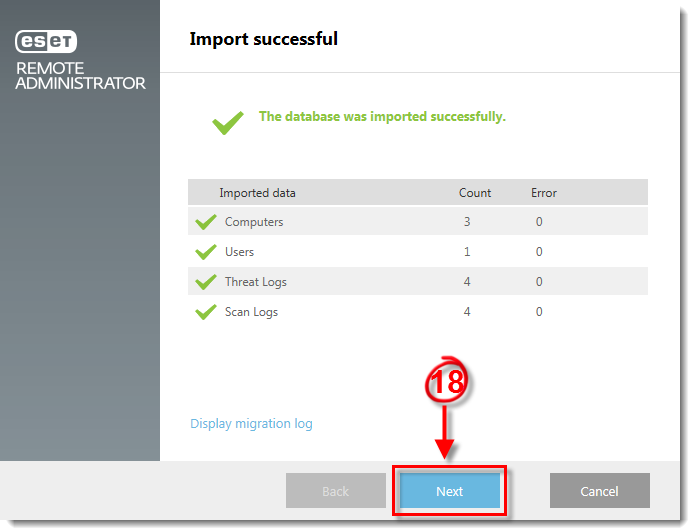
Figure 2-9
- If you chose to migrate users, user passwords are reset and replaced with randomly generated passwords. Click Save passwords to export a CSV file with the newly generated passwords for ERA users.
- The ERA Migration tool can export a script that you can run on client computers to align their settings with those migrated to ERA. Click Save script next to the appropriate operating system(s) to export a script for your client computers. When you are done, click Finish.
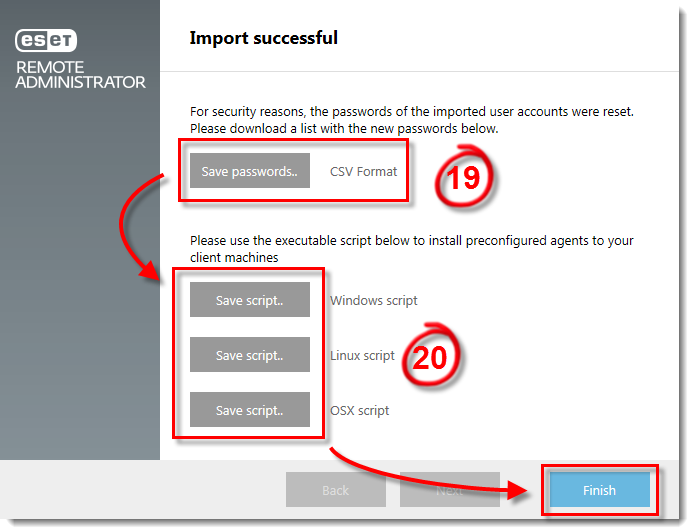
Figure 2-10
- Add your client computers in ERA.
- Deploy the ERA Agent to client computers.
- Run an uninstall task to remove version 5 or earlier ESET solutions on client computers.
- Push ESET endpoint solutions out to client computers. After push installation is complete, you can use your notes from step 5 to create new groups, tasks and policies and distribute them to client computers.
Last Updated: Jan 4, 2021
(Visited 19 times, 1 visits today)