Solution
- Uninstall any previously installed antivirus software on your system.
- Download the ESET Smart Security Premium installer file, and double-click the installer file to begin installation after it is finished downloading to your computer.
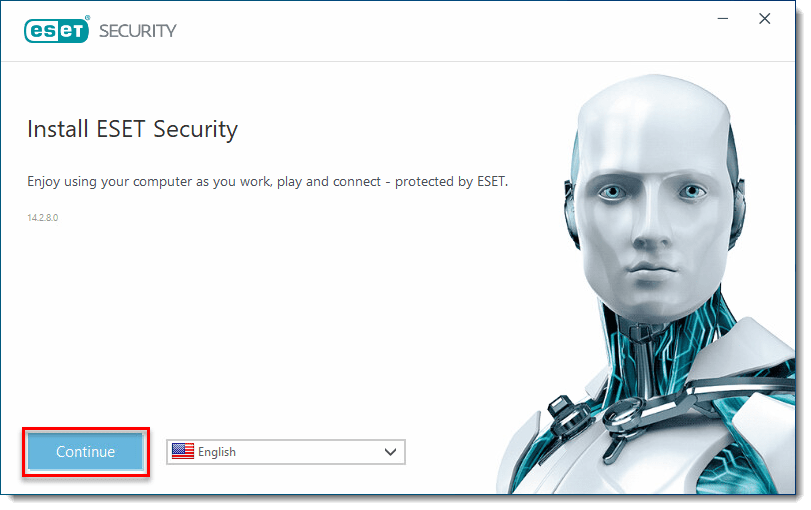
- In the Install ESET Security window, click Continue.
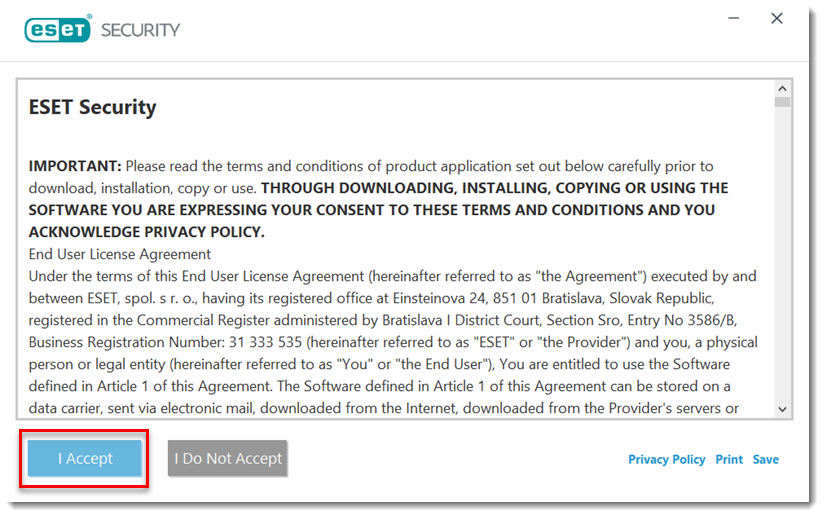
- Review the End-user license agreement and click I Accept to continue.
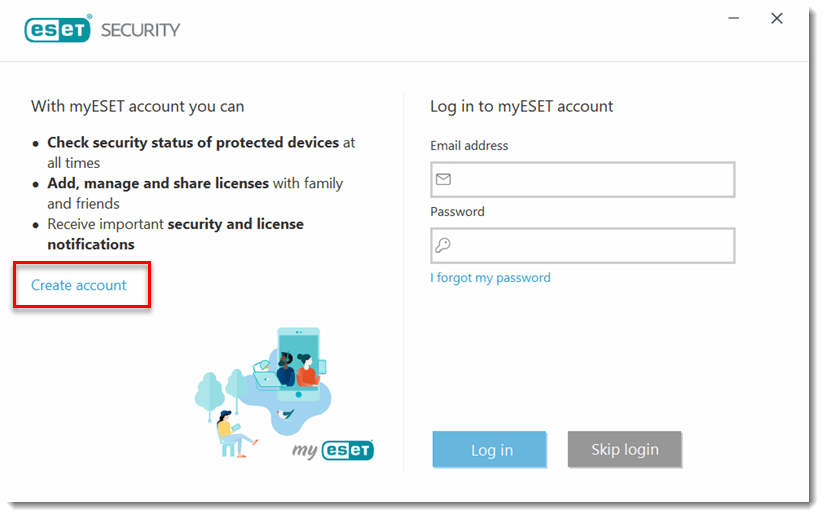
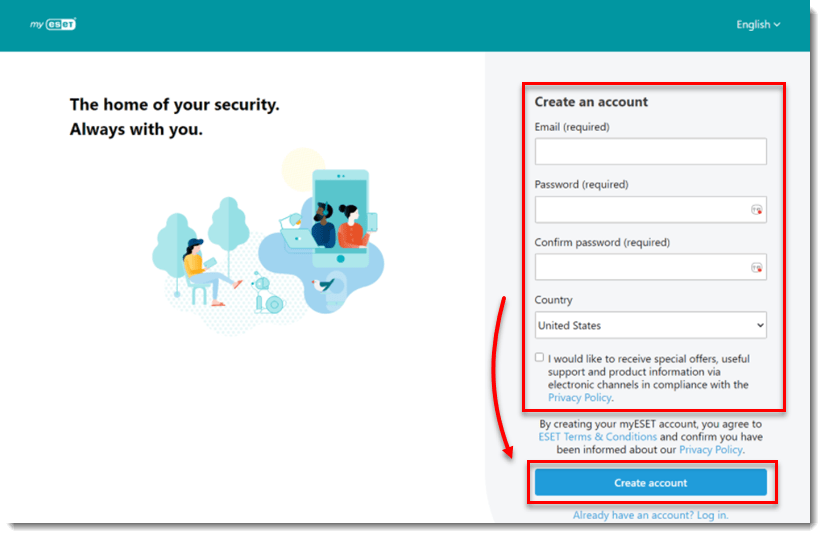
- After the Installation Wizard appears, click Create account to create your myESET account. Using myESET allows you to manage multiple features of your ESET home products from one source.
If you want to skip creating a myESET account, complete the following installation steps here.
- Type an email and password that will be used with the myESET account. Select a country, optionally select the check box to receive ESET special offers, then click Create account.
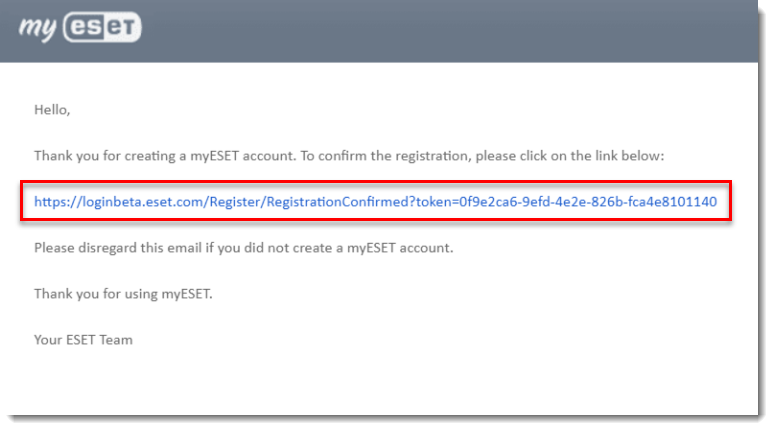
- You will receive an Account verification email in the inbox of the email associated with your myESET account. Click the verification link in that email.
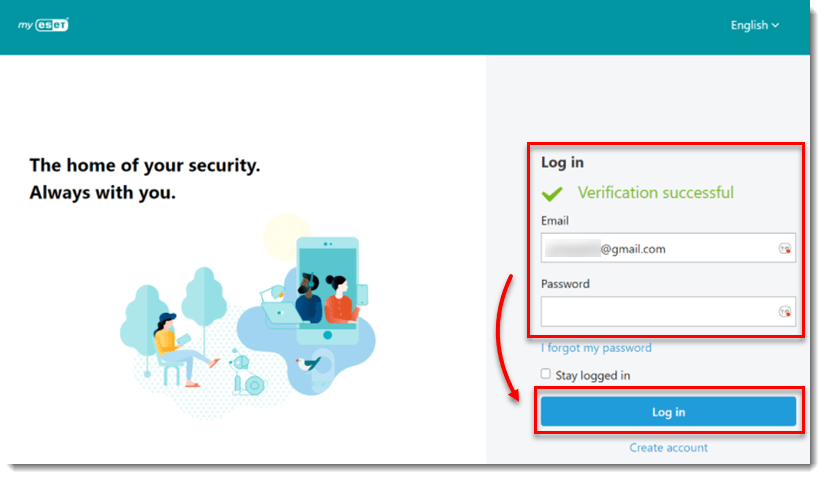
- Type your myESET email and password and click Log in to activate your myESET account.
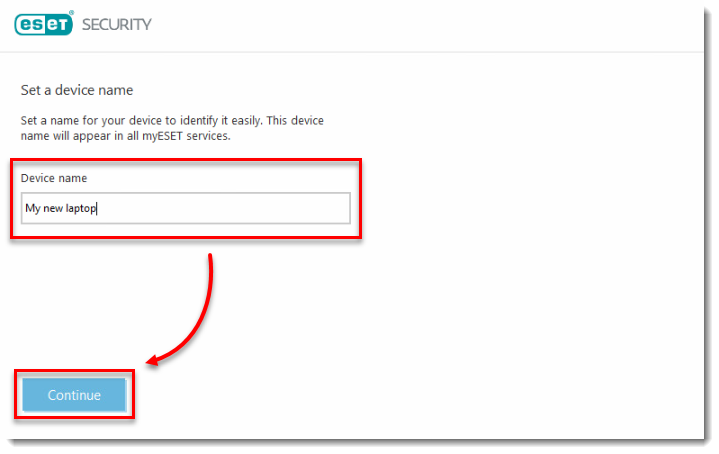
- Return to the installation wizard. Next to Device name, type a name that will be associated with your device and click Continue.
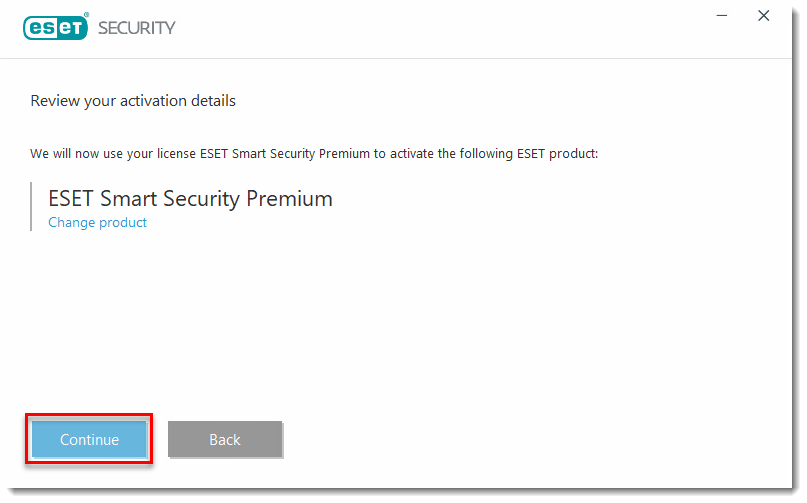
- Click Continue. You have the option to select a different product during or after installation.
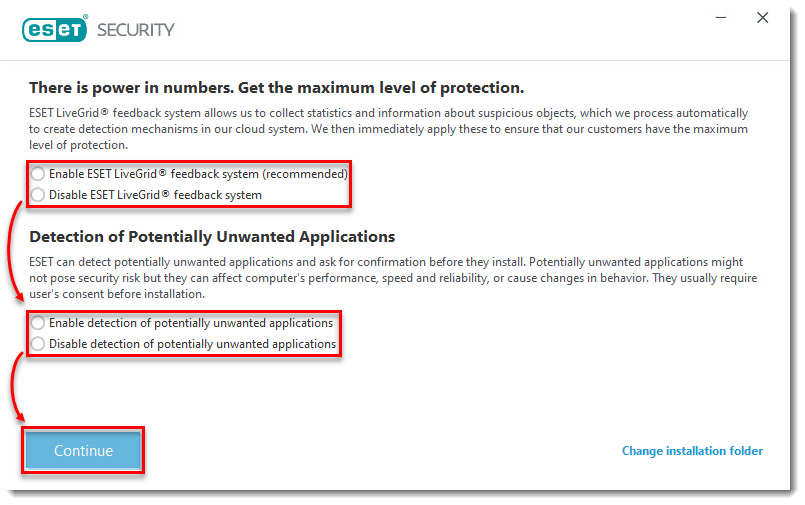
- Select your preference for ESET Live Grid and Detection of Potentially Unwanted Applications. Click Continue.
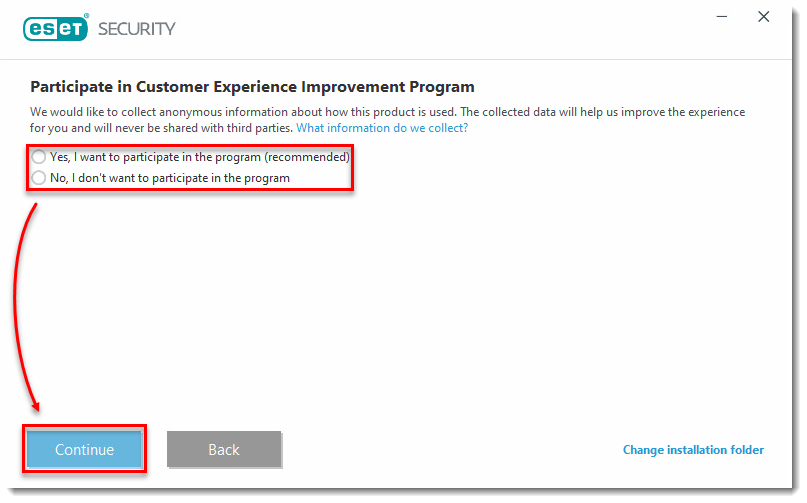
- Select your preference for the Customer Experience Improvement Program (CEIP) and click Continue. You can change your CEIP settings after installation.
- Click Done to exit the Installation Wizard. You can now view your license details and manage features in your ESET home product from your myESET account.
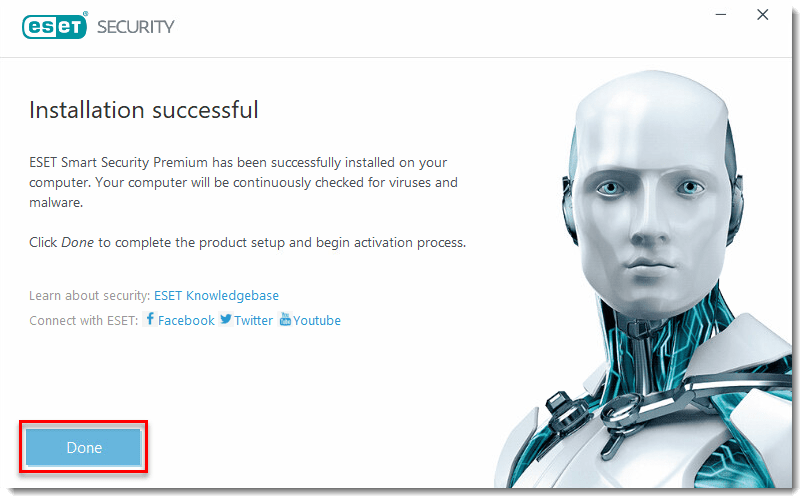
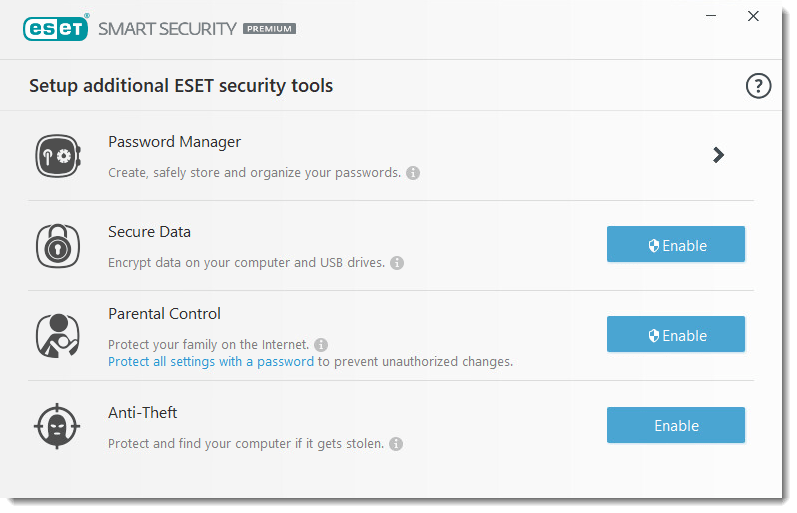
- ESET Security Premium is now installed and fully functional. You will be prompted to enable additional ESET security tools. You can set up Password Manager, Secure Data, Parental Control and Anti-Theft.
Your ESET product will automatically use your computer’s Windows network setting to determine if you are using a public or a home or office network to determine the appropriate firewall protection levels. To change your firewall protection level for a given network, visit Change network connection firewall setting in ESET Windows home products.
Your ESET product will start an initial scan of your computer shortly after installation is completed.
Log in to your myESET account and complete the installation
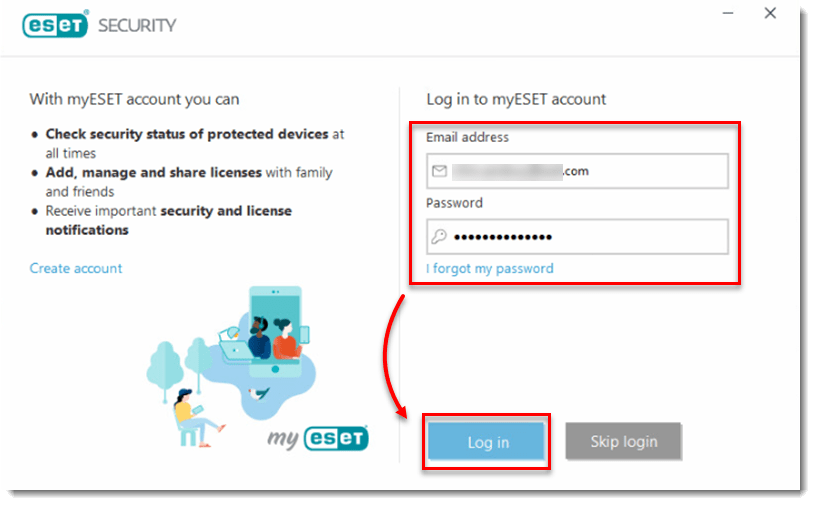
- Type your myESET email address and password and click Log in.
- In the Device name field, type a name for your device and click Continue.

- Select the license for the ESET Windows home product you want to activate and click Continue.
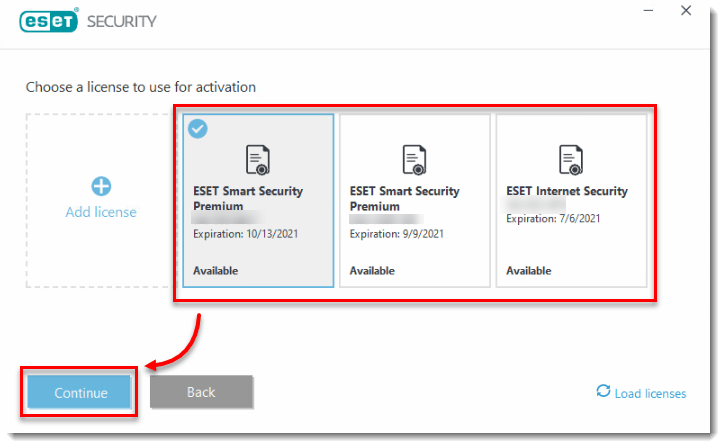
- Click Continue. You have the option to select a different product during or after installation.

- Select your preference for ESET Live Grid and Detection of Potentially Unwanted Applications. Click Continue.

- Select your preference for the Customer Experience Improvement Program (CEIP) and click Continue. You can change your CEIP settings after installation.

- Click Done to exit the Installation Wizard. You can now view your license details and manage features in your ESET home product from your myESET account.

- ESET Security Premium is now installed and fully functional. You will be prompted to enable additional ESET security tools. You can set up Password Manager, Secure Data, Parental Control and Anti-Theft.

Your ESET product will automatically use your computer’s Windows network setting to determine if you are using a public or a home or office network to determine the appropriate firewall protection levels. To change your firewall protection level for a given network, visit Change network connection firewall setting in ESET Windows home products.
Your ESET product will start an initial scan of your computer shortly after installation is completed.
Skip creating a myESET account and complete the installation
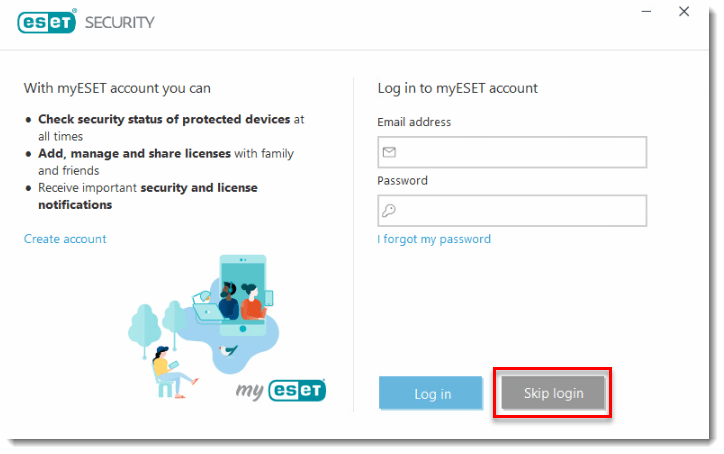
- Click Skip login.
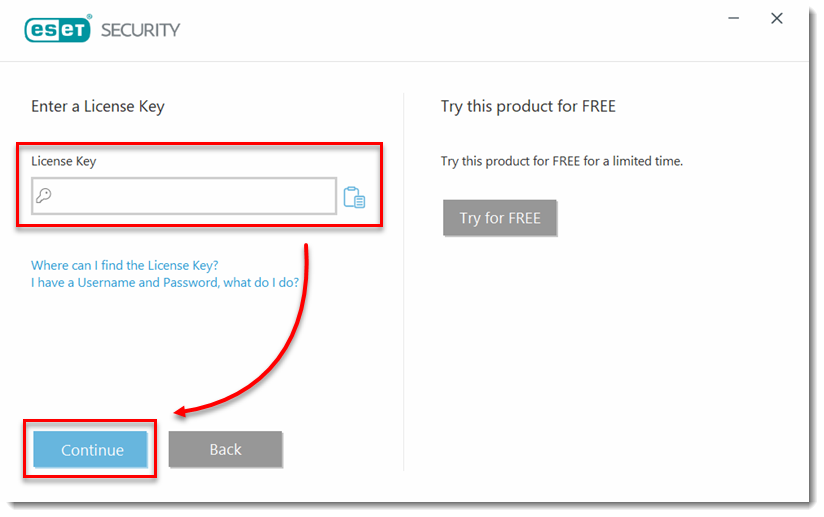
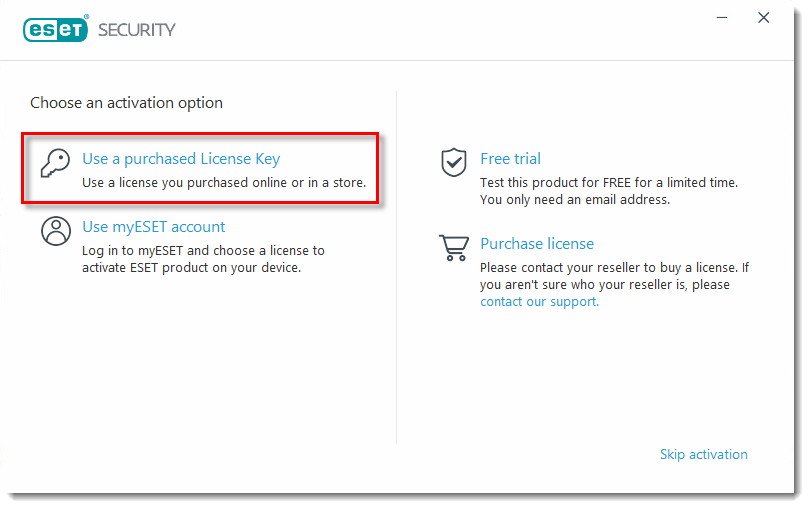
- Click Use a purchased License Key. If you do not have a license key yet, click Skip activation.
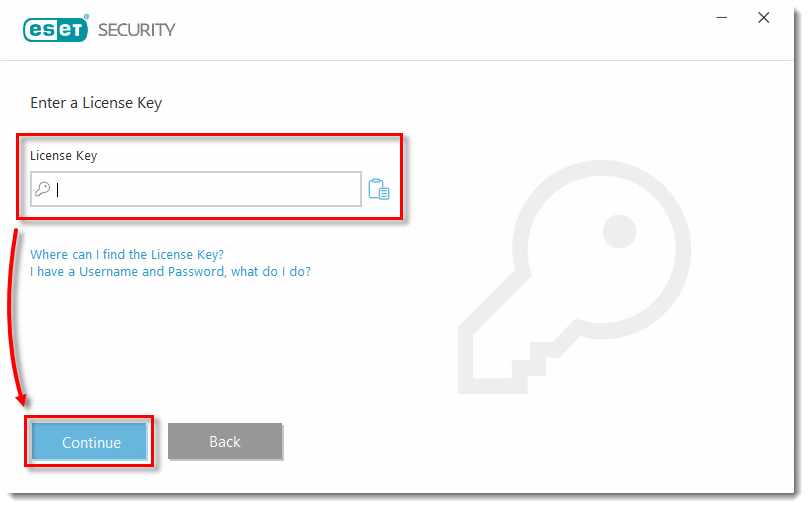
- Insert your license key, click Continue and complete the installation steps here.
