Steps to install the Mac OS X agent
Note: For users of Mountain Lion and higher, please go to System Preferences > Security & Privacy > General. At the bottom, select the lock to make changes, enter the administrator password and then in the Allow applications downloaded from: section, choose Anywhere.
- Browse to a Managed site.
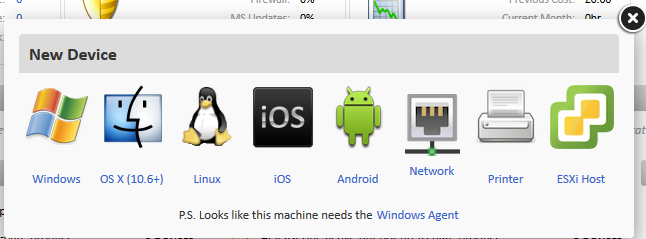
- Select New device.
- Select the icon for OS X (10.6+).

- Select either the logo to install OS X on the particular device or complete the box underneath to send a download link via email.
- Open the AgentSetup.dmg file which will bring up the installer, click Continue and install. Then, if required, enter the administrator password and click Install. The rest of the install will be automated and the agent will appear in the Menu bar.
Steps to uninstall the Mac OS X agent
Currently, unlike its Windows counterpart, it is not possible to auto-delete the Mac agent from deleting the device from the PCSM console. You must first uninstall the agent and then select to delete the device manually through the PCSM.
To do this:
- Locate the Centrastage.app in the Applications folder in the Finder.
- Right click on the icon and select Show package contents.
- Click Contents and then MacOS.
- Double click on Uninstall. This will require you to enter your admin credentials. A script will run and the agent will uninstall.
In some cases it may be necessary to do a completely clean uninstall. If you are having issues with re-installing an agent, please do the following in addition to the above:
- Using terminal, delete: /usr/share/Centrastage and private/var/root/.mono/registry/CurrentUser/software/centrastage.
- Use sudo rm -rf for both folders to completely remove the folder and its contents.
- If your preference is to use the Finder, ensure you have enabled root. You can do so by following the instructions here: http://support.apple.com/kb/ht1528. (Using the instructions for Lion will also work for later versions.)
- Once enabled, type the following -without quotes- into terminal to show all files in the Finder: “defaults write com.apple.finder AppleShowAllFiles” and then “killall Finder“.
- If you are using Mavericks 10.9 add -boolean true to the end of the first command so it looks like this: “defaults write com.apple.finder AppleShowAllFiles -boolean true“
- This will enable you to see the directories you need to navigate to then delete.

