How to set up a Wi-Fi connection
To configure a Wi-Fi connection manually:
- Click the network connection icon
 in the task bar.
 - Select the Wi-Fi network you wish to connect to.
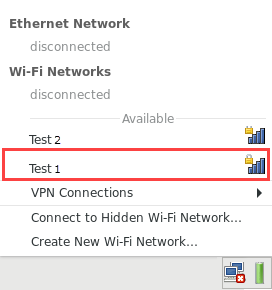
- Enter the Wi-Fi network password and click Connect.
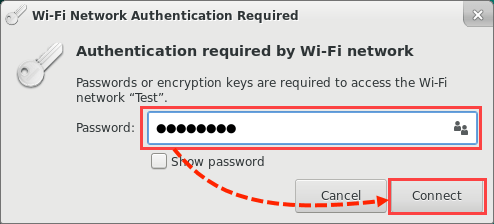
Upon connecting to the network successfully, the network connection icon  in the taskbar will change and a notification will appear with the message “Connection Established”.

What to do if your computer has non-standard network settings
You must configure non-standard network settings (such as static IP or DNS addresses) manually. To do so:
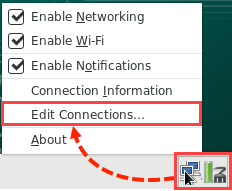
- In the network connection context menu, select Edit Connections.
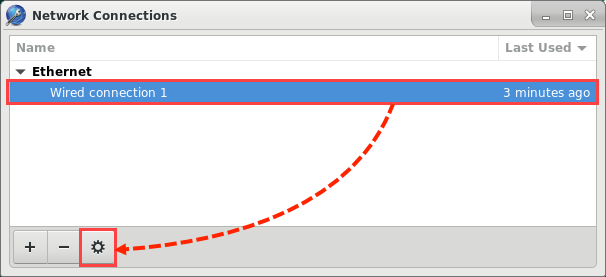
- Select the network connection and click
 .
.
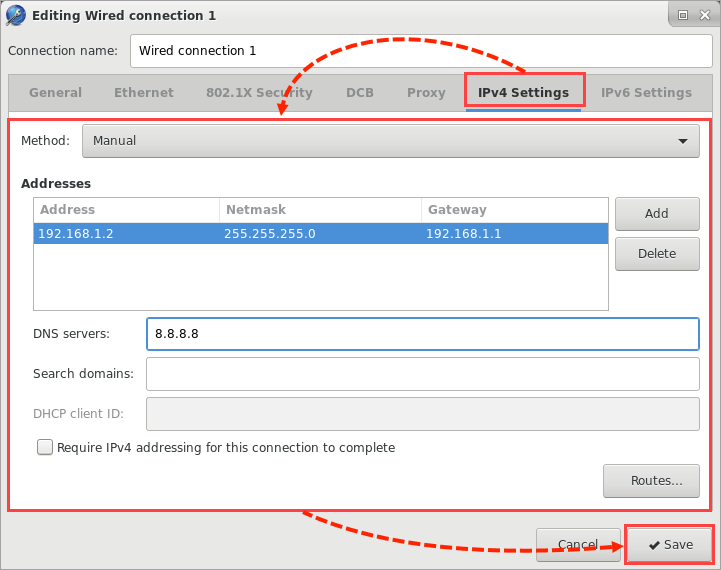
- Go to the IPv4 Settings tab and select the Manual configuration method.
- Configure the network settings and click Save.
What to do if the proxy server could not be identified
If Kaspersky Rescue Tool could not automatically detect the proxy server settings, set up the settings manually:
- Boot the computer under Kaspersky Rescue Disk. See this article for instructions.
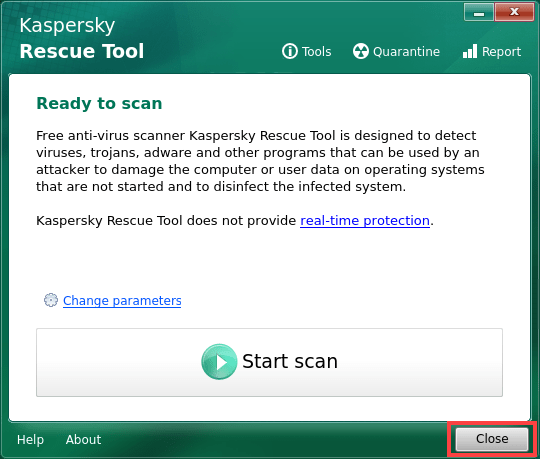
- In Kaspersky Rescue Tool window, click Close.
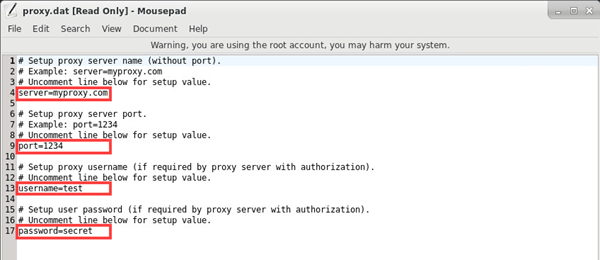
- Go to /opt/KRD/settings folder and open the proxy.dat file in edit mode.
- Remove character # from the lines “server”, “port”, “username”, and “password” and set values for them.
- Launch Kaspersky Rescue Tool and make sure the network connection in active.
Source : Official Kaspersky Brand
Editor by : BEST Antivirus KBS Team


 and a notification will appear with the message “Connection Established”.