To process requests, Kaspersky Lab technical support might need a report generated by the DumpAndroidApps utility. The report collects the following information from the mobile device:
- All APK files from the /data/app and /system/app folders on the mobile device are copied to the android_apps_0 folder on the computer.
- All paths to the APK files on the mobile device are saved to the file AndroidApps.txt. The file will be saved on the computer in the android_apps_0 folder.
- All files:
- From the folder /sdcard/Download on the mobile device are copied to the folder android_apps_0/Download on the computer.
- From the folder /system/bin on the mobile device are copied to the folder android_apps_0/system_bin on the computer.
- From the folder /system/xbin on the mobile device are copied to the folder ndroid_apps_0/system_xbin on the computer.
The data processed may be classified as personal by the laws of some countries. The data is provided for the purpose of analyzing whether there are any malicious applications on the device. By consenting to provide this data to Kaspersky Lab, you confirm that it contains no confidential information. You also confirm that you have read the Kaspersky Lab Products and Services Privacy Policy, in accordance with which the data will be proccessed.
To create a report and a send it to Kaspersky Lab, connect your mobile device to your computer and complete the following steps:
Step 1. Turn on USB debugging on the device
These steps may vary depending on the type of device you have and the version of Android it’s running.
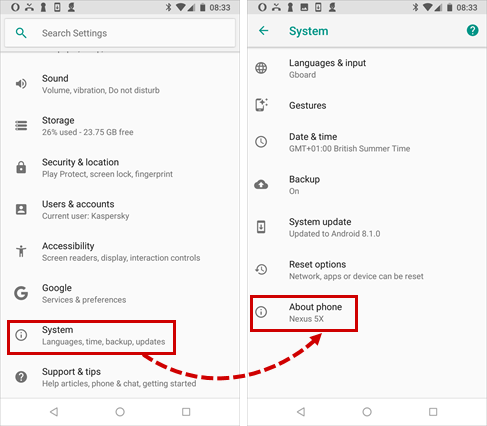
- Open Settings.
- Go to System → About phone.
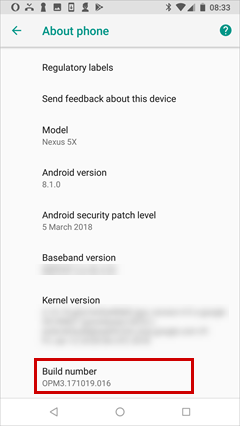
- Tap Build number 7 times to unlock developer options. On some devices you may need to tap Software info.
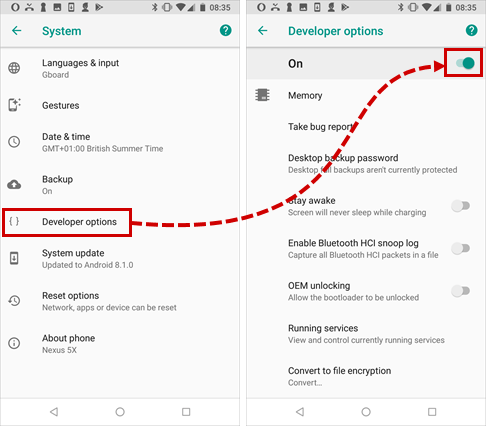
- Return to the previous settings window and tap Developer options.
- Turn on the Developer options setting.
- Scroll down to the Debugging section.
- Turn on USB debugging and tap OK.
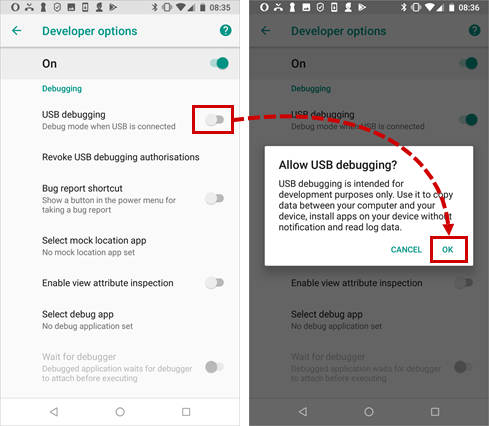
USB debugging is now turned on.
Don’t forget to turn off USB debugging and developer options after creating the report.
Step 2. Install the utility drivers
- Download the DumpAndroidApps_en.zip archive.
- Extract the files from the archive. See this article for instructions.
- Go to the folder containing the files extracted from the archive.
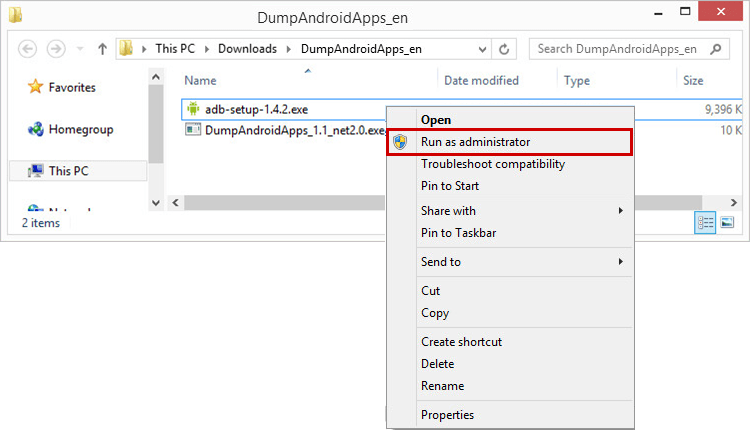
- From the shortcut menu of the file adb-setup-1.4.2.exe, select Run as administrator.
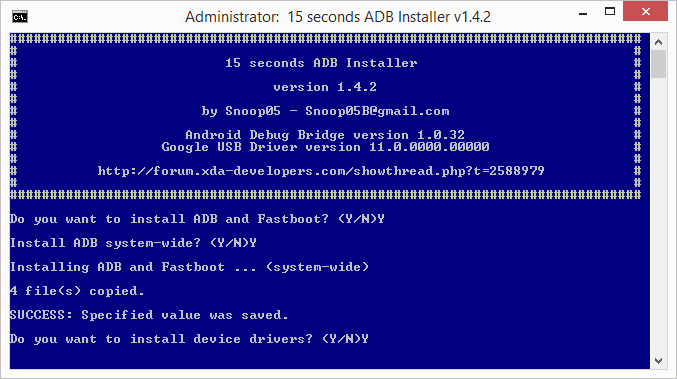
- Start the installation of the drivers. To do so, press Y and then Enter each time the console prompts you.
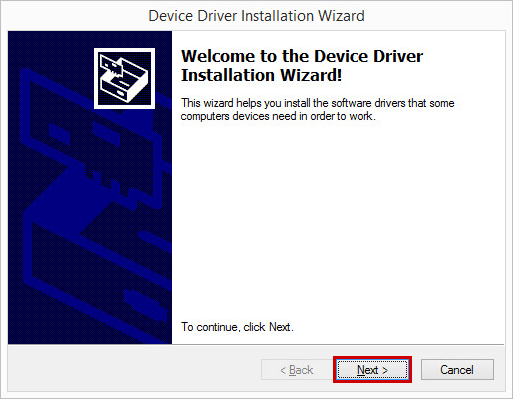
- If the Device Driver Installation Wizard window opens, click Next → Install → Finish.
- Wait until the installation window closes.
Step 3. Create a report using the utility
To run the DumpAndroidApps utility, .NET Framework 2.0 must be installed.
- Temporarily disable any anti-virus software on your computer so that it doesn’t delete any malicious application loaded from the mobile device. See the documentation for your anti-virus software for instructions on how to do so.
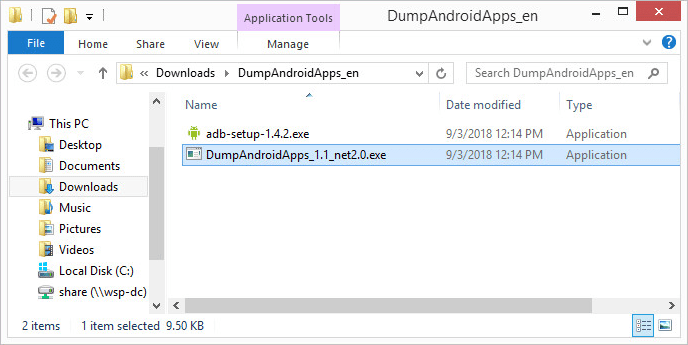
- Go to the folder containing the files extracted from the DumpAndroidApps_en.zip archive and start the DumpAndroidApps_1.0_net2.0.exe utility.
- The command prompt will open. Do not close the window until the applications have been loaded.
Loading the applications takes several minutes. If the process ends straight away, make sure that the drivers are installed, the device is connected to the computer, and that USB debugging is turned on. Start the utility again.
- When the loading is complete, press any key on the keyboard.
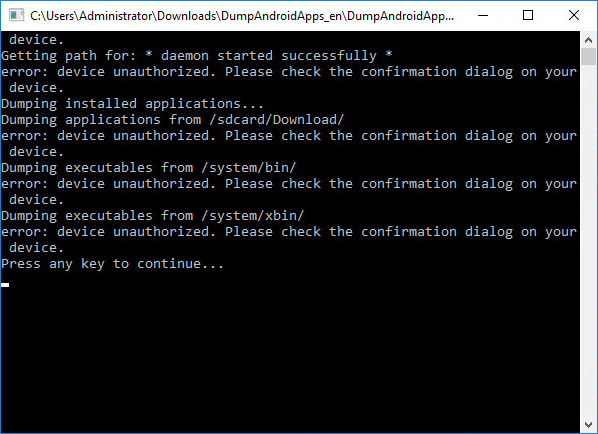
- The information will be saved in the android_apps_0 folder. If a folder with that name already exists, another will be created with the name android_apps_n+1. The new folder will be created in the same location from which you started the tool.
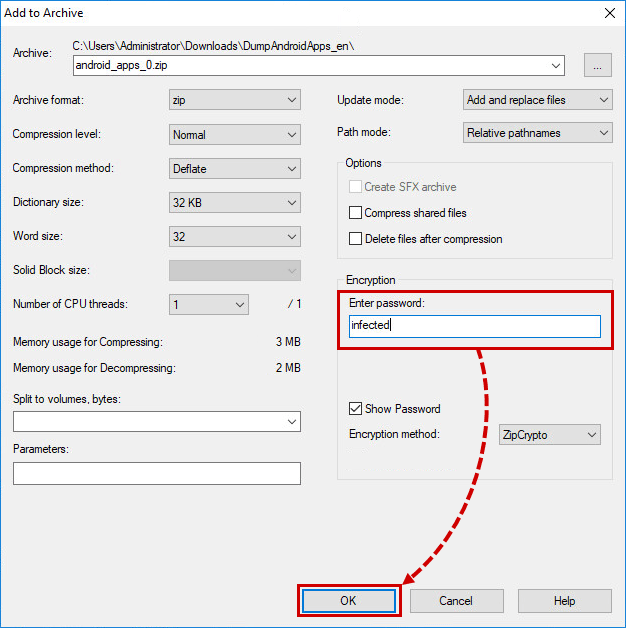
- Put the folder in an archive with the password “infected”, so that no malicious applications are deleted by anti-virus software when transferring the archive. For instructions on adding files to an archive, see this article.
- Enable your anti-virus software once again.
Step 4. Send the report to Kaspersky Lab
- Upload the archive to a cloud storage. For example, to Google Drive.
- Allow the archive to accessed via a direct link. For instructions, see the Google Drive help documentation.
- Send a request to Kaspersky Lab technical support via My Kaspersky and include a detailed description of the issue. Attach the link to the archive to your request.
For instructions on using My Kaspersky, see the Online Help page.
Source : Official Kaspersky Brand
Editor by : BEST Antivirus KBS Team

