

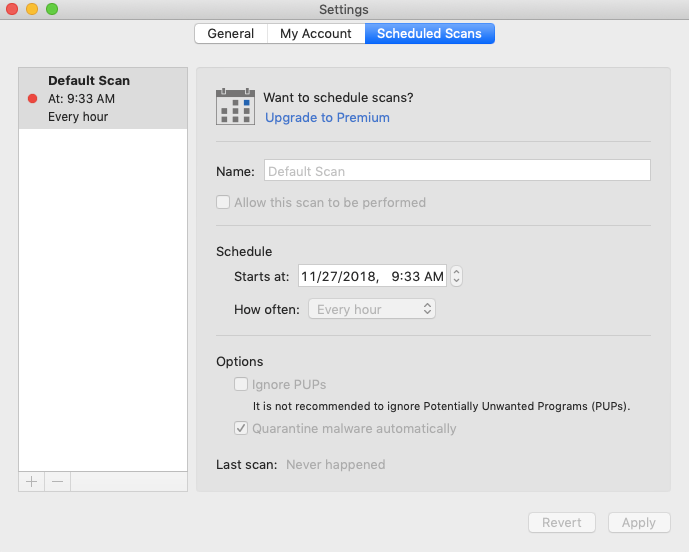
To create a scheduled scan in Malwarebytes for Mac, you must have purchased a Premium subscription and activated the subscription in the application.
Add or configure Scheduled scans in Malwarebytes on Mac device
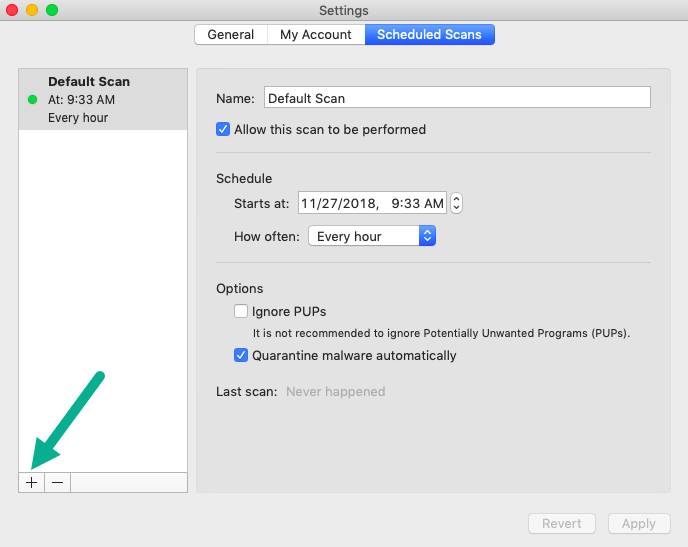
- Open Malwarebytes for Mac.
- At the top-right of the program, click the cog icon
 to open Settings.
 - At the top of the Settings window, click Scheduled Scans.
- The Default Scan displays. You can modify the default settings or create a new schedule scan.
If the scheduled scan is set to run and your computer is off or in sleep mode, the scan runs when the computer is powered on or awakened from sleep. - To add a new scheduled scan, click on the + icon.
- The New Scheduled Scan displays in the left pane.
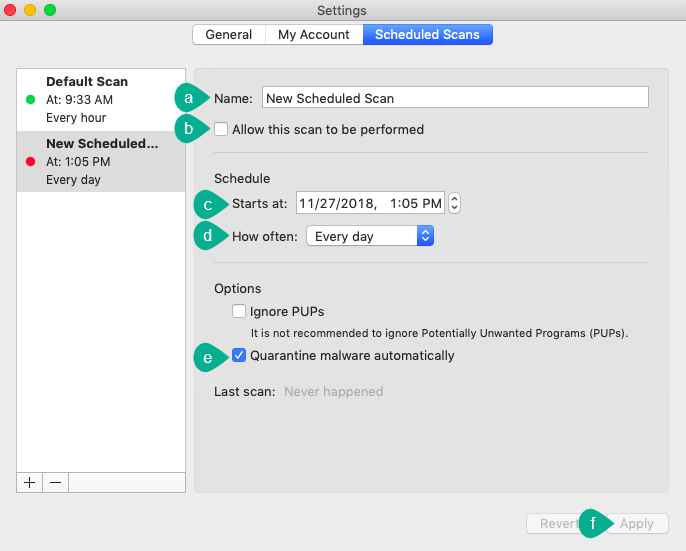
Add the following information to configure the New Scheduled Scan:- Click in the Name field and rename the scan if you choose.
- Check the Allow this scan to be performed checkbox.
- Choose the Starts at: date and time for the scan to run.
- Click the How often drop down menu to set the frequency for the scheduled scan.
- Check the Quarantine malware automatically checkbox.
- Click Apply to save changes.
Note: Malwarebytes Free version has no Scheduled Scans available. You must activate Premium on your Mac device to use this feature. Refer to Activate Premium subscription in Malwarebytes for Mac
Source : Official Malwarebytes Brand
Editor by : BEST Antivirus KBS Team
(Visited 7 times, 1 visits today)