This article concerns the following versions of Kaspersky Endpoint Security 10 for Mac:
- Service Pack 2 Maintenance Release 1 (version 10.2.1.319);
- Service Pack 2 (version 10.2.0.267);
- Service Pack 1 (version 10.1.0.622).
When you create a request to Kaspersky technical support, you might need a trace file for the support engineers to follow the instruction execution within the application step by step and find the cause of the problem.
How to create trace files using the interface
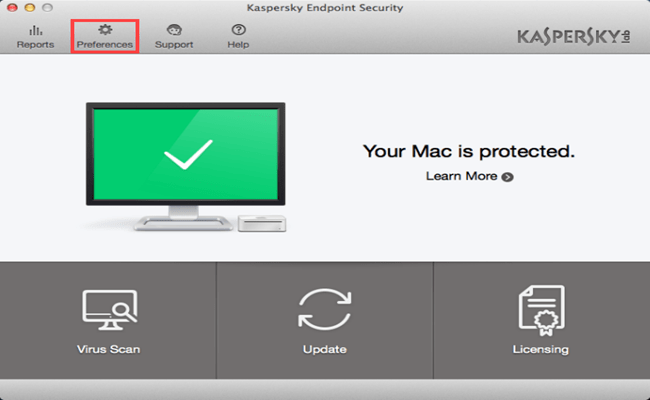
- Open Kaspersky Endpoint Security 10 for Mac.
- In the main window, click Preferences.

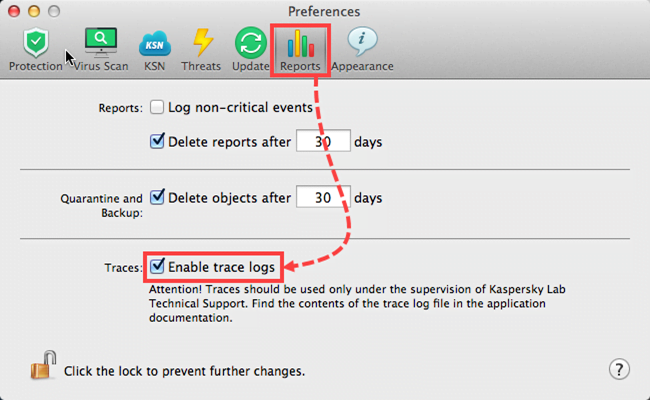
- Go to the Reports tab and select the Enable trace logs check box.

- Restart Kaspersky Endpoint Security 10 for Mac.
- Reproduce the issue.
- Open Kaspersky Endpoint Security 10 for Mac and click Preferences.
- Go to the Reports tab and clear the Enable trace logs check box.
- Restart Kaspersky Endpoint Security 10 for Mac.
The trace files will be created in the following folders:
- Library/Logs/Kaspersky Lab/
- /Users/<user_name>/Library/Logs/Kaspersky Lab/
How to create trace files using the script
- Shut down Kaspersky Endpoint Security 10 for Mac.
- Download the traces10.zip archive and extract the files from it:
- enable_traces10.sh—to enable tracing
- disable_traces10.sh—to disable tracing
- Open Terminal.
- Enable tracing by running the “enable_traces10.sh” file as administrator. To do so, type the command and press Enter:
sudo sh <file_path>/enable_traces10.sh
- Type the administrator password and press Enter.
- Open Kaspersky Endpoint Security 10 for Mac and reproduce the issue.
- Wait for one minute.
- Disable tracing. To do so, run the “disable_traces10.sh” file as administrator:
sudo sh <file_path>/disable_traces10.sh
The trace files will be created in the following folders:
- Library/Logs/Kaspersky Lab/
- /Users/<user_name>/Library/Logs/Kaspersky Lab/
Source : Official Kaspersky Brand
Editor by : BEST Antivirus KBS Team
(Visited 27 times, 1 visits today)

