Issue
- Best practices for upgrading from ESET File Security for Microsoft Windows Server (EFSW) 4.5 to version 6
Solution
Uninstall EFSW using ERA 5.x prior to migrating
- Open the ESET Remote Administrator Console by clicking Start → All programs → ESET → ESET Remote Administrator Console → ESET Remote Administrator Console.
- Click Tools → Policy Manager.
- In the Actions section, click Add New Policy.
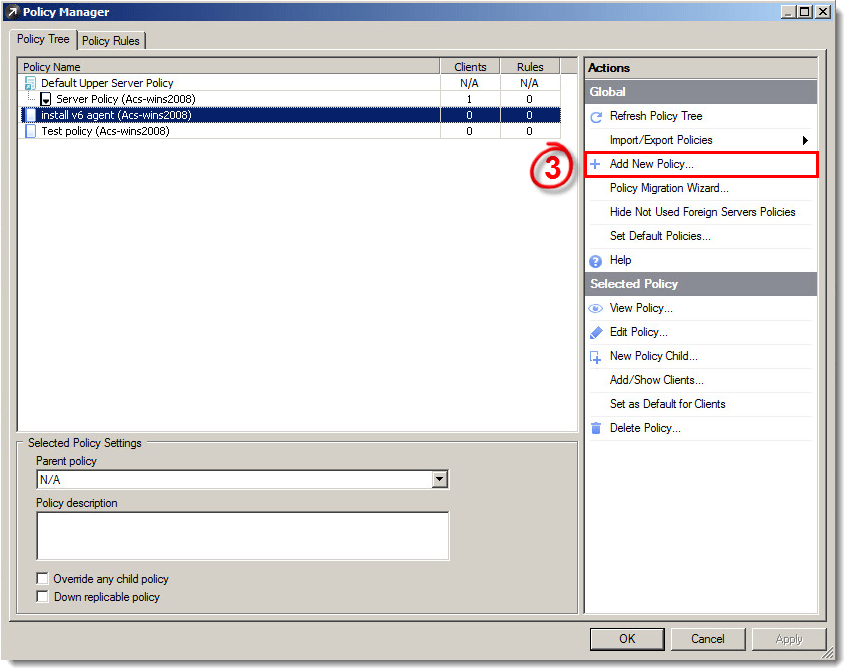
Figure 1-1
- Assign the applicable attributes for the new policy:
- Policy name: Server Migration
- Create empty policy configuration: (selected)
Click Ok when finished.
- Double-click the new Server Migration policy to edit it.
- Expand Windows Server v4.5.
- Disable Self-defense (set to “Yes”).
- Click Console to save changes.
- Select the servers to migrate, right-click and select Set Policy.
- Choose the new Server Migration policy and then click Set Policy.
- Wait for the servers check-in again, they will replicate the edited policy and disable Self-defense.
- Restart the server.
- Uninstall EFSW using the instructions in the following Knowledgebase article using ERA or manually on the servers:
Push uninstall to client workstations using ESET Remote Administrator (5.x)
- After uninstalling EFSW version 4.5, restart the server again.
Install EFSW version 6
- Click the appropriate link below to download the installer file for ESET File Security for Microsoft Windows Server 6:
32-bit Download 64-bit Download - Double-click the installer file to launch the ESET File Security for Microsoft Windows Server 6 Setup Wizard. Click Next in the welcome screen.
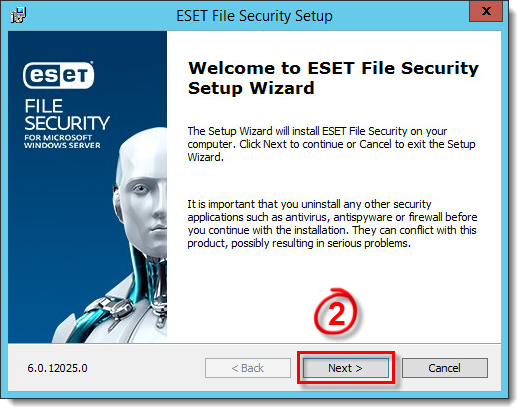
Figure 2-1
- Read the End-User License Agreement. Select I accept the terms in the License Agreement and click Next if you agree.
- Select Complete and click Next.
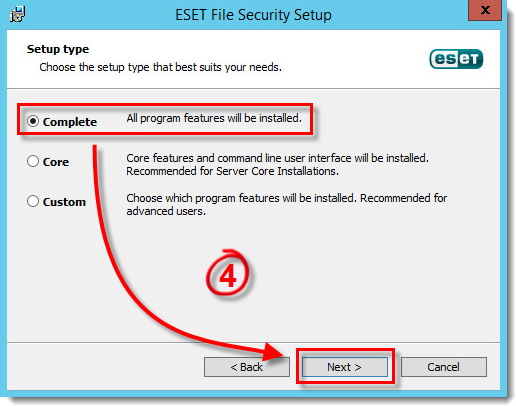
Figure 2-2
- If you want to change the install location for the ESET File Security Product, Module or Data folders, you can click Browse next to the appropriate file path to select a new install destination. Click Install when you are finished making changes.
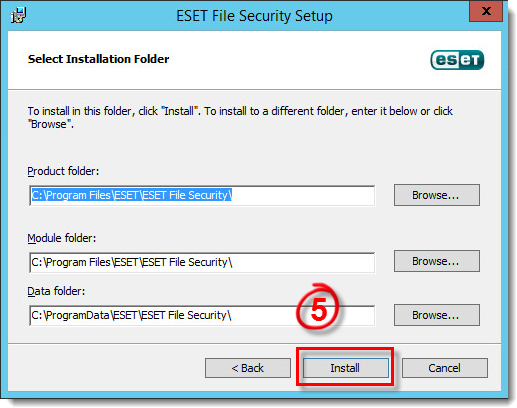
Figure 2-3
- Click Yes to restart.
- Click Finish. ESET File Security for Microsoft Windows Server will open automatically.
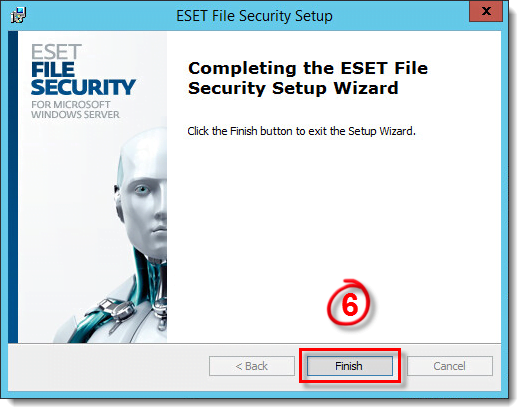
Figure 2-4
- To update or change your license information, click Help and Support → Manage license. Type your License Key into the blank field and click Activate (or alternatively you can use a Security Admin account or Offline License). If you currently use a Username and Password, click here for instructions to convert them into a License Key.
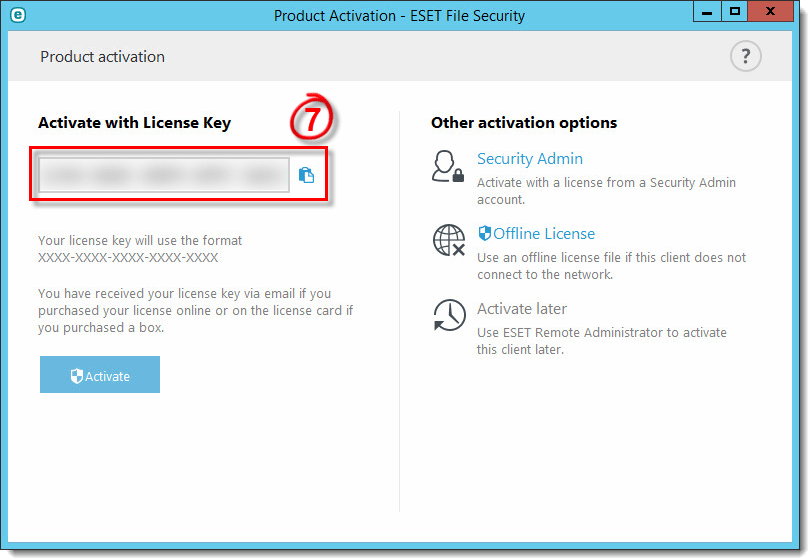
Figure 2-5
- Click Done.
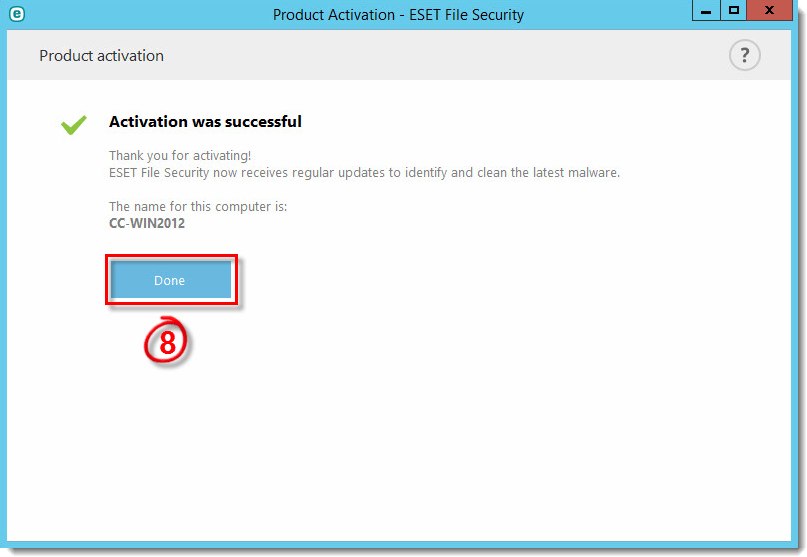
Figure 2-6
Click the image to view larger in new window
- The first time you open ESET File Security for Microsoft Windows Server, you must set your preference for detection of potentially unwanted applications (what is a potentially unwanted application?). Click OK when you are finished (see figure 1-7).
- We recommend that you leave the slider bar next to I want to be a part of ESET Live Grid (recommended) enabled. Click OK when you are finished.
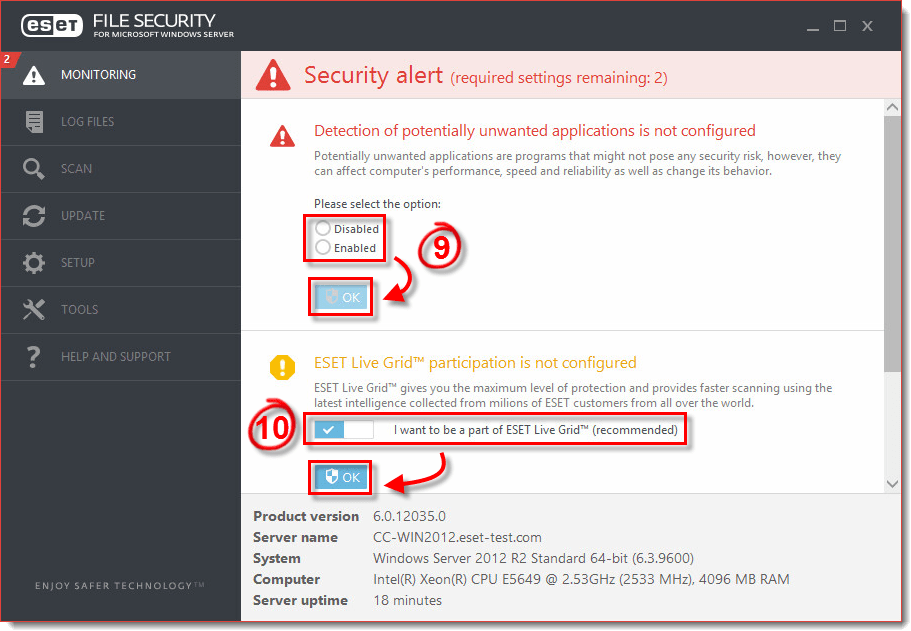
Figure 2-7
Uninstall EFSW version 4.5 on individual servers
If you do not use ERA to manage EFSW, manually uninstall EFSW following the three steps below:
- Disable self-defense in EFSW version 4.5 and then restart the computer. To disable Self-defense, press the F5 key to access Setup, expand Antivirus and antispyware and deselect the check box next to Enable Self-defense. Click OK and then restart your computer.
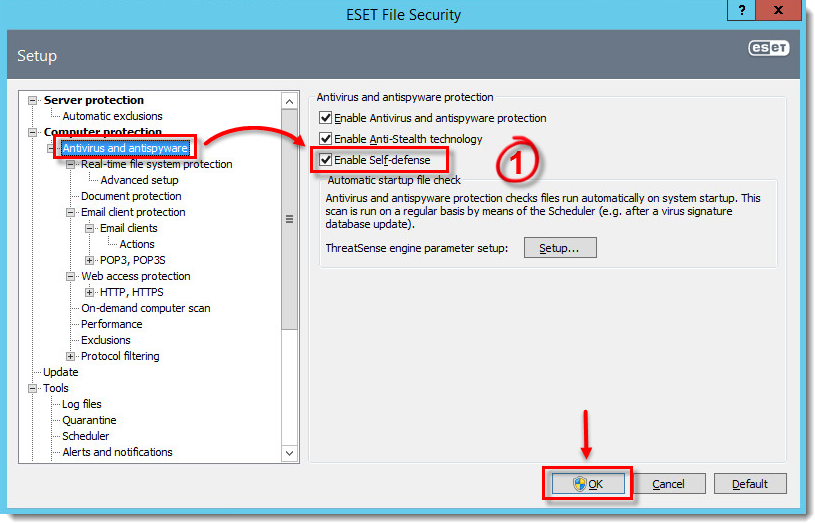
Figure 3-1
- Uninstall EFSW version 4.5. If you encounter errors when uninstalling EFSW 4.5 using ERA, uninstall ESET manually using the ESET uninstaller tool.
- Restart your computer after uninstalling EFSW 4.5.
Last Updated: Jun 16, 2021
(Visited 14 times, 1 visits today)

