You might need to troubleshoot the Microsoft Defender for Endpoint onboarding process if you encounter issues. This page provides detailed steps to troubleshoot onboarding issues that might occur when deploying with one of the deployment tools and common errors that might occur on the devices.
Troubleshoot issues with onboarding tools
If you have completed the onboarding process and don’t see devices in the Devices list after an hour, it might indicate an onboarding or connectivity problem.
Troubleshoot onboarding when deploying with Group Policy
Deployment with Group Policy is done by running the onboarding script on the devices. The Group Policy console does not indicate if the deployment has succeeded or not.
If you have completed the onboarding process and don’t see devices in the Devices list after an hour, you can check the output of the script on the devices. For more information, see Troubleshoot onboarding when deploying with a script.
If the script completes successfully, see Troubleshoot onboarding issues on the devices for additional errors that might occur.
Troubleshoot onboarding issues when deploying with Microsoft Endpoint Configuration Manager
When onboarding devices using the following versions of Configuration Manager:
- Microsoft Endpoint Configuration Manager
- System Center 2012 Configuration Manager
- System Center 2012 R2 Configuration Manager
Deployment with the above-mentioned versions of Configuration Manager is done by running the onboarding script on the devices. You can track the deployment in the Configuration Manager Console.
If the deployment fails, you can check the output of the script on the devices.
If the onboarding completed successfully but the devices are not showing up in the Devices list after an hour, see Troubleshoot onboarding issues on the device for additional errors that might occur.
Troubleshoot onboarding when deploying with a script
Check the result of the script on the device:
- Click Start, type Event Viewer, and press Enter.
- Go to Windows Logs > Application.
- Look for an event from WDATPOnboarding event source.
If the script fails and the event is an error, you can check the event ID in the following table to help you troubleshoot the issue.
Note
The following event IDs are specific to the onboarding script only.
| Event ID | Error Type | Resolution steps |
|---|---|---|
5 |
Offboarding data was found but couldn’t be deleted | Check the permissions on the registry, specificallyHKLM\SOFTWARE\Policies\Microsoft\Windows Advanced Threat Protection. |
10 |
Onboarding data couldn’t be written to registry | Check the permissions on the registry, specificallyHKLM\SOFTWARE\Policies\Microsoft\Windows Advanced Threat Protection.
Verify that the script has been run as an administrator. |
15 |
Failed to start SENSE service | Check the service health (sc query sense command). Make sure it’s not in an intermediate state (‘Pending_Stopped’, ‘Pending_Running’) and try to run the script again (with administrator rights).If the device is running Windows 10, version 1607 and running the command sc query sense returns START_PENDING, reboot the device. If rebooting the device doesn’t address the issue, upgrade to KB4015217 and try onboarding again. |
15 |
Failed to start SENSE service | If the message of the error is: System error 577 or error 1058 has occurred, you need to enable the Microsoft Defender Antivirus ELAM driver, see Ensure that Microsoft Defender Antivirus is not disabled by a policy for instructions. |
30 |
The script failed to wait for the service to start running | The service could have taken more time to start or has encountered errors while trying to start. For more information on events and errors related to SENSE, see Review events and errors using Event viewer. |
35 |
The script failed to find needed onboarding status registry value | When the SENSE service starts for the first time, it writes onboarding status to the registry locationHKLM\SOFTWARE\Microsoft\Windows Advanced Threat Protection\Status.
The script failed to find it after several seconds. You can manually test it and check if it’s there. For more information on events and errors related to SENSE, see Review events and errors using Event viewer. |
40 |
SENSE service onboarding status is not set to 1 | The SENSE service has failed to onboard properly. For more information on events and errors related to SENSE, see Review events and errors using Event viewer. |
65 |
Insufficient privileges | Run the script again with administrator privileges. |
Troubleshoot onboarding issues using Microsoft Intune
You can use Microsoft Intune to check error codes and attempt to troubleshoot the cause of the issue.
If you have configured policies in Intune and they are not propagated on devices, you might need to configure automatic MDM enrollment.
Use the following tables to understand the possible causes of issues while onboarding:
- Microsoft Intune error codes and OMA-URIs table
- Known issues with non-compliance table
- Mobile Device Management (MDM) event logs table
If none of the event logs and troubleshooting steps work, download the Local script from the Device management section of the portal, and run it in an elevated command prompt.
Microsoft Intune error codes and OMA-URIs
| Error Code Hex | Error Code Dec | Error Description | OMA-URI | Possible cause and troubleshooting steps |
|---|---|---|---|---|
| 0x87D1FDE8 | -2016281112 | Remediation failed | OnboardingOffboarding | Possible cause: Onboarding or offboarding failed on a wrong blob: wrong signature or missing PreviousOrgIds fields.Troubleshooting steps:
Check the event IDs in the View agent onboarding errors in the device event log section. Check the MDM event logs in the following table or follow the instructions in Diagnose MDM failures in Windows. |
| OnboardingOffboarding
SampleSharing |
Possible cause: Microsoft Defender for Endpoint Policy registry key does not exist or the OMA DM client doesn’t have permissions to write to it.Troubleshooting steps: Ensure that the following registry key exists: HKEY_LOCAL_MACHINE\SOFTWARE\Policies\Microsoft\Windows Advanced Threat Protection
If it doesn’t exist, open an elevated command and add the key. |
|||
| SenseIsRunningOnboardingState
OrgId |
Possible cause: An attempt to remediate by read-only property. Onboarding has failed.Troubleshooting steps: Check the troubleshooting steps in Troubleshoot onboarding issues on the device.
Check the MDM event logs in the following table or follow the instructions in Diagnose MDM failures in Windows. |
|||
| All | Possible cause: Attempt to deploy Microsoft Defender for Endpoint on non-supported SKU/Platform, particularly Holographic SKU.Currently supported platforms:
Enterprise, Education, and Professional. Server is not supported. |
|||
| 0x87D101A9 | -2016345687 | SyncML(425): The requested command failed because the sender does not have adequate access control permissions (ACL) on the recipient. | All | Possible cause: Attempt to deploy Microsoft Defender for Endpoint on non-supported SKU/Platform, particularly Holographic SKU.Currently supported platforms:
Enterprise, Education, and Professional. |
Known issues with non-compliance
The following table provides information on issues with non-compliance and how you can address the issues.
| Case | Symptoms | Possible cause and troubleshooting steps |
|---|---|---|
1 |
Device is compliant by SenseIsRunning OMA-URI. But is non-compliant by OrgId, Onboarding and OnboardingState OMA-URIs. | Possible cause: Check that user passed OOBE after Windows installation or upgrade. During OOBE onboarding couldn’t be completed but SENSE is running already.Troubleshooting steps: Wait for OOBE to complete. |
2 |
Device is compliant by OrgId, Onboarding, and OnboardingState OMA-URIs, but is non-compliant by SenseIsRunning OMA-URI. | Possible cause: Sense service’s startup type is set as “Delayed Start”. Sometimes this causes the Microsoft Intune server to report the device as non-compliant by SenseIsRunning when DM session occurs on system start.Troubleshooting steps: The issue should automatically be fixed within 24 hours. |
3 |
Device is non-compliant | Troubleshooting steps: Ensure that Onboarding and Offboarding policies are not deployed on the same device at same time. |
Mobile Device Management (MDM) event logs
View the MDM event logs to troubleshoot issues that might arise during onboarding:
Log name: Microsoft\Windows\DeviceManagement-EnterpriseDiagnostics-Provider
Channel name: Admin
| ID | Severity | Event description | Troubleshooting steps |
|---|---|---|---|
| 1819 | Error | Microsoft Defender for Endpoint CSP: Failed to Set Node’s Value. NodeId: (%1), TokenName: (%2), Result: (%3). | Download the Cumulative Update for Windows 10, 1607. |
Troubleshoot onboarding issues on the device
If the deployment tools used does not indicate an error in the onboarding process, but devices are still not appearing in the devices list in an hour, go through the following verification topics to check if an error occurred with the Microsoft Defender for Endpoint agent.
- View agent onboarding errors in the device event log
- Ensure the diagnostic data service is enabled
- Ensure the service is set to start
- Ensure the device has an Internet connection
- Ensure that Microsoft Defender Antivirus is not disabled by a policy
View agent onboarding errors in the device event log
- Click Start, type Event Viewer, and press Enter.
- In the Event Viewer (Local) pane, expand Applications and Services Logs > Microsoft > Windows > SENSE.
Note
SENSE is the internal name used to refer to the behavioral sensor that powers Microsoft Defender for Endpoint.
- Select Operational to load the log.
- In the Action pane, click Filter Current log.
- On the Filter tab, under Event level: select Critical, Warning, and Error, and click OK.
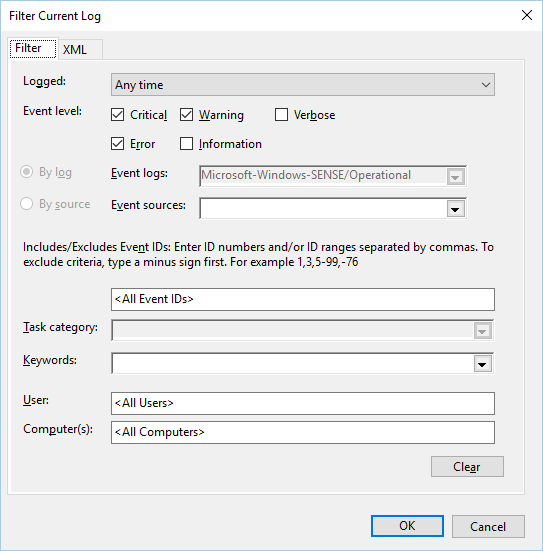
- Events which can indicate issues will appear in the Operational pane. You can attempt to troubleshoot them based on the solutions in the following table:
| Event ID | Message | Resolution steps |
|---|---|---|
5 |
Microsoft Defender for Endpoint service failed to connect to the server at variable | Ensure the device has Internet access. |
6 |
Microsoft Defender for Endpoint service is not onboarded and no onboarding parameters were found. Failure code: variable | Run the onboarding script again. |
7 |
Microsoft Defender for Endpoint service failed to read the onboarding parameters. Failure code: variable | Ensure the device has Internet access, then run the entire onboarding process again. |
9 |
Microsoft Defender for Endpoint service failed to change its start type. Failure code: variable | If the event happened during onboarding, reboot and re-attempt running the onboarding script. For more information, see Run the onboarding script again.
If the event happened during offboarding, contact support. |
10 |
Microsoft Defender for Endpoint service failed to persist the onboarding information. Failure code: variable | If the event happened during onboarding, re-attempt running the onboarding script. For more information, see Run the onboarding script again.
If the problem persists, contact support. |
15 |
Microsoft Defender for Endpoint cannot start command channel with URL: variable | Ensure the device has Internet access. |
17 |
Microsoft Defender for Endpoint service failed to change the Connected User Experiences and Telemetry service location. Failure code: variable | Run the onboarding script again. If the problem persists, contact support. |
25 |
Microsoft Defender for Endpoint service failed to reset health status in the registry. Failure code: variable | Contact support. |
27 |
Failed to enable Microsoft Defender for Endpoint mode in Windows Defender. Onboarding process failed. Failure code: variable | Contact support. |
29 |
Failed to read the offboarding parameters. Error type: %1, Error code: %2, Description: %3 | Ensure the device has Internet access, then run the entire offboarding process again. |
30 |
Failed to disable $(build.sense.productDisplayName) mode in Microsoft Defender for Endpoint. Failure code: %1 | Contact support. |
32 |
$(build.sense.productDisplayName) service failed to request to stop itself after offboarding process. Failure code: %1 | Verify that the service start type is manual and reboot the device. |
55 |
Failed to create the Secure ETW autologger. Failure code: %1 | Reboot the device. |
63 |
Updating the start type of external service. Name: %1, actual start type: %2, expected start type: %3, exit code: %4 | Identify what is causing changes in start type of mentioned service. If the exit code is not 0, fix the start type manually to expected start type. |
64 |
Starting stopped external service. Name: %1, exit code: %2 | Contact support if the event keeps re-appearing. |
68 |
The start type of the service is unexpected. Service name: %1, actual start type: %2, expected start type: %3 | Identify what is causing changes in start type. Fix mentioned service start type. |
69 |
The service is stopped. Service name: %1 | Start the mentioned service. Contact support if persists. |
There are additional components on the device that the Microsoft Defender for Endpoint agent depends on to function properly. If there are no onboarding related errors in the Microsoft Defender for Endpoint agent event log, proceed with the following steps to ensure that the additional components are configured correctly.
Ensure the diagnostic data service is enabled
If the devices aren’t reporting correctly, you might need to check that the Windows diagnostic data service is set to automatically start and is running on the device. The service might have been disabled by other programs or user configuration changes.
First, you should check that the service is set to start automatically when Windows starts, then you should check that the service is currently running (and start it if it isn’t).
Ensure the service is set to start
Use the command line to check the Windows diagnostic data service startup type:
- Open an elevated command-line prompt on the device:
a. Click Start, type cmd, and press Enter.
b. Right-click Command prompt and select Run as administrator.
- Enter the following command, and press Enter:
Console
sc qc diagtrackIf the service is enabled, then the result should look like the following screenshot:
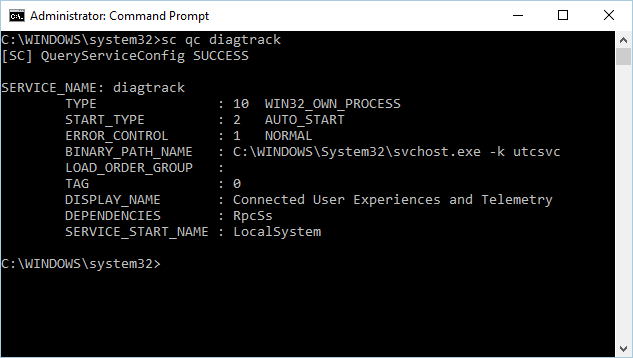
If the
START_TYPEis not set toAUTO_START, then you’ll need to set the service to automatically start.
Use the command line to set the Windows diagnostic data service to automatically start:
- Open an elevated command-line prompt on the device:
a. Click Start, type cmd, and press Enter.
b. Right-click Command prompt and select Run as administrator.
- Enter the following command, and press Enter:
Console
sc config diagtrack start=auto - A success message is displayed. Verify the change by entering the following command, and press Enter:
Console
sc qc diagtrack - Start the service. In the command prompt, type the following command and press Enter:
Console
sc start diagtrack
Ensure the device has an Internet connection
The Microsoft Defender for Endpoint sensor requires Microsoft Windows HTTP (WinHTTP) to report sensor data and communicate with the Microsoft Defender for Endpoint service.
WinHTTP is independent of the Internet browsing proxy settings and other user context applications and must be able to detect the proxy servers that are available in your particular environment.
To ensure that sensor has service connectivity, follow the steps described in the Verify client connectivity to Microsoft Defender for Endpoint service URLs topic.
If the verification fails and your environment is using a proxy to connect to the Internet, then follow the steps described in Configure proxy and Internet connectivity settings topic.
Ensure that Microsoft Defender Antivirus is not disabled by a policy
Important
The following only applies to devices that have not yet received the August 2020 (version 4.18.2007.8) update to Microsoft Defender Antivirus.
The update ensures that Microsoft Defender Antivirus cannot be turned off on client devices via system policy.
Problem: The Microsoft Defender for Endpoint service does not start after onboarding.
Symptom: Onboarding successfully completes, but you see error 577 or error 1058 when trying to start the service.
Solution: If your devices are running a third-party antimalware client, the Microsoft Defender for Endpoint agent needs the Early Launch Antimalware (ELAM) driver to be enabled. You must ensure that it’s not turned off by a system policy.
- Depending on the tool that you use to implement policies, you’ll need to verify that the following Windows Defender policies are cleared:
- DisableAntiSpyware
- DisableAntiVirus
For example, in Group Policy there should be no entries such as the following values:
<Key Path="SOFTWARE\Policies\Microsoft\Windows Defender"><KeyValue Value="0" ValueKind="DWord" Name="DisableAntiSpyware"/></Key><Key Path="SOFTWARE\Policies\Microsoft\Windows Defender"><KeyValue Value="0" ValueKind="DWord" Name="DisableAntiVirus"/></Key>
Important
The disableAntiSpyware setting is discontinued and will be ignored on all Windows 10 devices, as of the August 2020 (version 4.18.2007.8) update to Microsoft Defender Antivirus.
- After clearing the policy, run the onboarding steps again.
- You can also check the previous registry key values to verify that the policy is disabled, by opening the registry key
HKEY_LOCAL_MACHINE\SOFTWARE\Policies\Microsoft\Windows Defender.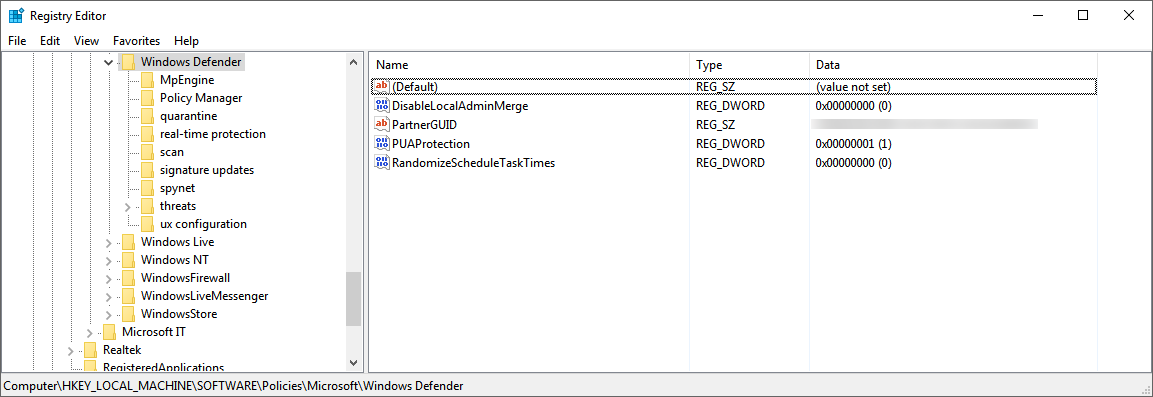
Note
All Windows Defender services (wdboot, wdfilter, wdnisdrv, wdnissvc, and windefend) should be in their default state. Changing the startup of these services is unsupported and may force you to reimage your system.
Example default configurations for WdBoot and WdFilter:
<Key Path="SYSTEM\CurrentControlSet\Services\WdBoot"><KeyValue Value="0" ValueKind="DWord" Name="Start"/></Key><Key Path="SYSTEM\CurrentControlSet\Services\WdFilter"><KeyValue Value="0" ValueKind="DWord" Name="Start"/></Key>
Troubleshoot onboarding issues
Note
The following troubleshooting guidance is only applicable for Windows Server 2016 and lower.
If you encounter issues while onboarding a server, go through the following verification steps to address possible issues.
- Ensure Microsoft Monitoring Agent (MMA) is installed and configured to report sensor data to the service
- Ensure that the server proxy and Internet connectivity settings are configured properly
You might also need to check the following:
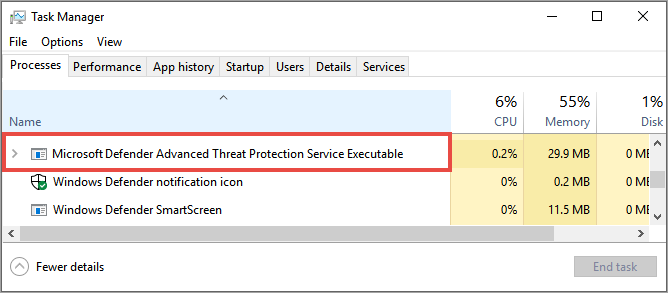
- Check that there is a Microsoft Defender for Endpoint Service running in the Processes tab in Task Manager. For example:
- Check Event Viewer > Applications and Services Logs > Operation Manager to see if there are any errors.
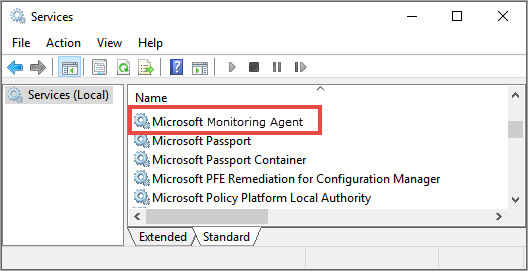
- In Services, check if the Microsoft Monitoring Agent is running on the server. For example,
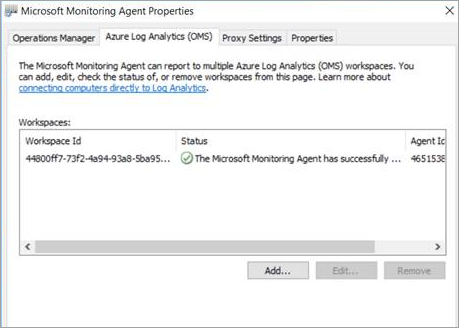
- In Microsoft Monitoring Agent > Azure Log Analytics (OMS), check the Workspaces and verify that the status is running.
- Check to see that devices are reflected in the Devices list in the portal.
Confirming onboarding of newly built devices
There may be instances when onboarding is deployed on a newly built device but not completed.
The steps below provide guidance for the following scenario:
- Onboarding package is deployed to newly built devices
- Sensor does not start because the Out-of-box experience (OOBE) or first user logon has not been completed
- Device is turned off or restarted before the end user performs a first logon
- In this scenario, the SENSE service will not start automatically even though onboarding package was deployed
Note
User Logon after OOBE is no longer required for SENSE service to start on the following or more recent Windows versions: Windows 10, version 1809 or Windows Server 2019, or Windows Server 2022 with April 22 2021 update rollup. Windows 10, version 1909 with April 2021 update rollup. Windows 10, version 2004/20H2 with April 28 2021 update rollup.
Note
The following steps are only relevant when using Microsoft Endpoint Configuration Manager. For more details about onboarding using Microsoft Endpoint Configuration Manager, see Microsoft Defender for Endpoint.
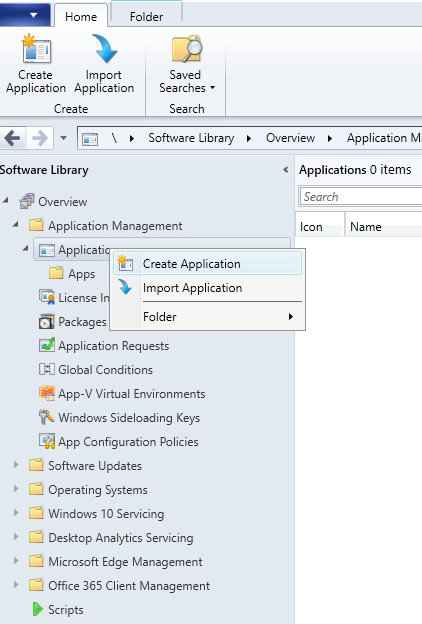
- Create an application in Microsoft Endpoint Configuration Manager.
- Select Manually specify the application information.
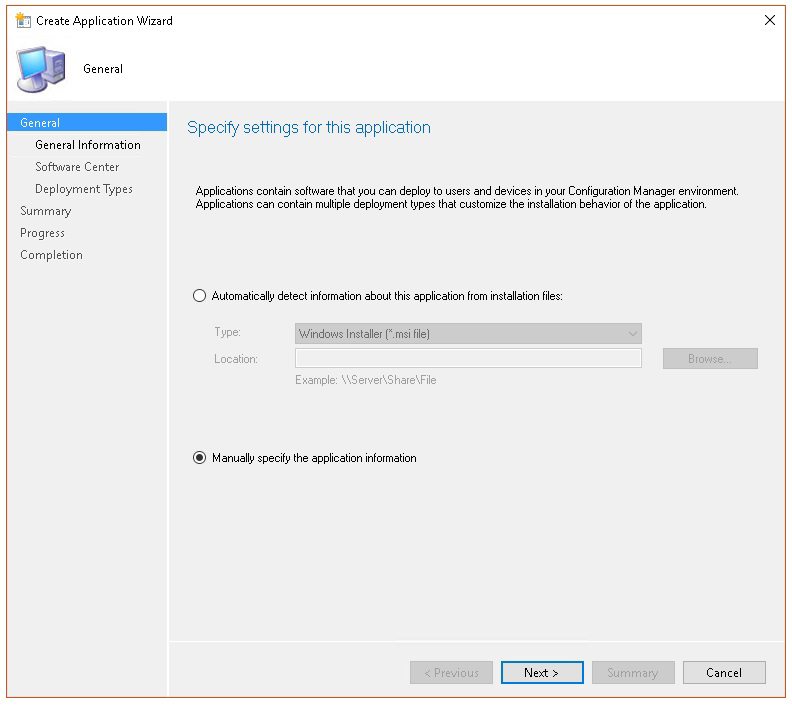
- Specify information about the application, then select Next.
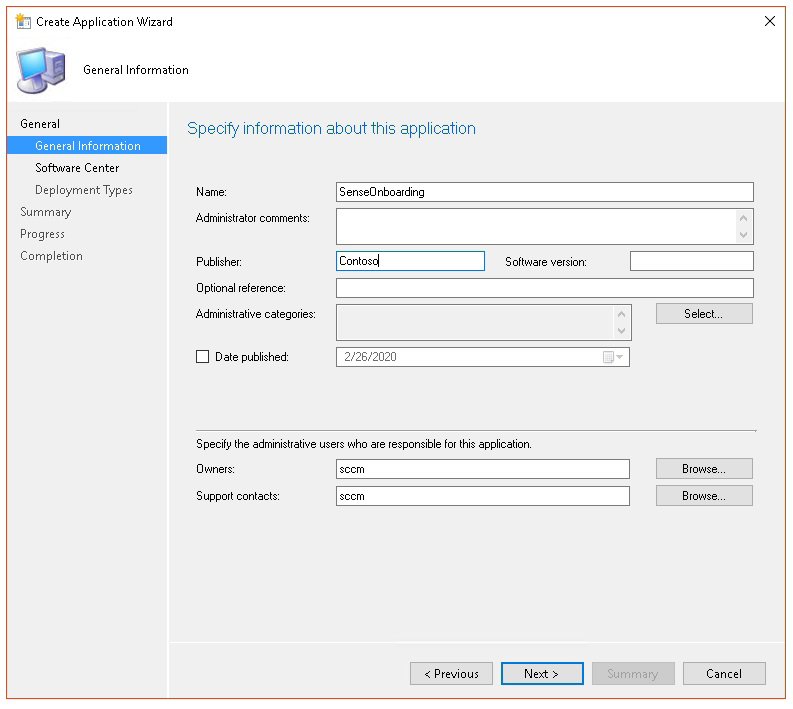
- Specify information about the software center, then select Next.
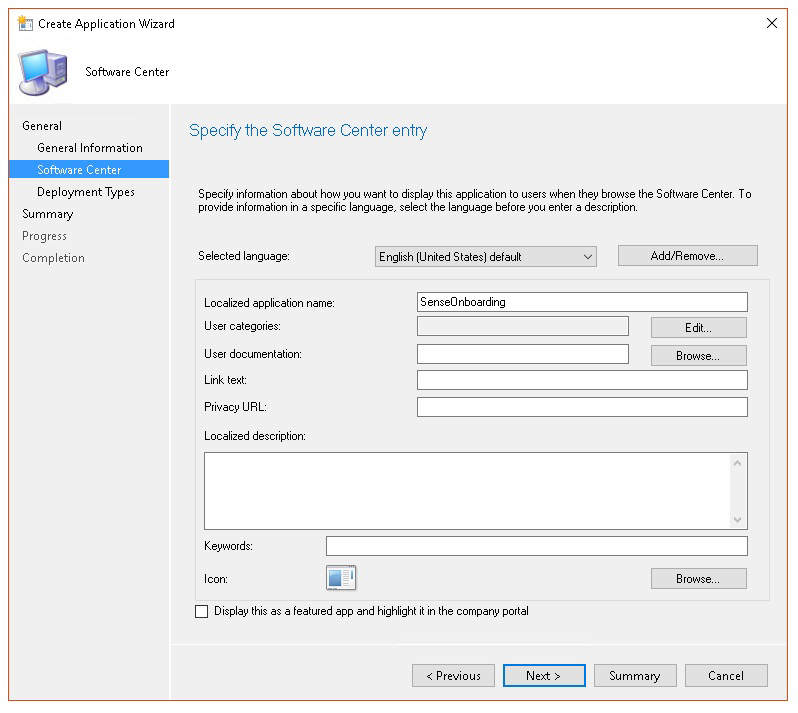
- In Deployment types select Add.
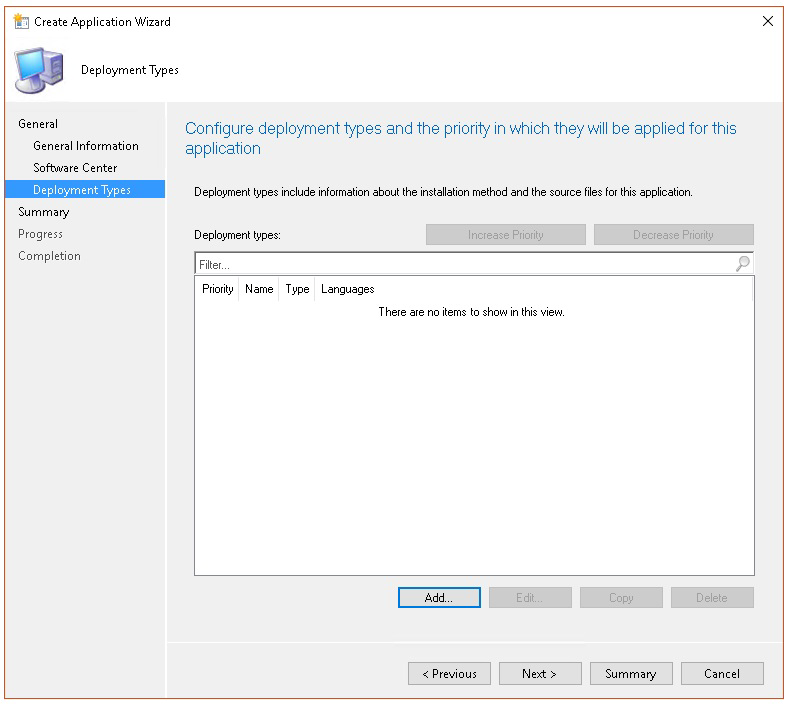
- Select Manually specify the deployment type information, then select Next.
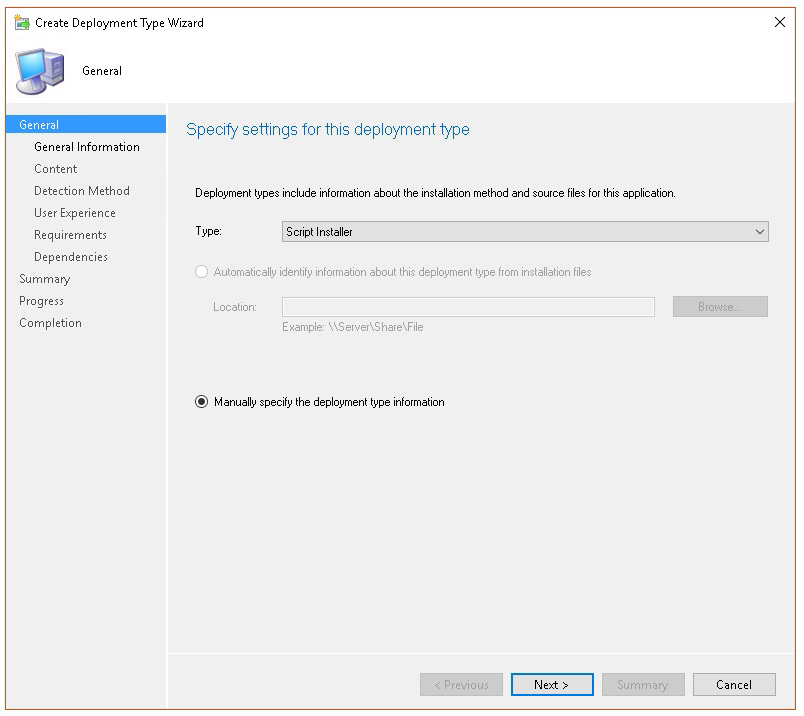
- Specify information about the deployment type, then select Next.
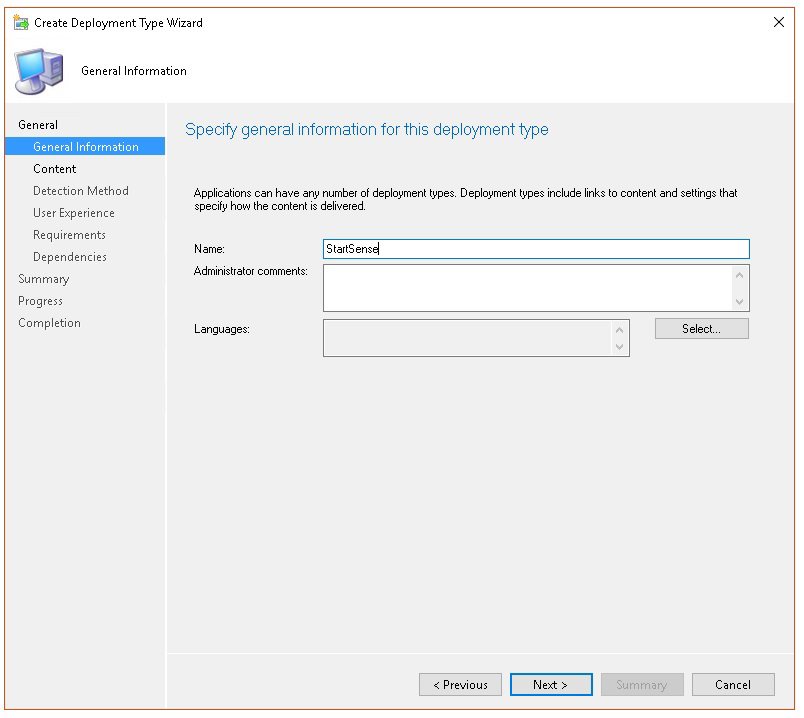
- In Content > Installation program specify the command:
net start sense.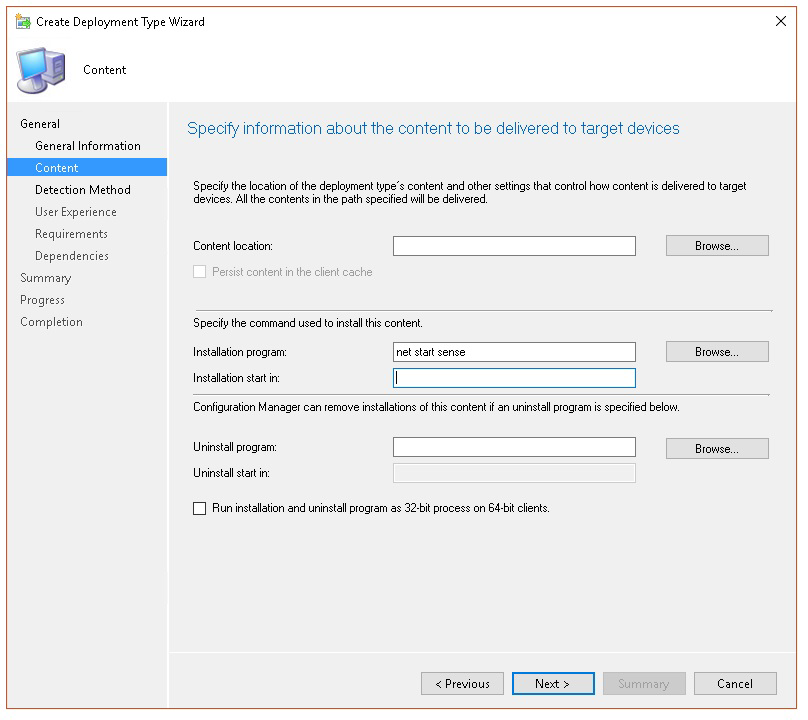
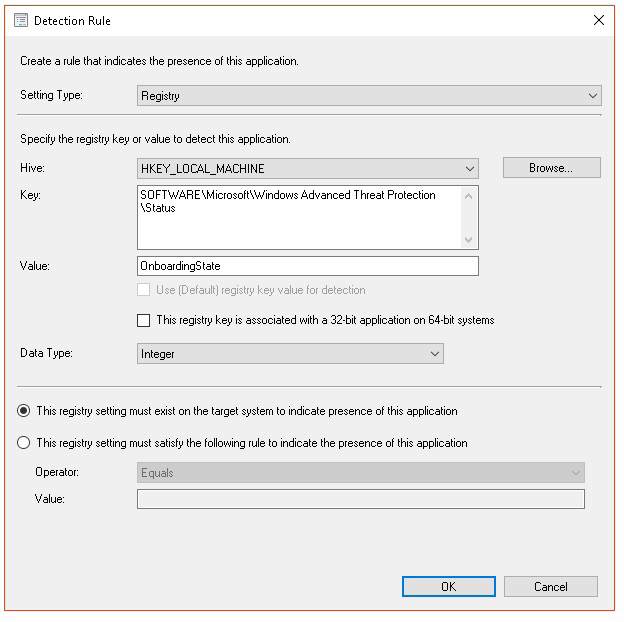
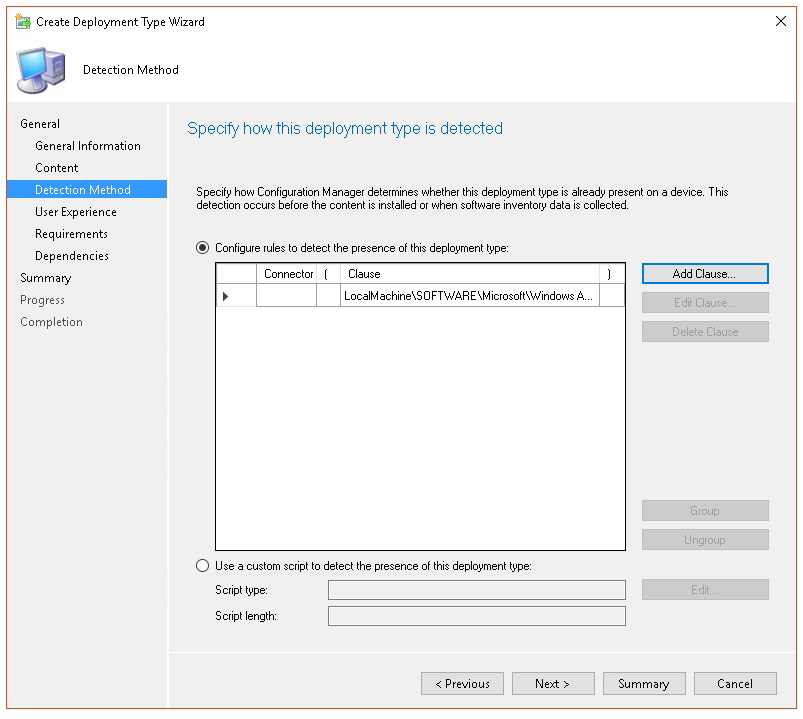
- In Detection method, select Configure rules to detect the presence of this deployment type, then select Add Clause.
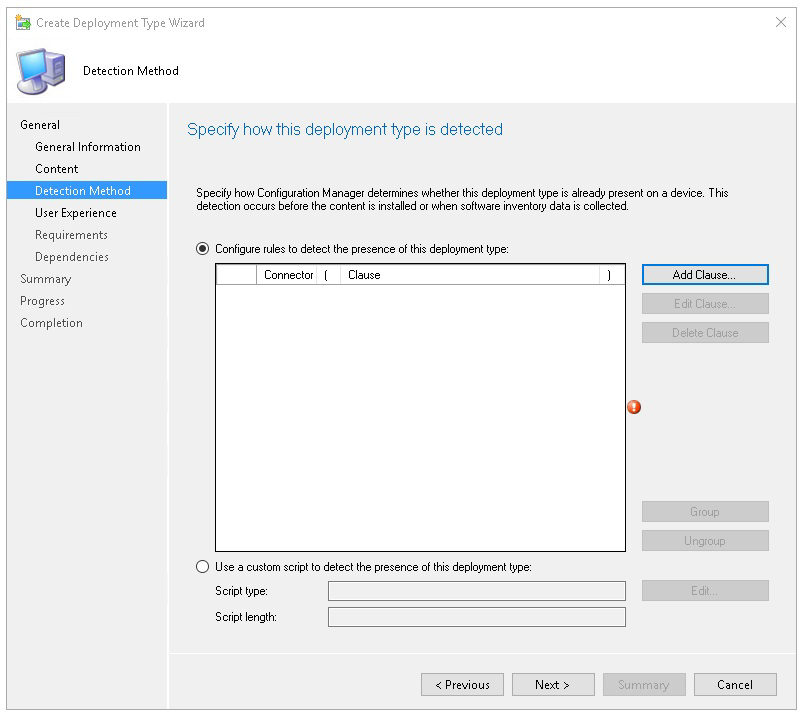
- Specify the following detection rule details, then select OK:
- In Detection method select Next.
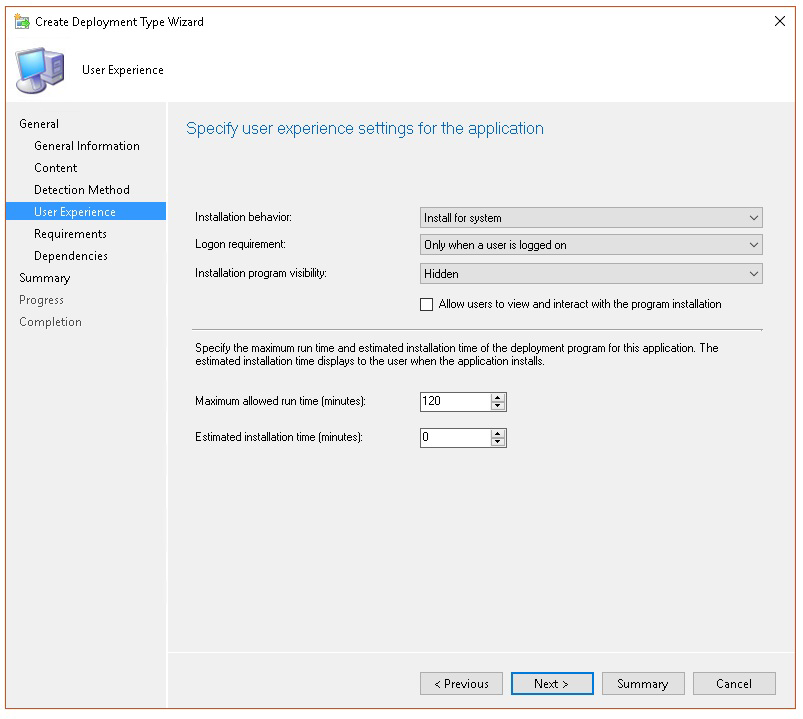
- In User Experience, specify the following information, then select Next:
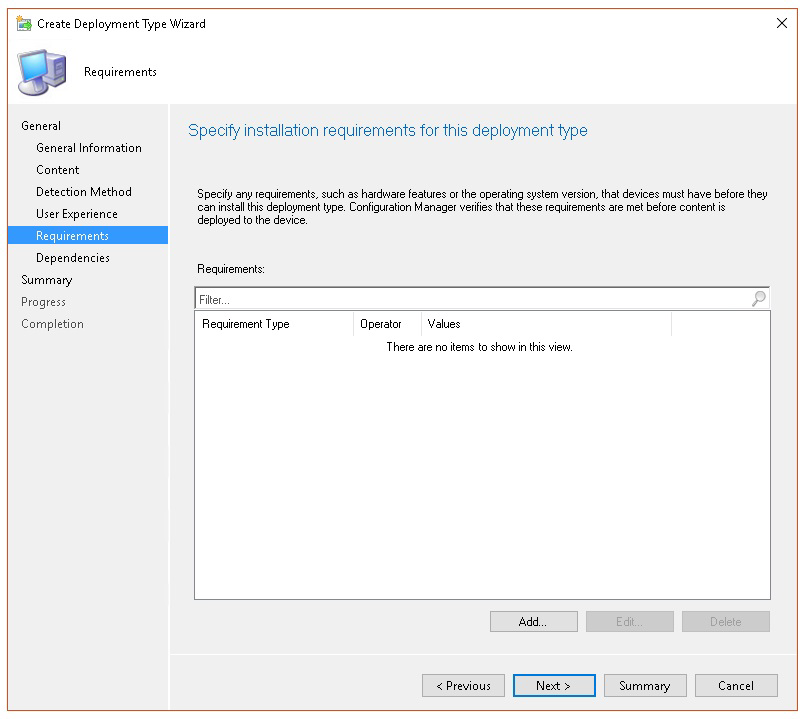
- In Requirements, select Next.
- In Dependencies, select Next.
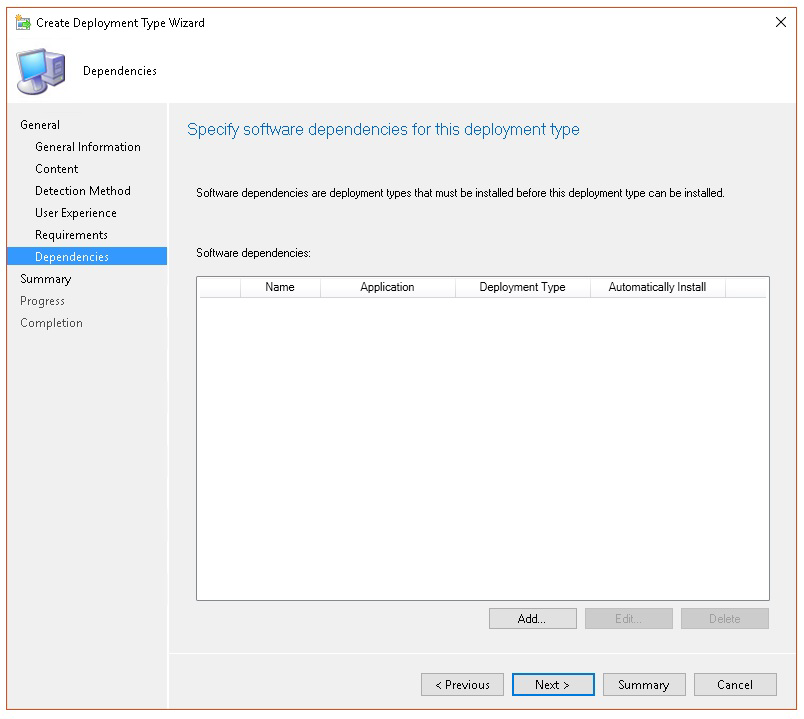
- In Summary, select Next.
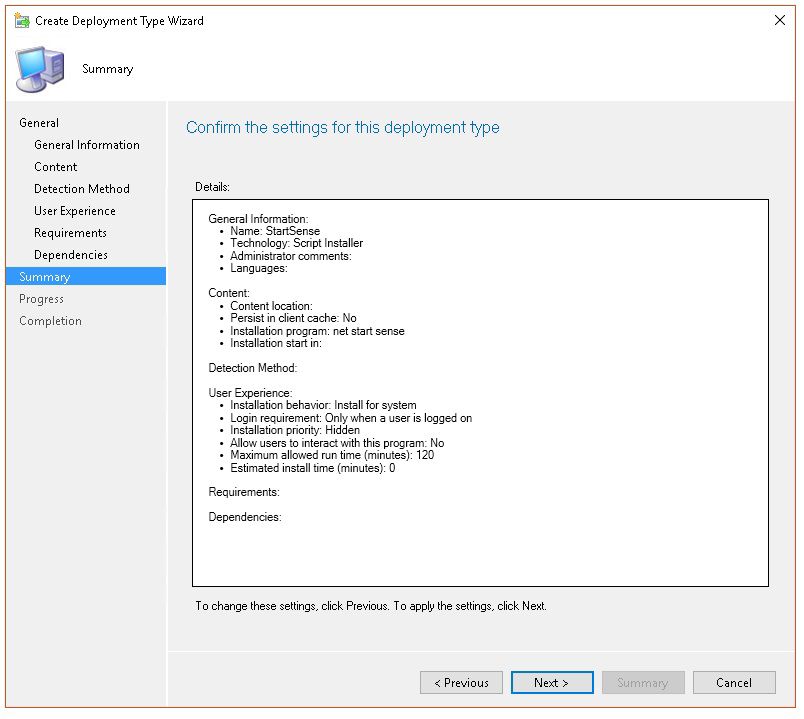
- In Completion, select Close.
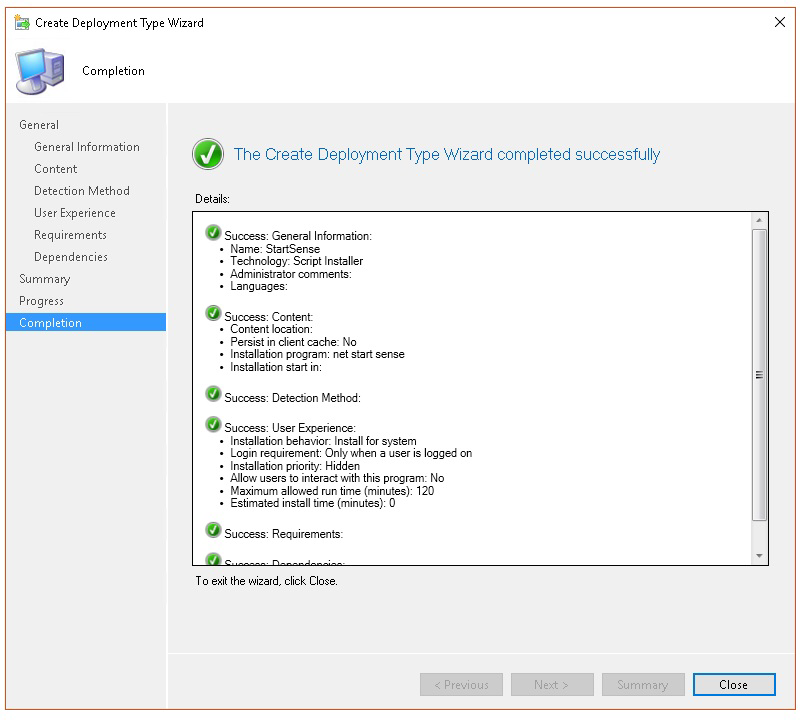
- In Deployment types, select Next.
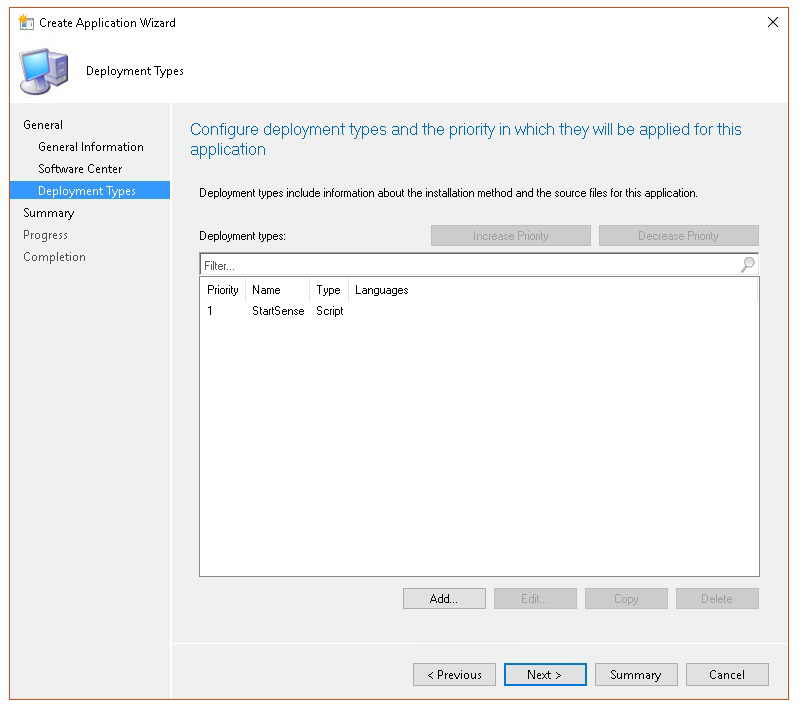
- In Summary, select Next.
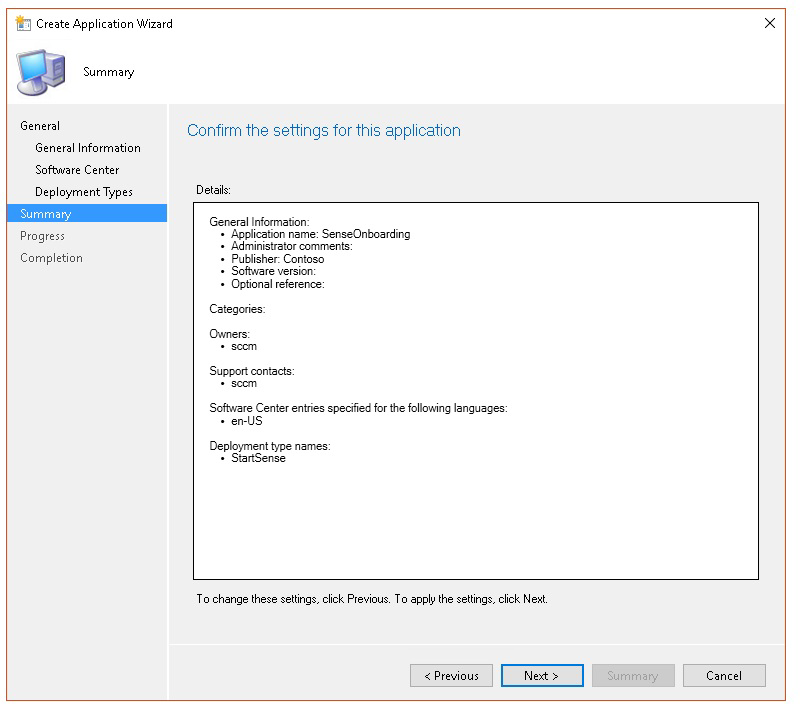
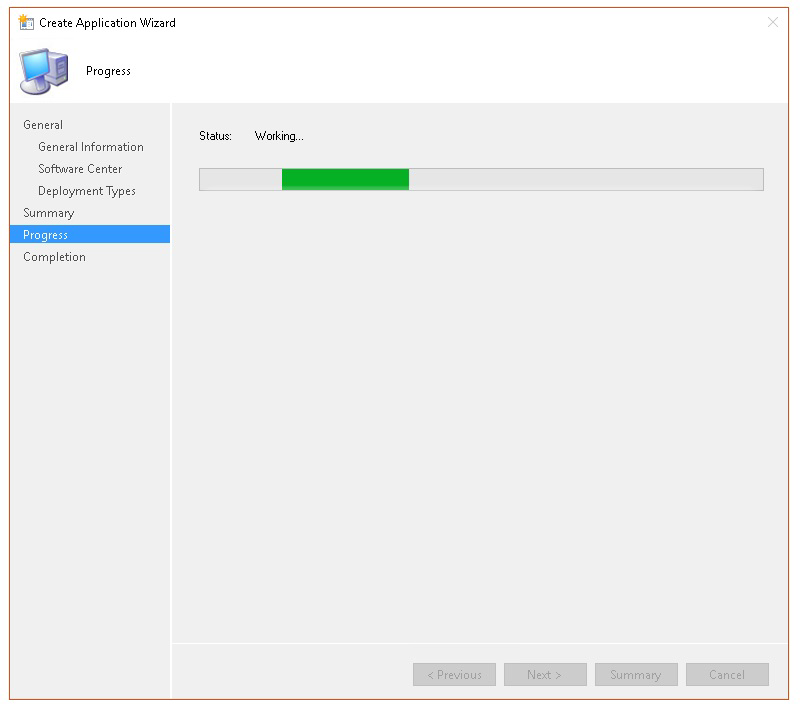
The status is then displayed:
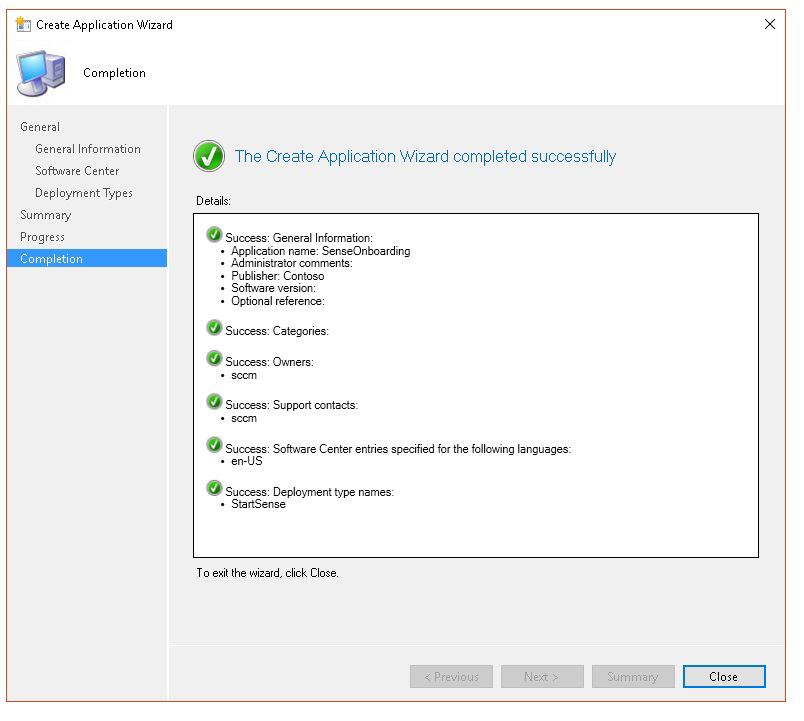
- In Completion, select Close.
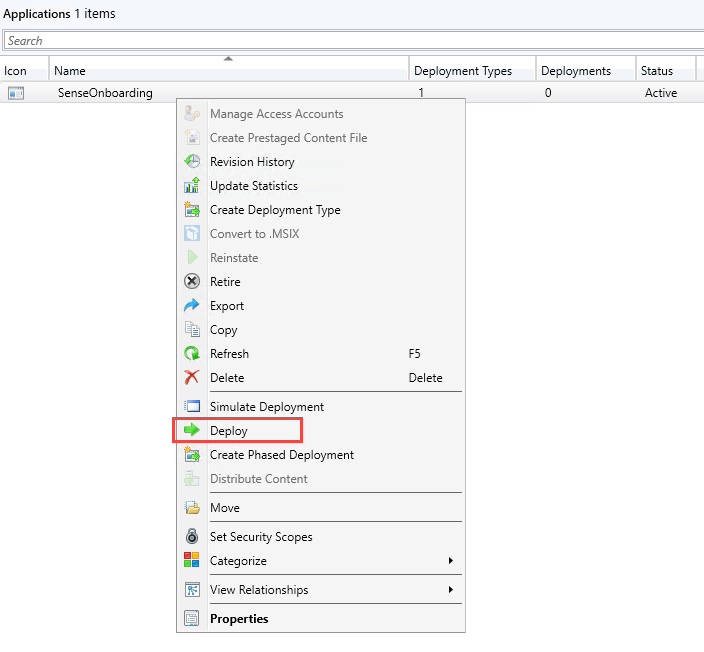
- You can now deploy the application by right-clicking the app and selecting Deploy.
- In General select Automatically distribute content for dependencies and Browse.
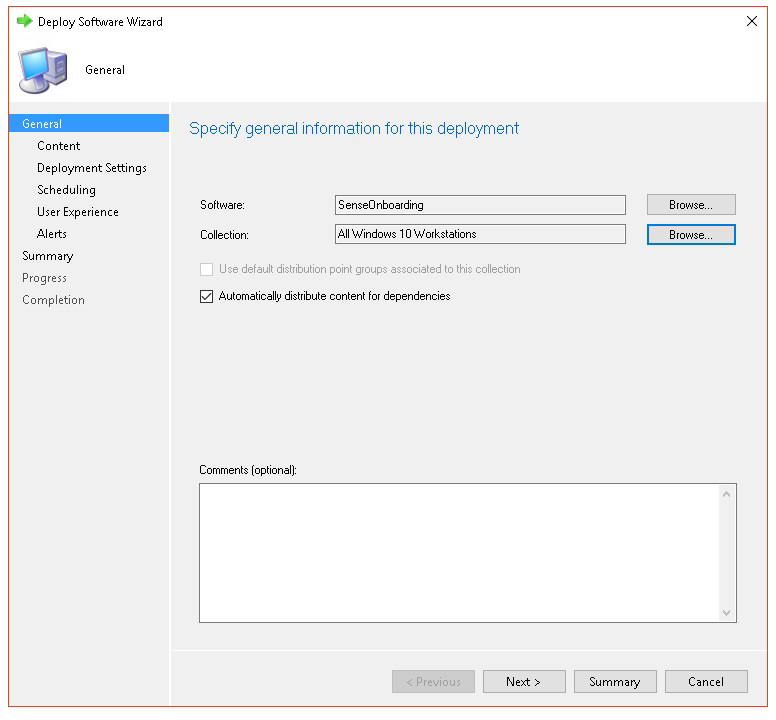
- In Content select Next.
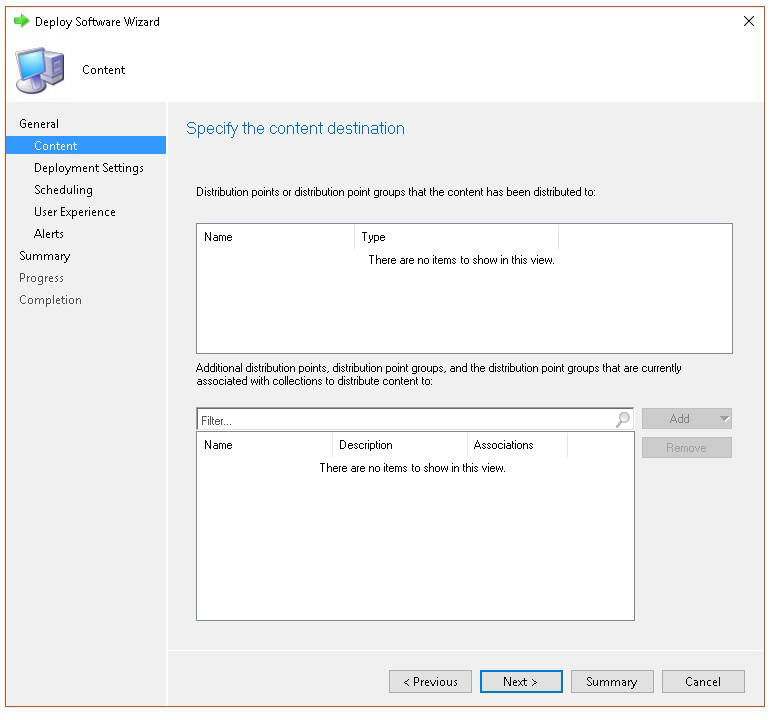
- In Deployment settings, select Next.
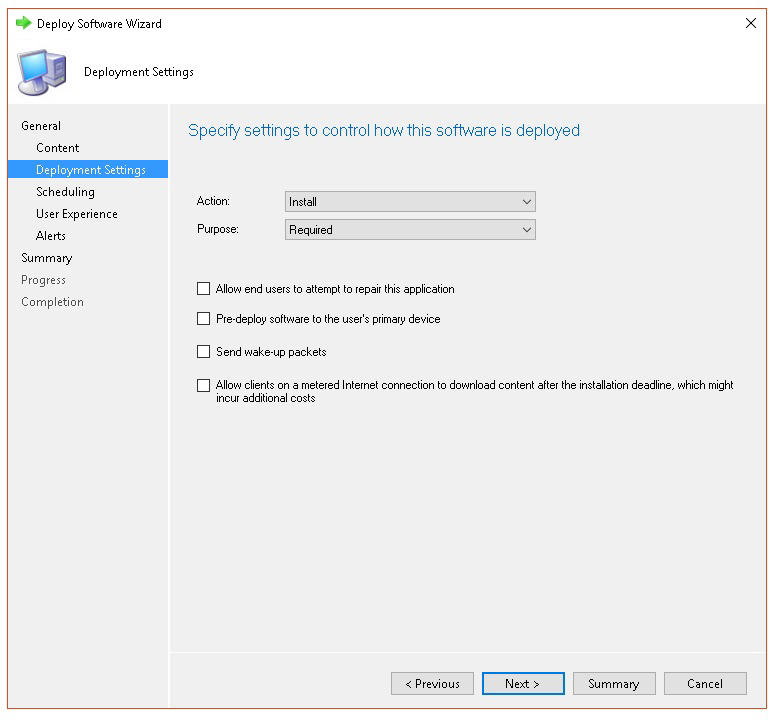
- In Scheduling select As soon as possible after the available time, then select Next.
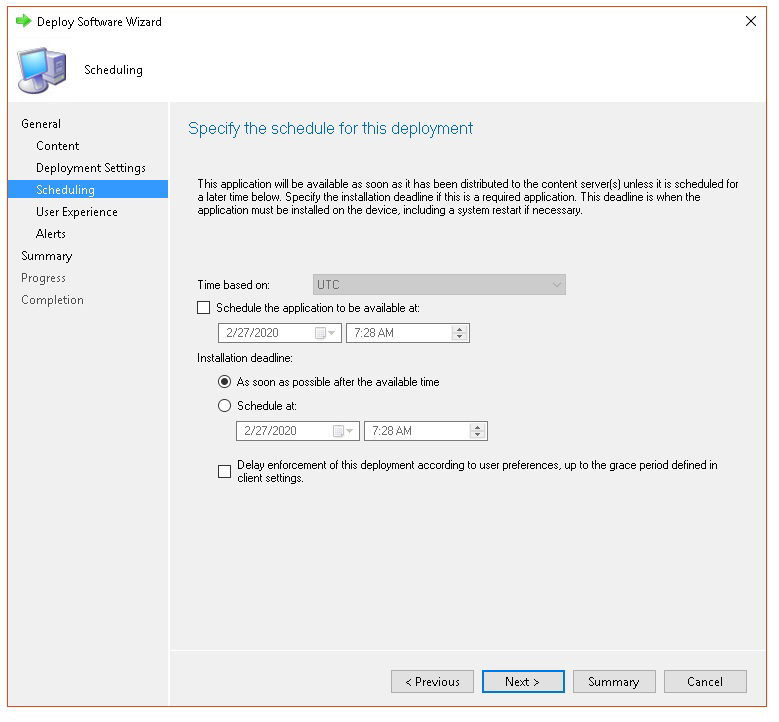
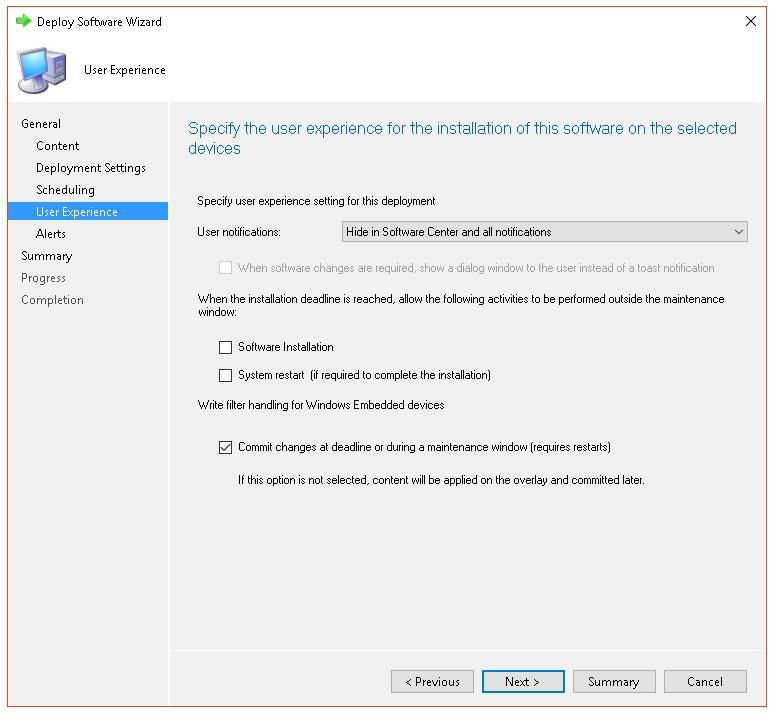
- In User experience, select Commit changes at deadline or during a maintenance window (requires restarts), then select Next.
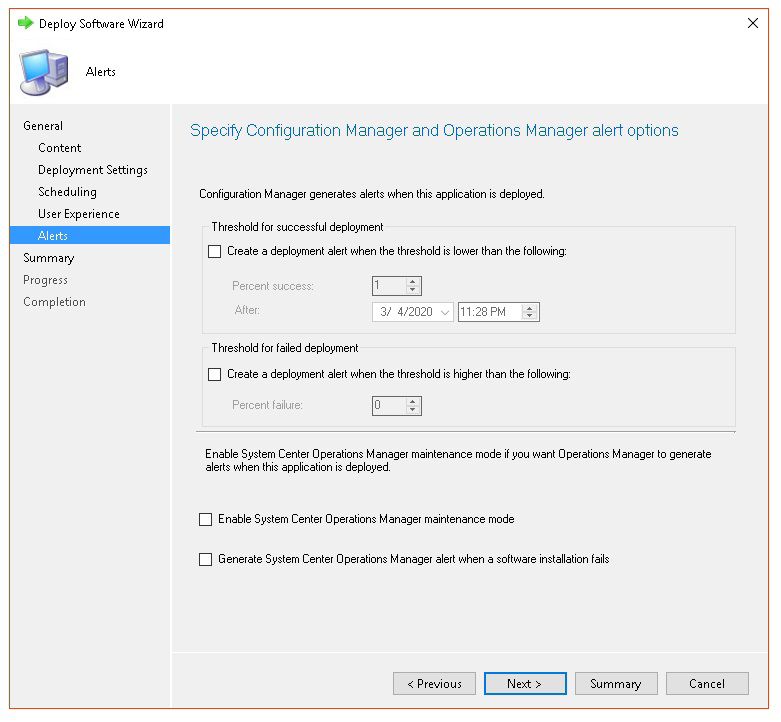
- In Alerts select Next.
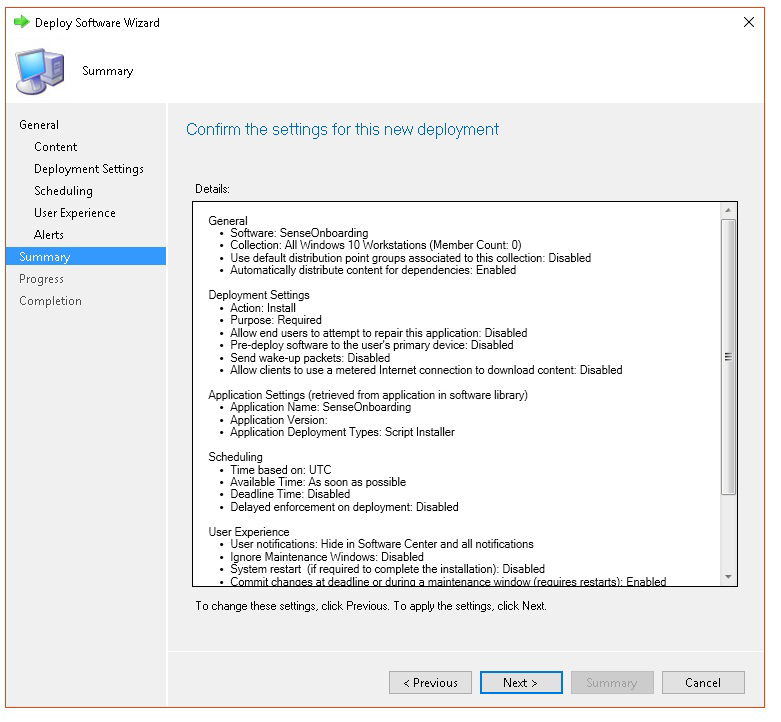
- In Summary, select Next.
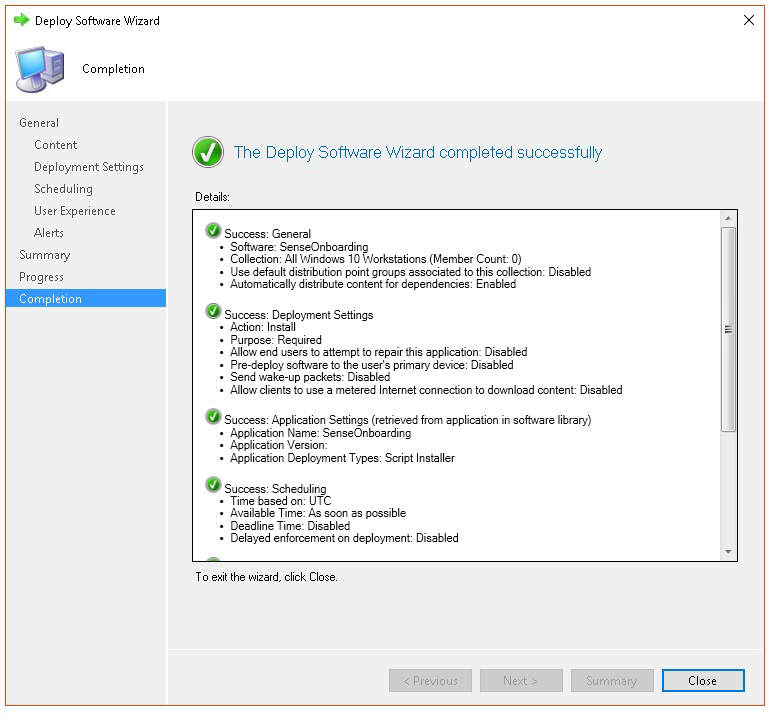
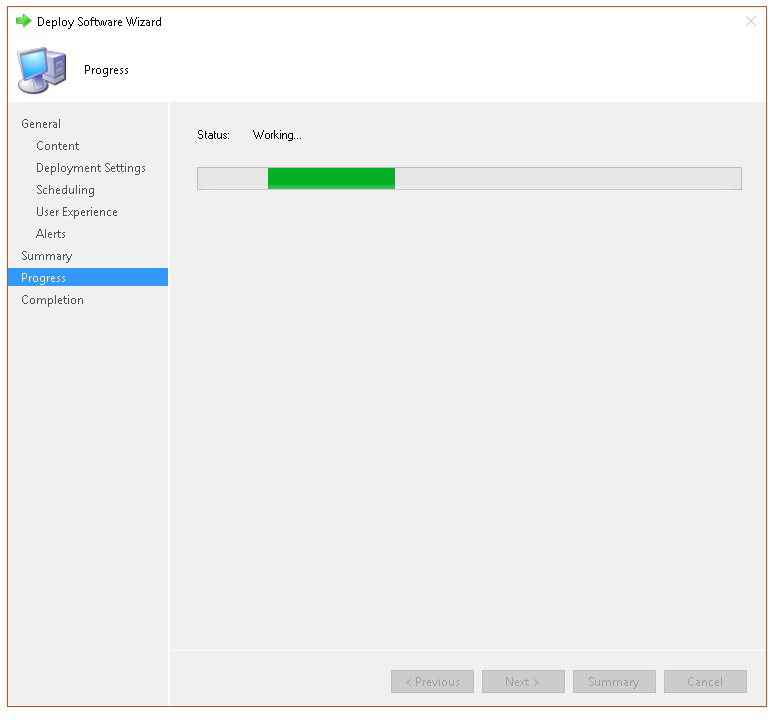
The status is then displayed
- In Completion, select Close.
