Issue
- Install the new ESET PROTECT Server
- Export the Certificate Authority from the new ESET PROTECT Server
- Export the Agent Certificate
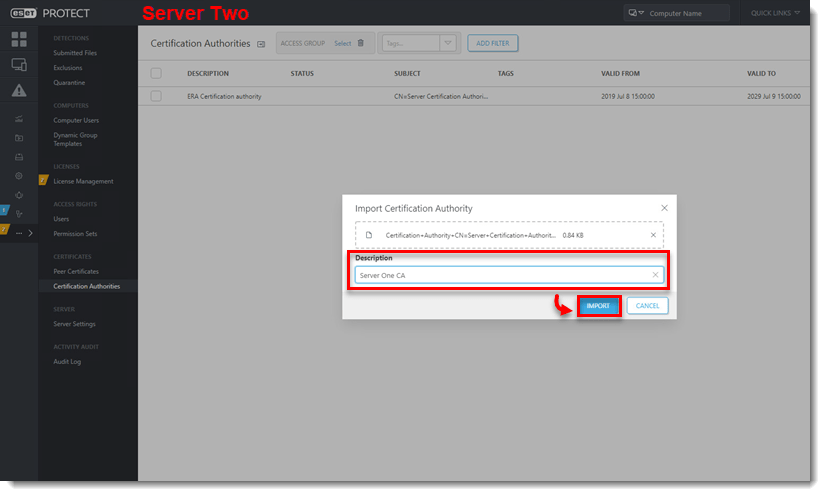
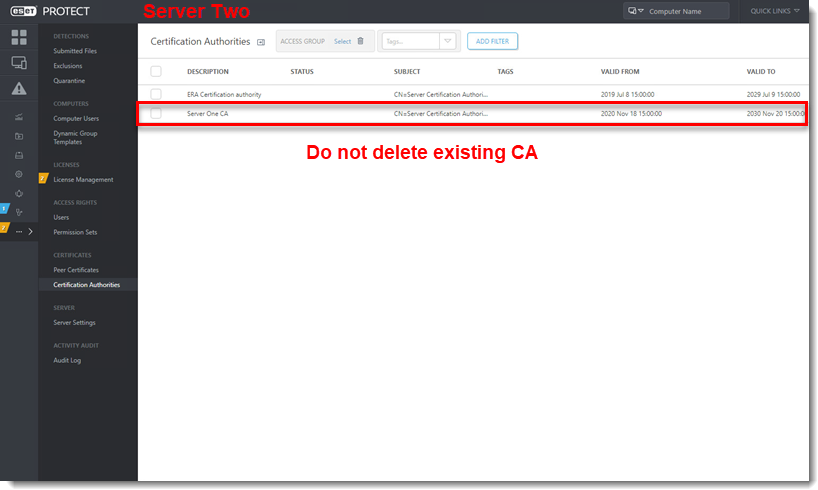
- Import the Certificate Authority (CA) .der file to the existing ESET PROTECT Server
- Migrate client computers
Solution
I. Install the new ESET PROTECT Server
- Install ESET PROTECT Server using the All-in-one package installer (Windows) or choose another installation method (Windows manual installation, Linux or Virtual Appliance).
- Import all required ESET licenses to ESET PROTECT.
II. Export the Certificate Authority from the new ESET PROTECT Server, Server One in this example
-
Open the ESET PROTECT Web Console in your web browser and log in.
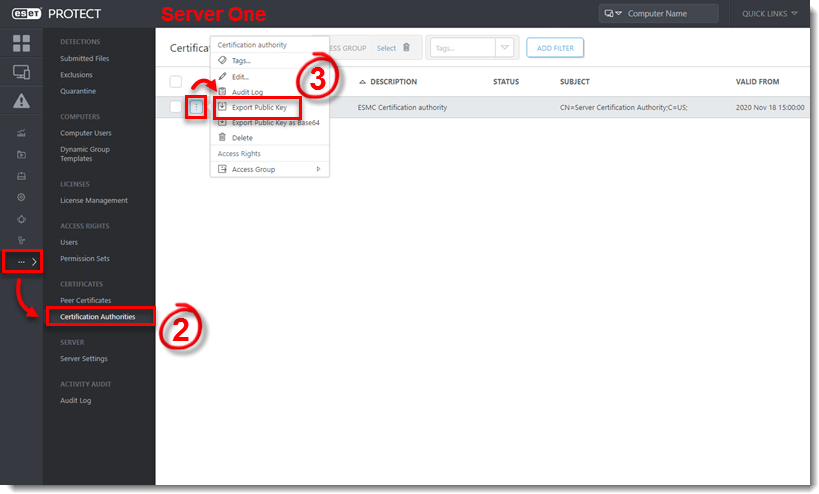
- Click the More icon … → Certification Authorities.
- Click ESET PROTECT Certification authority and select Export Public Key.
- The file is saved with a
.derfile extension.
III. Export the Agent Certificate .pfx file from the new ESET PROTECT Server
-
Open the ESET PROTECT Web Console in your web browser and log in.
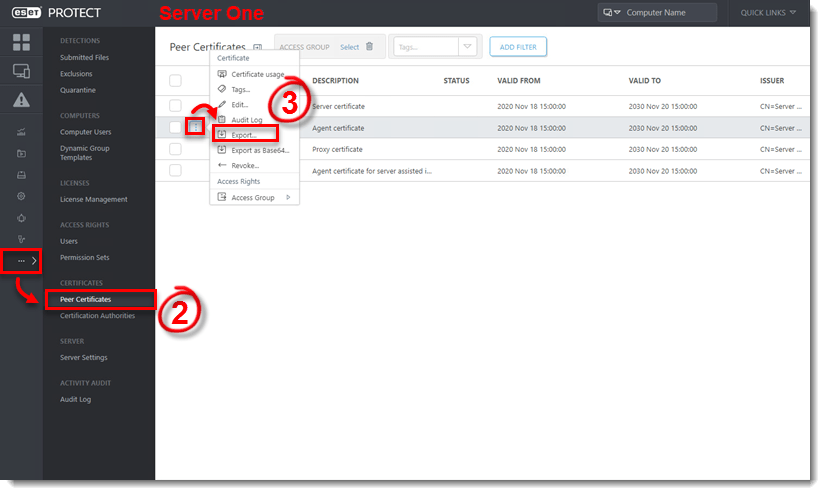
- Click the More icon …→ Peer Certificates.
- Click Agent certificate and select Export.
- The file is saved with a
.pfxfile extension.
- Save the .pfx and .der files to a shared location that is accessible from Server Two.
IV. Import the Certificate Authority (CA) .der file to the existing ESET PROTECT Server (Server Two in this example)
-
Open the ESET PROTECT Web Console in your web browser and log in.
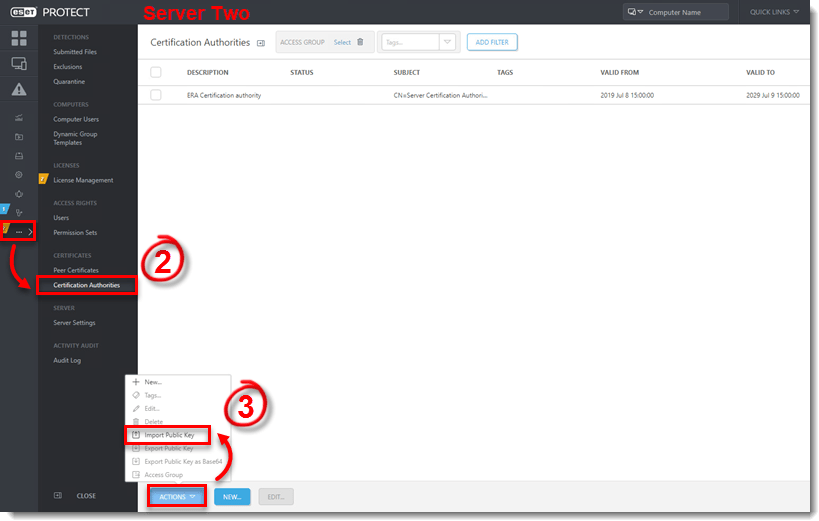
- Click the More icon … → Certification Authorities.
- Click Actions and select Import Public Key.
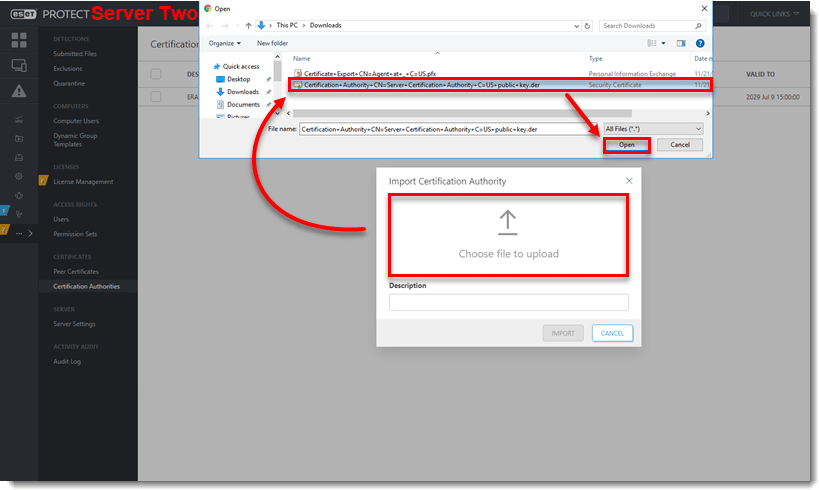
- Click Choose file to upload, navigate to the shared location where you saved the Certificate Authority (CA) .der file, select the file and then click Open.
V. Migrate client computers
-
Open the ESET PROTECT Web Console in your web browser and log in.
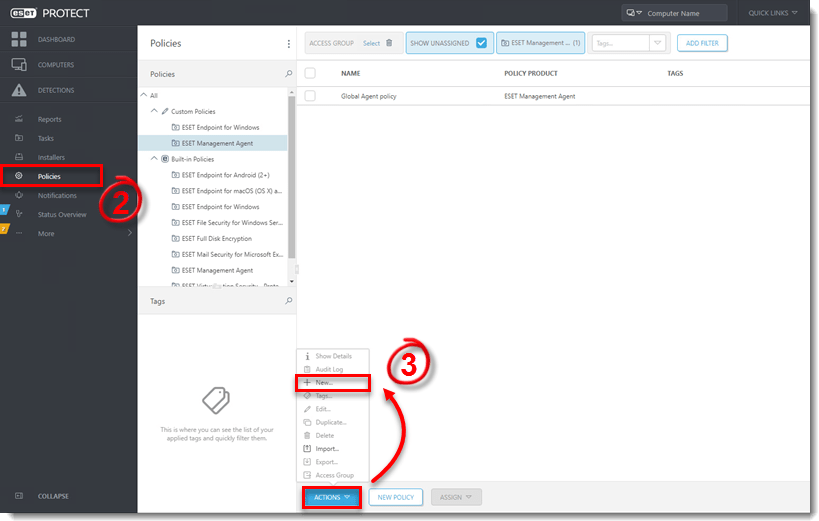
- Click Policies.
- Click Actions → New.
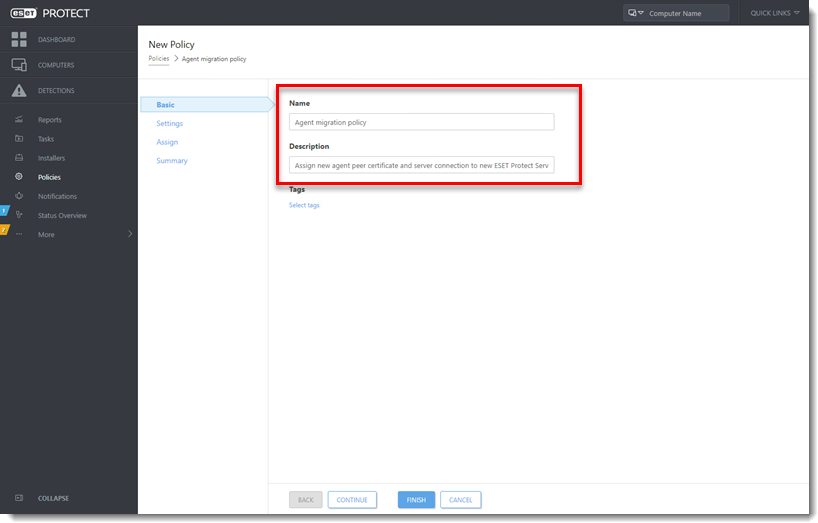
- Type a Name and optional Description for the policy in the appropriate fields.
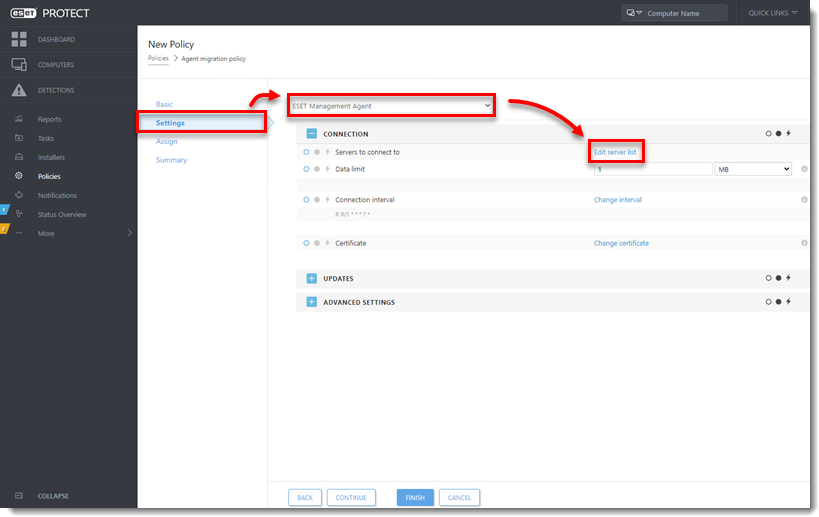
- Click Settings, select ESET Management Agent from the drop-down menu and click Edit server list.
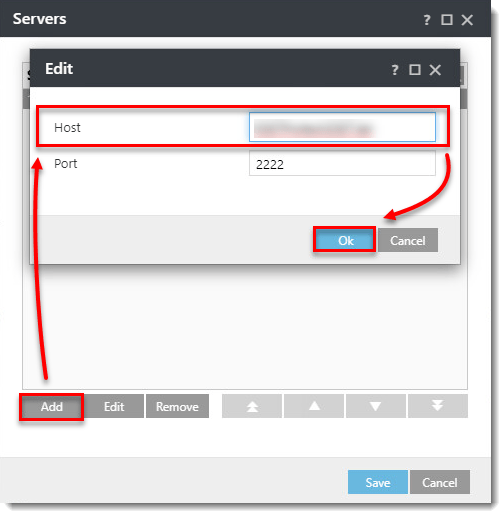
- Click Add. Type the FQDN / IP address of the new server in the Host field and click OK.
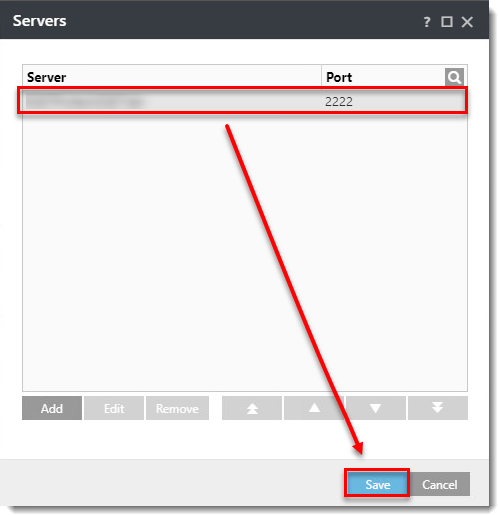
- Verify the FQDN / IP address for the new server is correct and click Save.
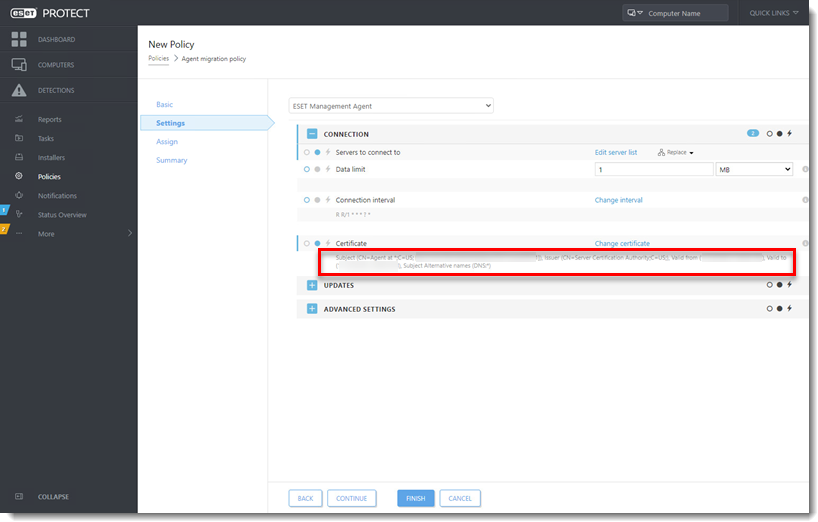
- Click Change certificate.

- Select Custom certificate and click the folder icon.
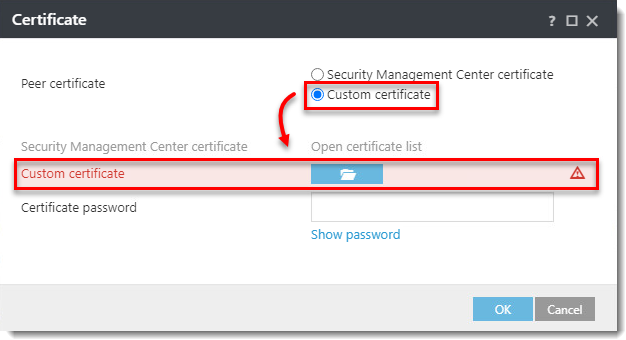
- Navigate to the Agent Certificate
.pfxfile exported from the new ESET PROTECT Server, select the file and click OK.

Figure 4-8 - The Agent certificate is in the policy.
- Click Assign → Assign, select a client computer (only select one to start) to migrate to the new server. Click OK.
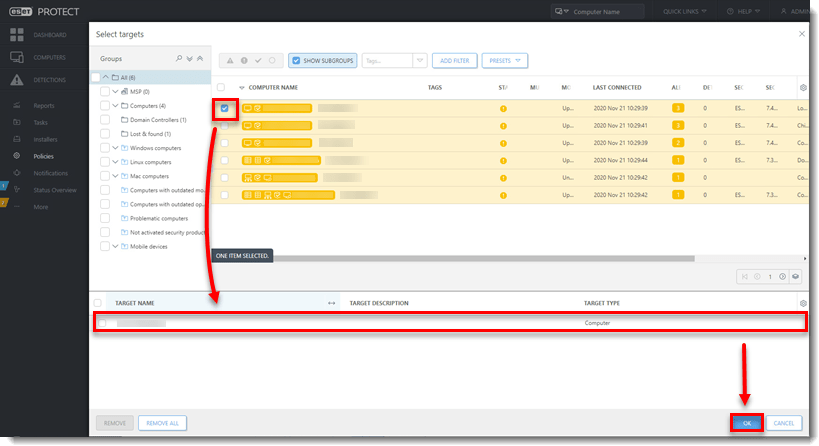
Figure 4-10 - Click Finish.
- Verify the test client computer is now connected to the new ESET PROTECT Server and the Agent policy has the correct certificate.
- After a successful migration of the test client computer, assign the new policy you created to the rest of your client computers to complete the migration to the new ESET PROTECT Server.
- Client computers should now connect to your new ESET PROTECT Server. If clients are not connecting, see Problems after upgrade/migration of ESET PROTECT Server.
-
When you have everything running correctly on your new ESET PROTECT Server, carefully decommission your old ESET PROTECT Server.
Last Updated: Jul 19, 2021
(Visited 115 times, 1 visits today)


