

Issue
- Create a policy using the ESET Security Management Center Web Console (ESMC Web Console)
- Assign a policy to a group
Solution
Create a new policy and assign it to a group
- Open ESET Security Management Center Web Console (ESMC Web Console) in your web browser and log in.
- Click Policies.
- Click Policies → New.
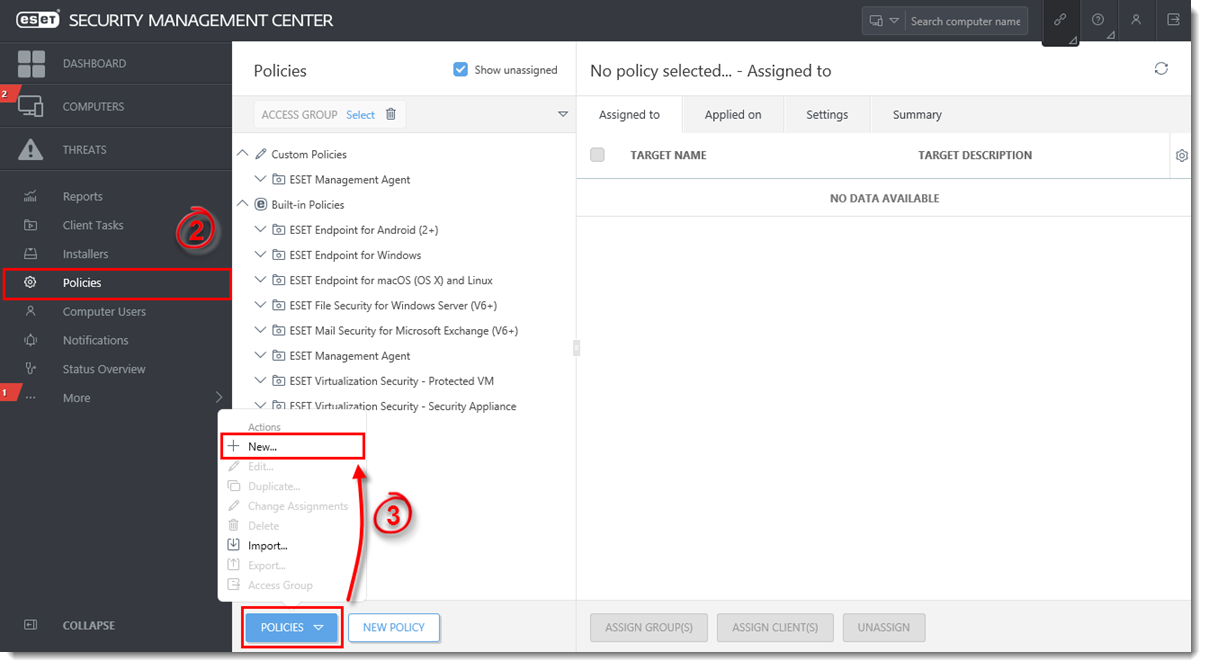
Figure 1-1
Click the image to view larger in new window - Type a name for the policy in the Name field (the Description field is optional).
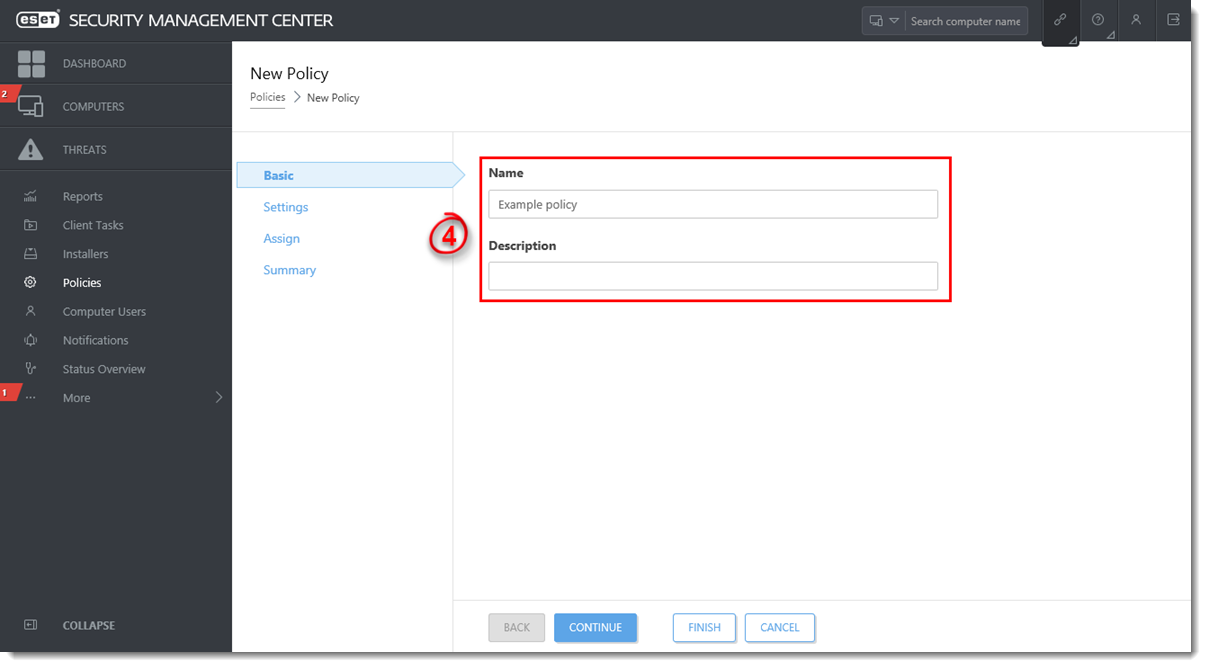
Figure 1-2
Click the image to view larger in new window - Click Settings. Select the product this policy will affect from the Select product drop-down menu. In this example, we are creating a rule for ESET Endpoint for Windows.
- In the menu on the left, select the category for the rule you want to set. In this example, we are creating a User Interface rule.
- In the center pane, configure your rule. In this example, we are disabling Show splash-screen at startup.
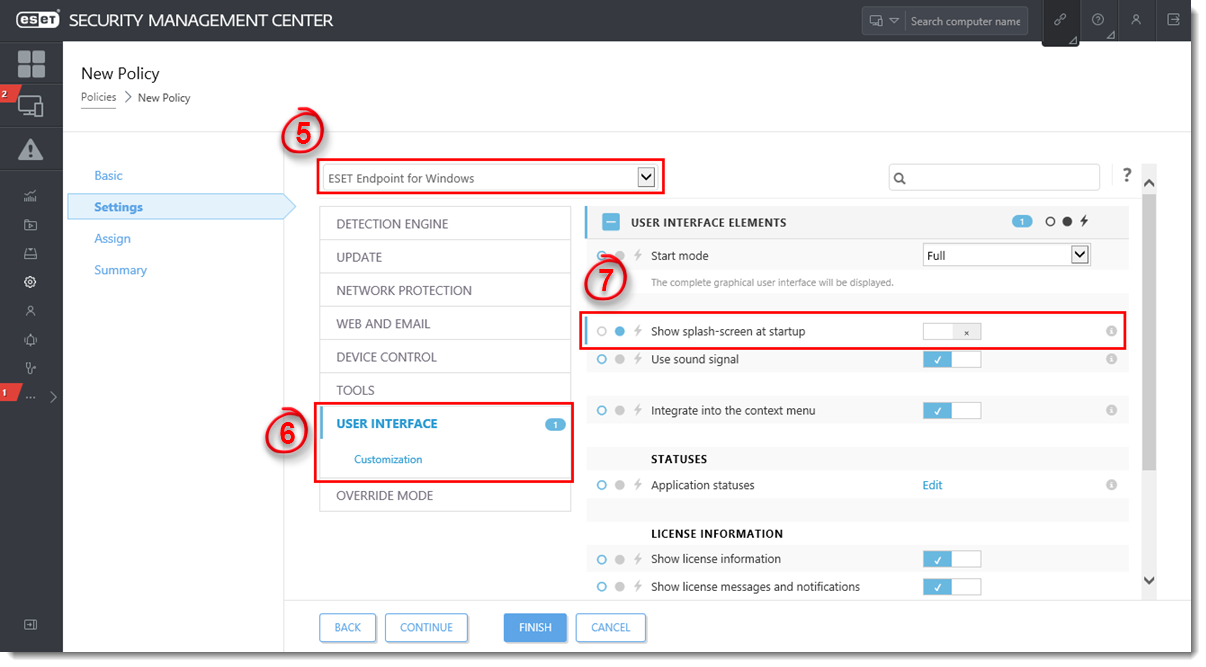
Figure 1-3
Click the image to view larger in new window - Click Assign and click Assign.

Figure 1-4
- Select the check box(es) next to each static or dynamic group you want this policy assigned to and click OK.

Figure 1-5
- Click Finish to save your policy. Your policy settings will be applied to the target groups or client computers.
To see the policies that are assigned to each group, click Computers, click the gear icon ![]() next to the group, and then select Manage Policies from the drop-down menu.
next to the group, and then select Manage Policies from the drop-down menu.
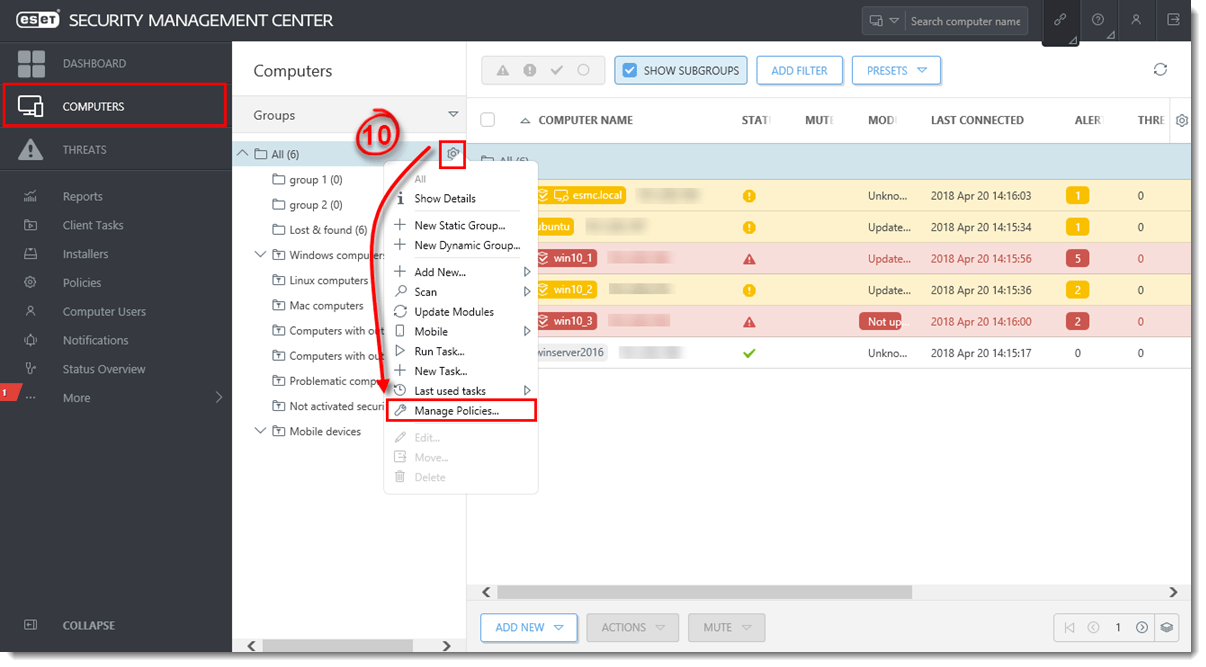
Figure 1-6
Click the image to view larger in new window
For more information about policies, read Online Help.
Last Updated: May 5, 2021
(Visited 18 times, 1 visits today)