

Solution
A Parametric Group is an effective tool that network administrators can use to manage client workstations on their server. Parametric groups can be used for view filtering, notifications and for applying tasks and policies. By defining and implementing a parametric group, administrators can apply specific settings to workstations meeting certain criteria (i.e. operating system). The following article will demonstrate how to create a parametric group and link it to a policy:
Create a Parametric Group:
-
- In the ESET Remote Administrator Console, click Tools → Group Manager.
- Click the Parametric Group tab and click Create.
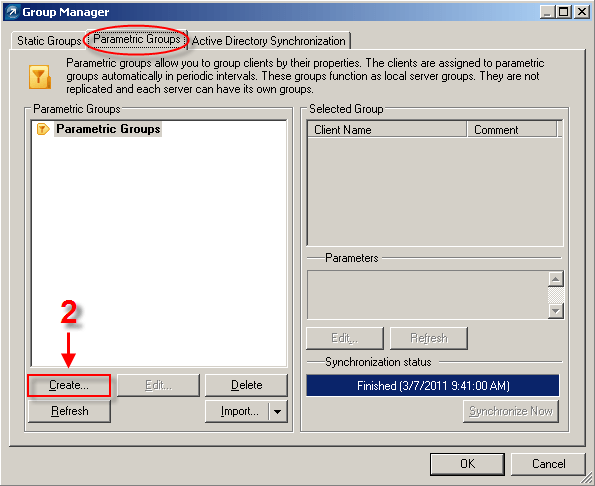
Figure 1-1
- Enter a name for your parametric group (i.e. WinXP Workstation Group) and click Edit to open the Rule Editor window.
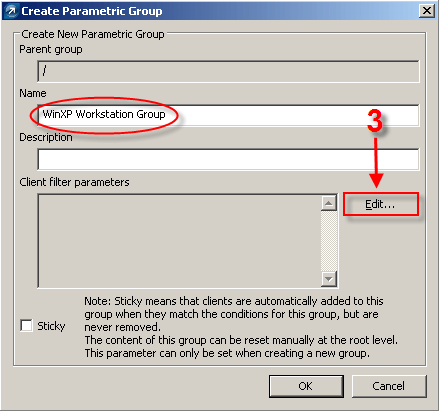
Figure 1-2
-
- In the Rule Editor window, define your parametric group by selecting items in the Rule Conditions section. In the example below From Primary Server and OS Name Mask (specify) are selected (see Figure 1-3).

Figure 1-3
- In the Rule Editor window, define your parametric group by selecting items in the Rule Conditions section. In the example below From Primary Server and OS Name Mask (specify) are selected (see Figure 1-3).
- In the Parameters section, specify the operating system (OS Name Mask) you want included in your parametric group by clicking Specify. For example, to create a parametric group that includes only workstations with Windows XP OS installed, type Microsoft Windows XP into the Enter Rule Condition field. Click Add to add the OS to the parametric group.
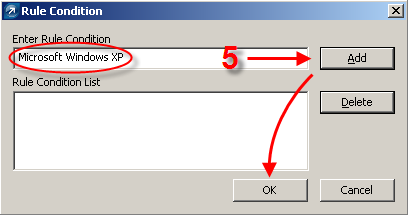
Figure 1-4
- Once finished, click OK three times to return to the ERAC window.
Create a Policy Rule for your Parametric Group:
-
- In the ESET Remote Administrator Console, click Tools → Policy Manager and click the Policy Rules tab. Click New.
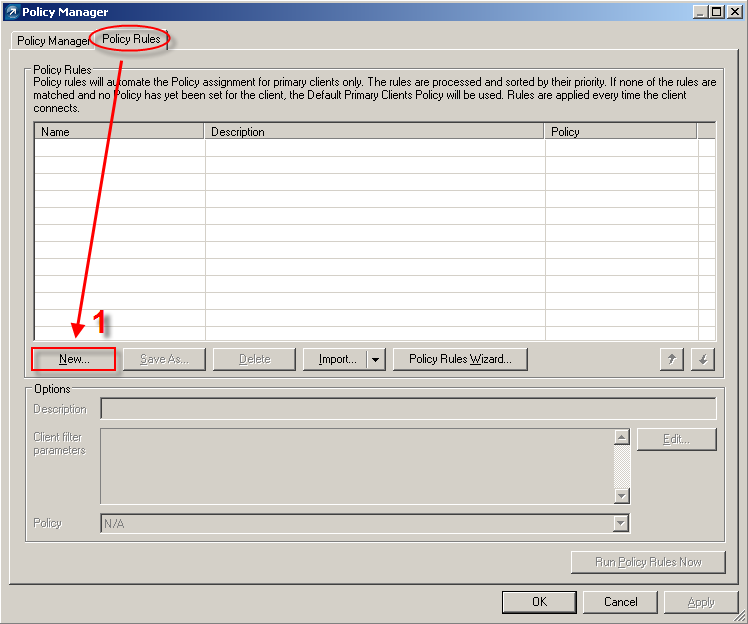
Figure 1-5
- In the ESET Remote Administrator Console, click Tools → Policy Manager and click the Policy Rules tab. Click New.
-
- Enter a name for the rule, such as WinXP Workstations Parametric Policy Rule, and click Edit.

Figure 1-6
- Enter a name for the rule, such as WinXP Workstations Parametric Policy Rule, and click Edit.
-
- In the Rule Editor window, define the policy rule by selecting items in the Rule Conditions section. In the example below, From Primary Server and ERA Group IN (specify) are selected (see Figure 1-7).
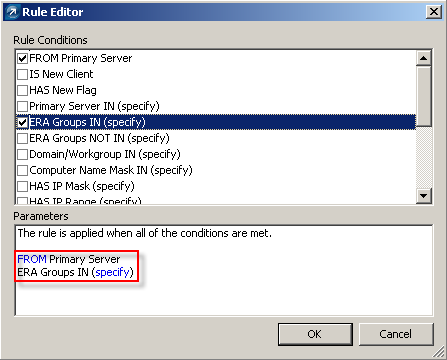
Figure 1-7
- In the Rule Editor window, define the policy rule by selecting items in the Rule Conditions section. In the example below, From Primary Server and ERA Group IN (specify) are selected (see Figure 1-7).
- In the Parameters section, specify the ERA Groups IN by clicking Specify and selecting your parametric group. Click OK.
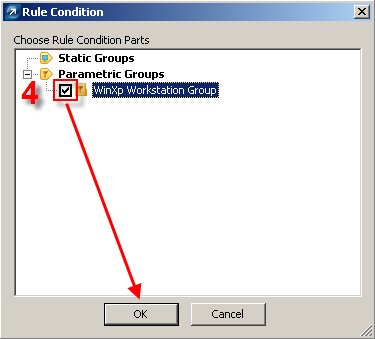
Figure 1-8
- In the Create New Policy Rule window, select the policy you want associated with this rule by selecting it from the Policy drop-down menu. Click OK to save your changes.
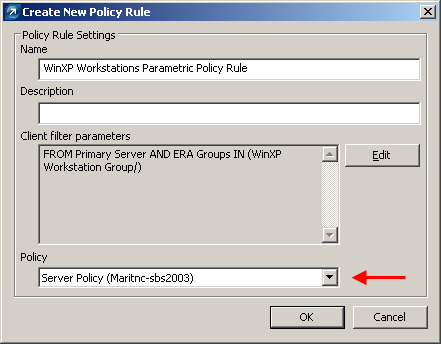
Figure 1-9
Test the functionality of your Parametric Group:
-
- In the ERAC, go to Tools → Group Manager and click the Parametric Groups tab.
-
- Select your group and click Synchronize Now.
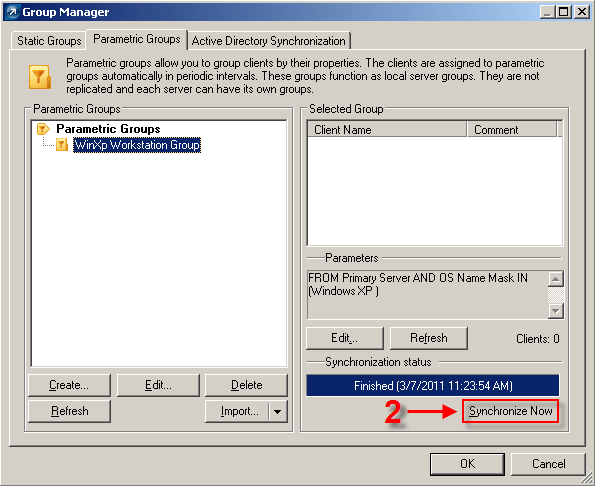
Figure 1-10
- Select your group and click Synchronize Now.
-
- Clients should populate in the Selected Group section (pictured above). Click OK to return to the ERAC.
-
- Click Tools → Policy Manager and click the Policy Rules tab.
- Click Run Policy Rules Now. You can check one of the Windows XP workstations on your network to verify that they received the configuration changes.
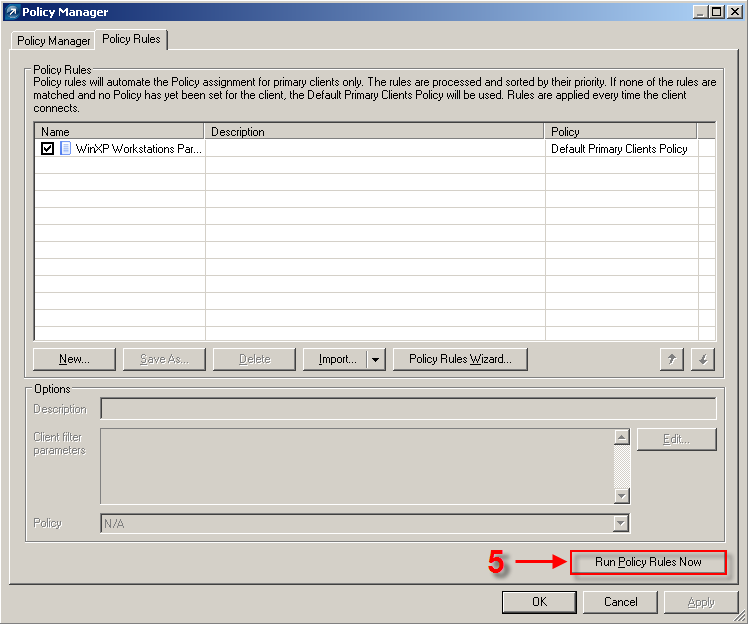
Figure 1-11
Last Updated: Dec 31, 2020
Source : Official ESET Brand
Editor by : BEST Antivirus KBS Team
Editor by : BEST Antivirus KBS Team
(Visited 19 times, 1 visits today)