
In the Planning topic, there were several methods provided to onboard devices to the service. This topic covers the cloud-native architecture.
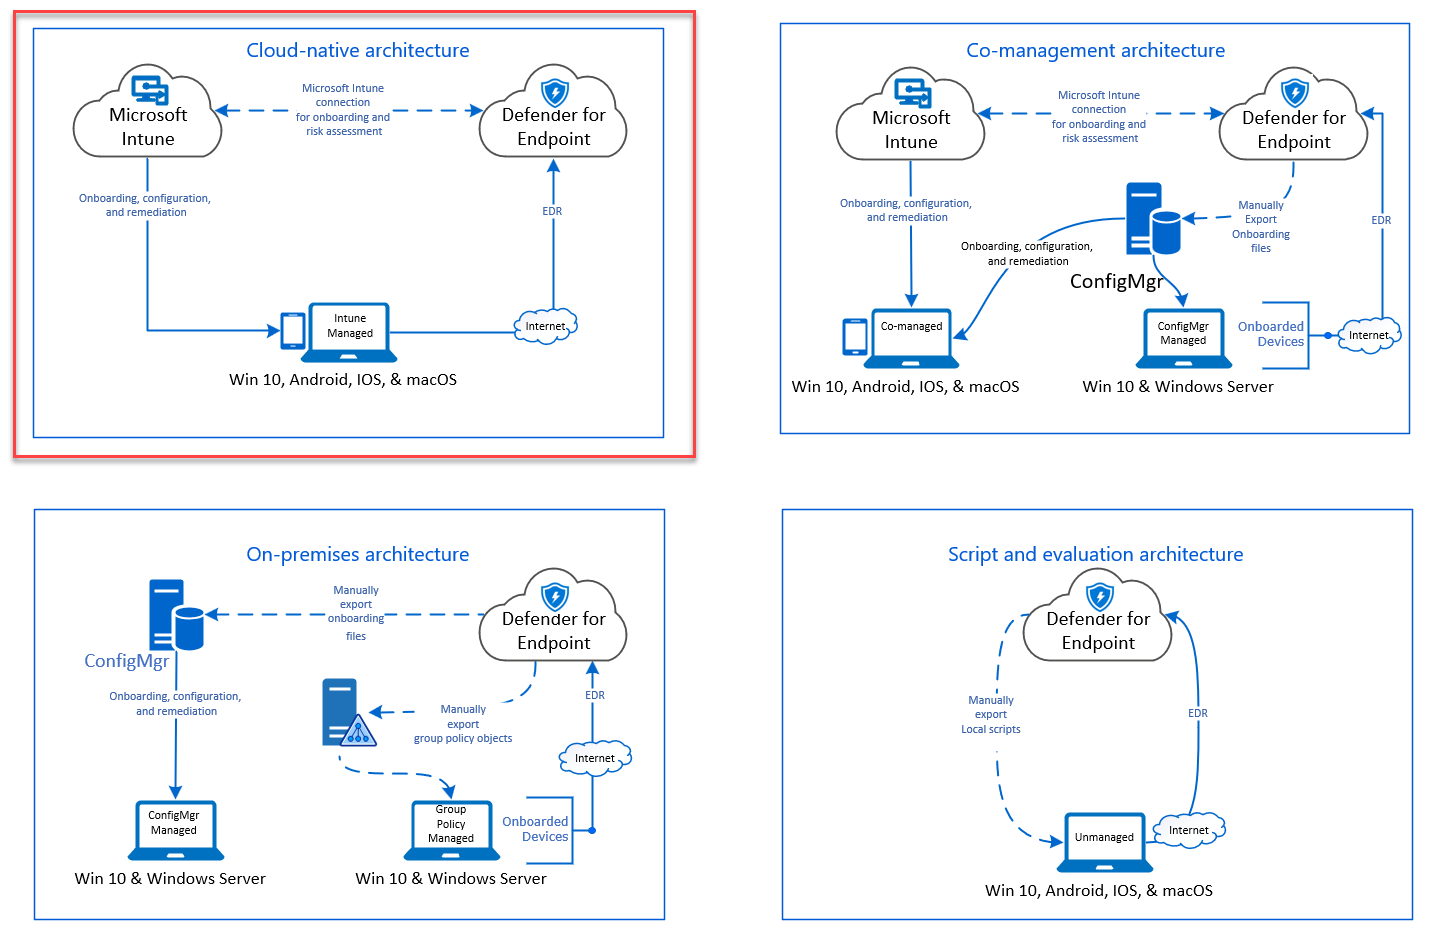 Diagram of environment architectures
While Defender for Endpoint supports onboarding of various endpoints and tools, this article does not cover them. For information on general onboarding using other supported deployment tools and methods, see Onboarding overview.
Microsoft Endpoint Manager is a solution platform that unifies several services. It includes Microsoft Intune
-based device management.
This topic guides users in:
- Step 1: Onboarding devices to the service by creating a group in Microsoft Endpoint Manager (MEM) to assign configurations on
- Step 2: Configuring Defender for Endpoint capabilities using Microsoft Endpoint Manager
This onboarding guidance will walk you through the following basic steps that you need to take when using Microsoft Endpoint Manager:
- Identifying target devices or users
- Creating an Azure Active Directory group (User or Device)
- Creating a Configuration Profile
- In Microsoft Endpoint Manager, we’ll guide you in creating a separate policy for each capability.
Resources
Here are the links you’ll need for the rest of the process:
For more information about Microsoft Endpoint Manager, check out these resources:
- Microsoft Endpoint Manager page
- Blog post on convergence of Intune and ConfigMgr
- Introduction video on MEM
Step 1: Onboard devices by creating a group in MEM to assign configurations on
Identify target devices or users
In this section, we will create a test group to assign your configurations on.
Note
Intune uses Azure Active Directory (Azure AD) groups to manage devices and users. As an Intune admin, you can set up groups to suit your organizational needs.
For more information, see Add groups to organize users and devices.
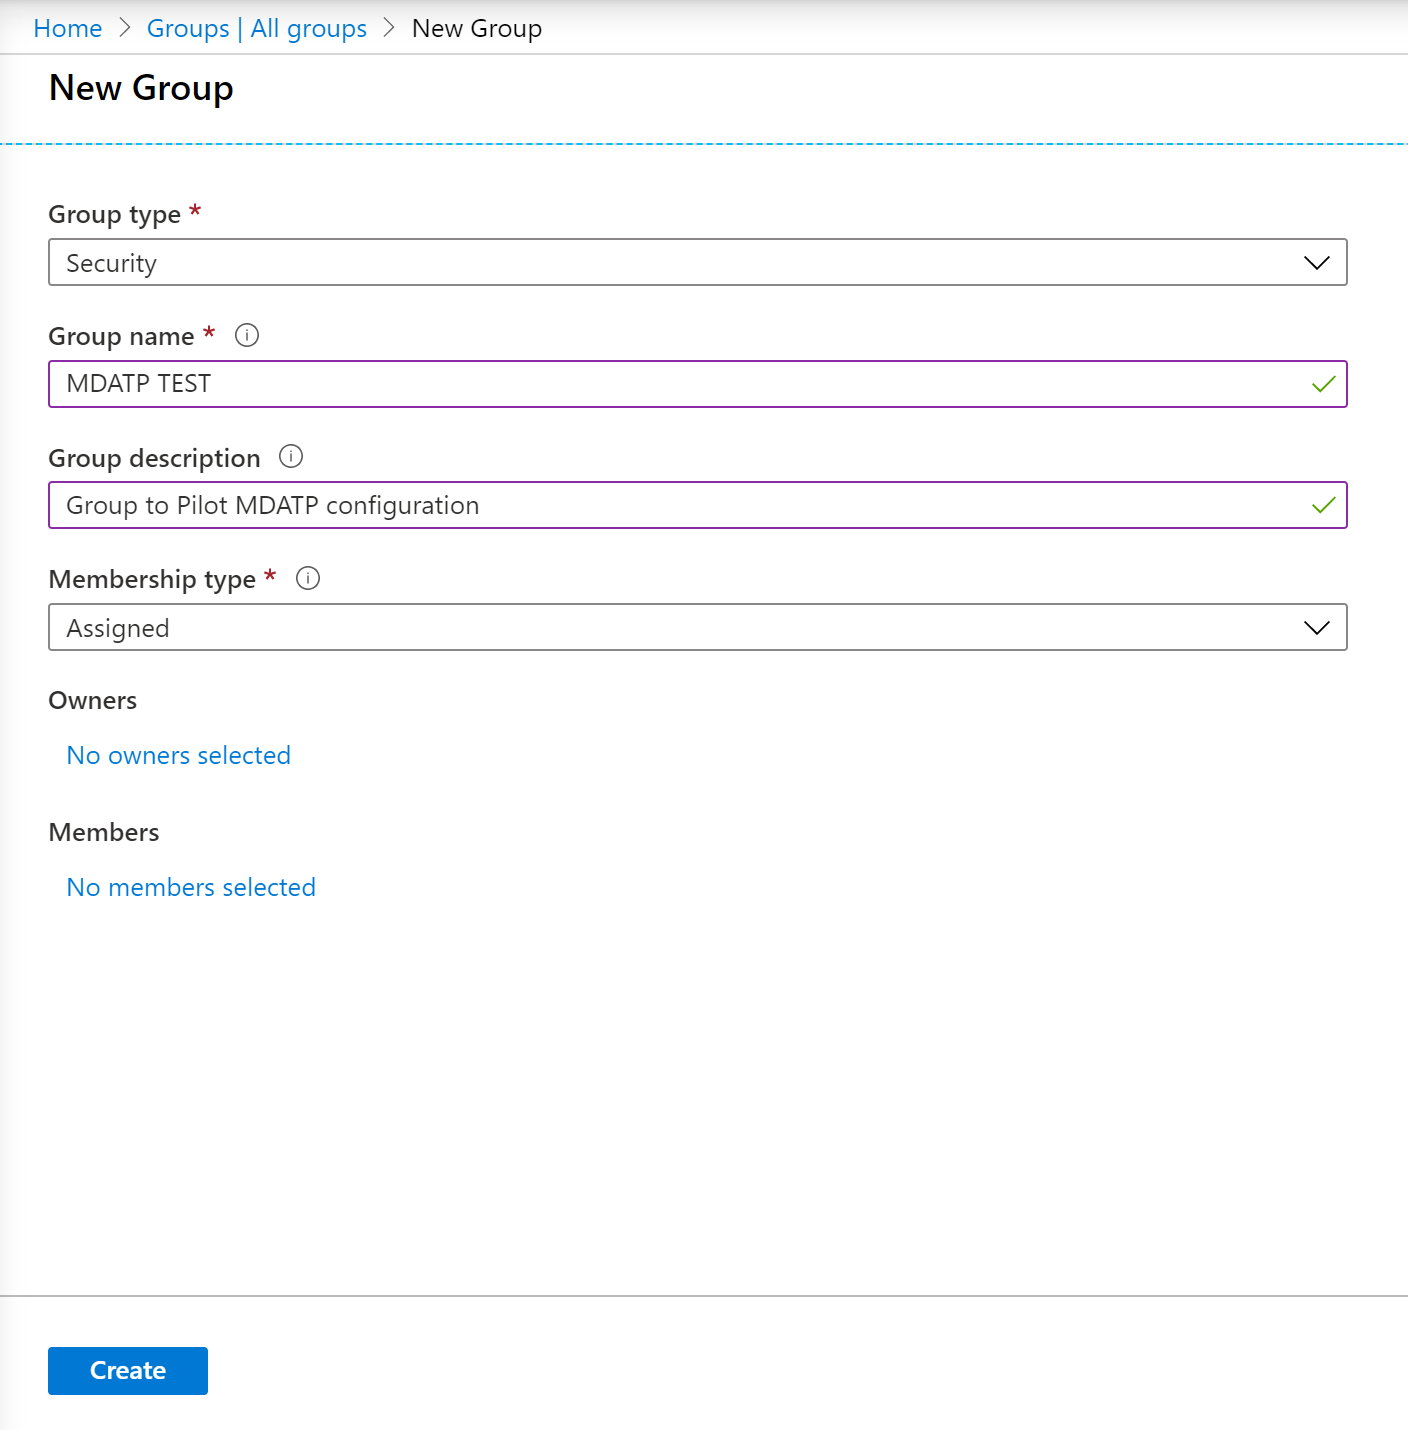
Create a group
- Open the MEM portal.
- Open Groups > New Group.

- Enter details and create a new group.
- Add your test user or device.
- From the Groups > All groups pane, open your new group.
- Select Members > Add members.
- Find your test user or device and select it.
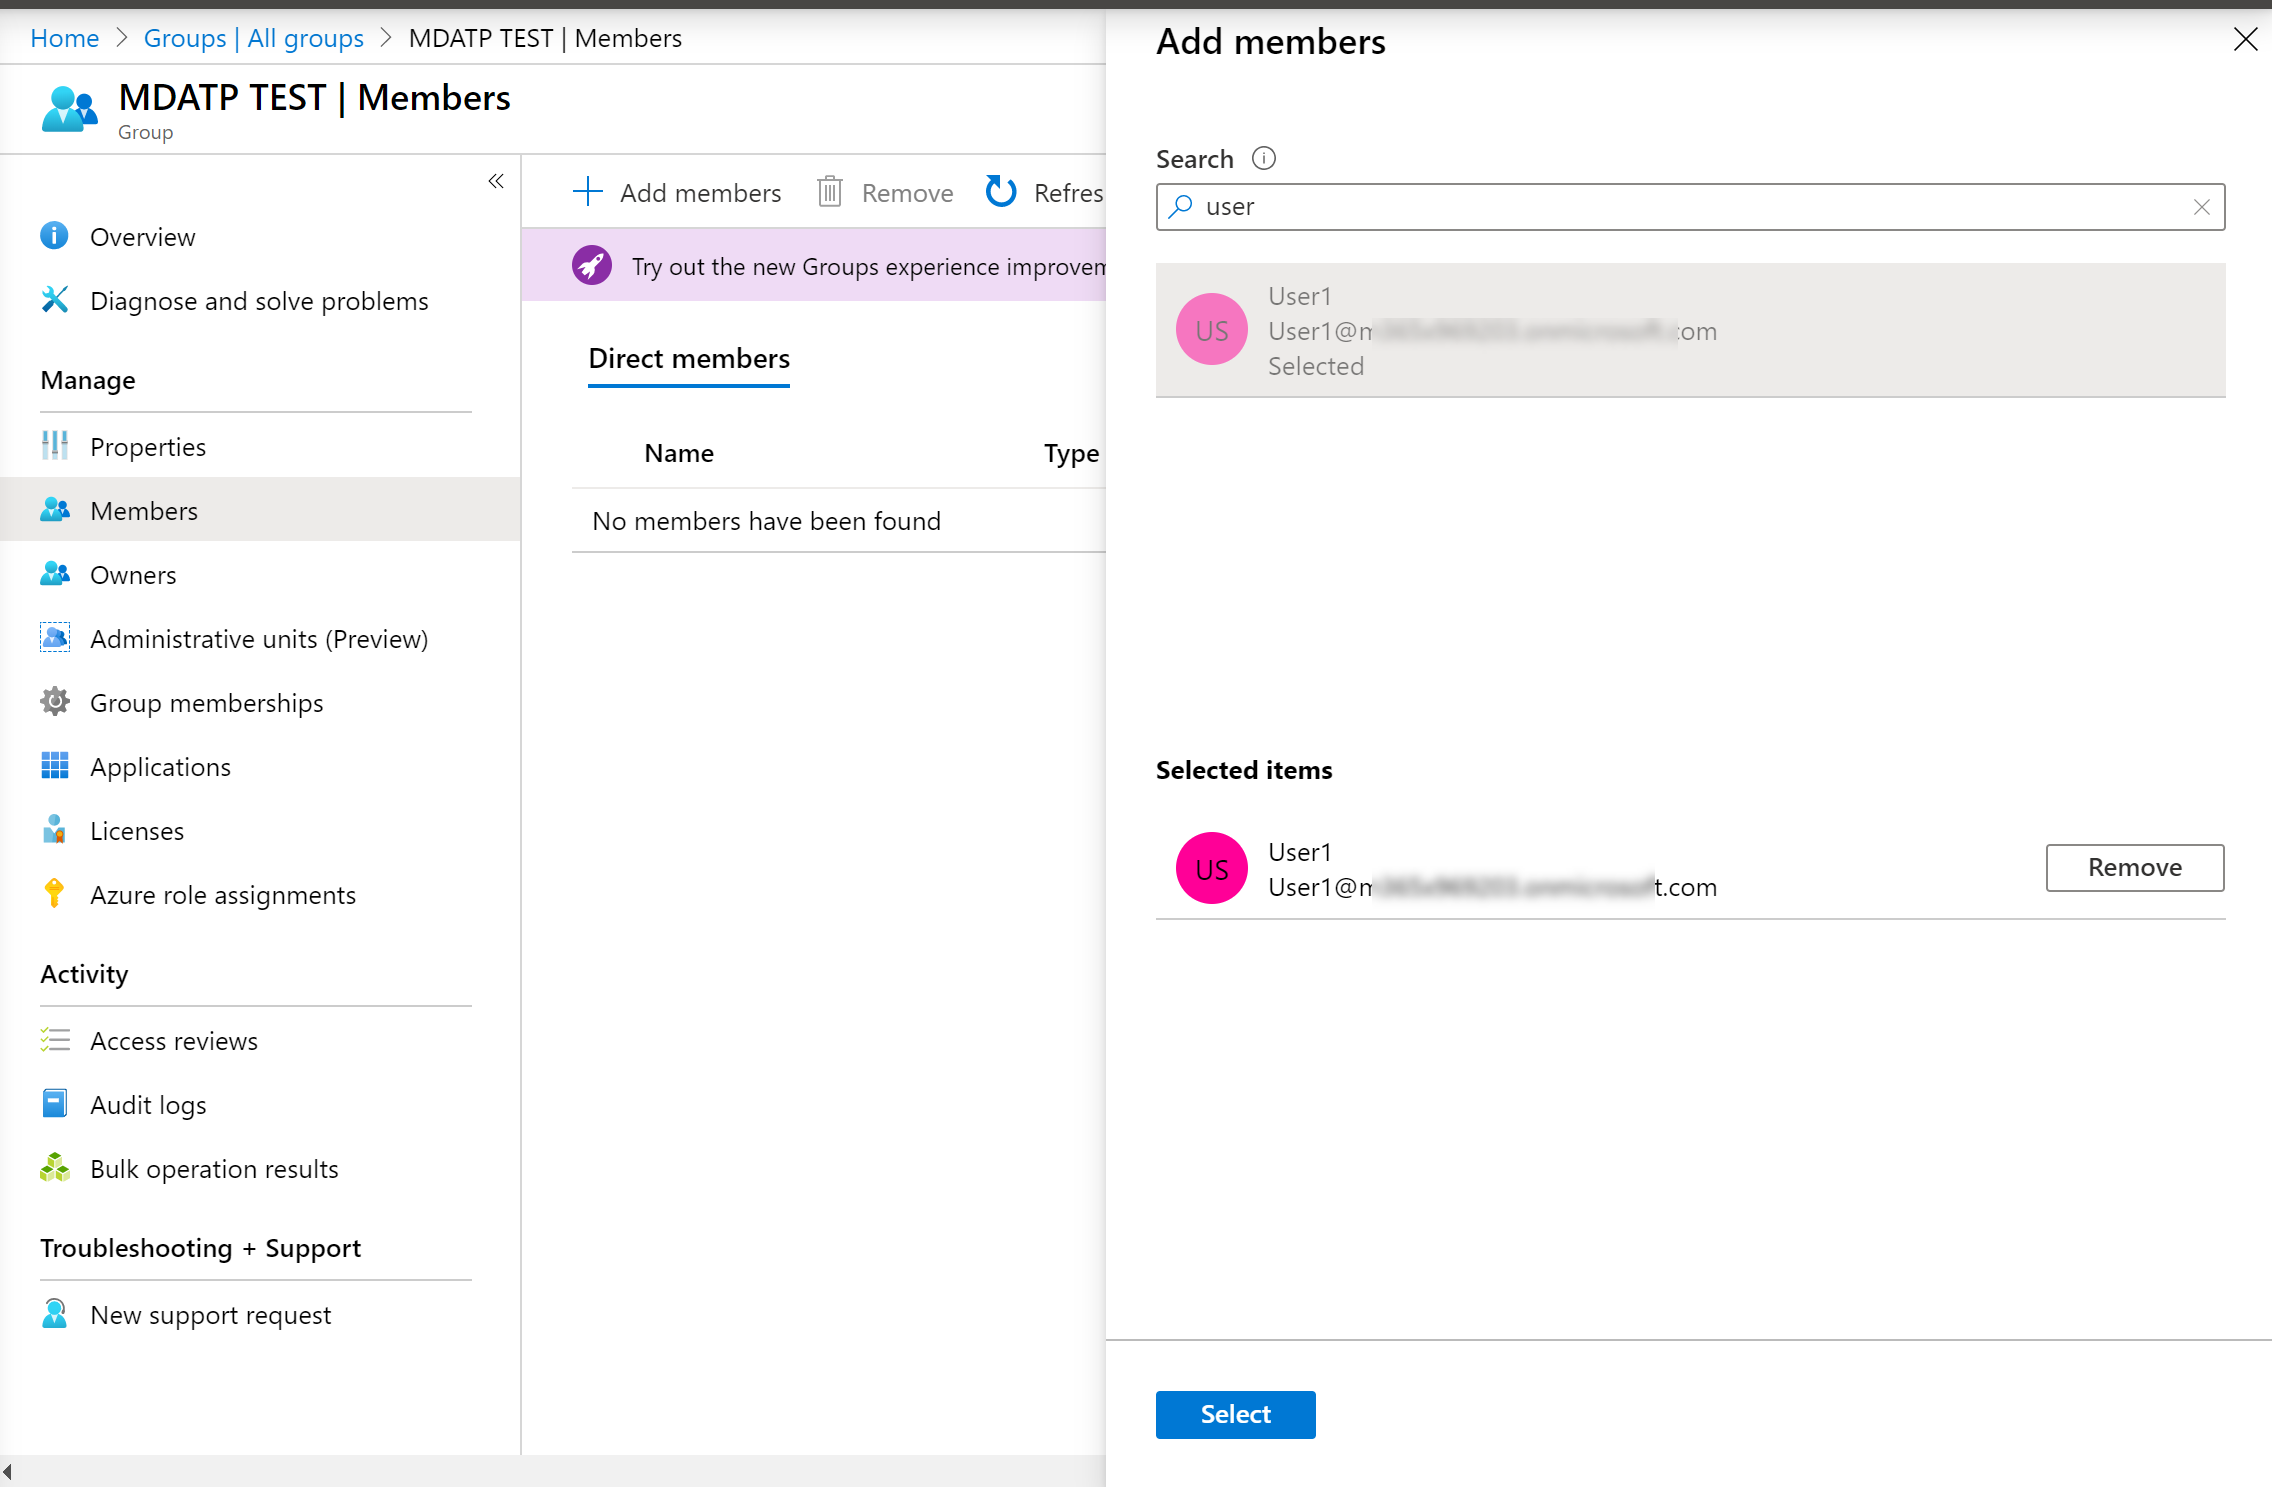
- Your testing group now has a member to test.
Step 2: Create configuration policies to configure Microsoft Defender for Endpoint capabilities
In the following section, you’ll create a number of configuration policies.
First is a configuration policy to select which groups of users or devices will be onboarded to Defender for Endpoint:
Then you will continue by creating several different types of endpoint security policies:
Endpoint detection and response
- Open the MEM portal.
- Navigate to Endpoint security > Endpoint detection and response. Click on Create Profile.
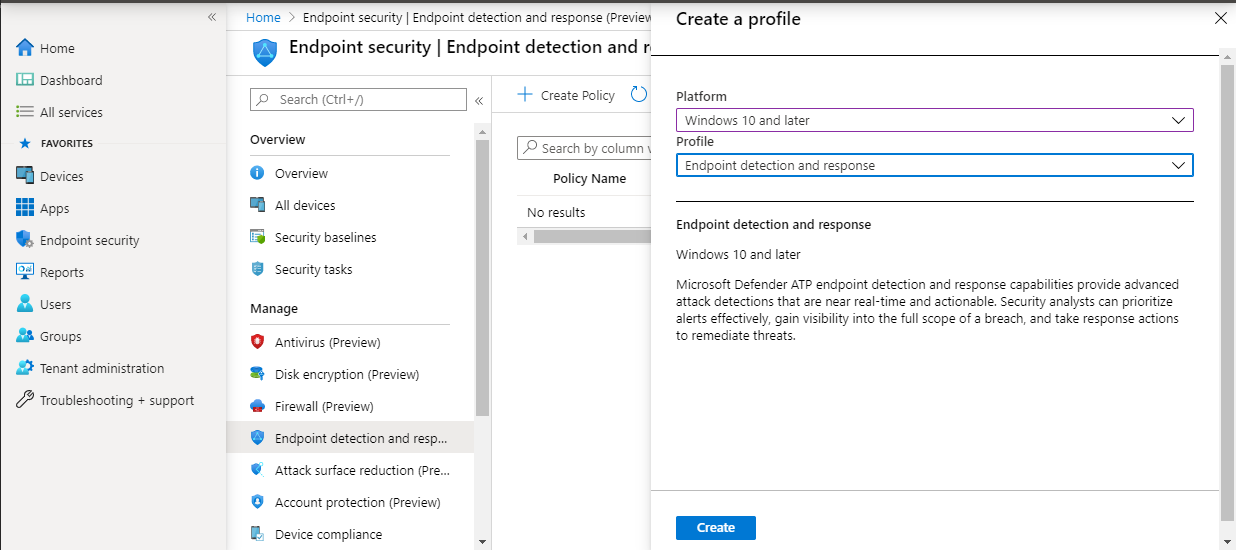
- Under Platform, select Windows 10 and Later, Profile – Endpoint detection and response > Create.
- Enter a name and description, then select Next.

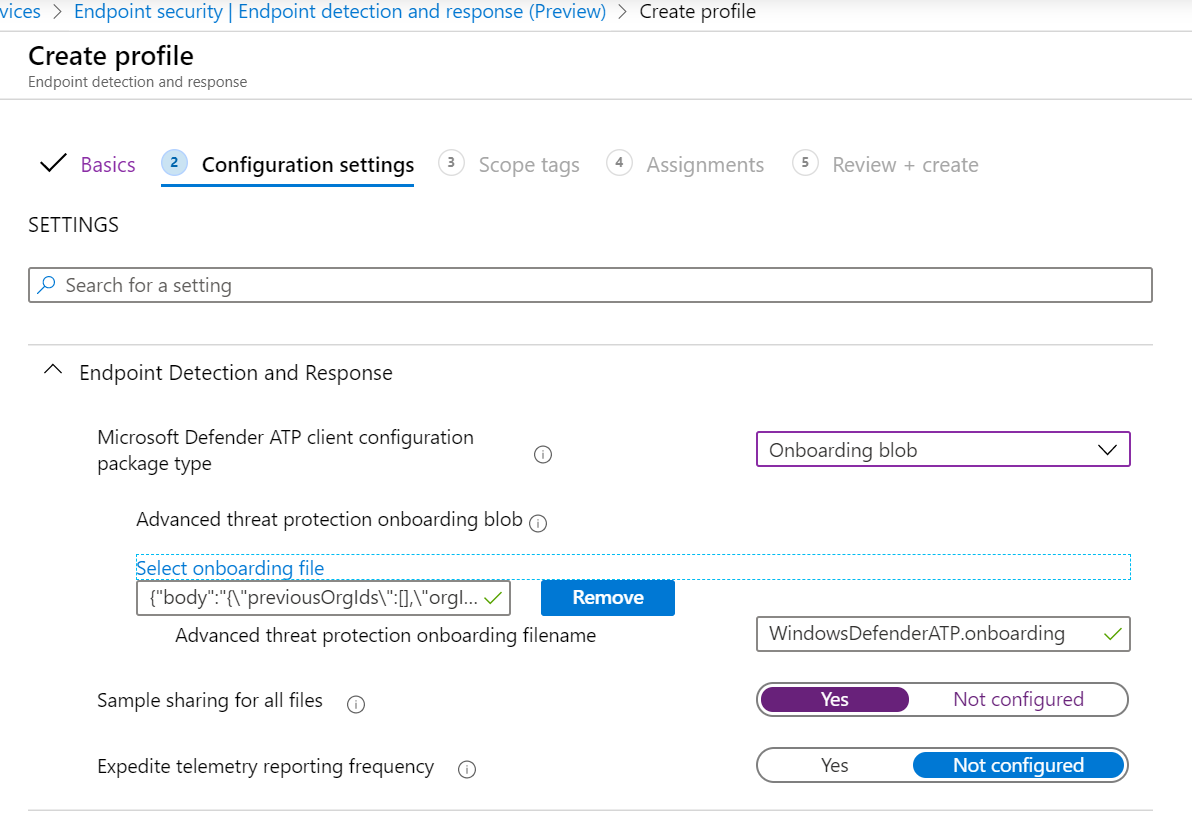
- Select settings as required, then select Next.
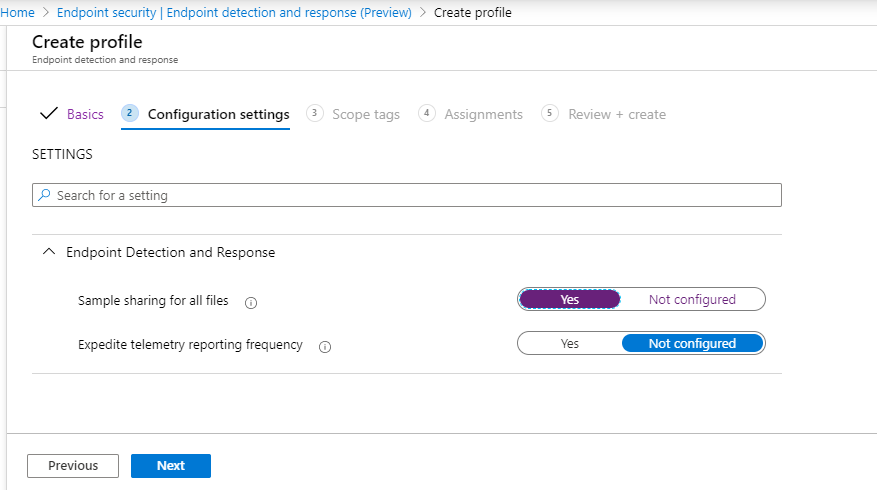
Note
In this instance, this has been auto populated as Defender for Endpoint has already been integrated with Intune. For more information on the integration, see Enable Microsoft Defender for Endpoint in Intune.
The following image is an example of what you’ll see when Microsoft Defender for Endpoint is NOT integrated with Intune:
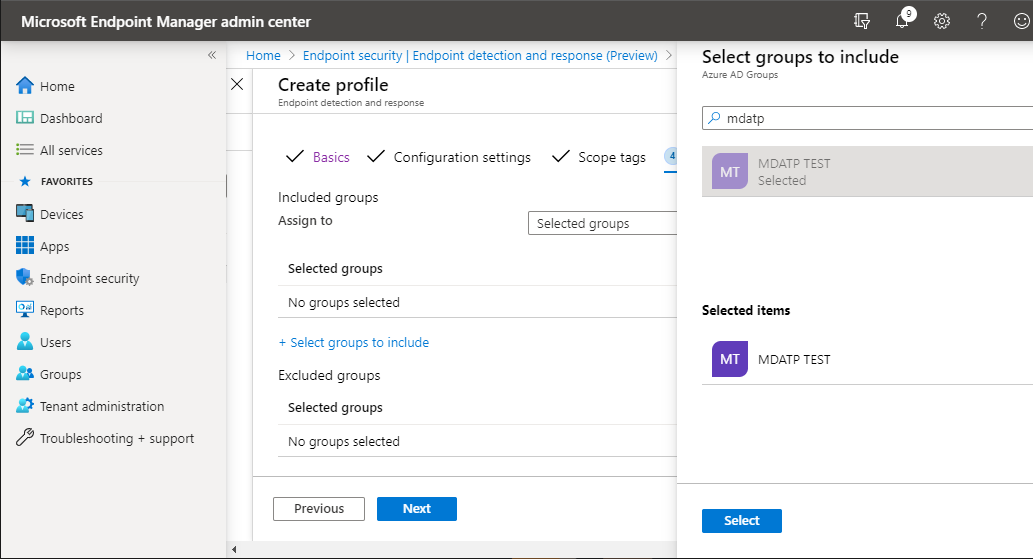
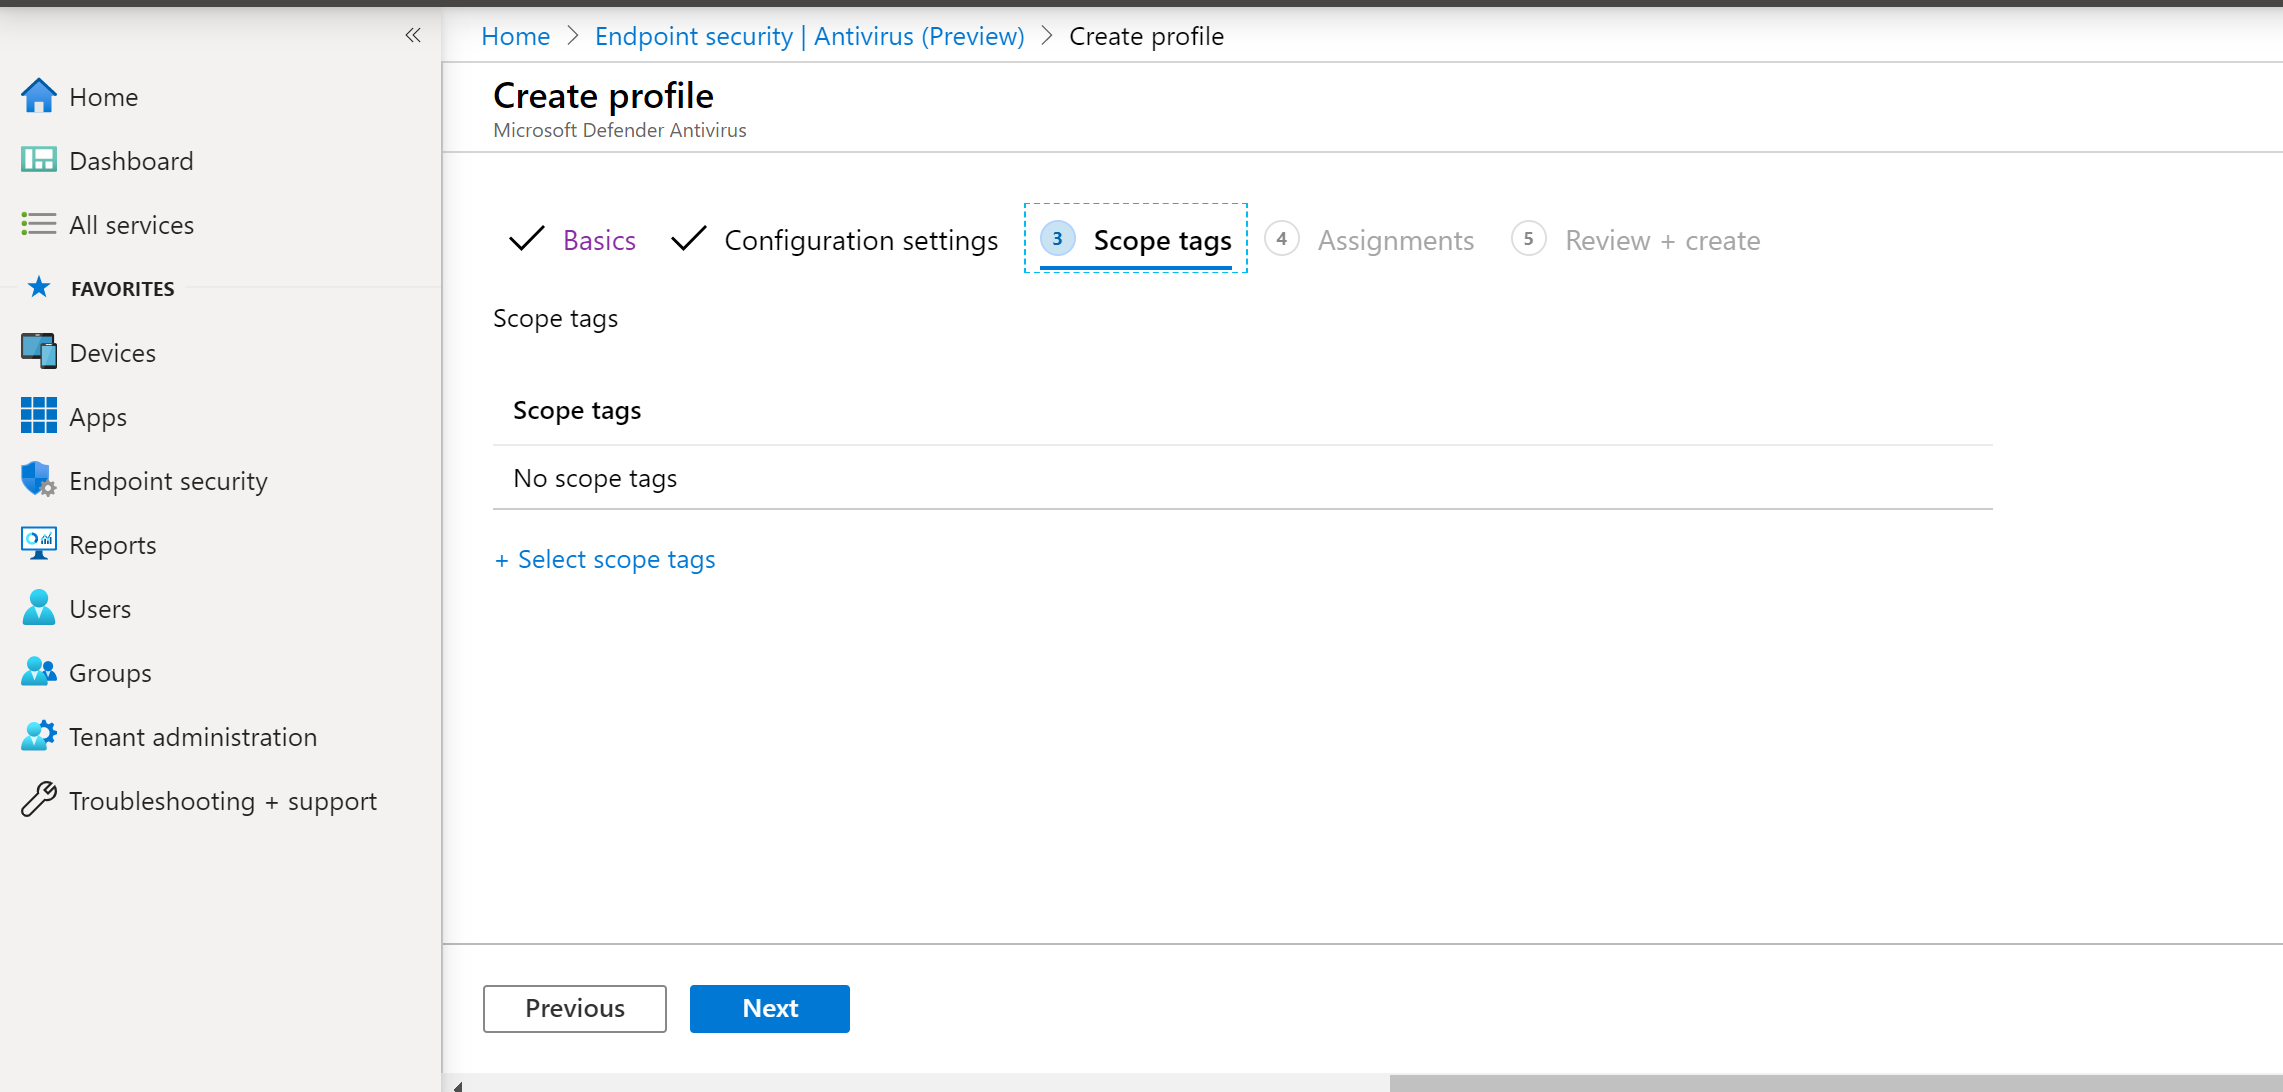
- Add scope tags if necessary, then select Next.

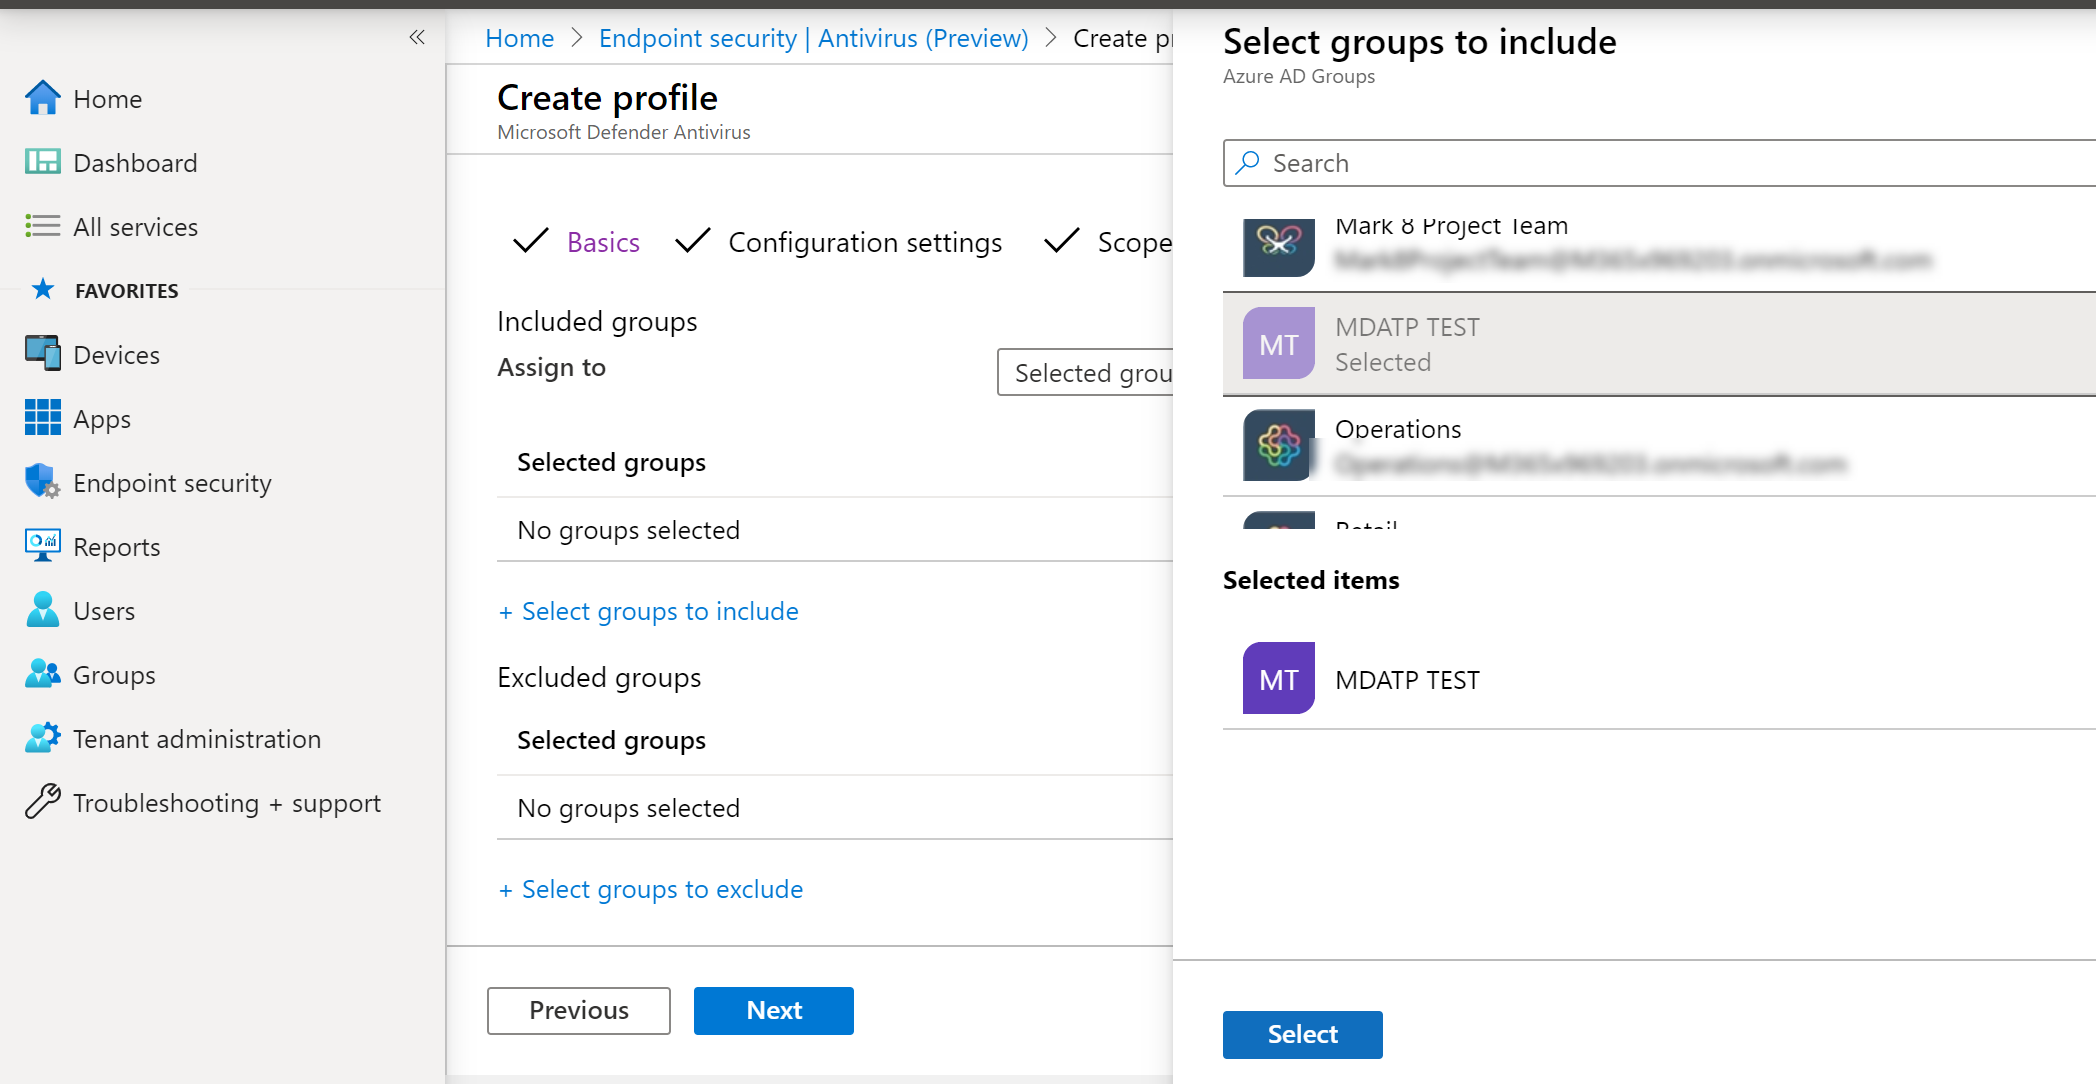
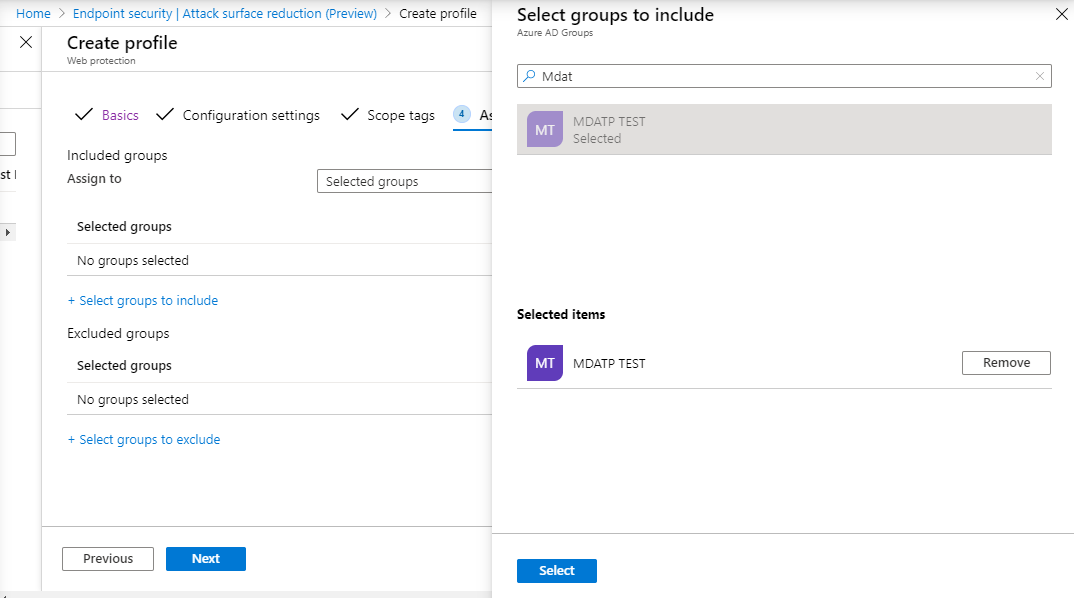
- Add test group by clicking on Select groups to include and choose your group, then select Next.
- Review and accept, then select Create.
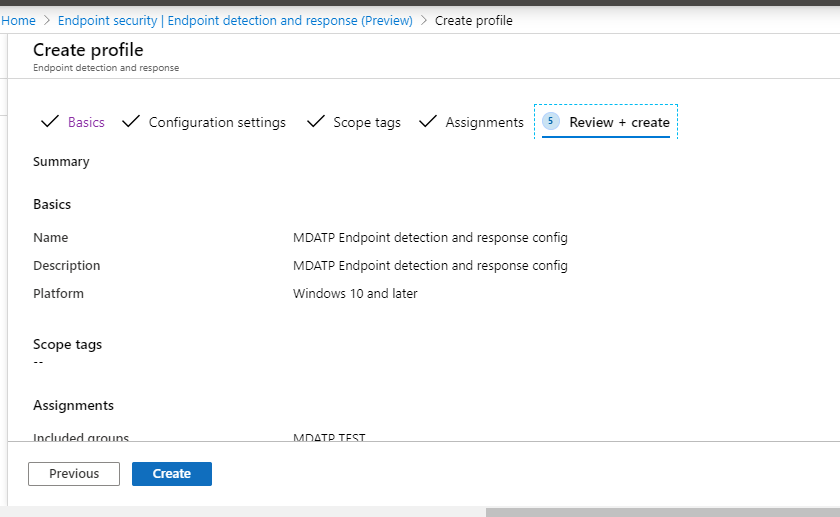
- You can view your completed policy.

Next-generation protection
- Open the MEM portal.
- Navigate to Endpoint security > Antivirus > Create Policy.
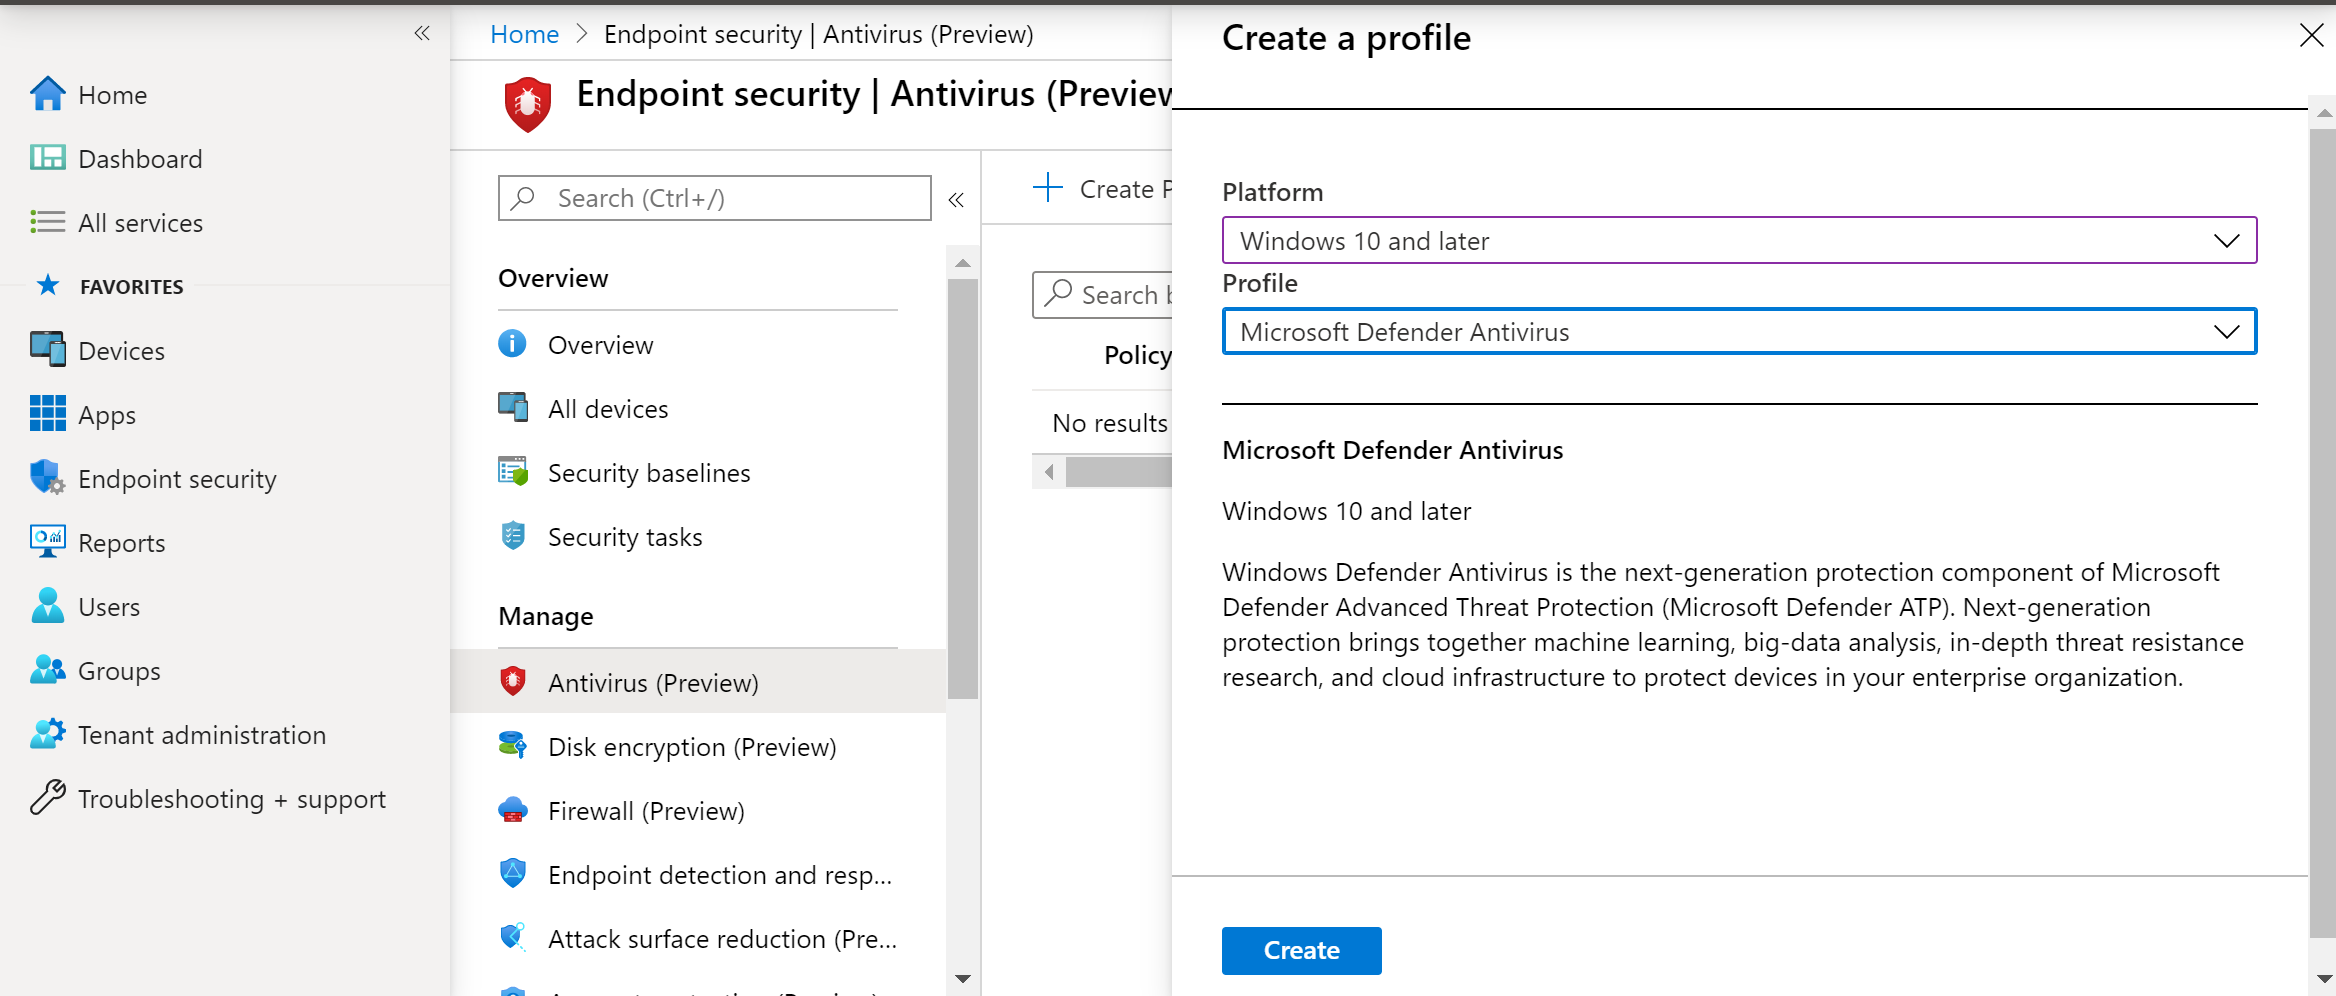
- Select Platform – Windows 10 and Later – Windows and Profile – Microsoft Defender Antivirus > Create.
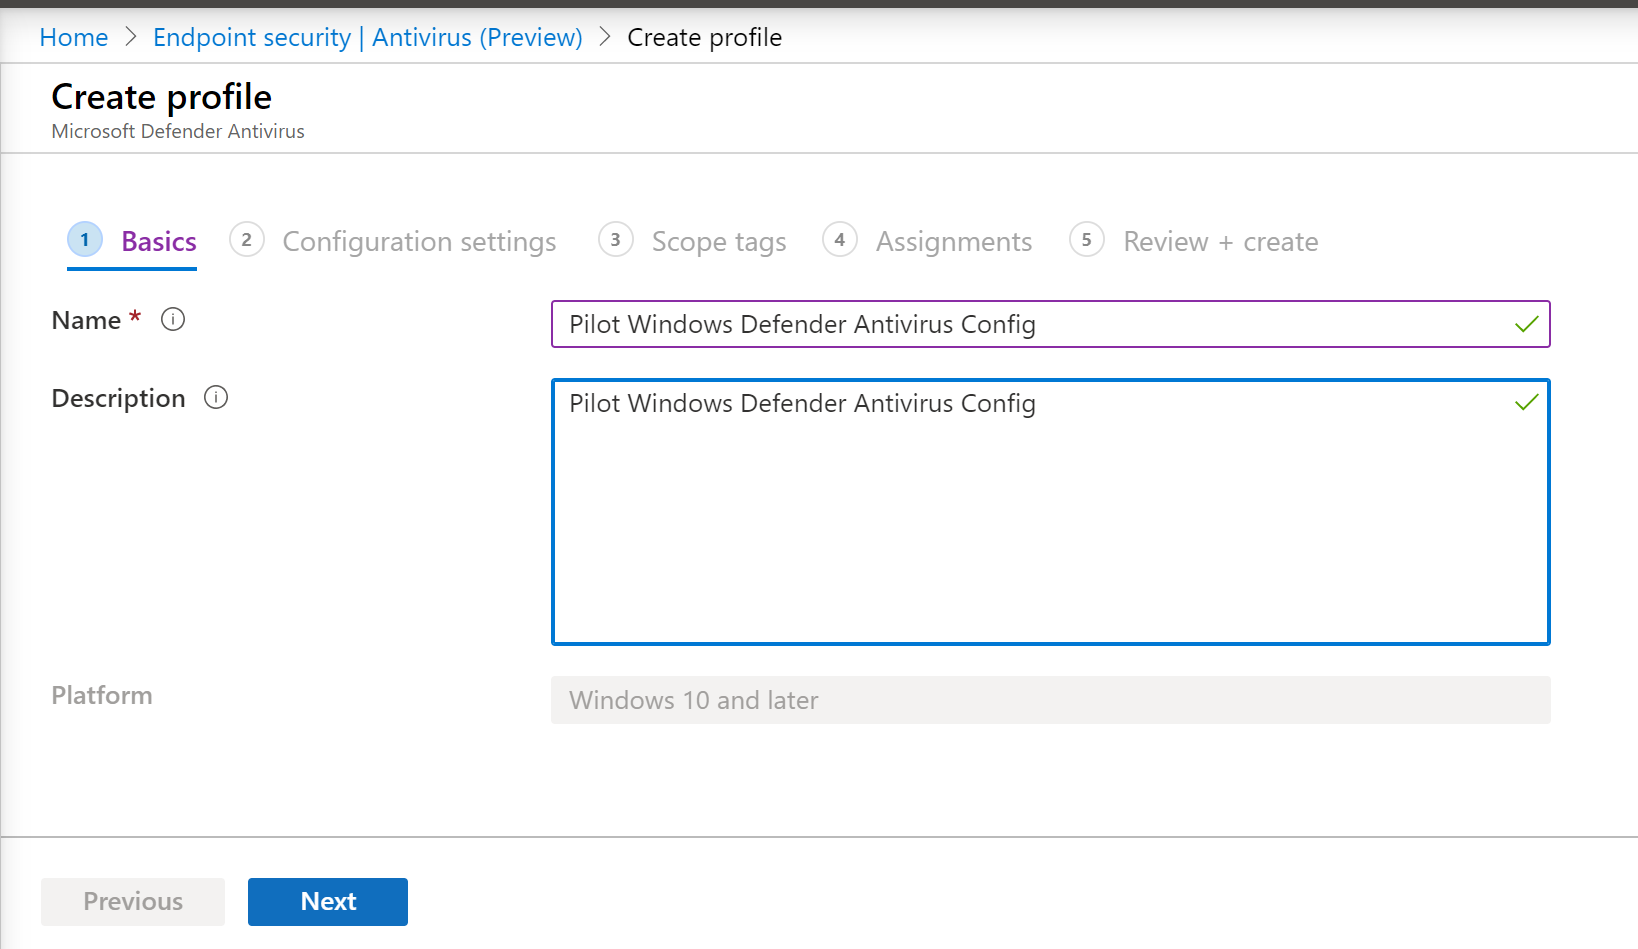
- Enter name and description, then select Next.
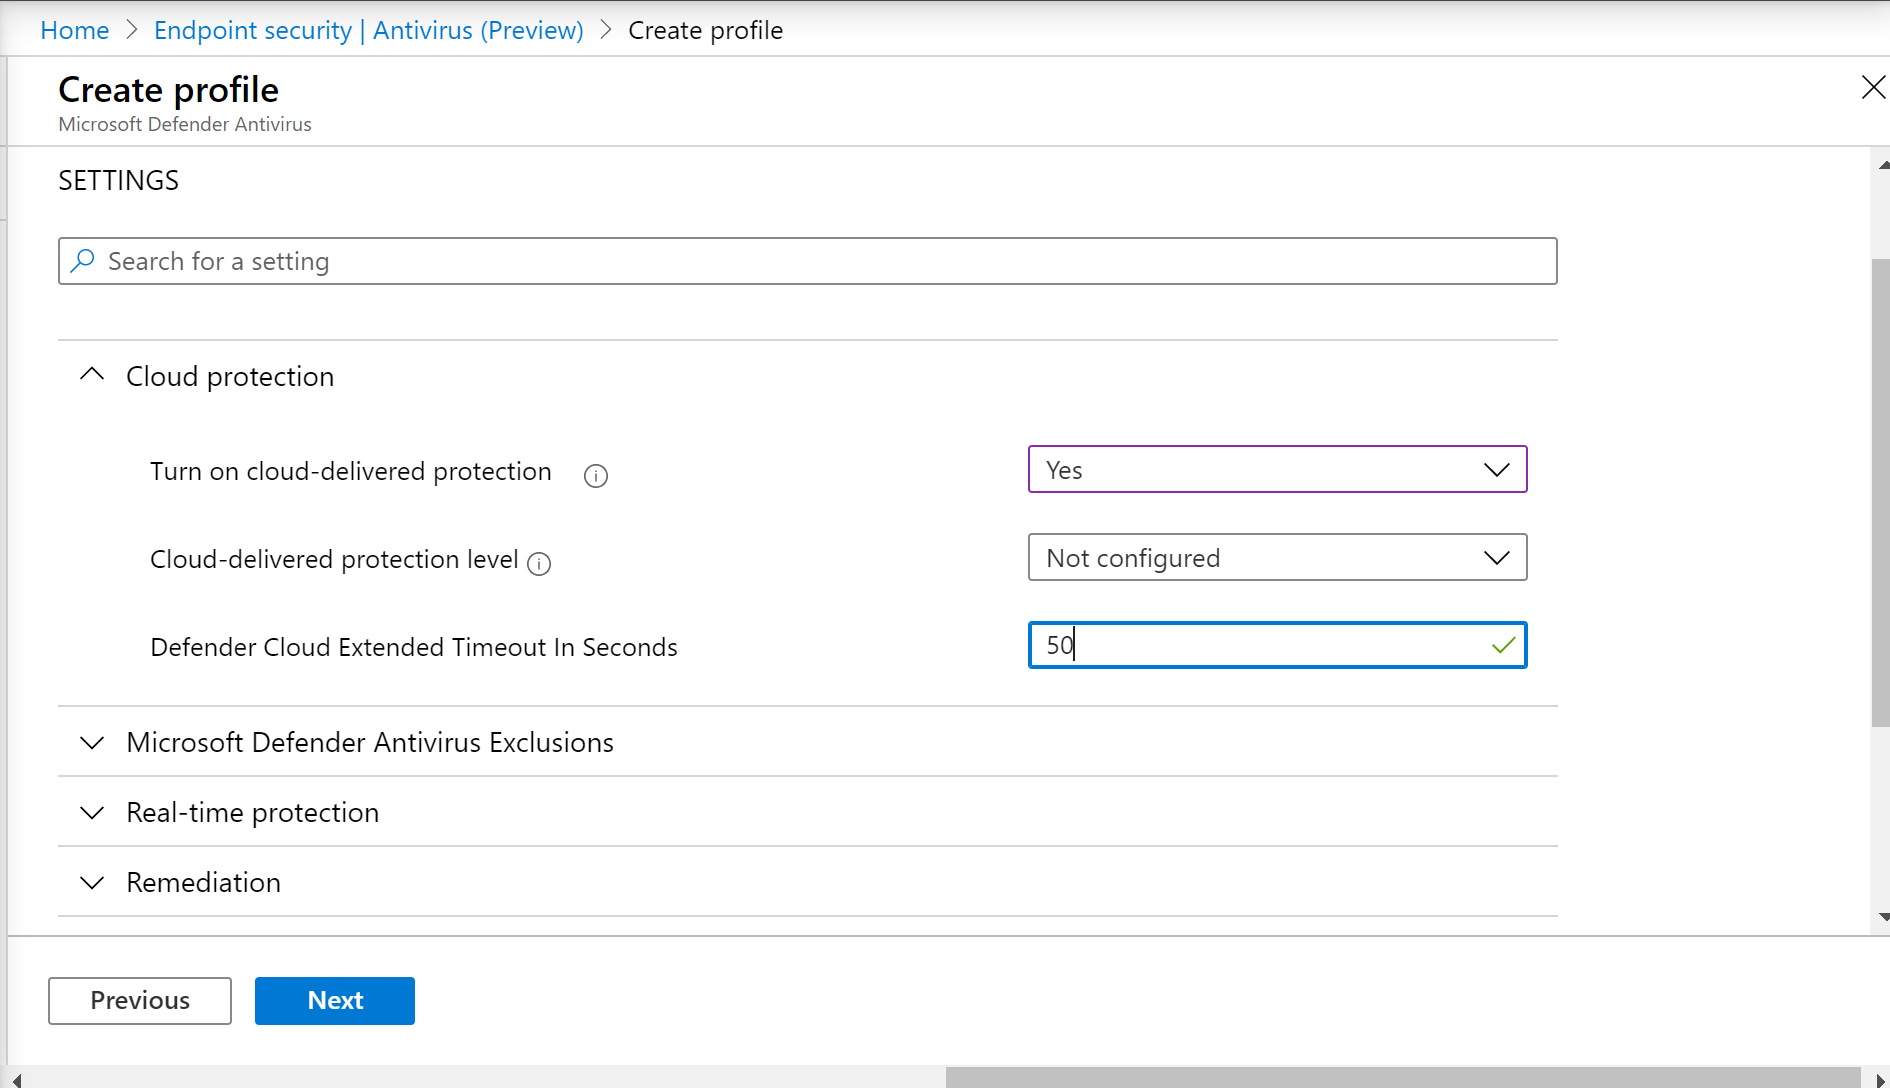
- In the Configuration settings page: Set the configurations you require for Microsoft Defender Antivirus (Cloud Protection, Exclusions, Real-Time Protection, and Remediation).
- Add scope tags if necessary, then select Next.
- Select groups to include, assign to your test group, then select Next.
- Review and create, then select Create.
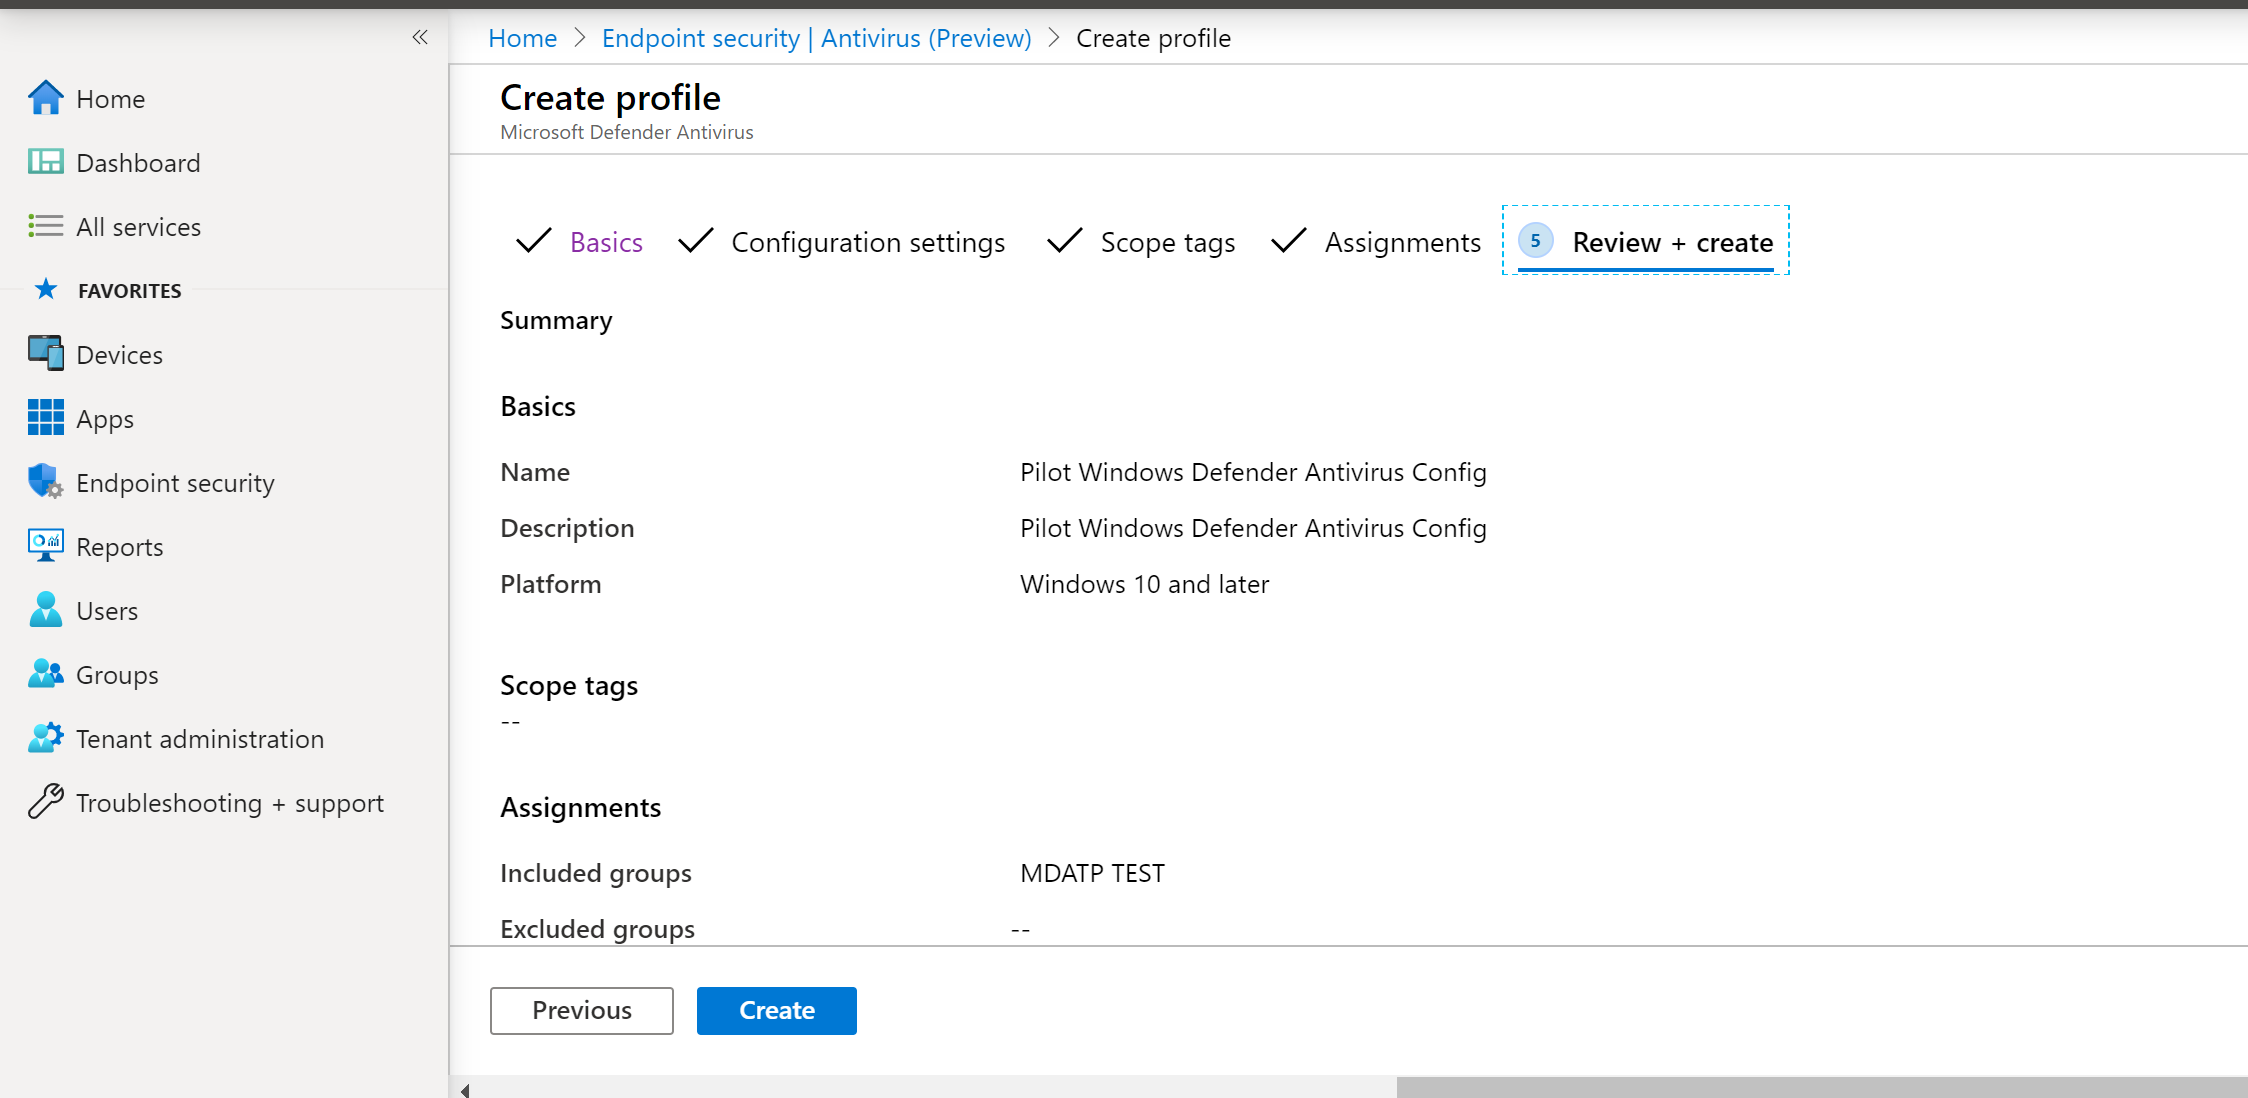
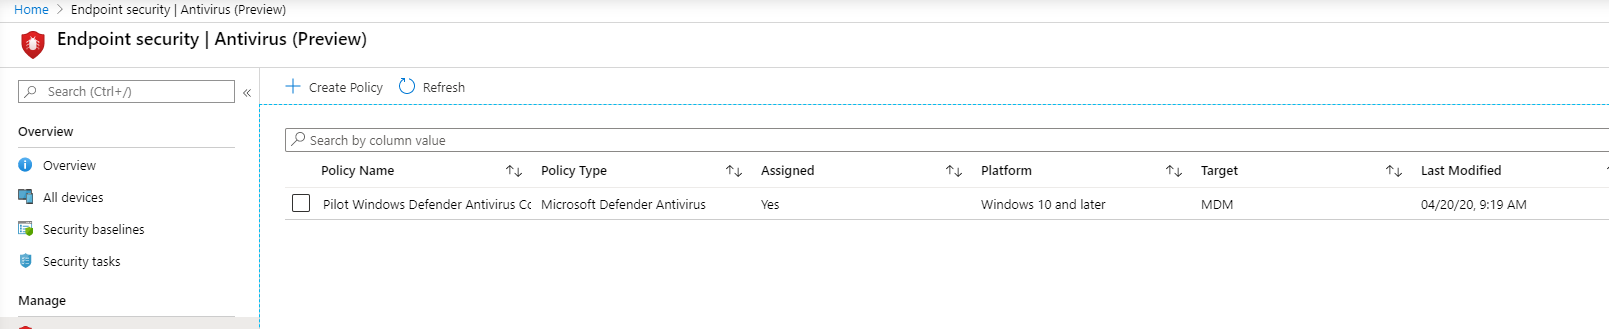
- You’ll see the configuration policy you created.
Attack Surface Reduction – Attack surface reduction rules
- Open the MEM portal.
- Navigate to Endpoint security > Attack surface reduction.
- Select Create Policy.
- Select Platform – Windows 10 and Later – Profile – Attack surface reduction rules > Create.
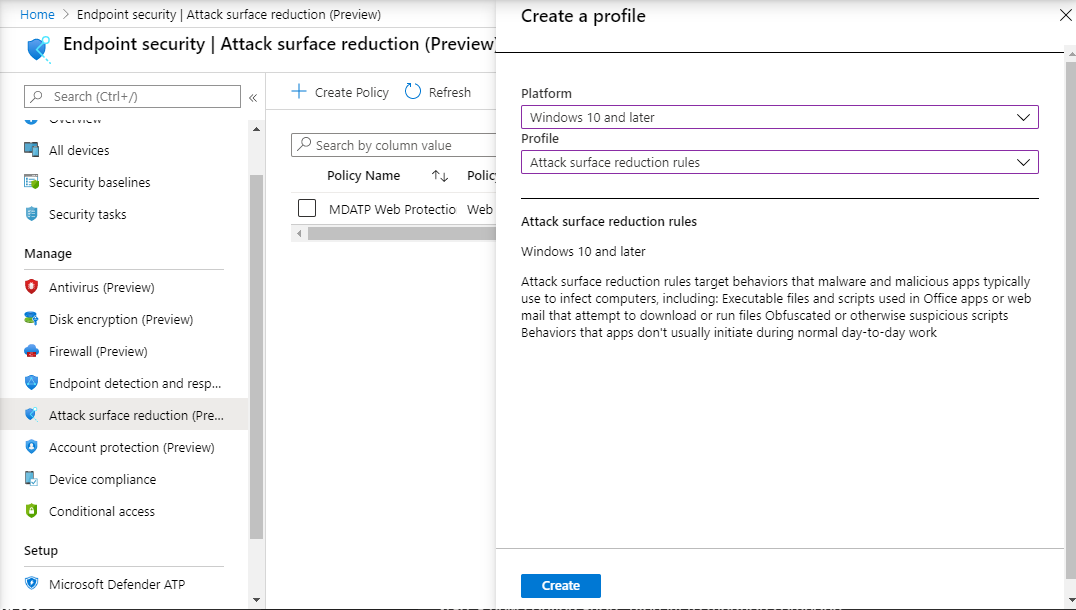
- Enter a name and description, then select Next.
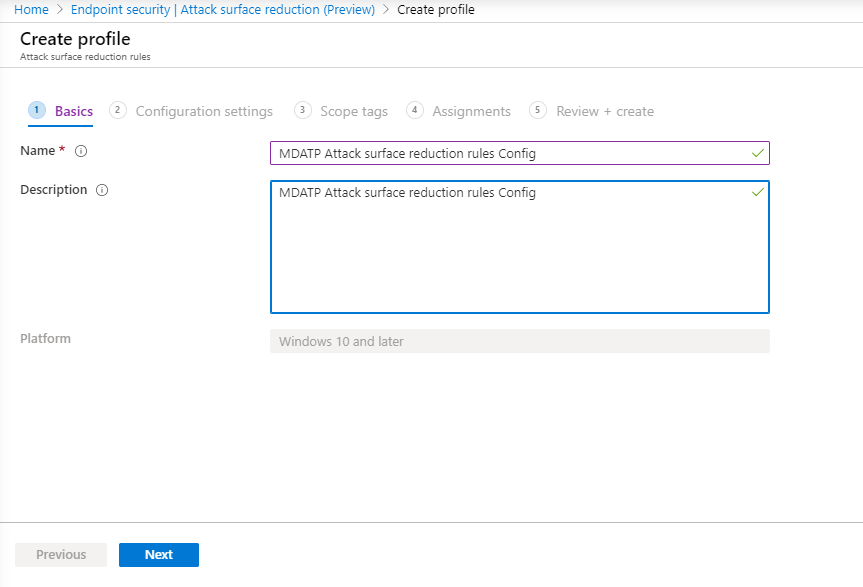
- In the Configuration settings page: Set the configurations you require for Attack surface reduction rules, then select Next.
Note
We will be configuring all of the Attack surface reduction rules to Audit.
For more information, see Attack surface reduction rules.

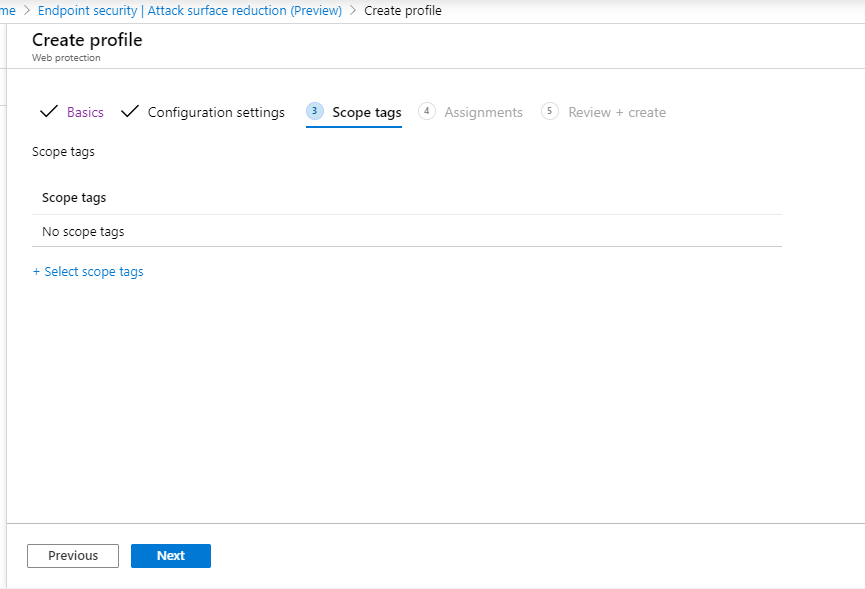
- Add Scope Tags as required, then select Next.
- Select groups to include and assign to test group, then select Next.
- Review the details, then select Create.
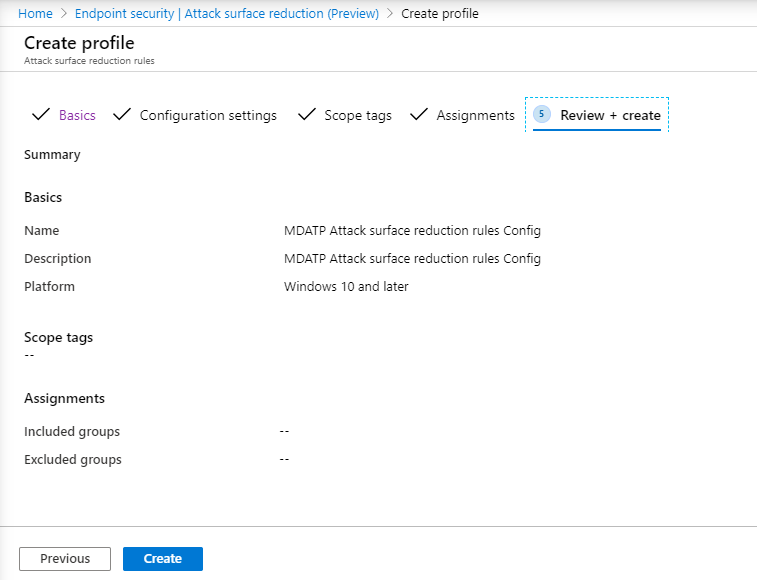
- View the policy.
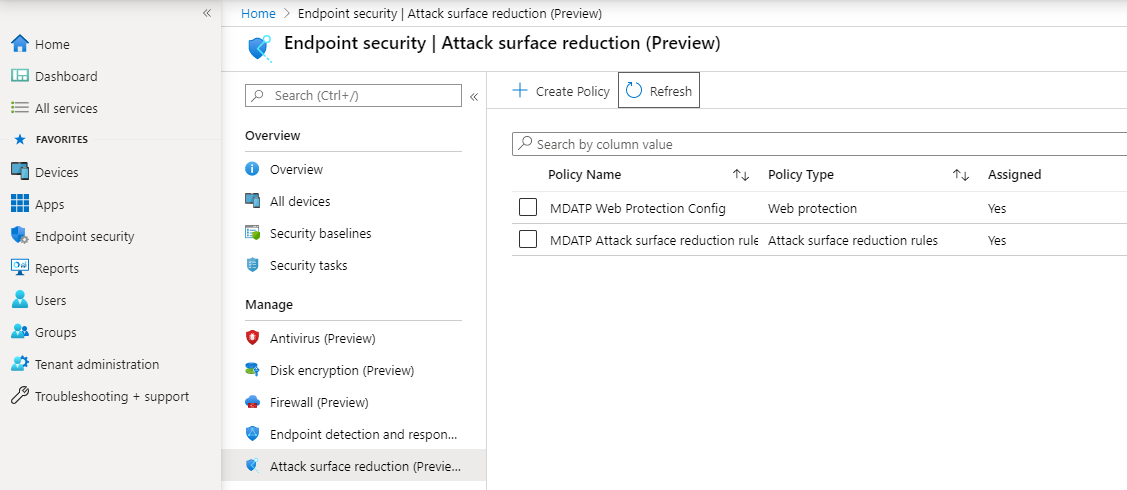
Attack Surface Reduction – Web Protection
- Open the MEM portal.
- Navigate to Endpoint security > Attack surface reduction.
- Select Create Policy.
- Select Windows 10 and Later – Web protection > Create.
- Enter a name and description, then select Next.
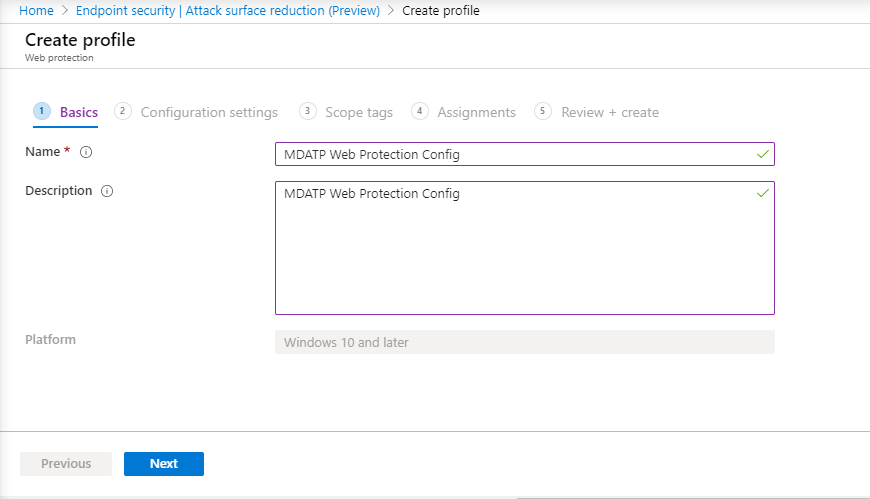
- In the Configuration settings page: Set the configurations you require for Web Protection, then select Next.
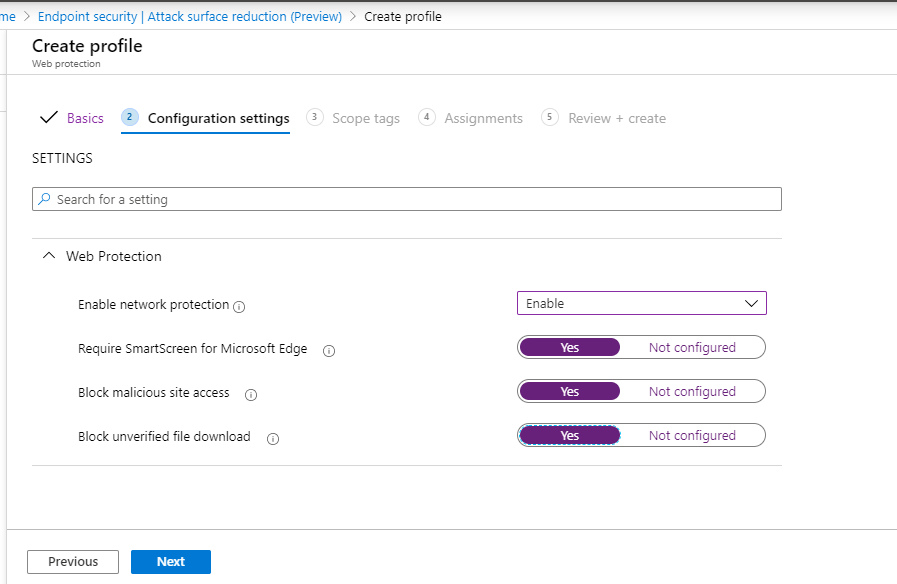
- Add Scope Tags as required > Next.
- Select Assign to test group > Next.
- Select Review and Create > Create.
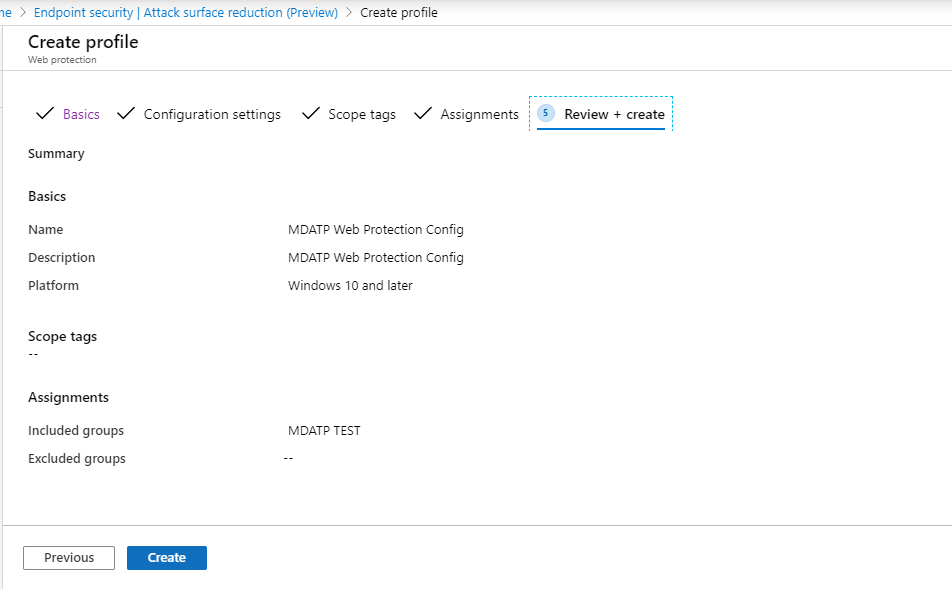
- View the policy.

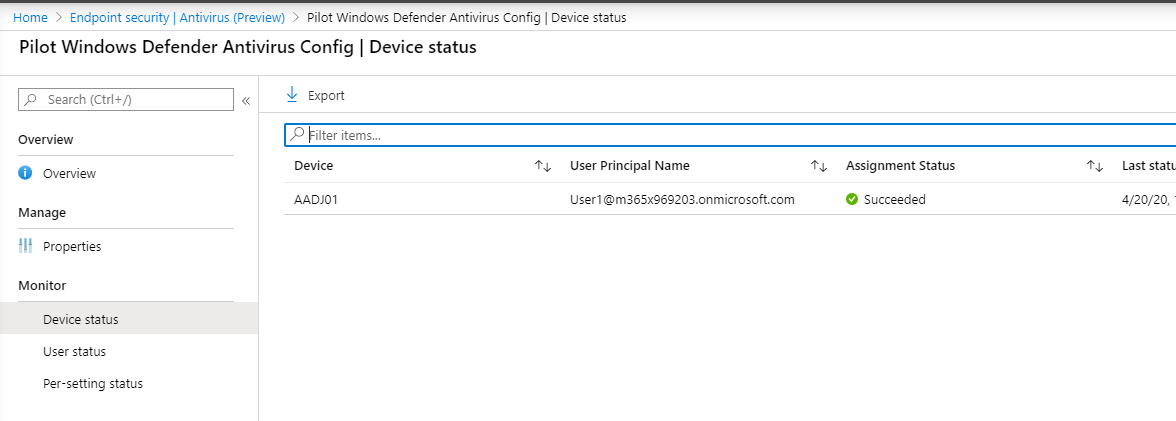
Validate configuration settings
Confirm policies have been applied
Once the Configuration policy has been assigned, it will take some time to apply.
For information on timing, see Intune configuration information.
To confirm that the configuration policy has been applied to your test device, follow the following process for each configuration policy.
- Open the MEM portal and navigate to the relevant policy as shown in the steps above. The following example shows the next generation protection settings.

- Select the Configuration Policy to view the policy status.
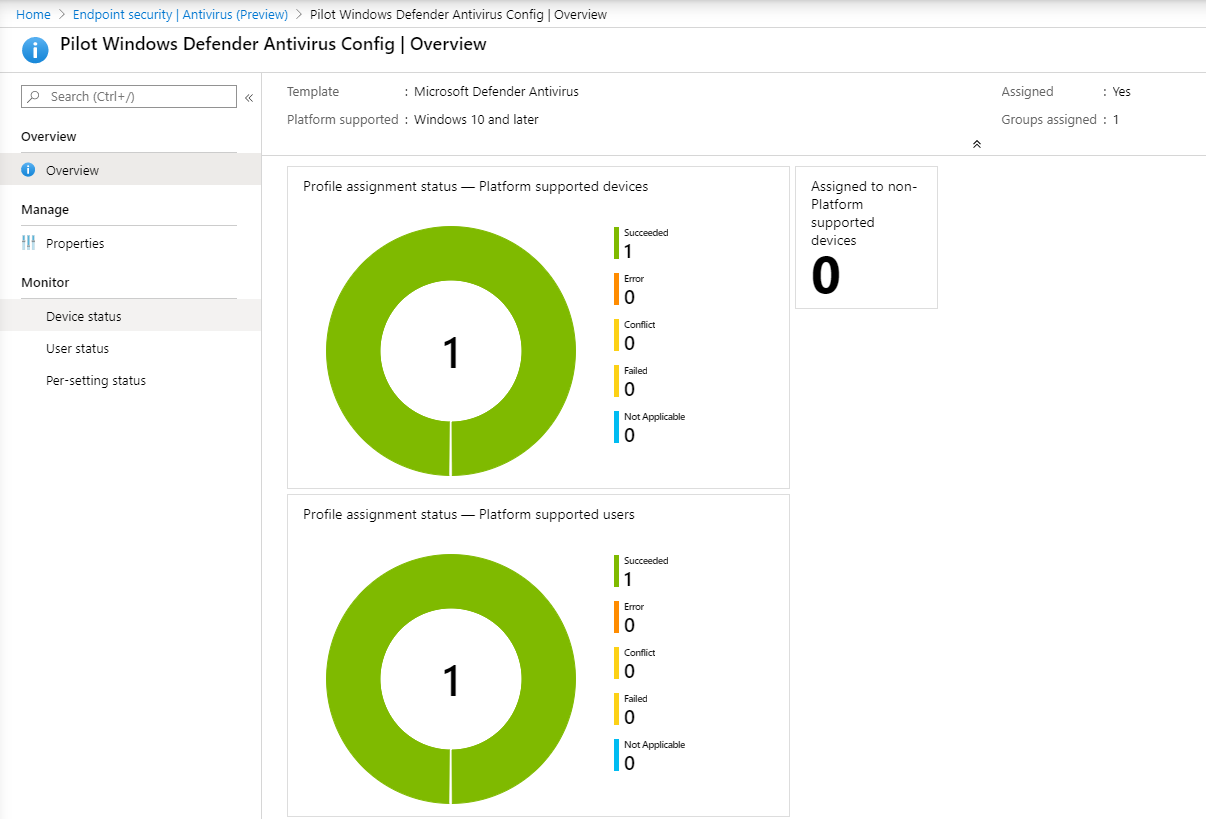
- Select Device Status to see the status.
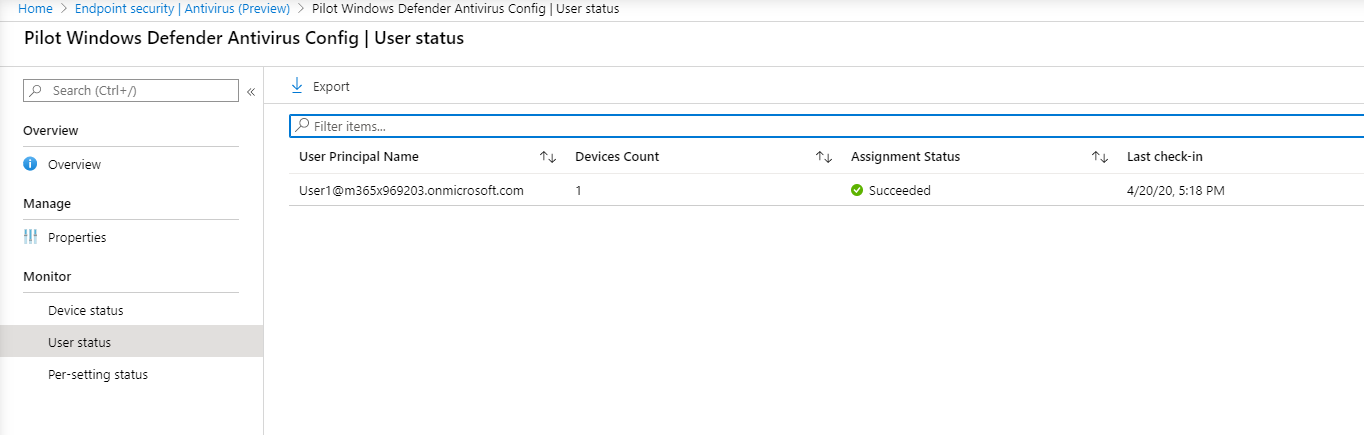
- Select User Status to see the status.
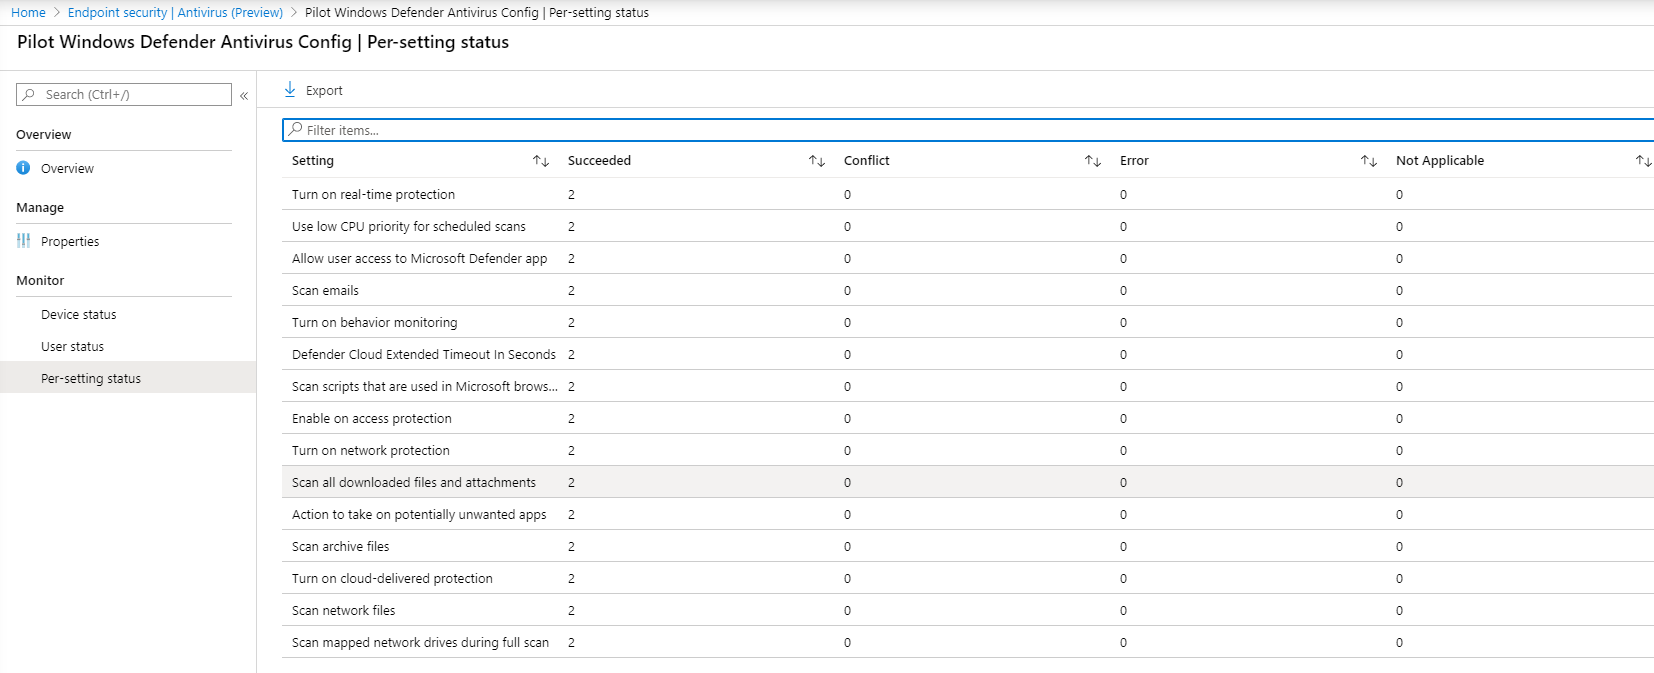
- Select Per-setting status to see the status.
Tip
This view is very useful to identify any settings that conflict with another policy.


Confirm endpoint detection and response
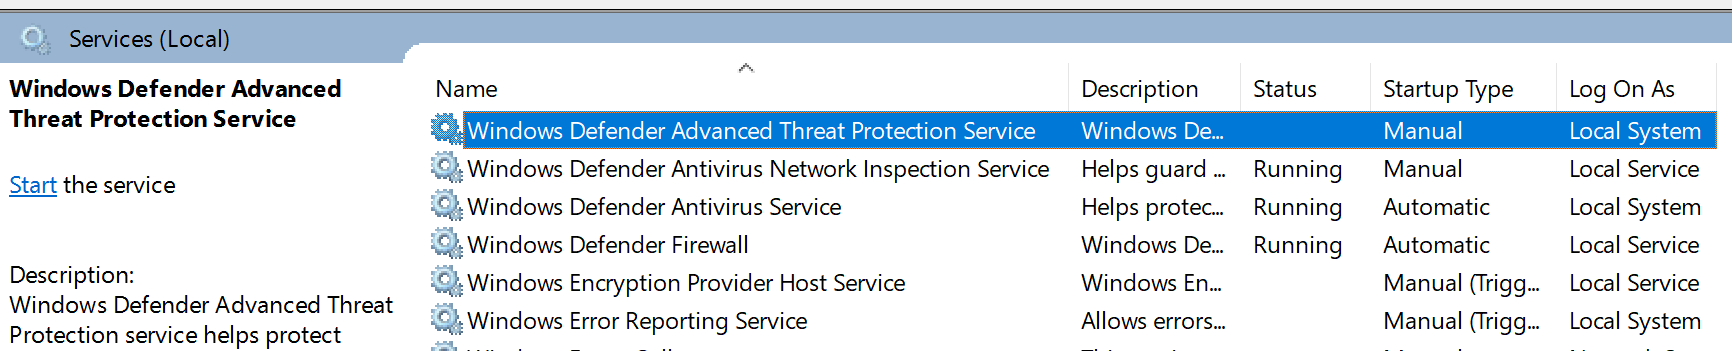
- Before applying the configuration, the Defender for Endpoint Protection service should not be started.
- After the configuration has been applied, the Defender for Endpoint Protection Service should be started.
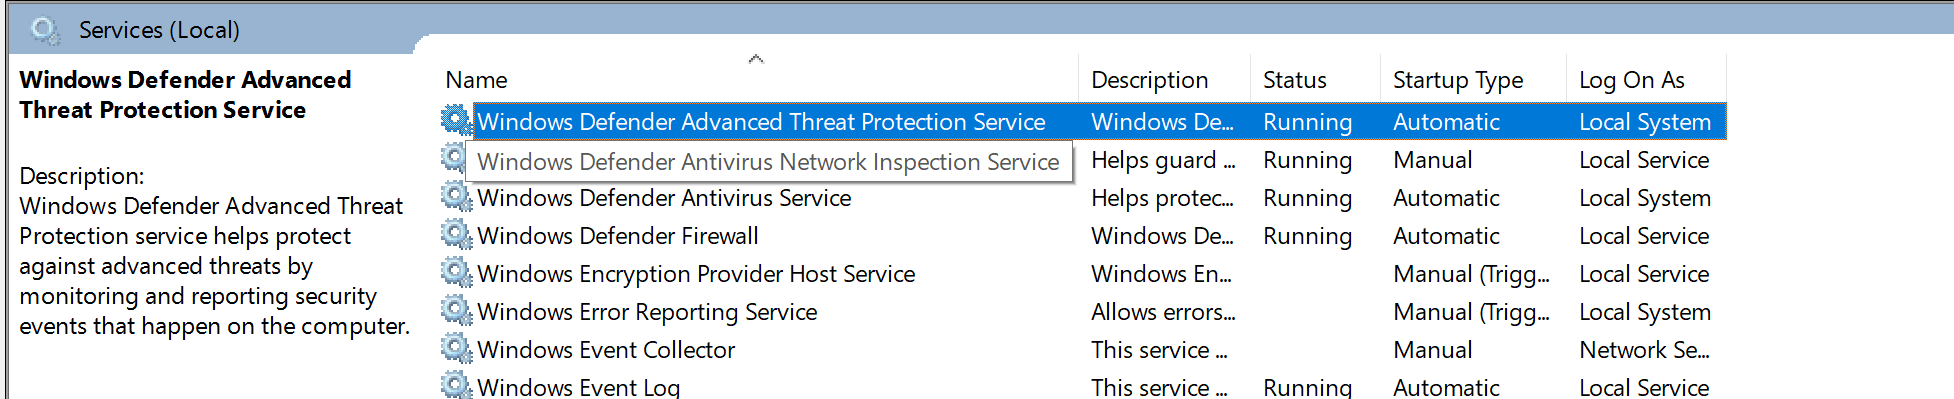
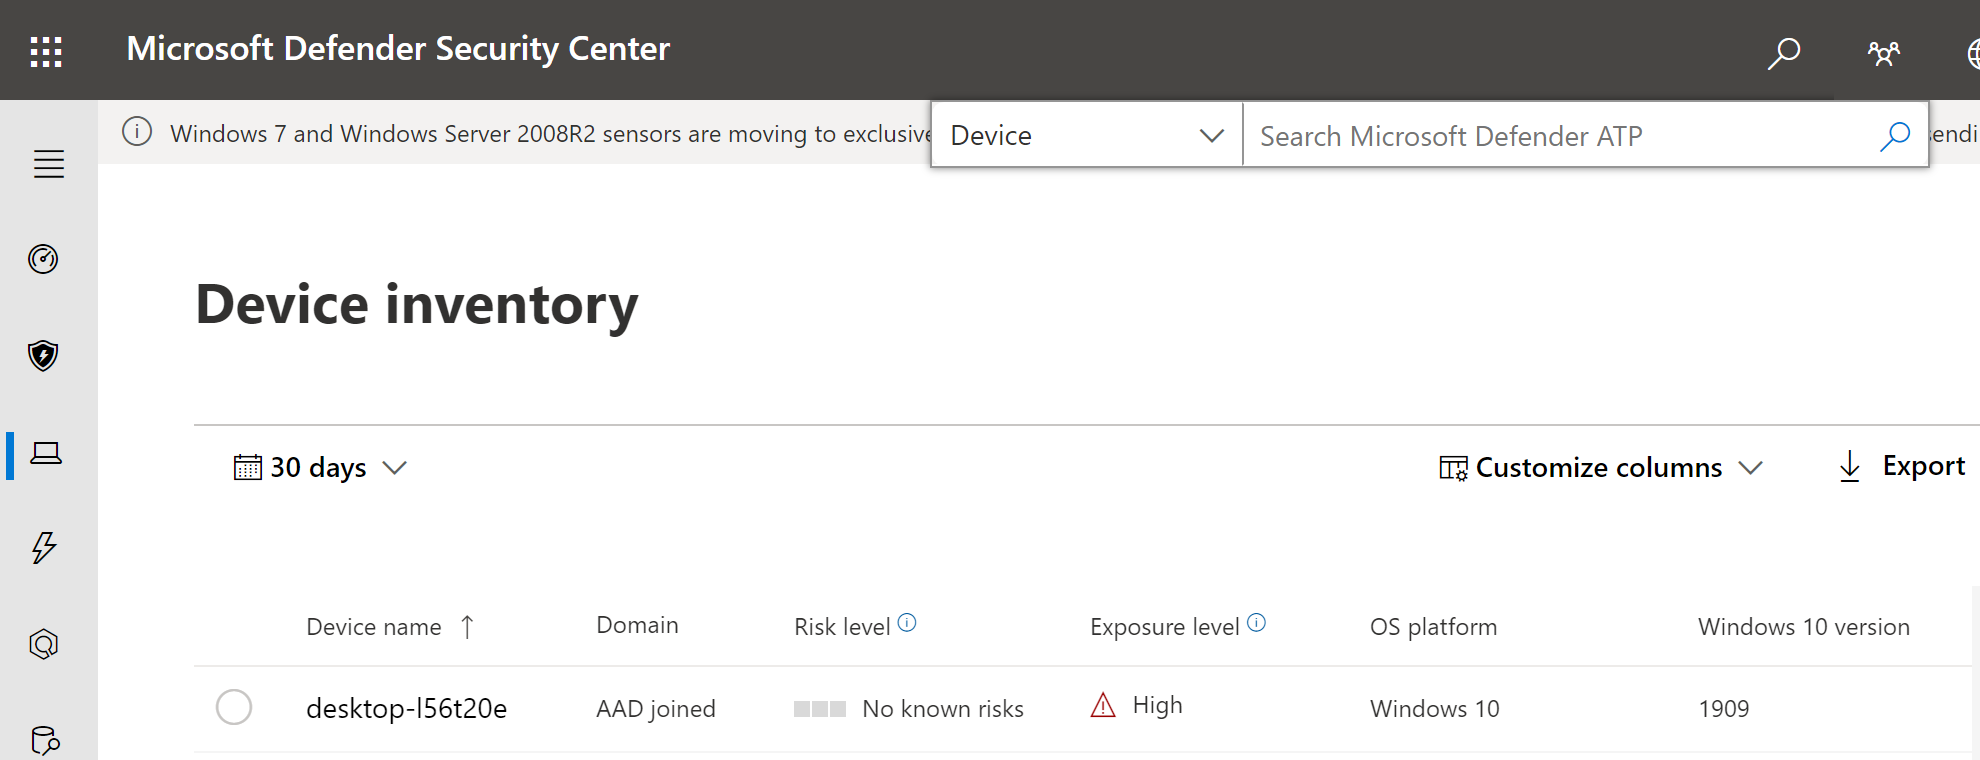
- After the services are running on the device, the device appears in Microsoft Defender Security Center.


Confirm next-generation protection
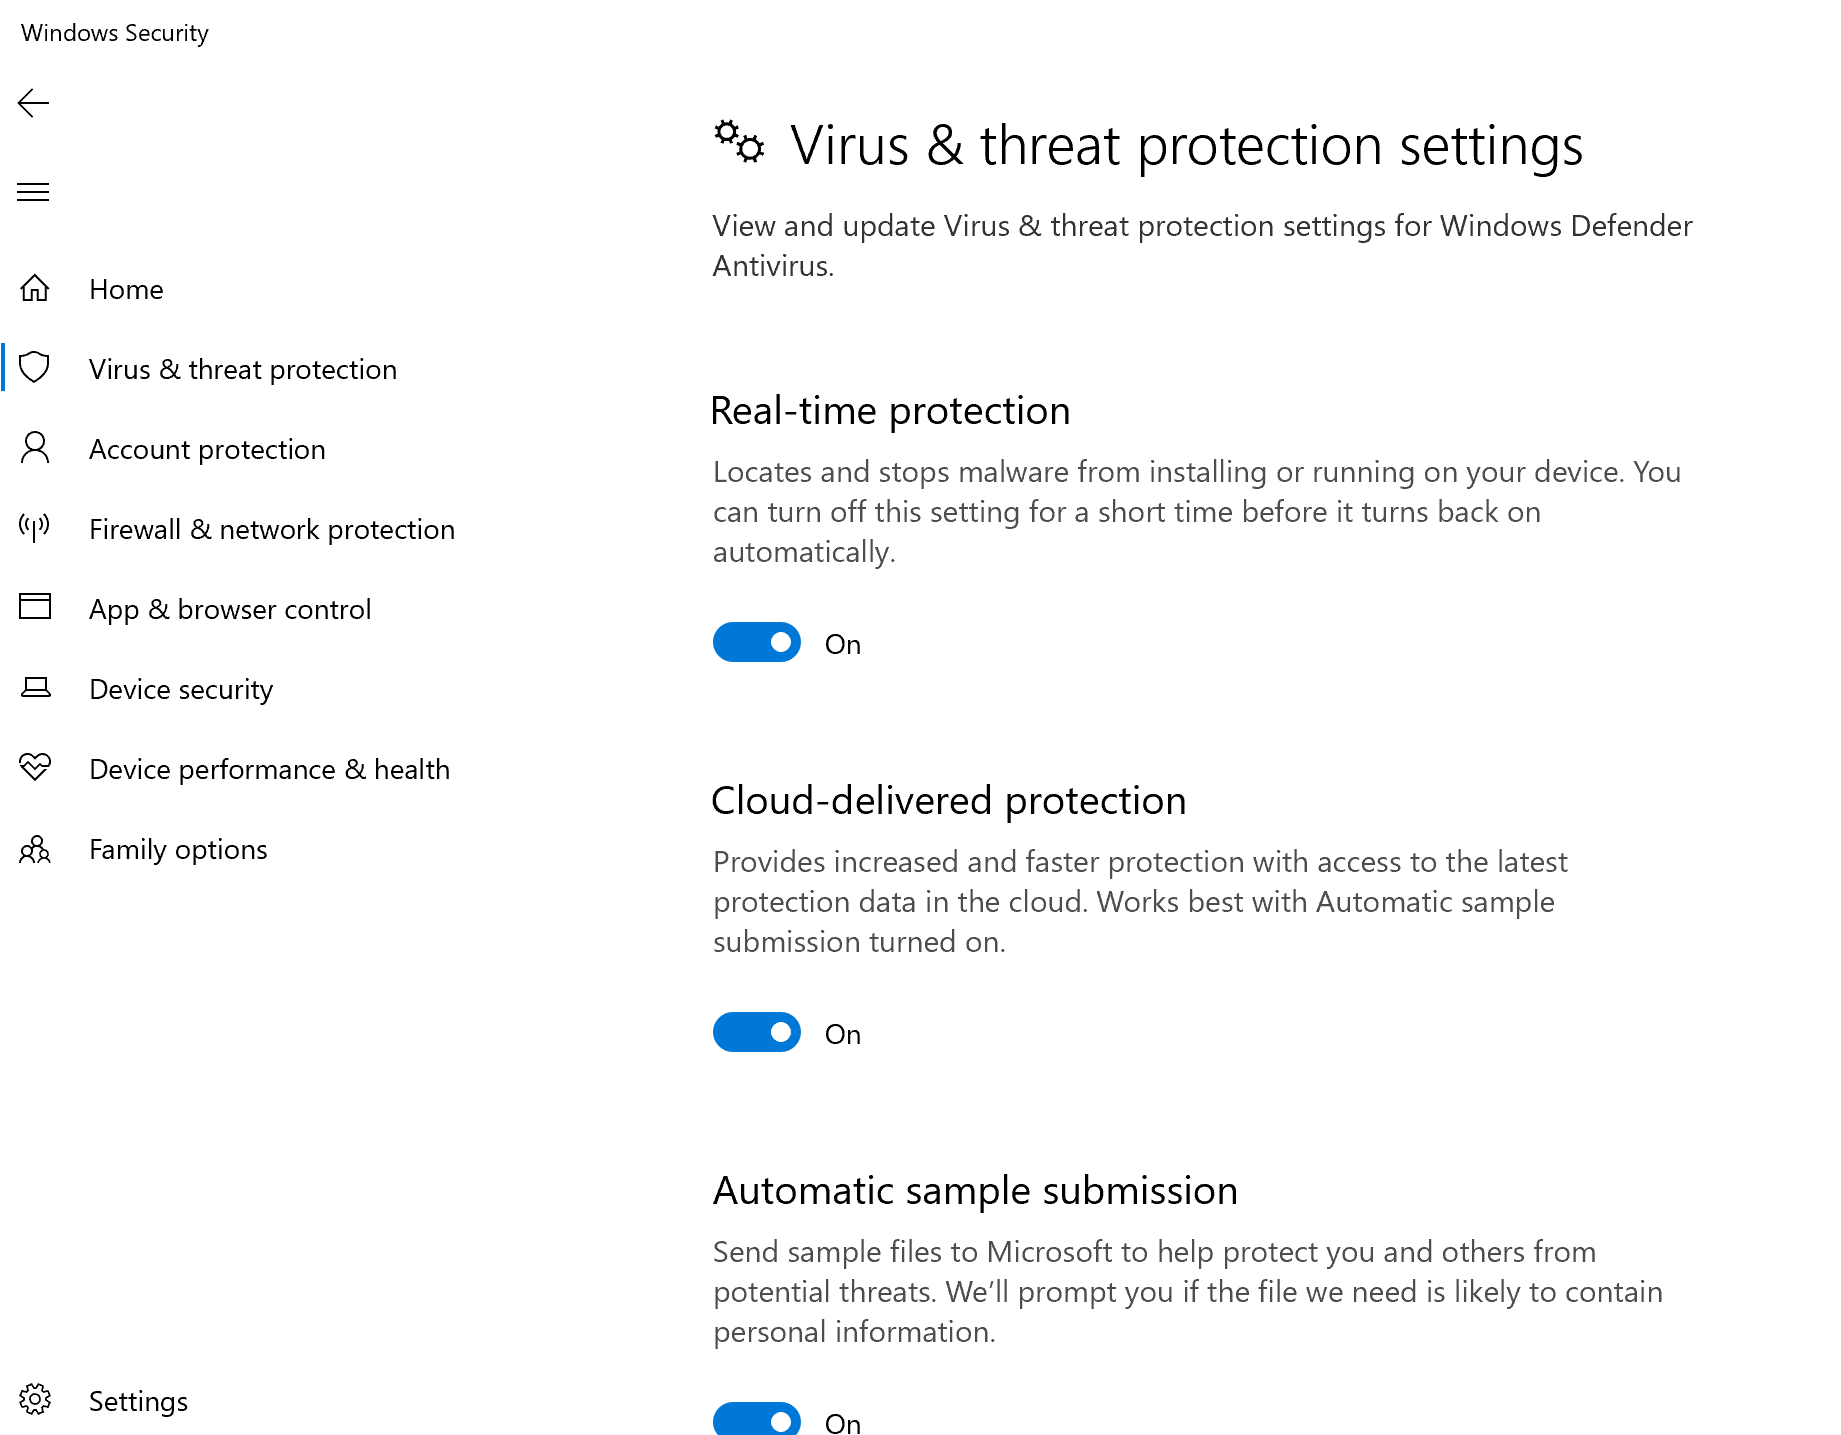
- Before applying the policy on a test device, you should be able to manually manage the settings as shown below.
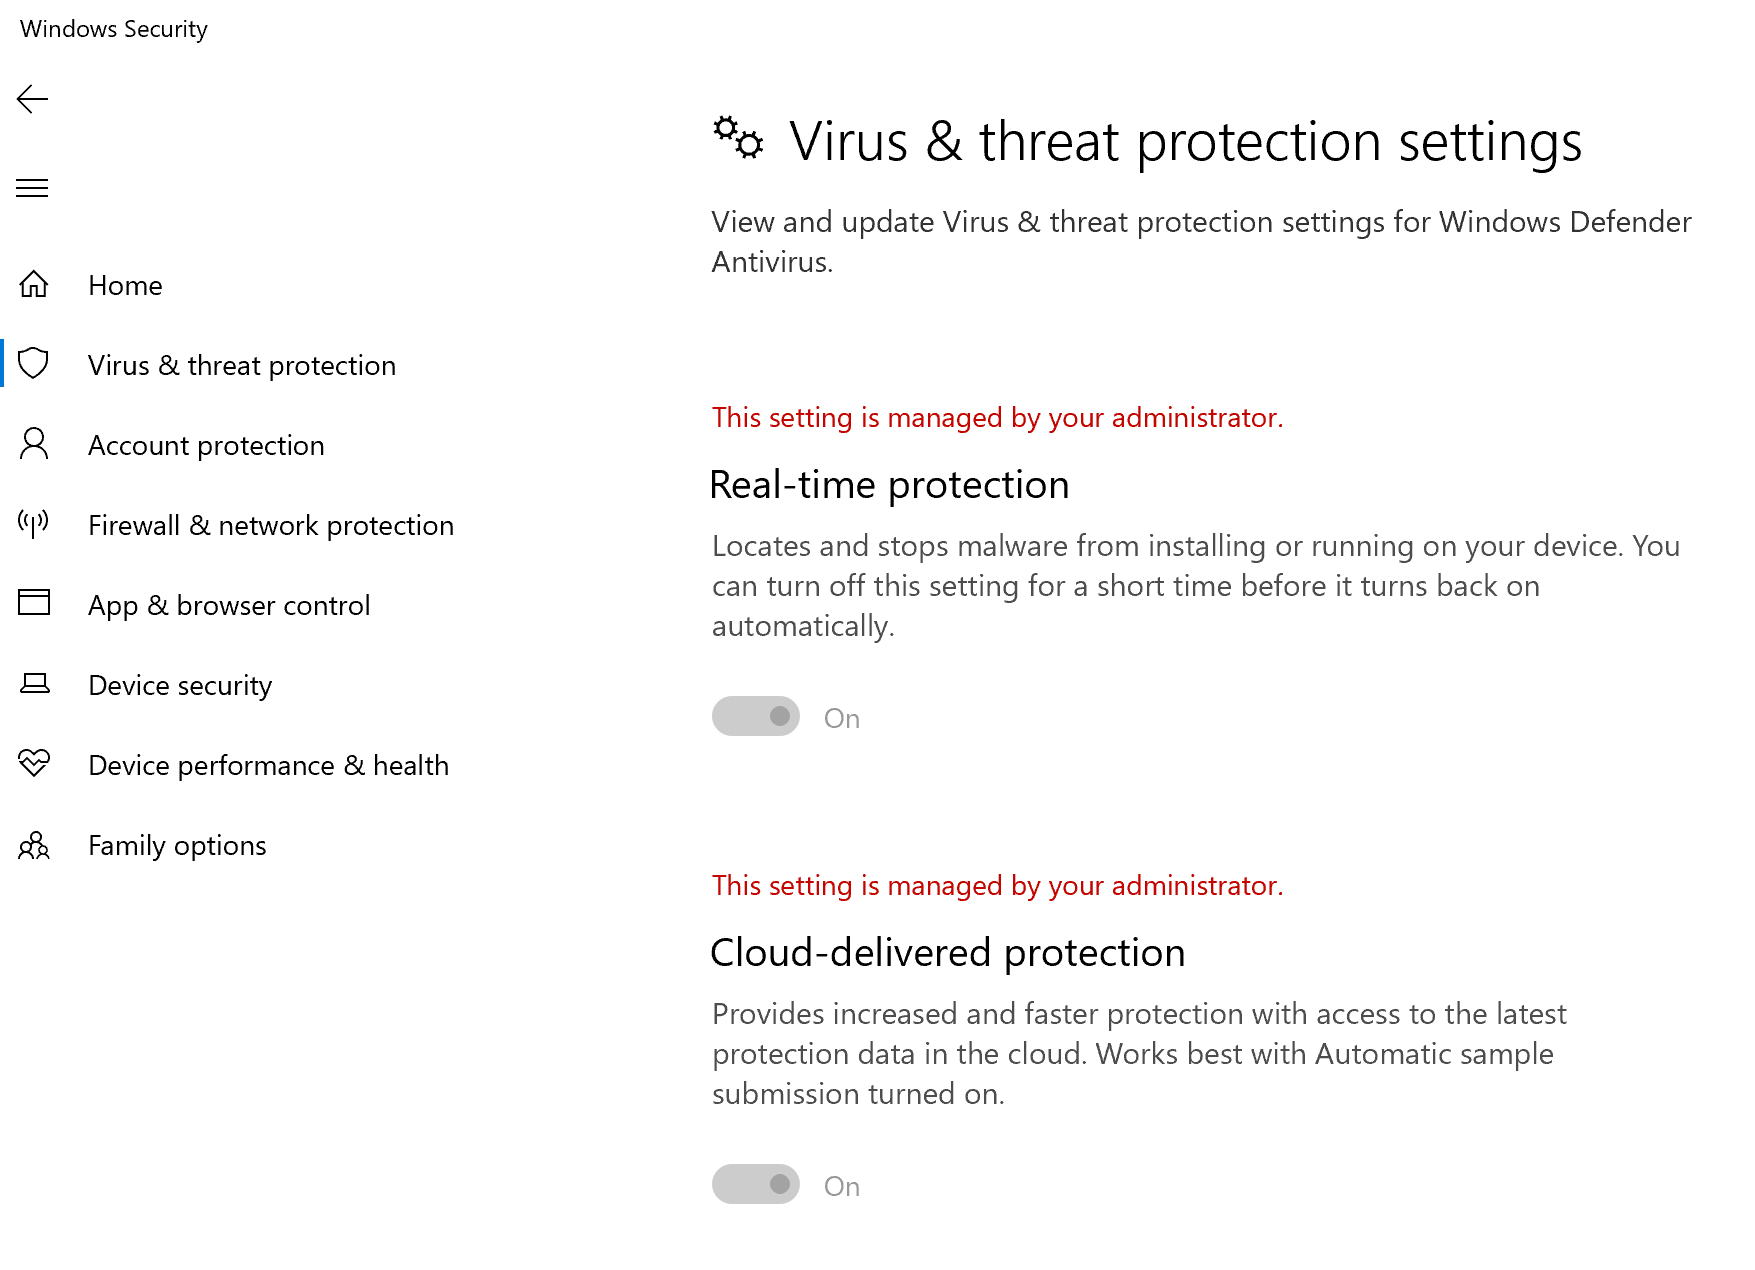
- After the policy has been applied, you should not be able to manually manage the settings.
Note
In the following image Turn on cloud-delivered protection and Turn on real-time protection are being shown as managed.
Confirm Attack Surface Reduction – Attack surface reduction rules
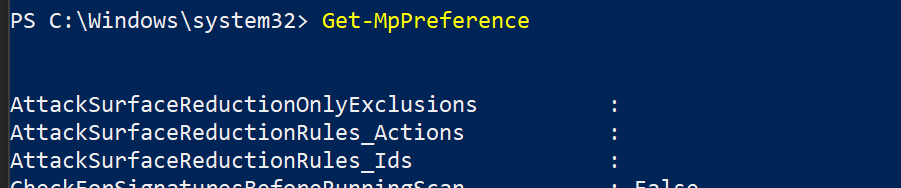
- Before applying the policy on a test device, pen a PowerShell Window and type
Get-MpPreference. - This should respond with the following lines with no content:
AttackSurfaceReductionOnlyExclusions:
AttackSurfaceReductionRules_Actions:
AttackSurfaceReductionRules_Ids:
- After applying the policy on a test device, open a PowerShell Windows and type
Get-MpPreference. - This should respond with the following lines with content as shown below:

Confirm Attack Surface Reduction – Web Protection
- On the test device, open a PowerShell Windows and type
(Get-MpPreference).EnableNetworkProtection. - This should respond with a 0 as shown below.

- After applying the policy, open a PowerShell Windows and type
(Get-MpPreference).EnableNetworkProtection. - This should respond with a 1 as shown below.
