This topic describes how to deploy Microsoft Defender for Endpoint on macOS through Intune. A successful deployment requires the completion of all of the following steps:
- Download the onboarding package
- Client device setup
- Approve system extensions
- Create System Configuration profiles
- Publish application
Prerequisites and system requirements
Before you get started, see the main Microsoft Defender for Endpoint on macOS page for a description of prerequisites and system requirements for the current software version.
Overview
The following table summarizes the steps you would need to take to deploy and manage Microsoft Defender for Endpoint on Macs, via Intune. More detailed steps are available below.
| Step | Sample file names | BundleIdentifier |
|---|---|---|
| Download the onboarding package | WindowsDefenderATPOnboarding__MDATP_wdav.atp.xml | com.microsoft.wdav.atp |
| Approve System Extension for Microsoft Defender for Endpoint | MDATP_SysExt.xml | N/A |
| Approve Kernel Extension for Microsoft Defender for Endpoint | MDATP_KExt.xml | N/A |
| Grant full disk access to Microsoft Defender for Endpoint | MDATP_tcc_Catalina_or_newer.xml | com.microsoft.wdav.tcc |
| Network Extension policy | MDATP_NetExt.xml | N/A |
| Configure Microsoft AutoUpdate (MAU) | MDATP_Microsoft_AutoUpdate.xml | com.microsoft.autoupdate2 |
Microsoft Defender for Endpoint configuration settingsNote: If you’re planning to run a third-party AV for macOS, set passiveMode to true. |
MDATP_WDAV_and_exclusion_settings_Preferences.xml | com.microsoft.wdav |
| Configure Microsoft Defender for Endpoint and MS AutoUpdate (MAU) notifications | MDATP_MDAV_Tray_and_AutoUpdate2.mobileconfig | com.microsoft.autoupdate2 or com.microsoft.wdav.tray |
Download the onboarding package
Download the onboarding packages from Microsoft 365 Defender portal:
- In Microsoft 365 Defender portal, go to Settings > Endpoints > Device management > Onboarding.
- Set the operating system to macOS and the deployment method to Mobile Device Management / Microsoft Intune.
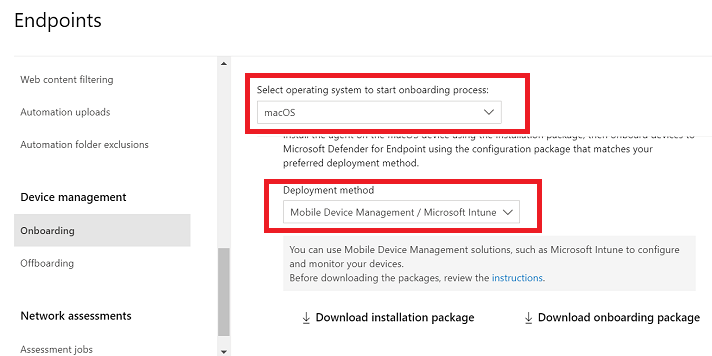
- Select Download onboarding package. Save it as WindowsDefenderATPOnboardingPackage.zip to the same directory.
- Extract the contents of the .zip file:
Bash
unzip WindowsDefenderATPOnboardingPackage.zipOutputArchive: WindowsDefenderATPOnboardingPackage.zip warning: WindowsDefenderATPOnboardingPackage.zip appears to use backslashes as path separators inflating: intune/kext.xml inflating: intune/WindowsDefenderATPOnboarding.xml inflating: jamf/WindowsDefenderATPOnboarding.plist
Create System Configuration profiles
The next step is to create system configuration profiles that Microsoft Defender for Endpoint needs. In the Microsoft Endpoint Manager admin center, open Devices > Configuration profiles.
Onboarding blob
This profile contains a license information for Microsoft Defender for Endpoint, without it it will report that it is not licensed.
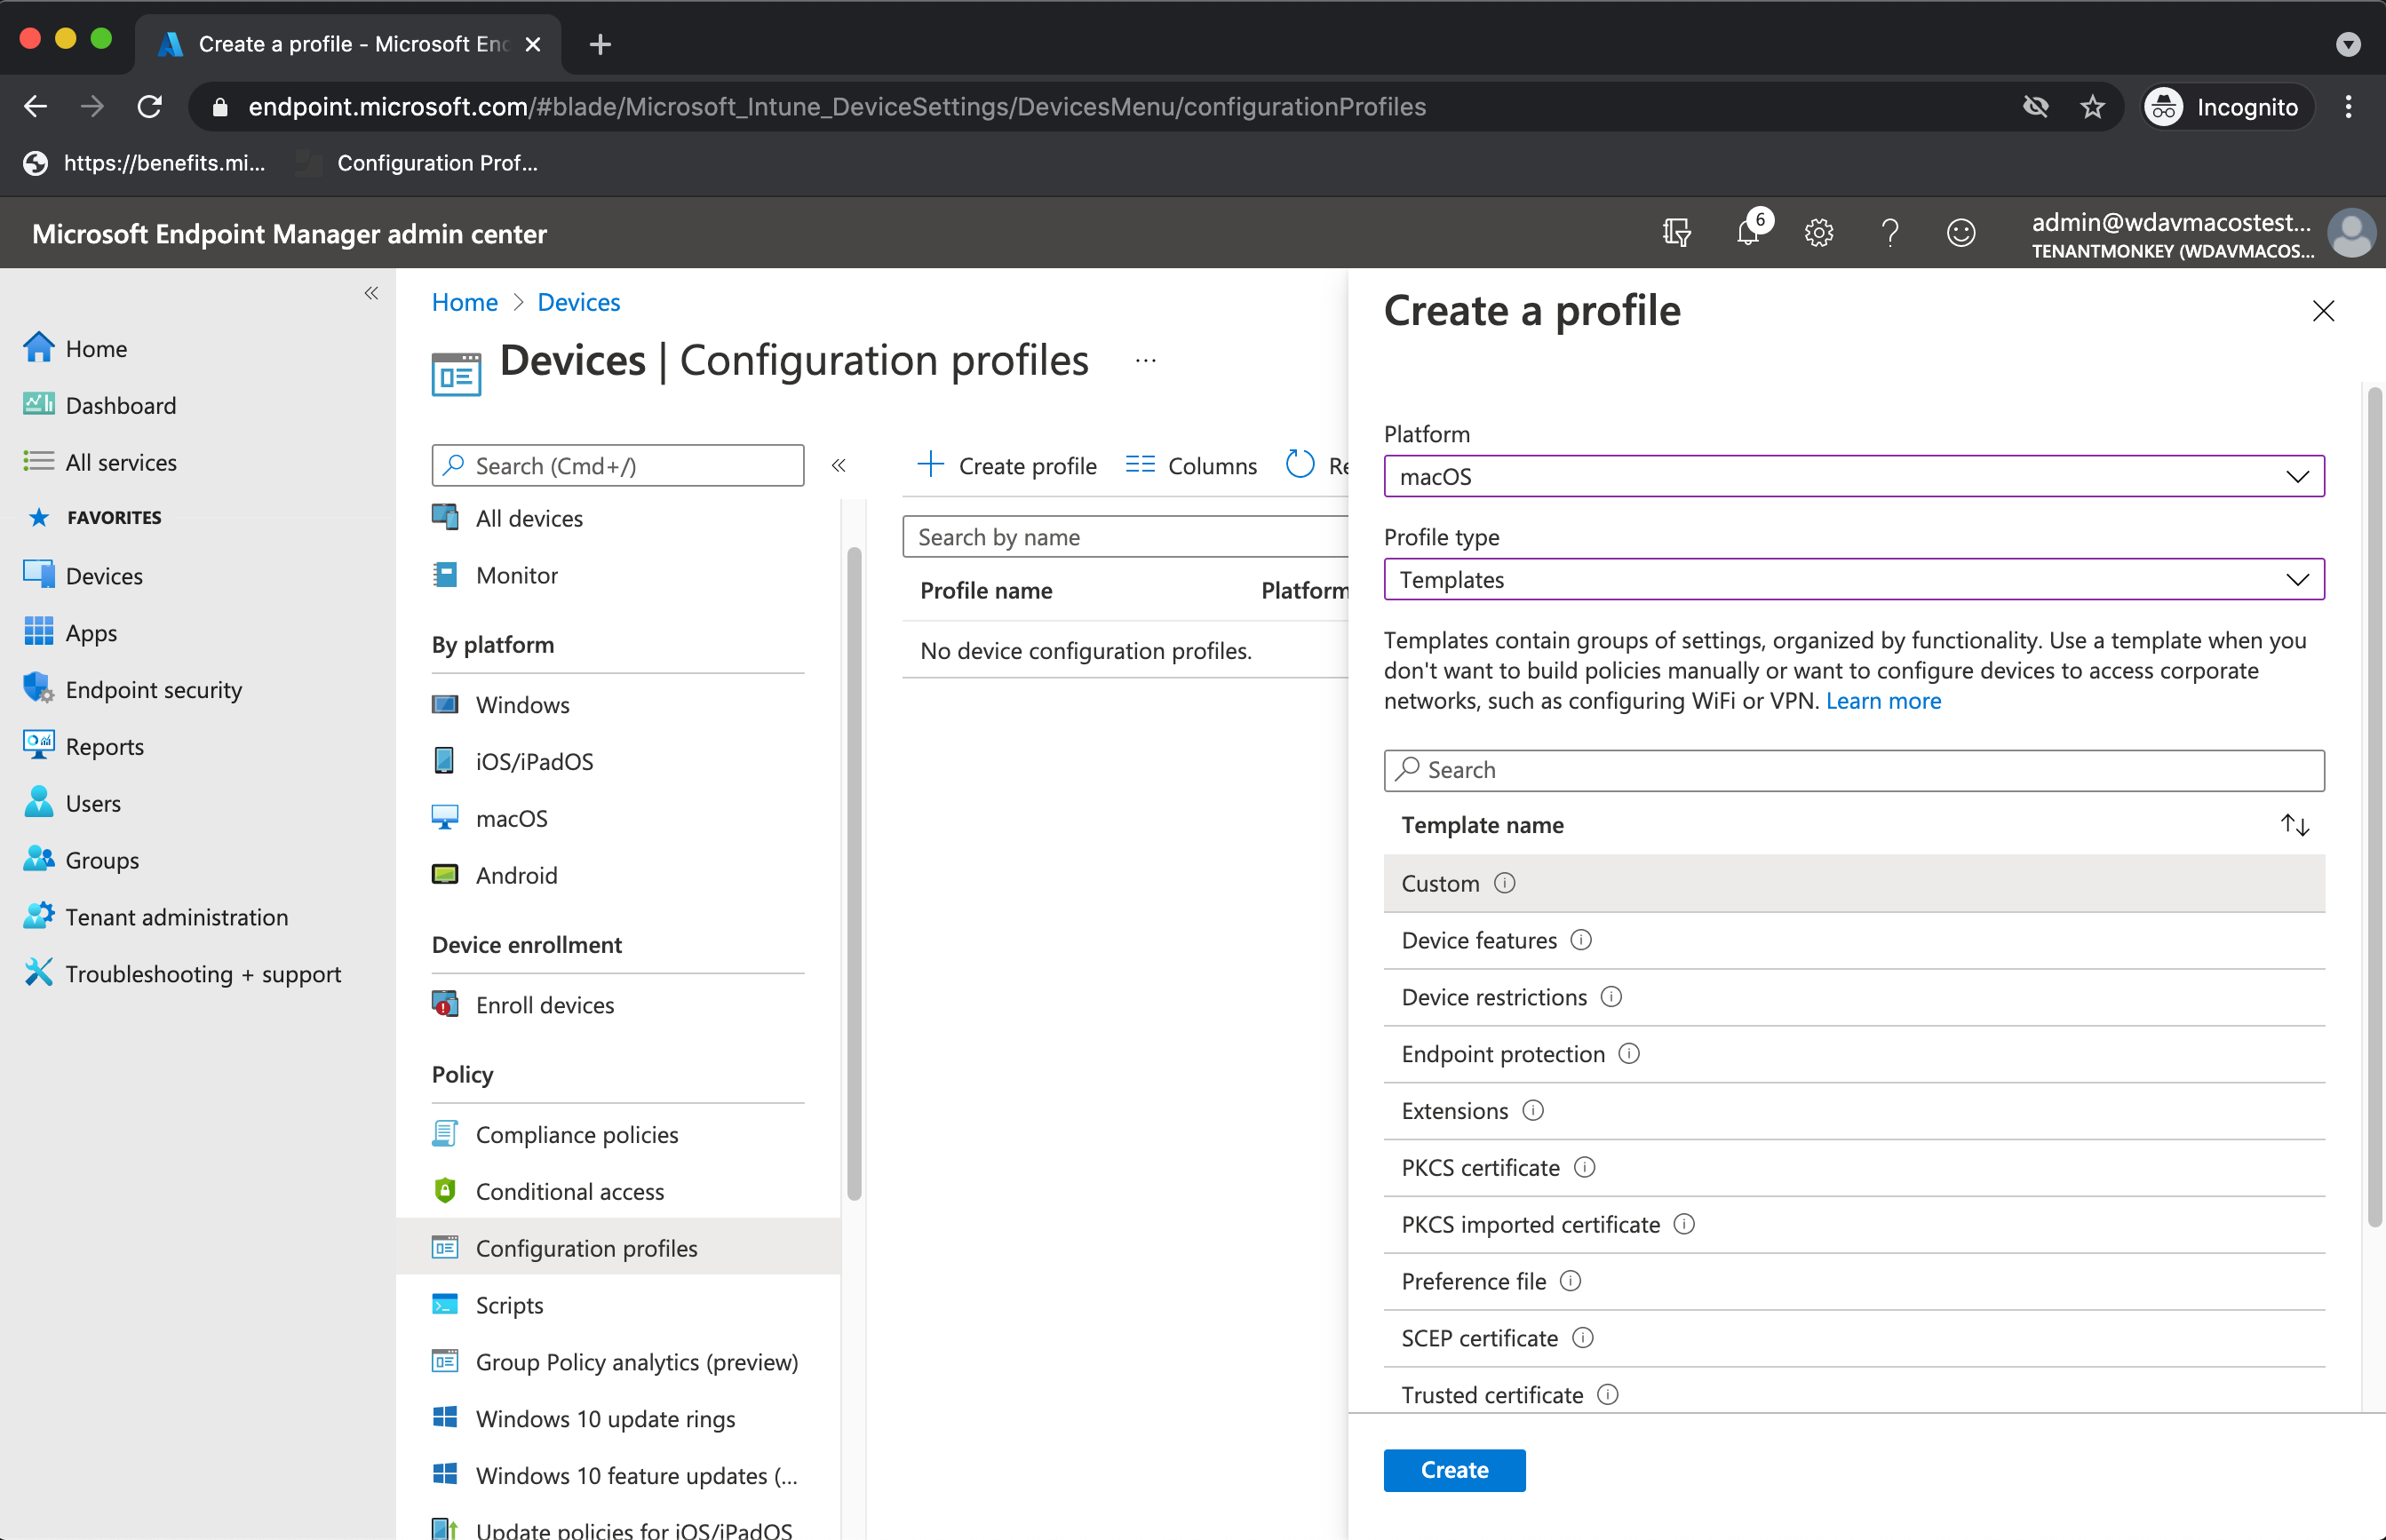
- Select Create Profile under Configuration Profiles.
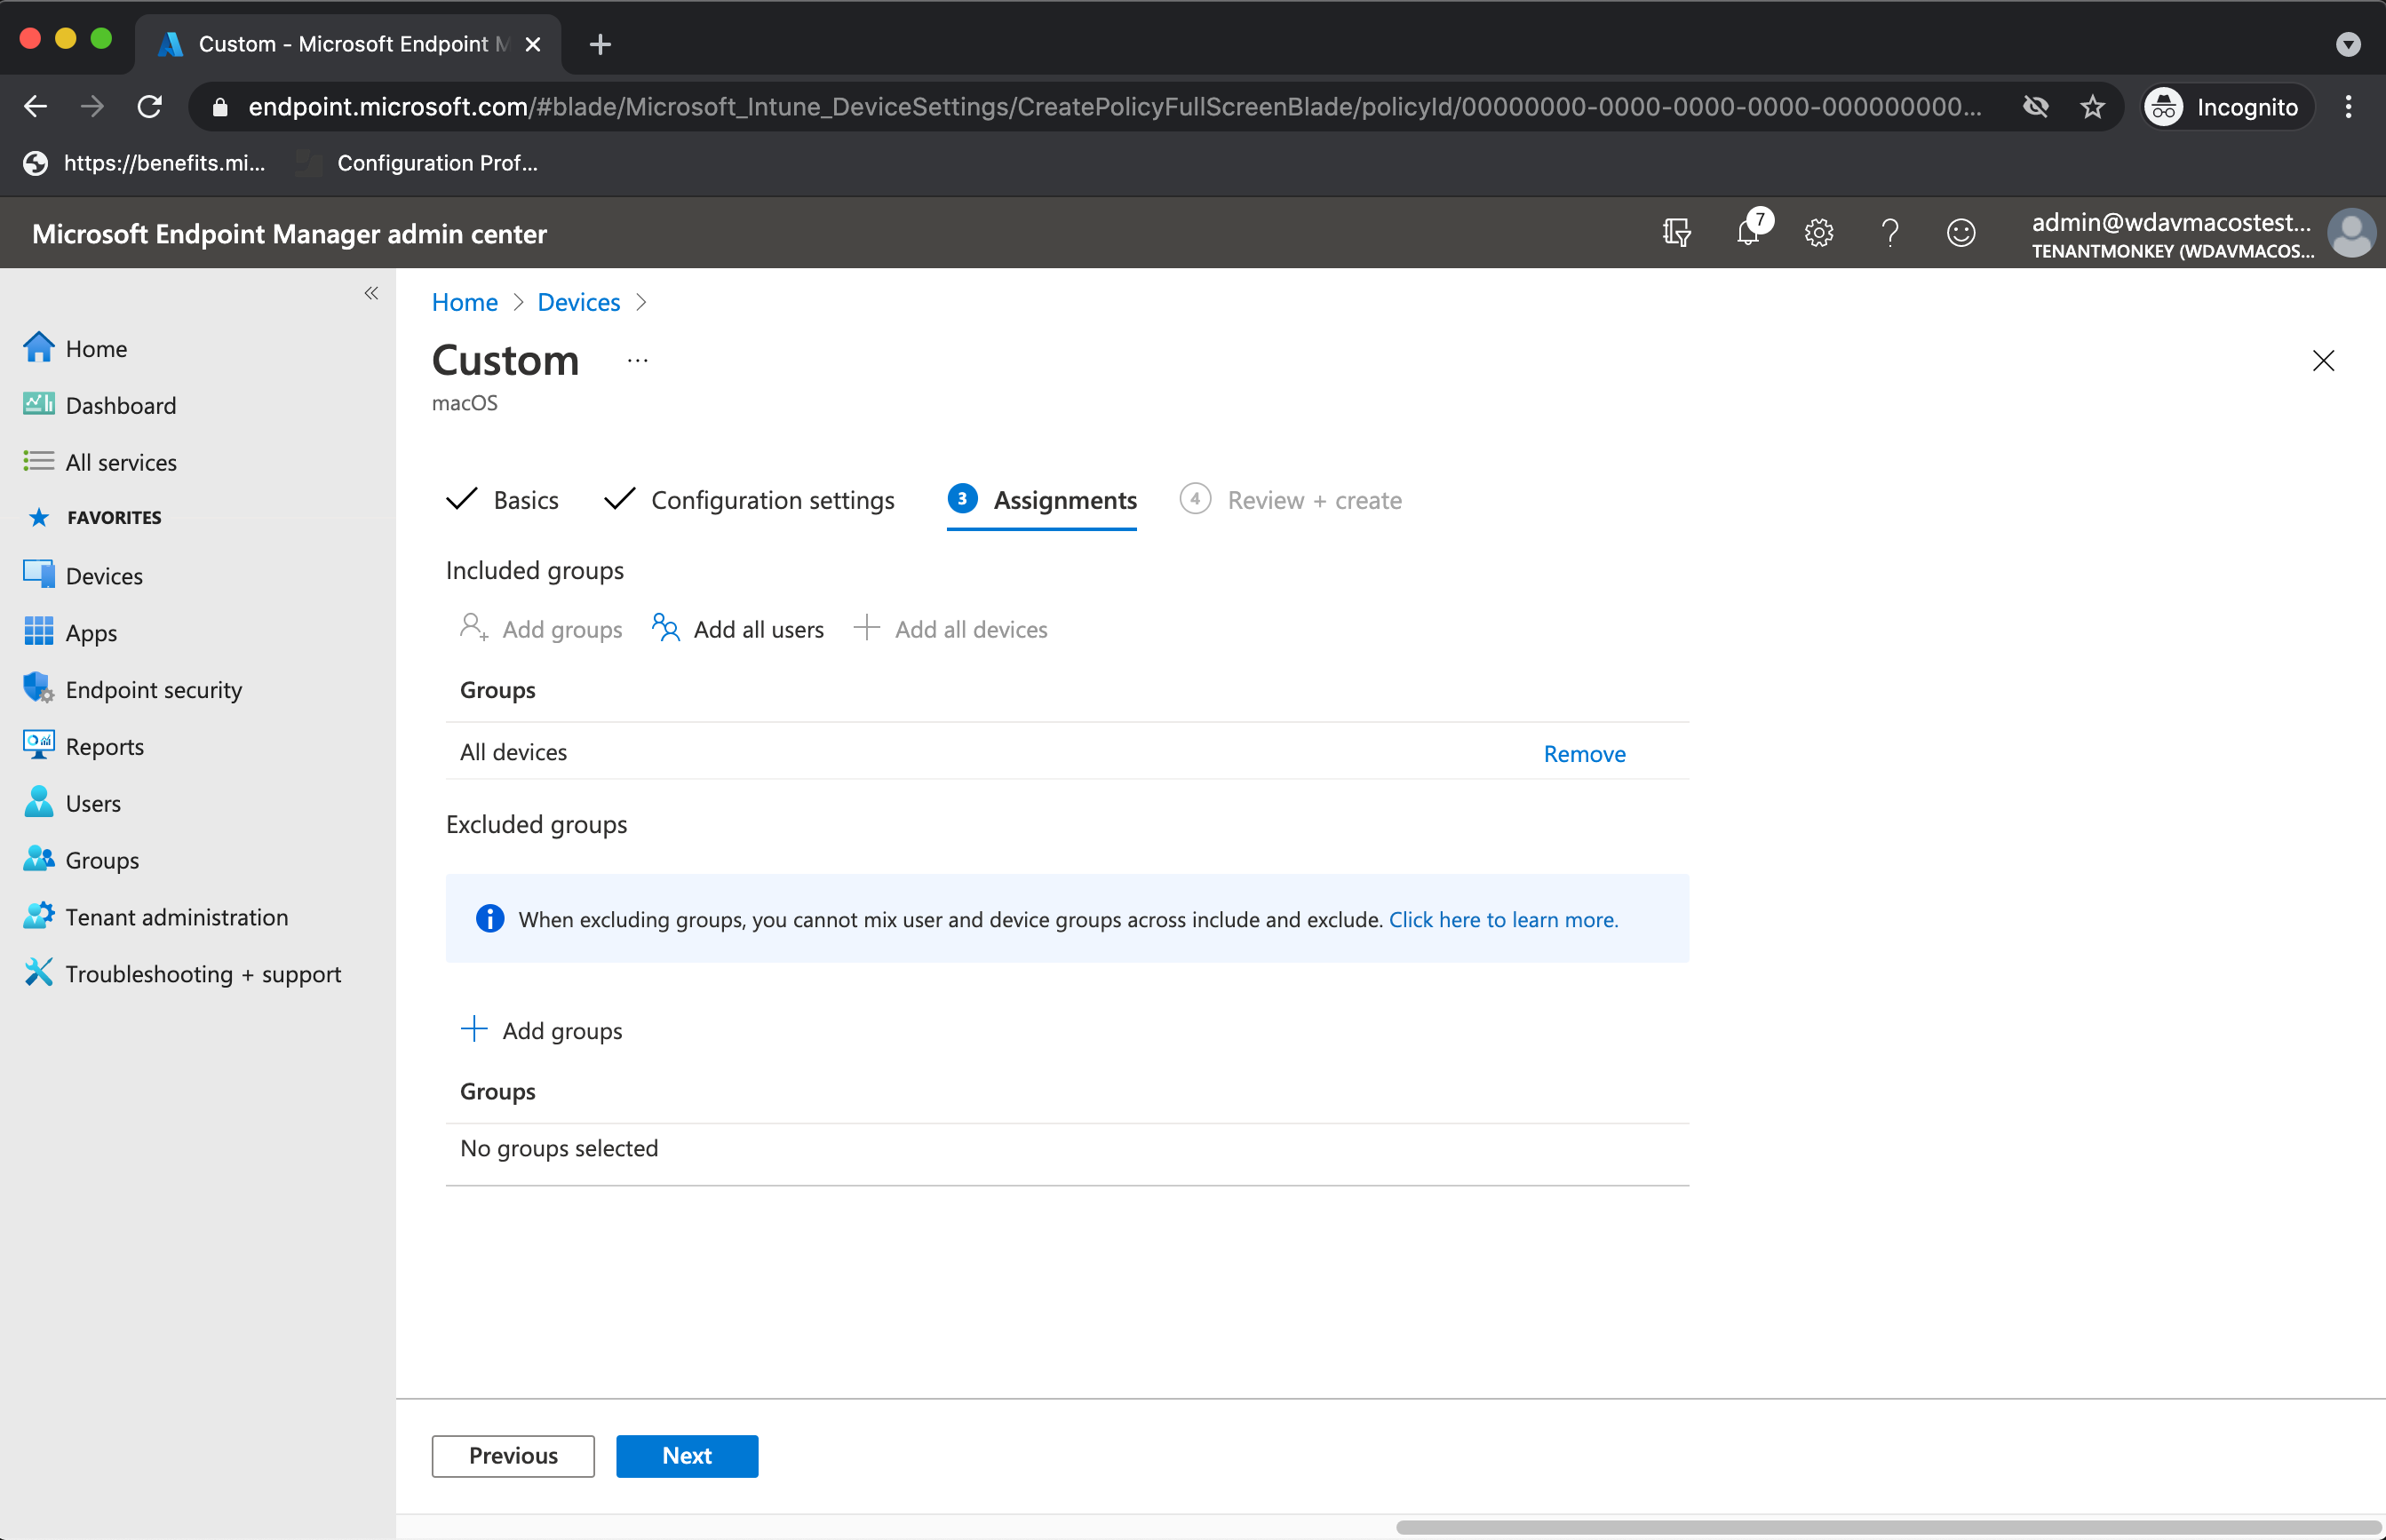
- Select Platform=macOS, Profile type=Templates. Template name=Custom. Click Create.
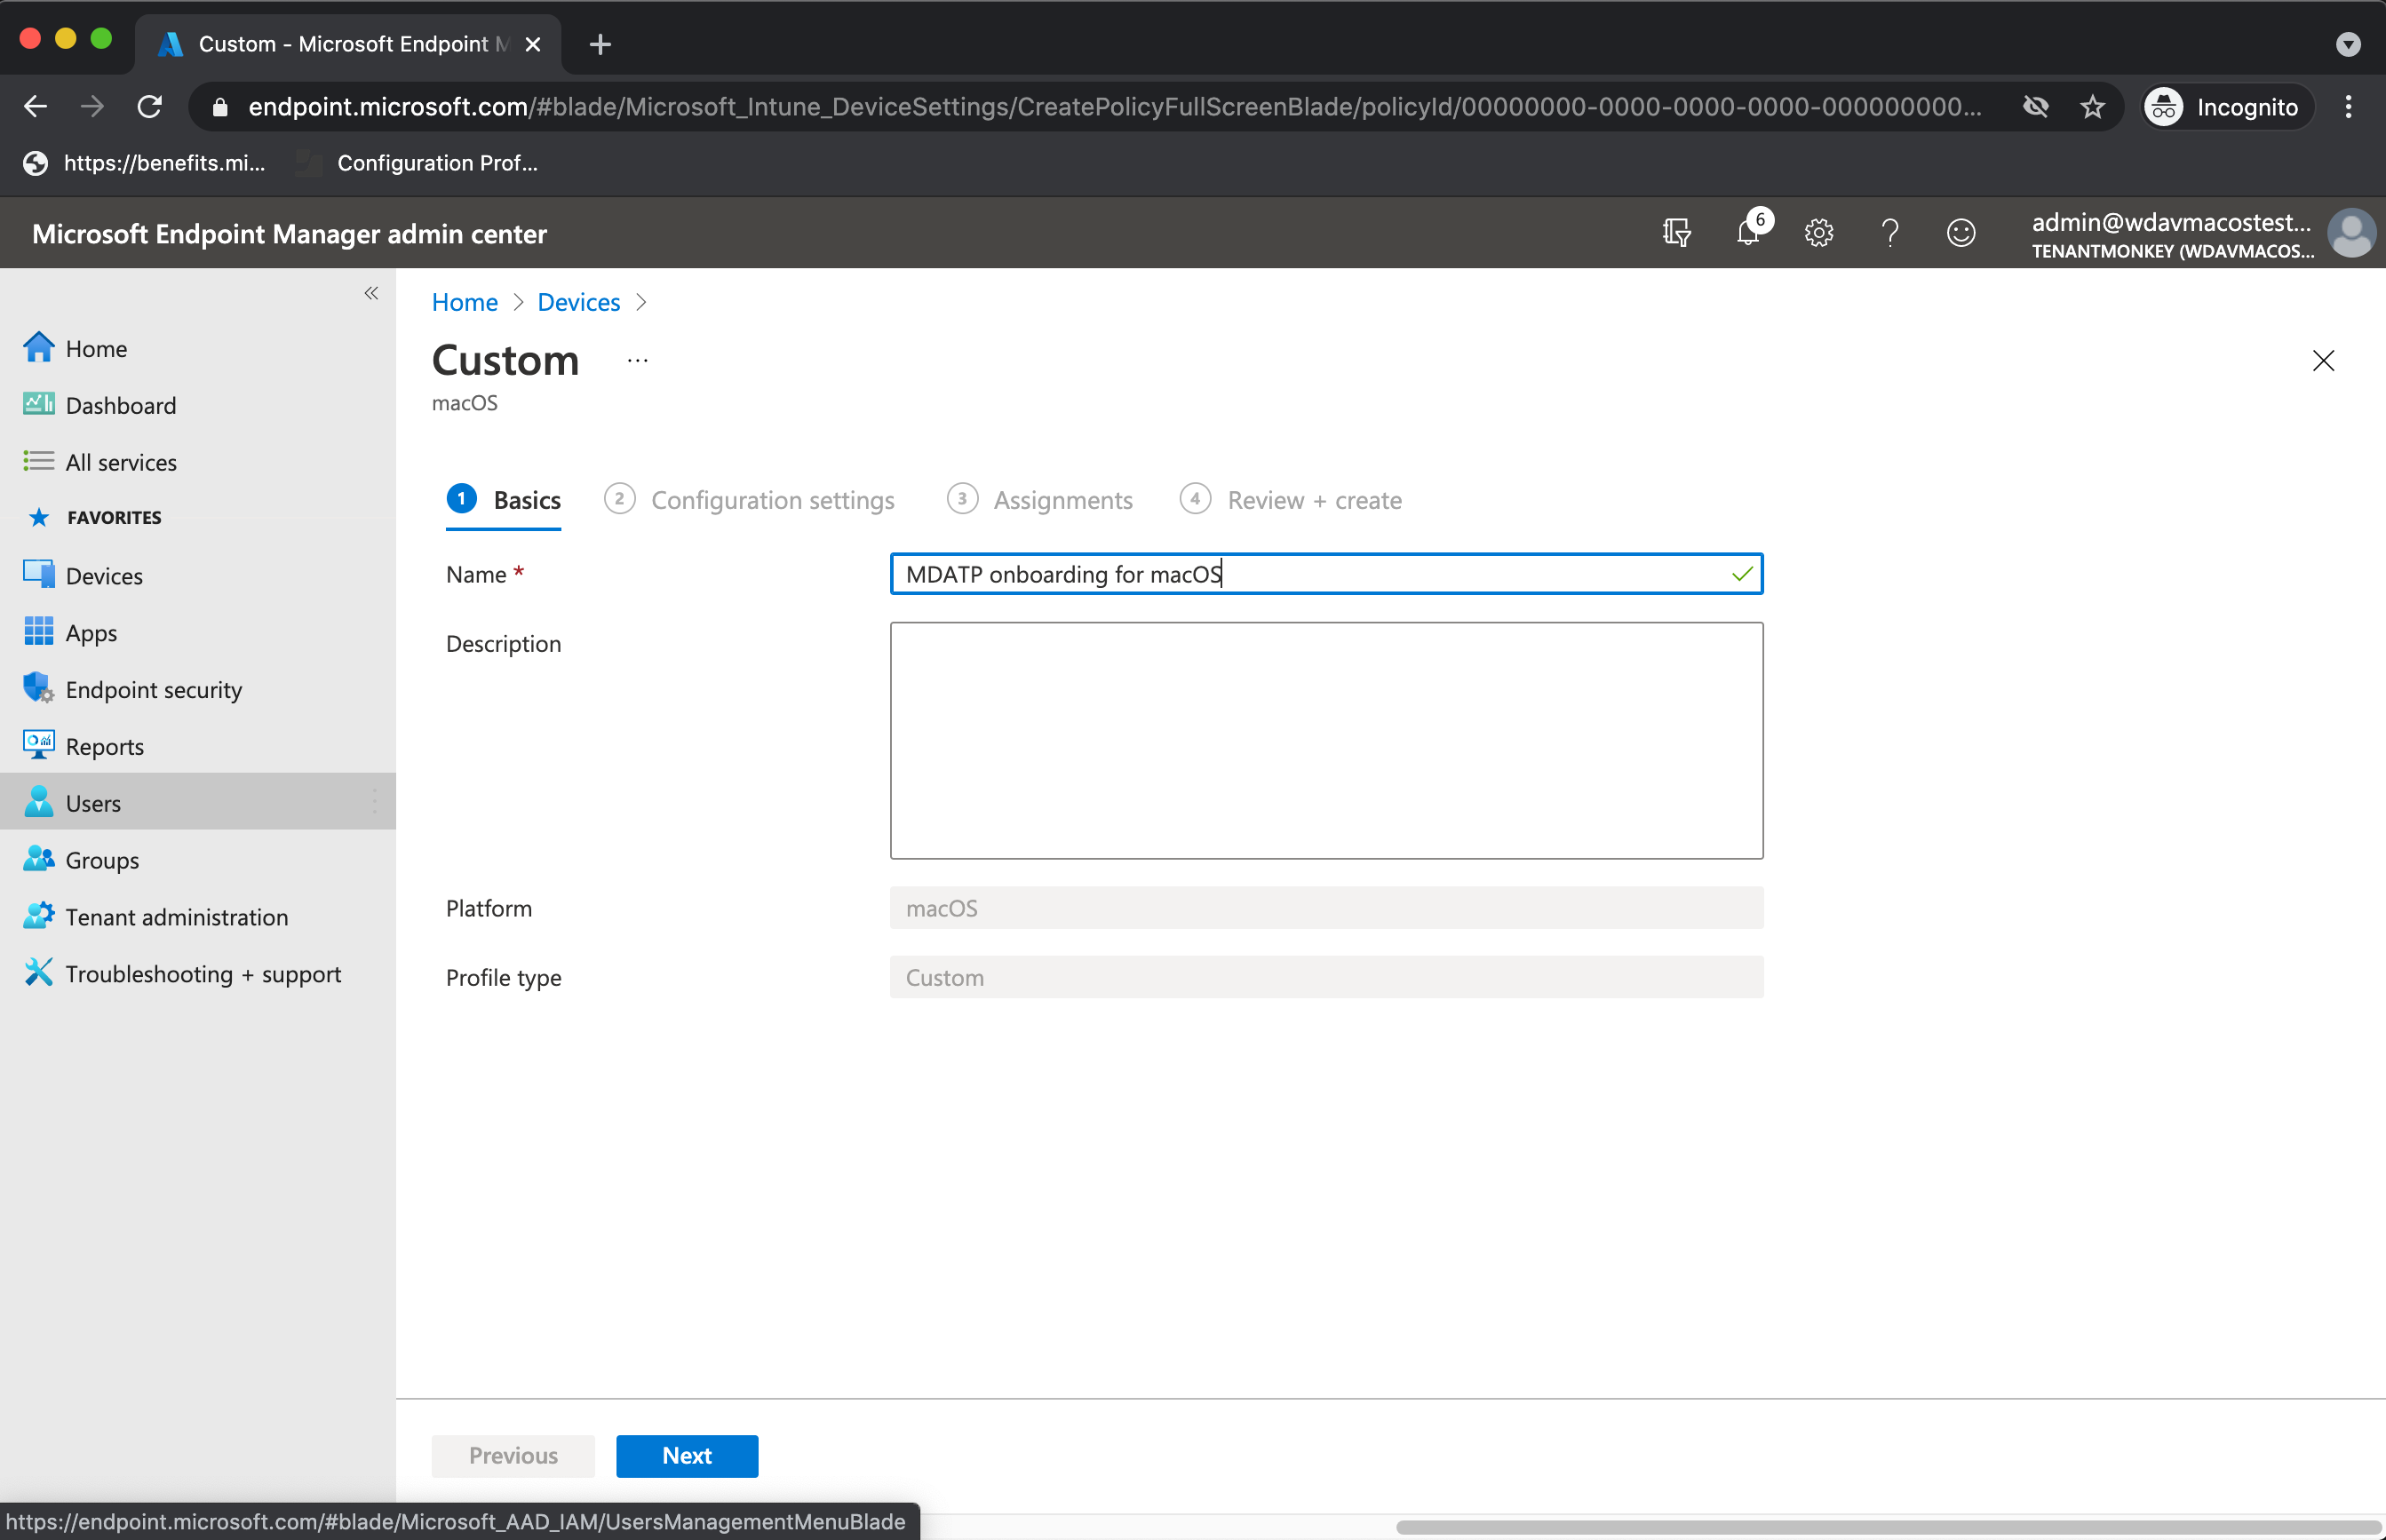
- Choose a name for the profile, e.g., “Defender for Cloud or Endpoint onboarding for macOS”. Click Next.
- Choose a name for the configuration profile name, e.g., “Defender for Endpoint onboarding for macOS”.
- Select intune/WindowsDefenderATPOnboarding.xml that you extracted from the onboarding package above as configuration profile file.
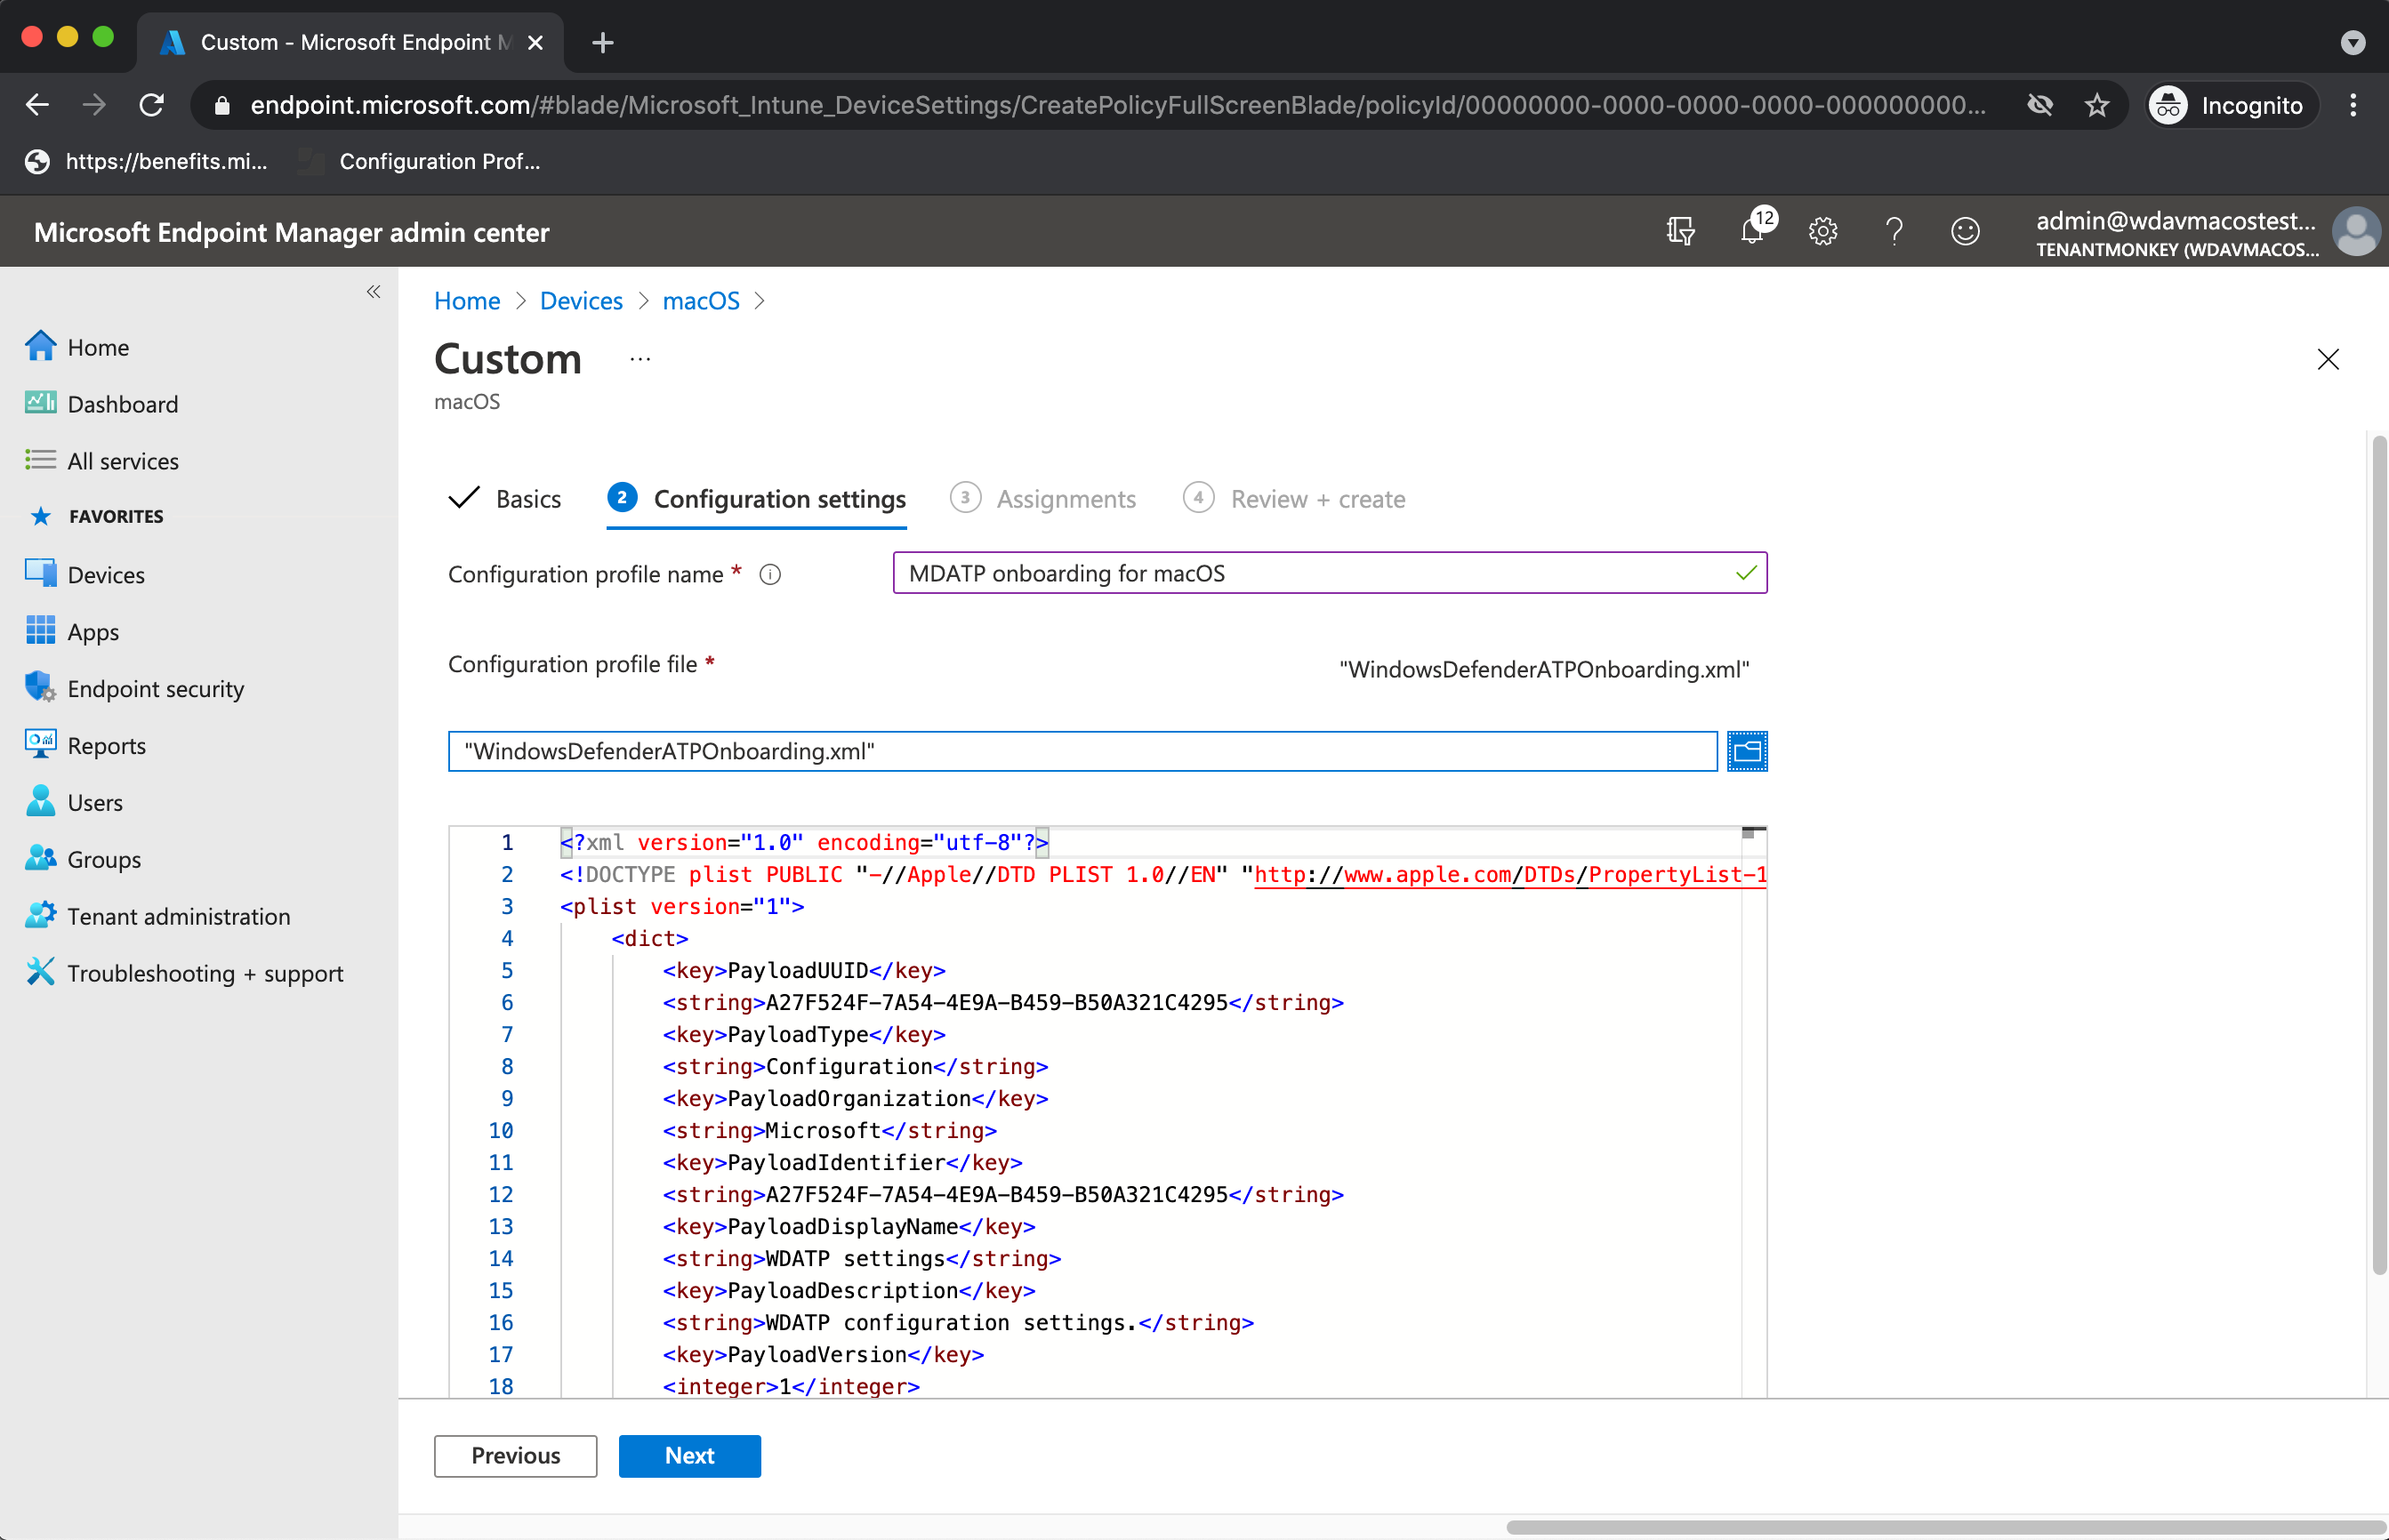
- Click Next.
- Assign devices on the Assignment tab. Click Next.

- Review and Create.
- Open Devices > Configuration profiles, you can see your created profile there.
Approve System Extensions
This profile is needed for macOS 10.15 (Catalina) or newer. It will be ignored on older macOS.
- Select Create Profile under Configuration Profiles.
- Select Platform=macOS, Profile type=Templates. Template name=Extensions. Click Create.
- In the Basics tab, give a name to this new profile.
- In the Configuration settings tab, expand System Extensions add the following entries in the Allowed system extensions section:
TABLE 2 Bundle identifier Team identifier com.microsoft.wdav.epsext UBF8T346G9 com.microsoft.wdav.netext UBF8T346G9 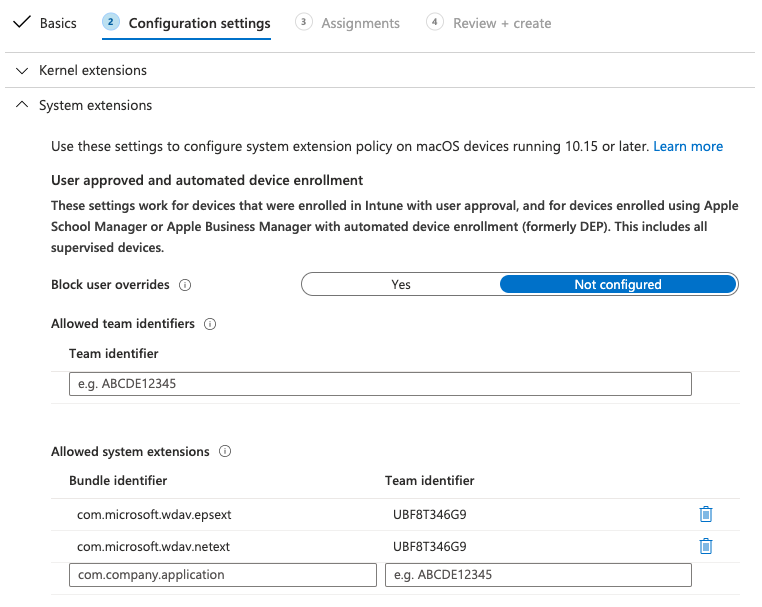
- In the Assignments tab, assign this profile to All Users & All devices.
- Review and create this configuration profile.
Kernel Extensions
This profile is needed for macOS 10.15 (Catalina) or older. It will be ignored on newer macOS.
Caution
Apple Silicon (M1) devices do not support KEXT. Installation of a configuration profile consisting KEXT policies will fail on these devices.
- Select Create Profile under Configuration Profiles.
- Select Platform=macOS, Profile type=Templates. Template name=Extensions. Click Create.
- In the Basics tab, give a name to this new profile.
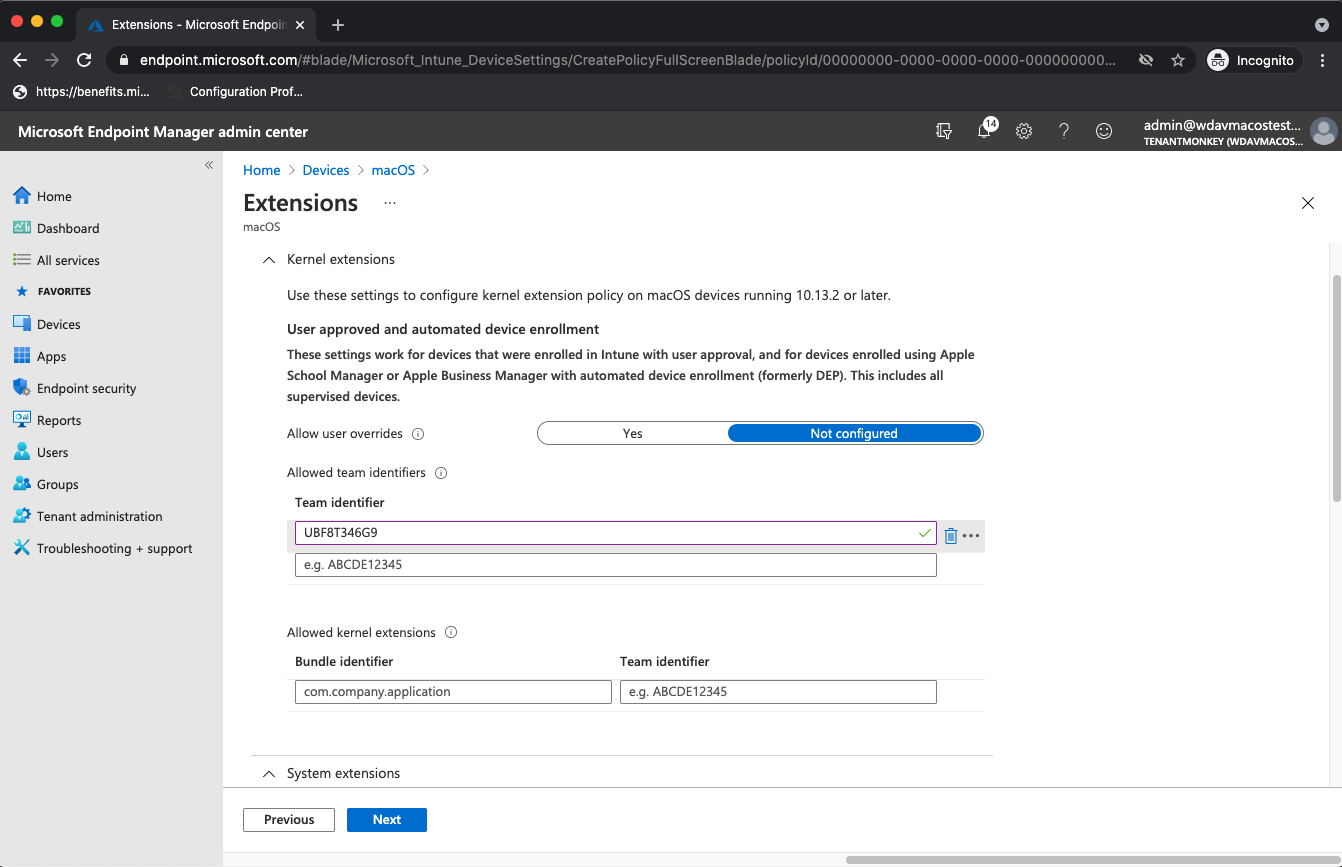
- In the Configuration settings tab, expand Kernel Extensions.
- Set Team identifier to UBF8T346G9 and click Next.
- In the Assignments tab, assign this profile to All Users & All devices.
- Review and create this configuration profile.
Full Disk Access
Caution
macOS 10.15 (Catalina) contains new security and privacy enhancements. Beginning with this version, by default, applications are not able to access certain locations on disk (such as Documents, Downloads, Desktop, etc.) without explicit consent. In the absence of this consent, Microsoft Defender for Endpoint is not able to fully protect your device.
This configuration profile grants Full Disk Access to Microsoft Defender for Endpoint. If you previously configured Microsoft Defender for Endpoint through Intune, we recommend you update the deployment with this configuration profile.
Download fulldisk.mobileconfig from our GitHub repository.
Follow the instructions for Onboarding blob from above, using “Defender for Endpoint Full Disk Access” as profile name, and downloaded fulldisk.mobileconfig as Configuration profile name.
Network Filter
As part of the Endpoint Detection and Response capabilities, Microsoft Defender for Endpoint on macOS inspects socket traffic and reports this information to the Microsoft 365 Defender portal. The following policy allows the network extension to perform this functionality.
Download netfilter.mobileconfig from our GitHub repository.
Follow the instructions for Onboarding blob from above, using “Defender for Endpoint Network Filter” as profile name, and downloaded netfilter.mobileconfig as Configuration profile name.
Notifications
This profile is used to allow Microsoft Defender for Endpoint on macOS and Microsoft Auto Update to display notifications in UI on macOS 10.15 (Catalina) or newer.
Download notif.mobileconfig from our GitHub repository.
Follow the instructions for Onboarding blob from above, using “Defender for Endpoint Notifications” as profile name, and downloaded notif.mobileconfig as Configuration profile name.
View Status
Once the Intune changes are propagated to the enrolled devices, you can see them listed under Monitor > Device status:

Publish application
This step enables deploying Microsoft Defender for Endpoint to enrolled machines.
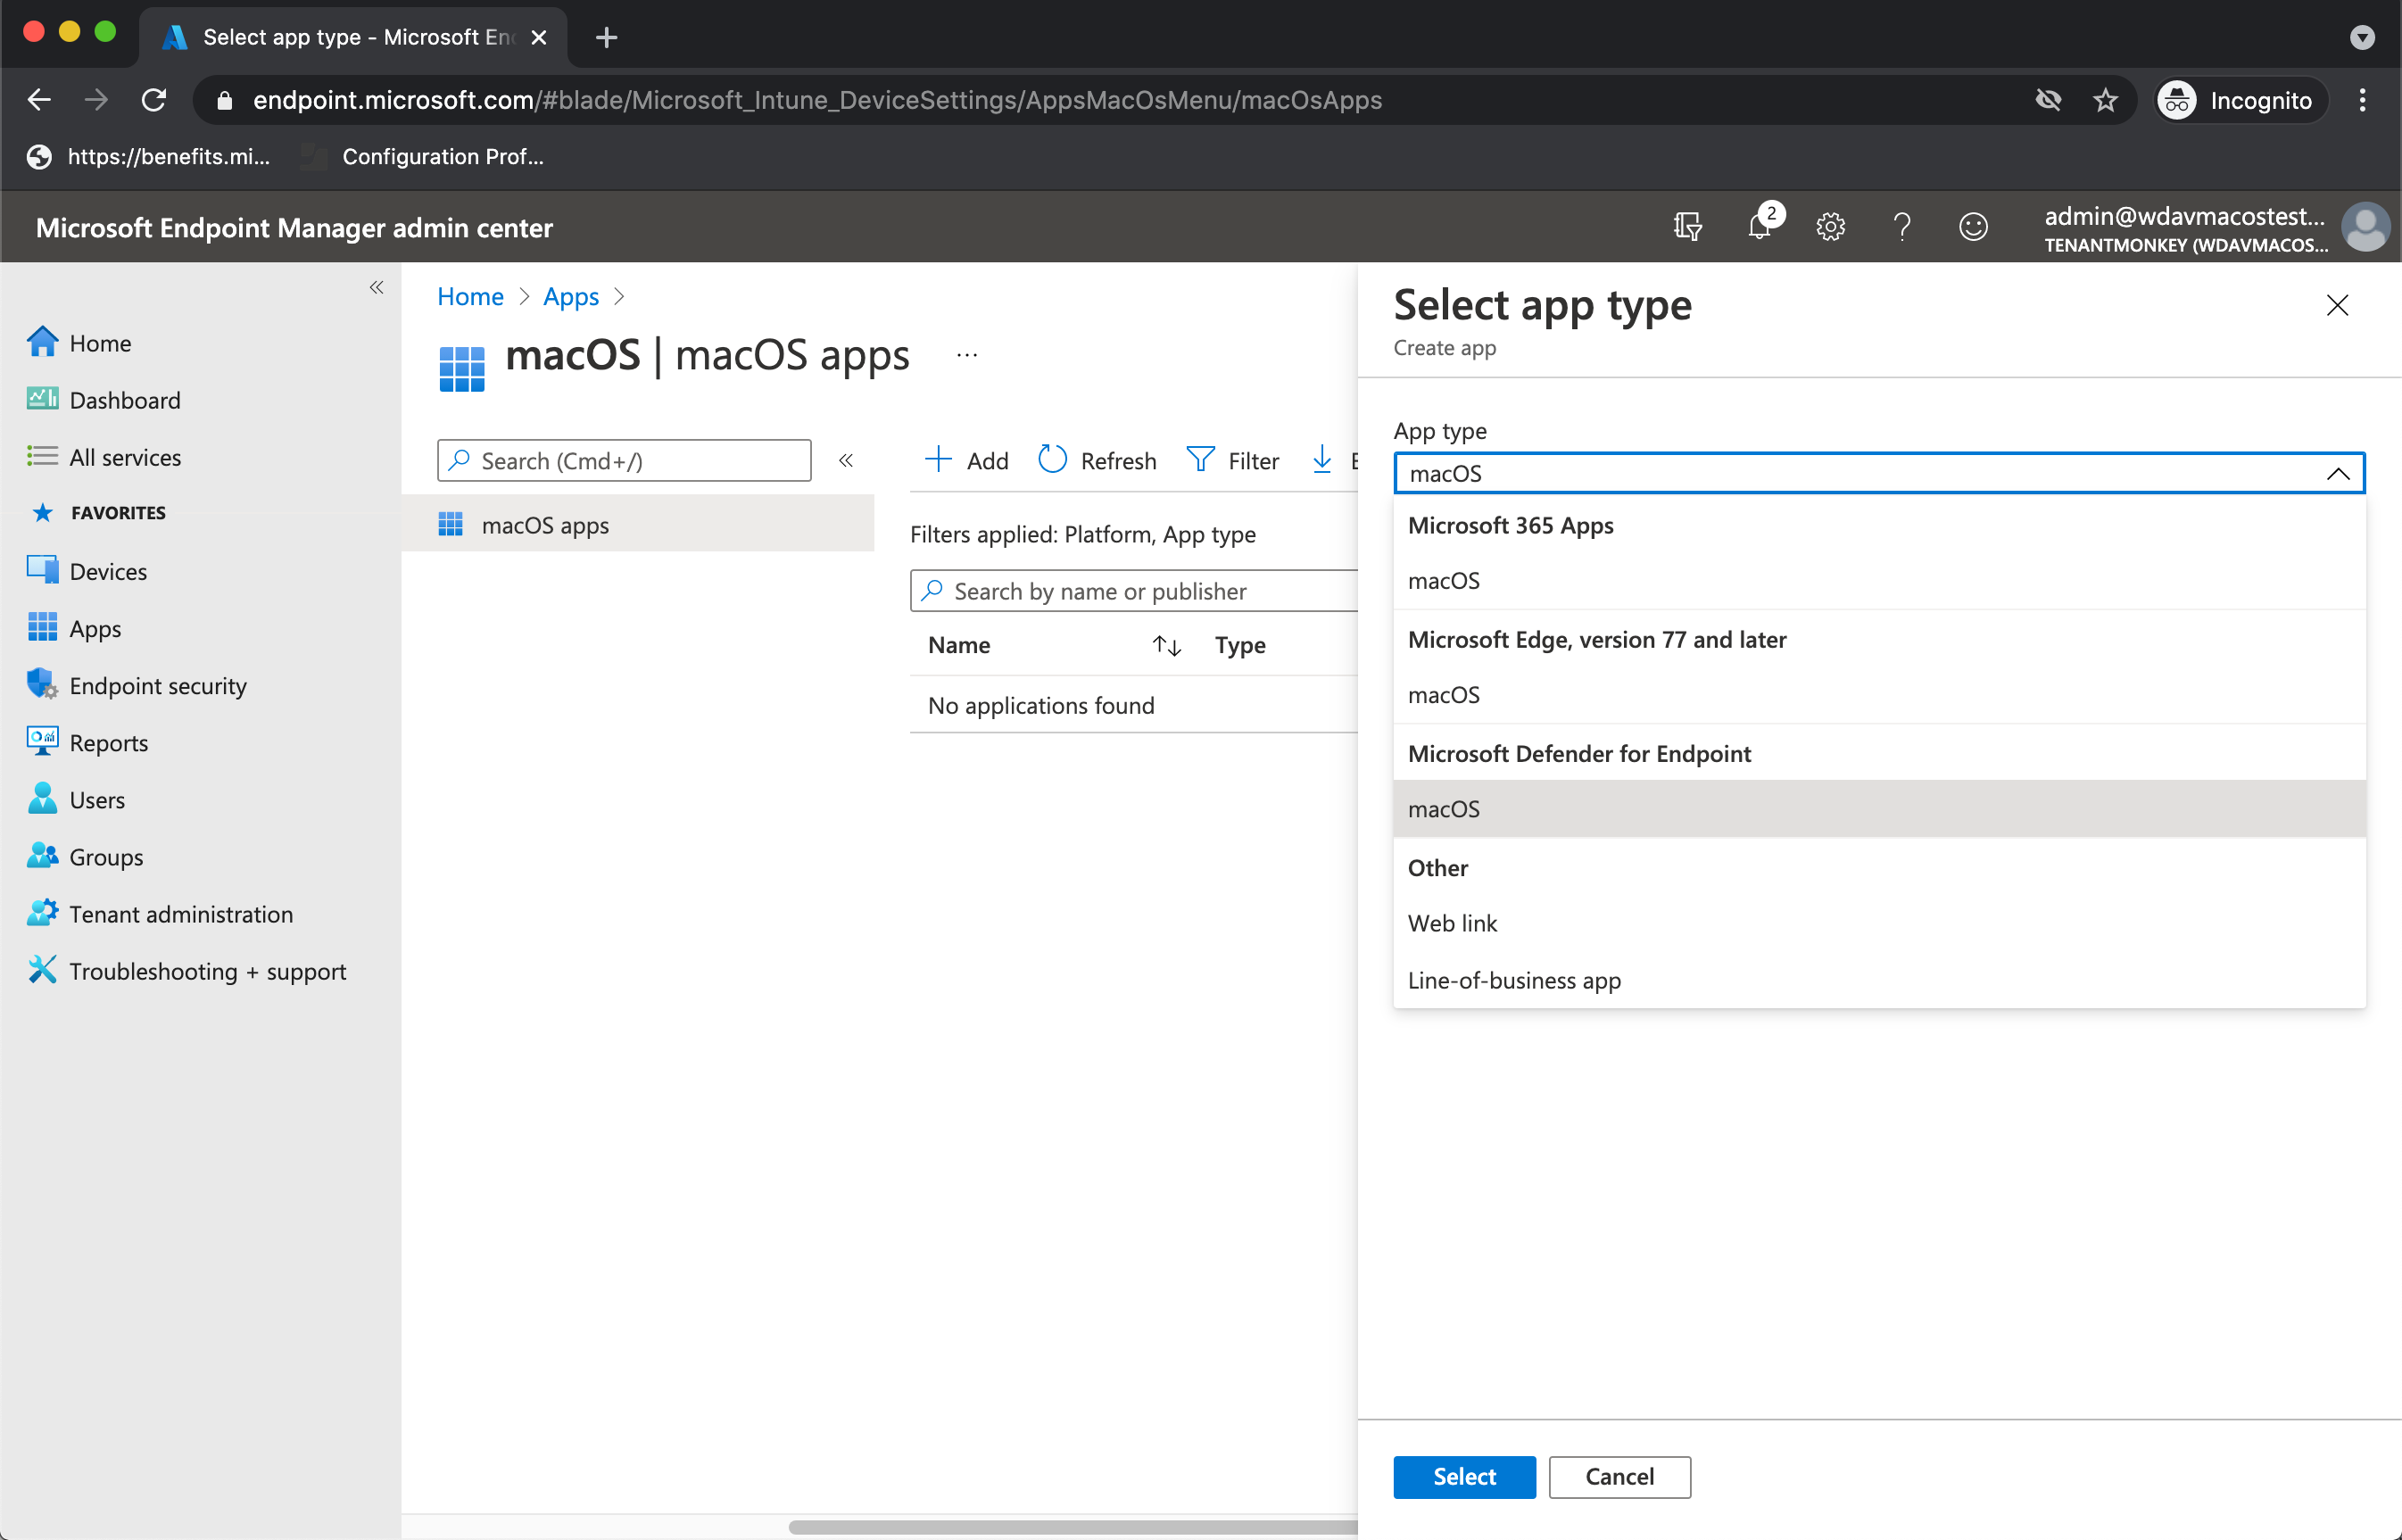
- In the Microsoft Endpoint Manager admin center, open Apps.
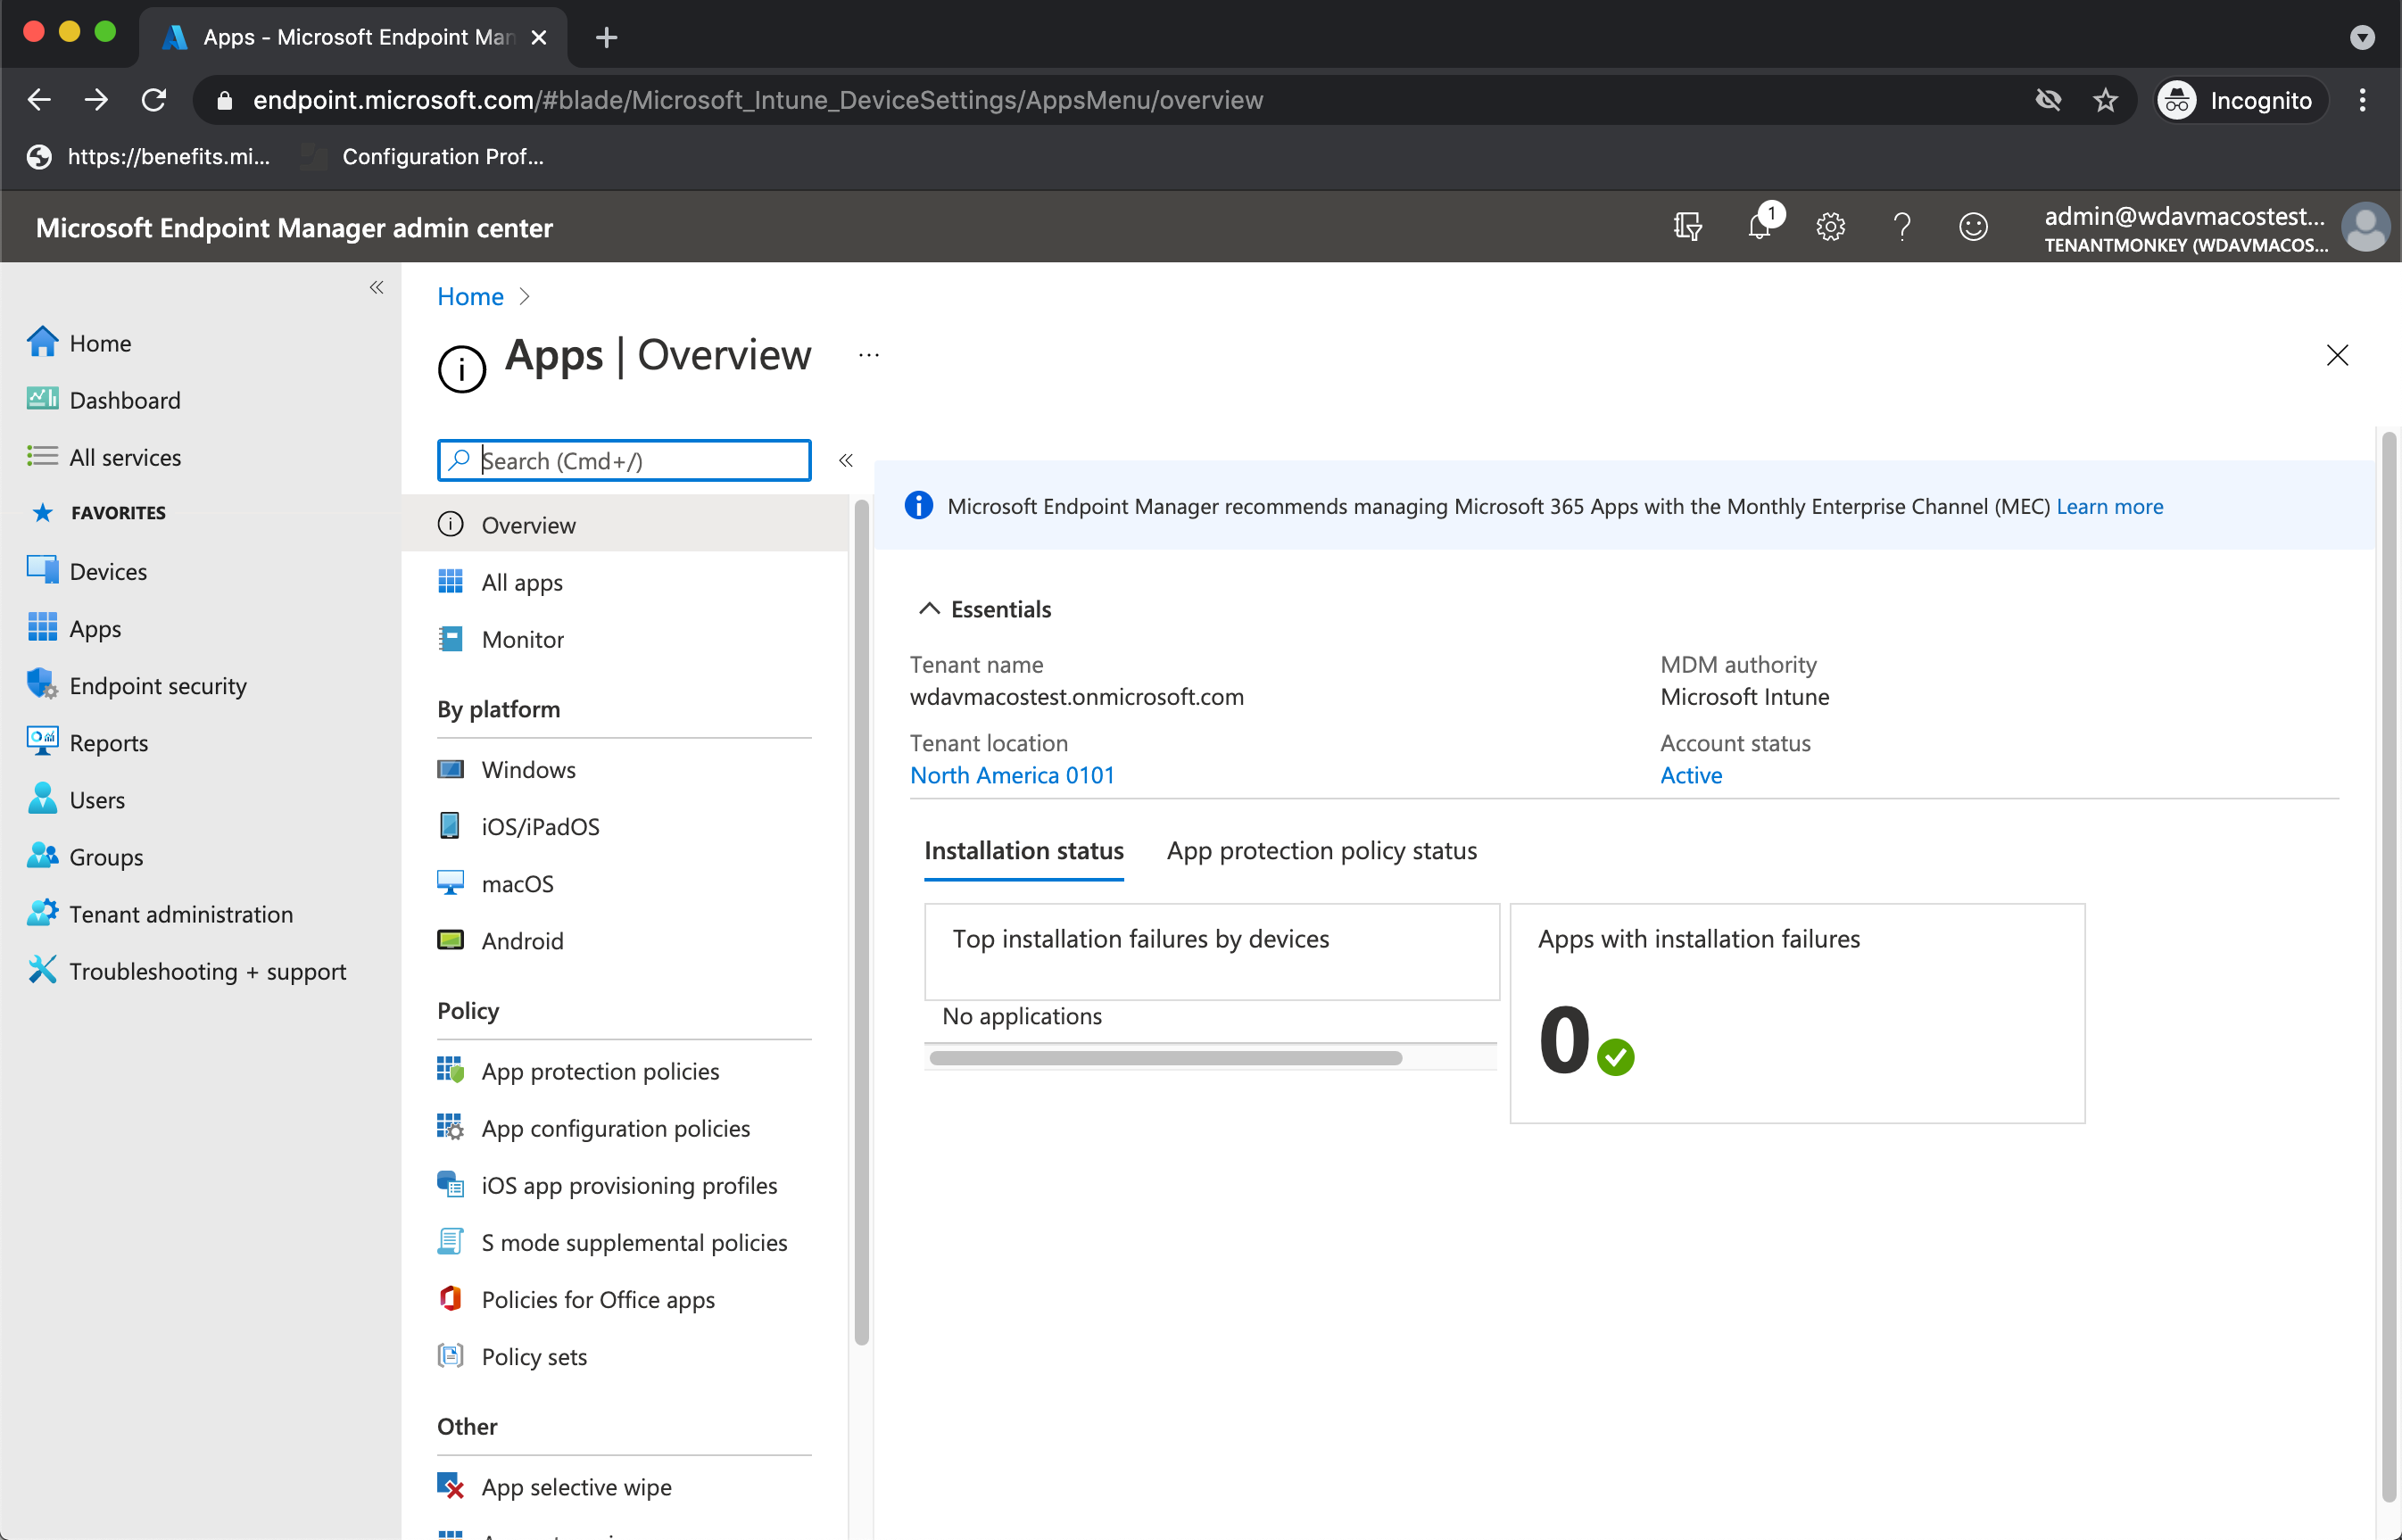
- Select By platform > macOS > Add.
- Choose App type=macOS, click Select.
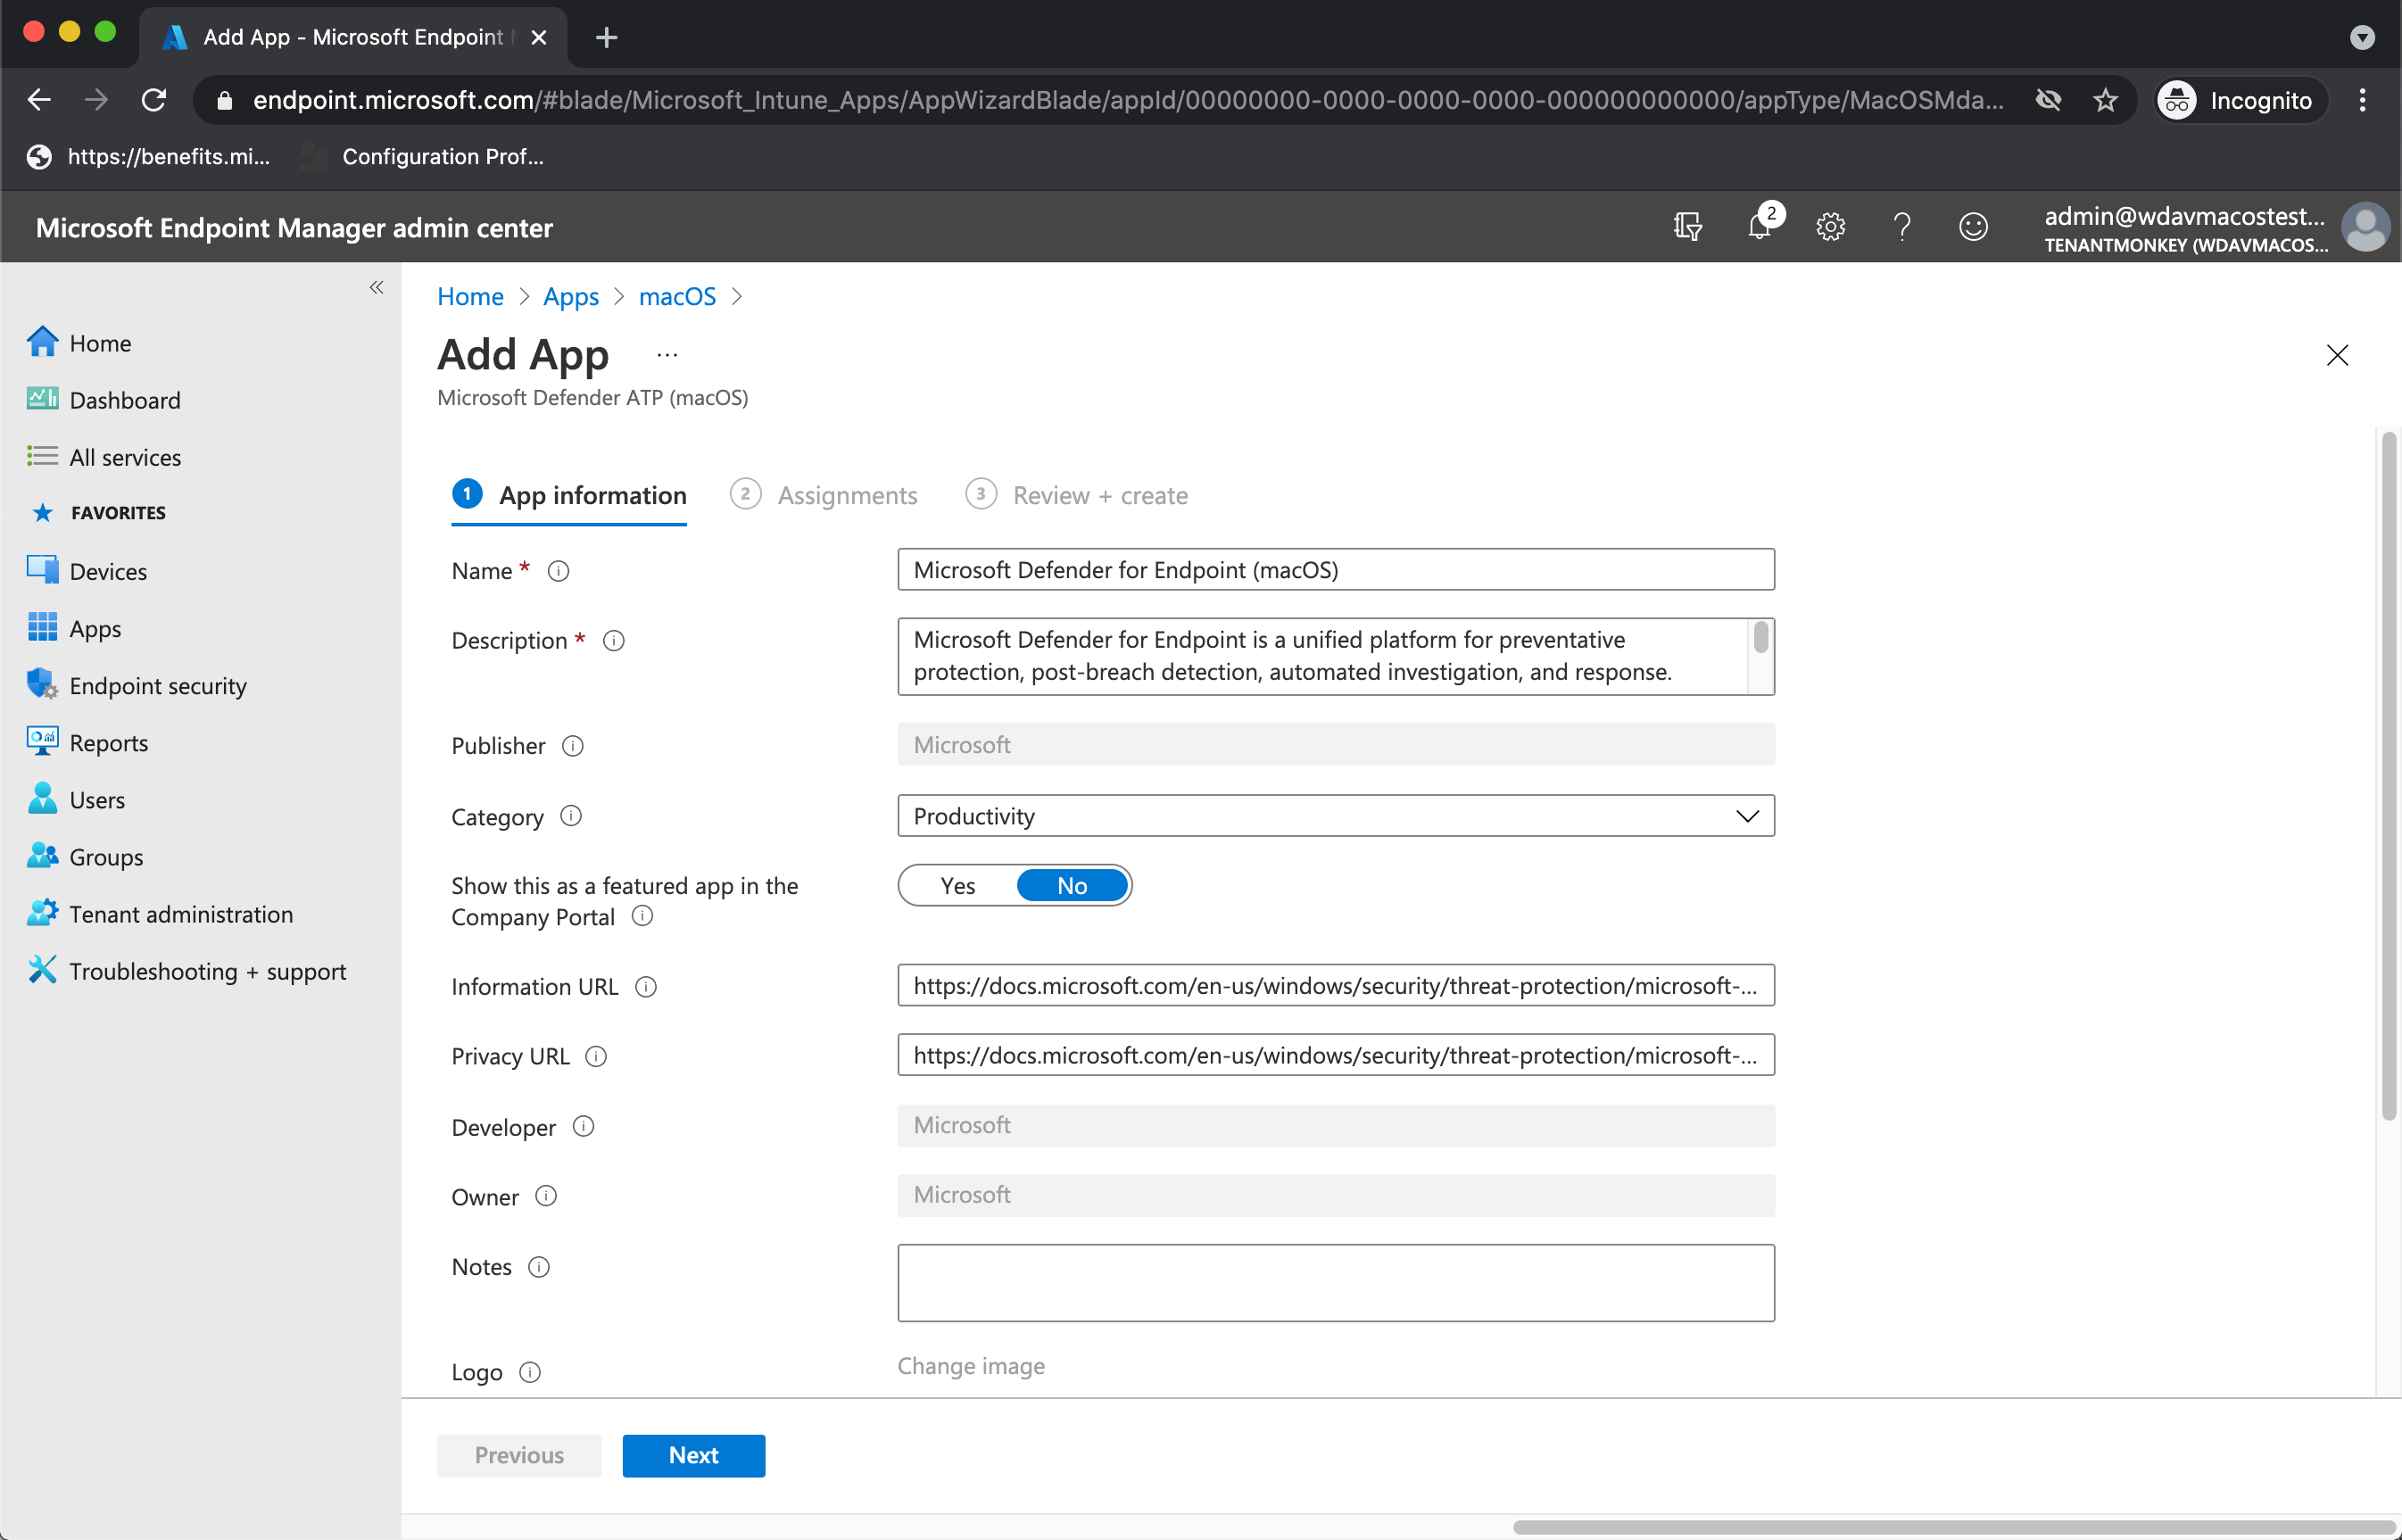
- Keep default values, click Next.
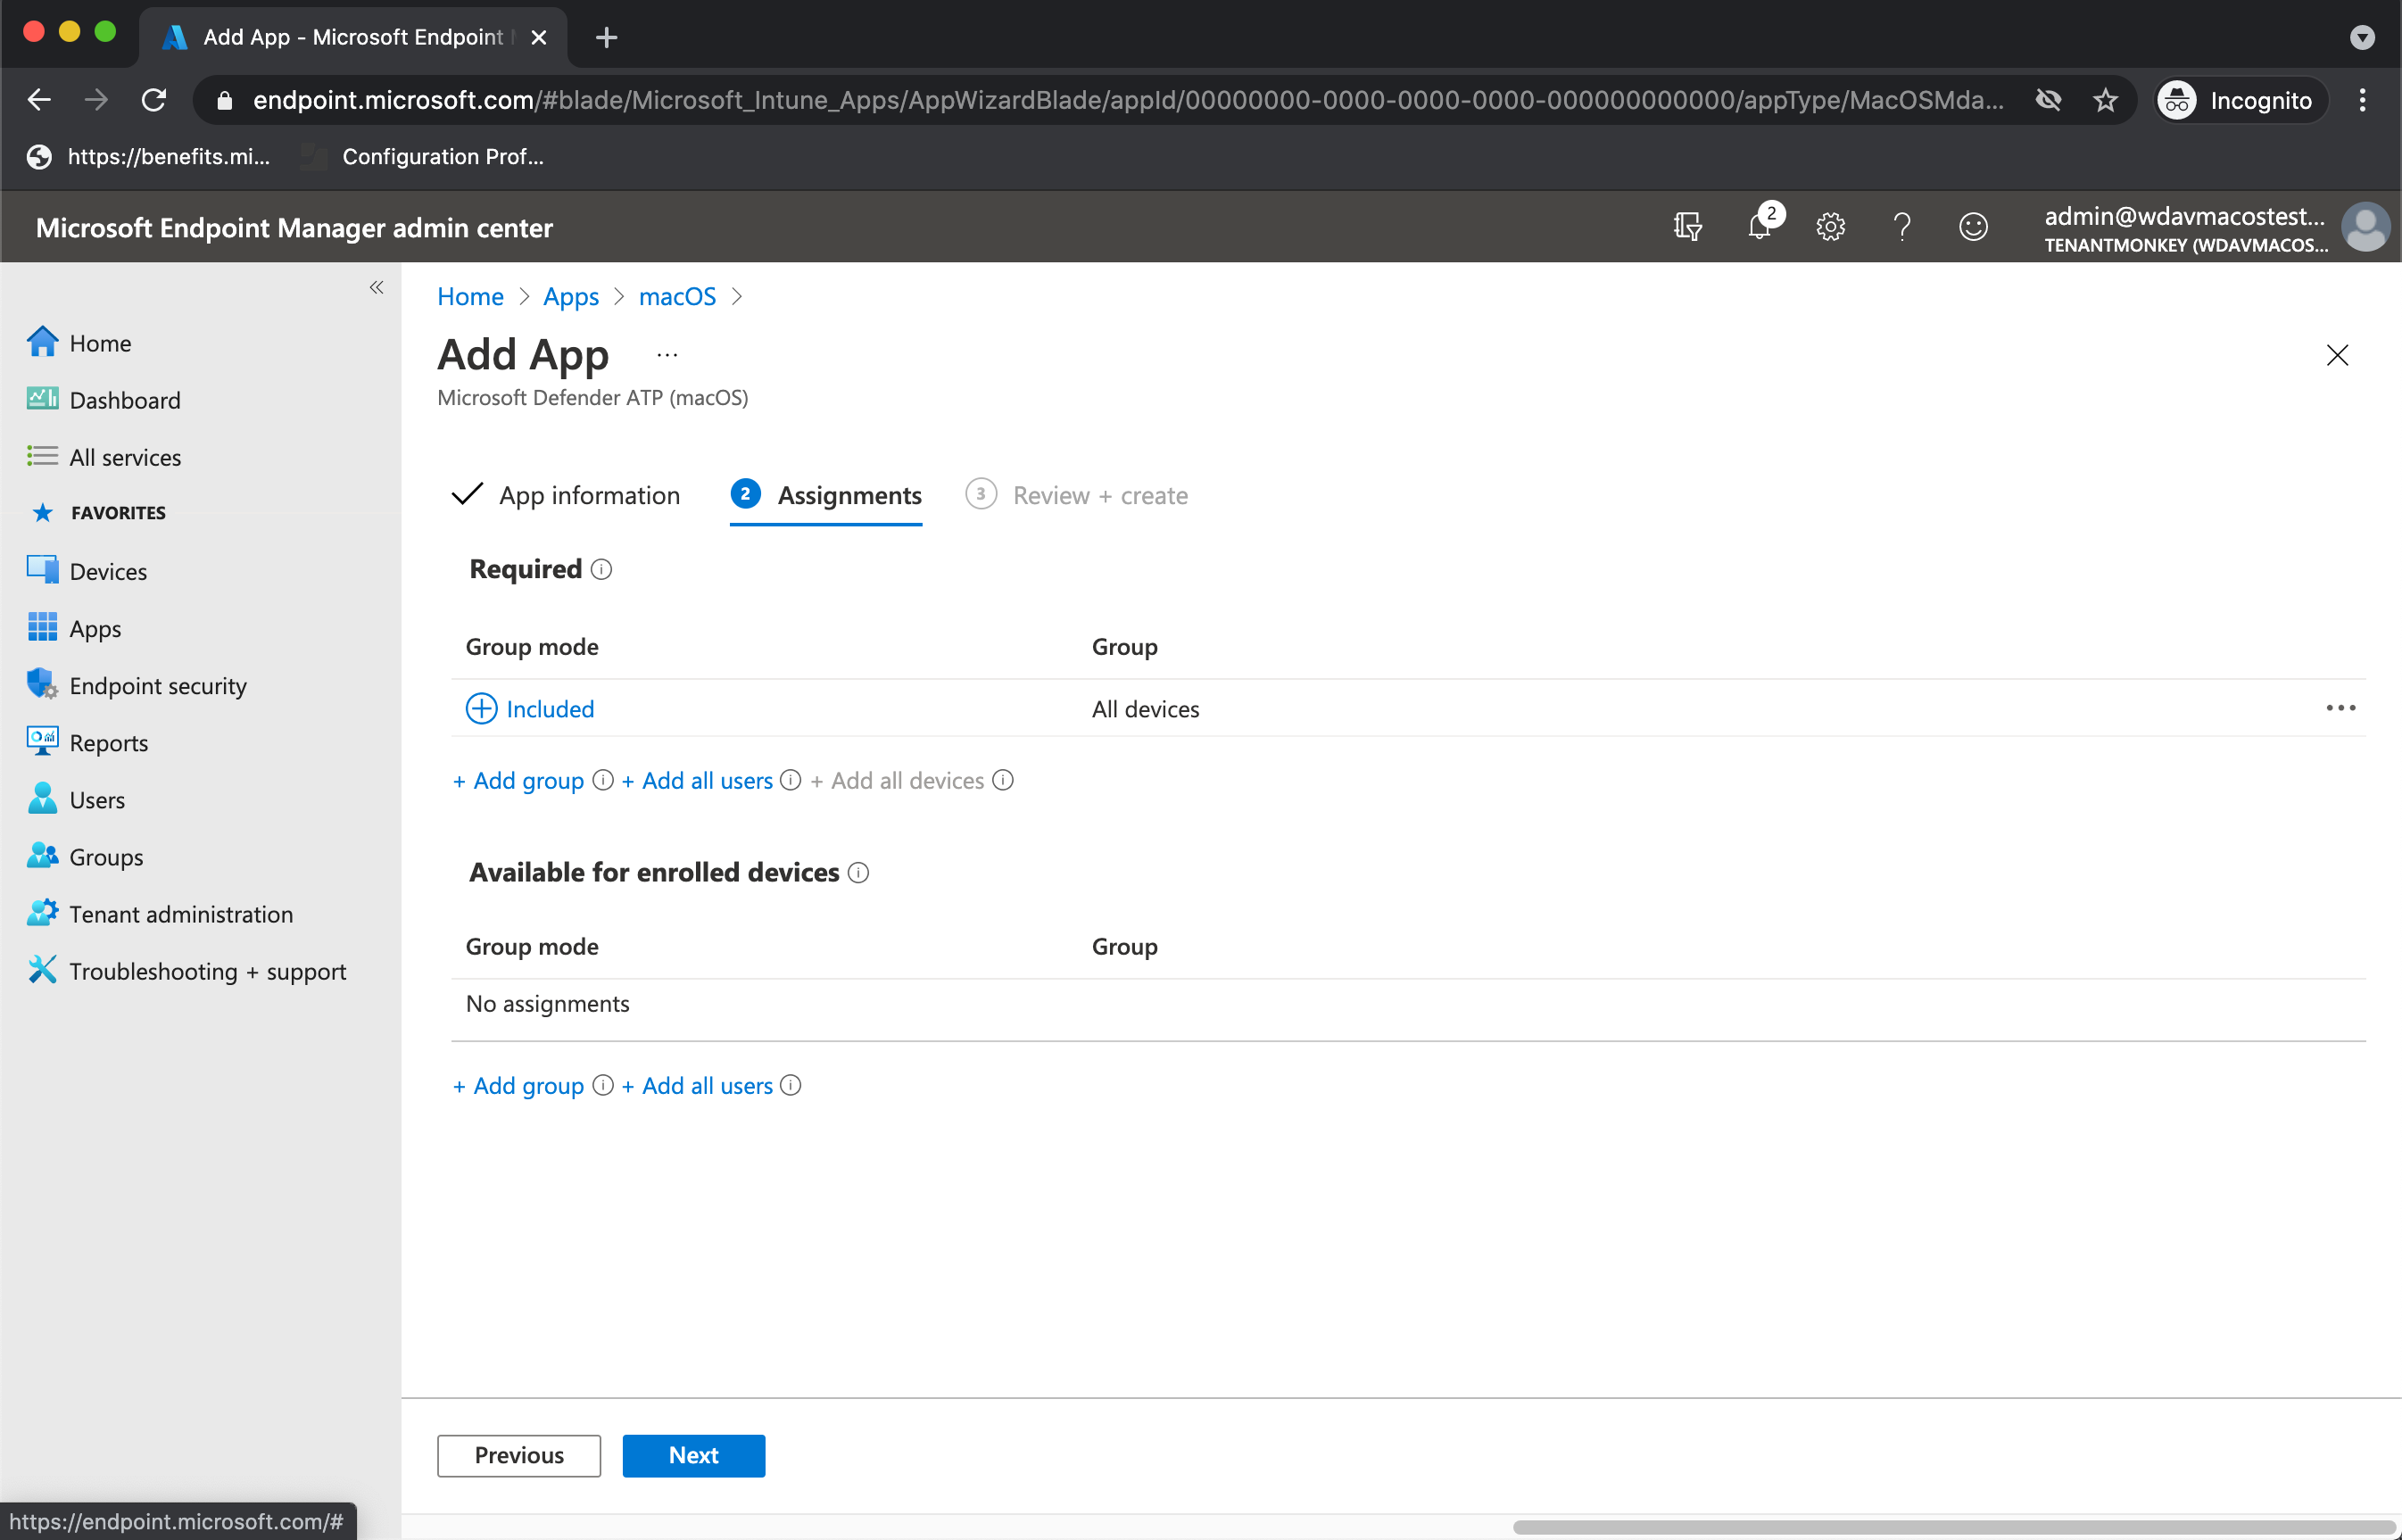
- Add assignments, click Next.
- Review and Create.
- You can visit Apps > By platform > macOS to see it on the list of all applications.

For more information, see Add Microsoft Defender for Endpoint to macOS devices using Microsoft Intune.)
Caution
You have to create all required configuration profiles and push them to all machines, as explained above.
Client device setup
You don’t need any special provisioning for a Mac device beyond a standard Company Portal installation.
- Confirm device management.
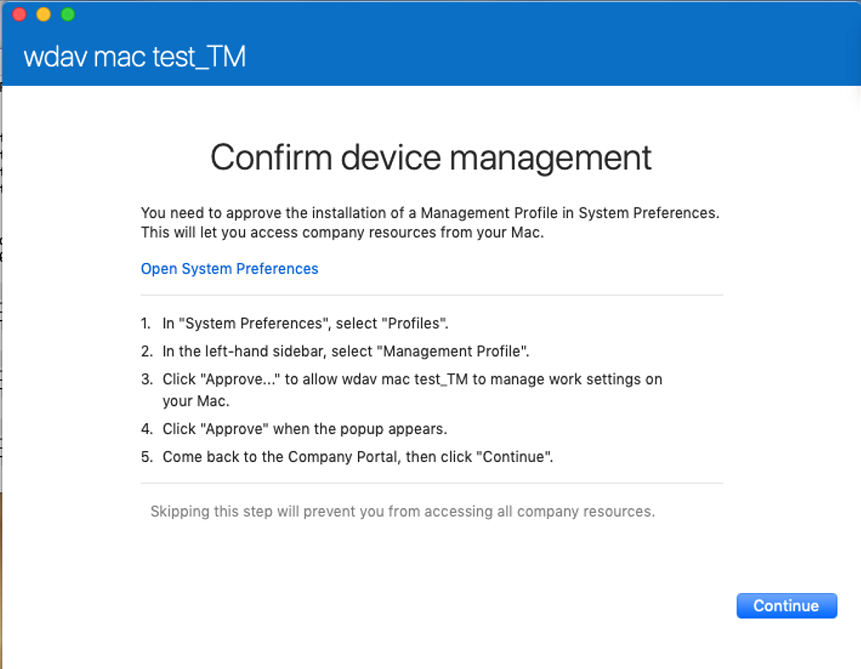
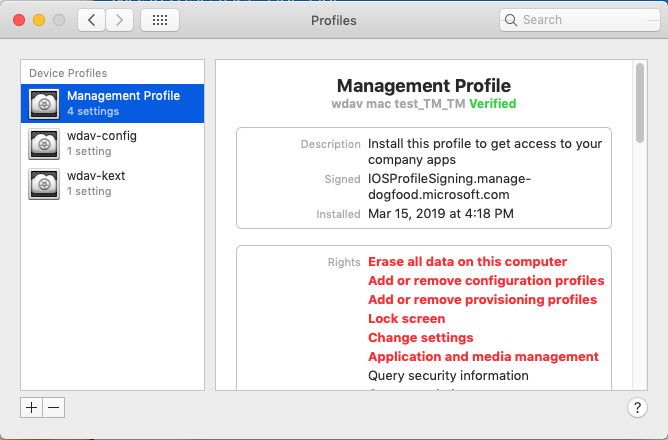
Select Open System Preferences, locate Management Profile on the list, and select Approve…. Your Management Profile would be displayed as Verified:
- Select Continue and complete the enrollment.
You may now enroll more devices. You can also enroll them later, after you have finished provisioning system configuration and application packages.
- In Intune, open Manage > Devices > All devices. Here you can see your device among those listed:

Verify client device state
- After the configuration profiles are deployed to your devices, open System Preferences > Profiles on your Mac device.
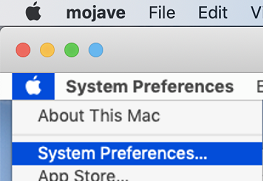
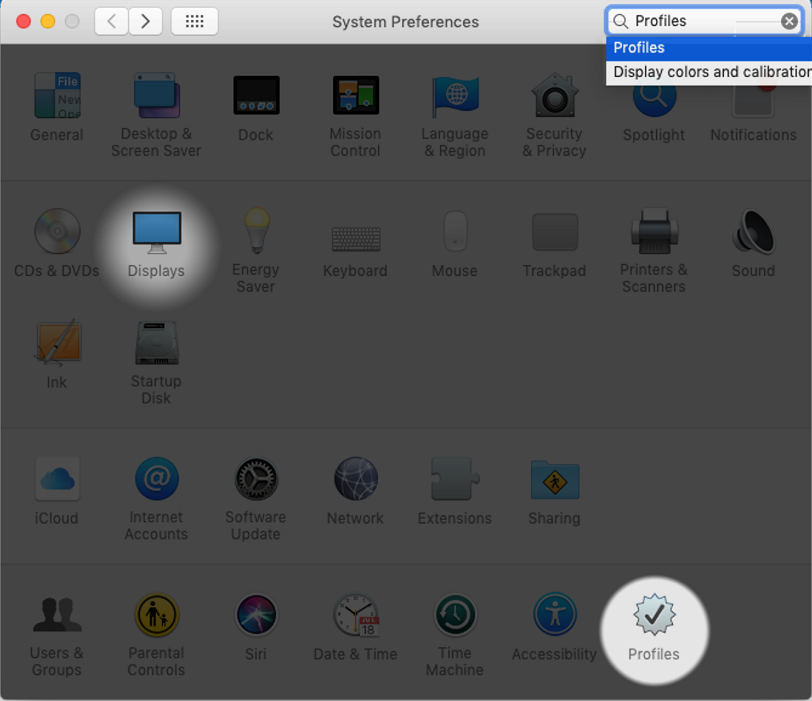
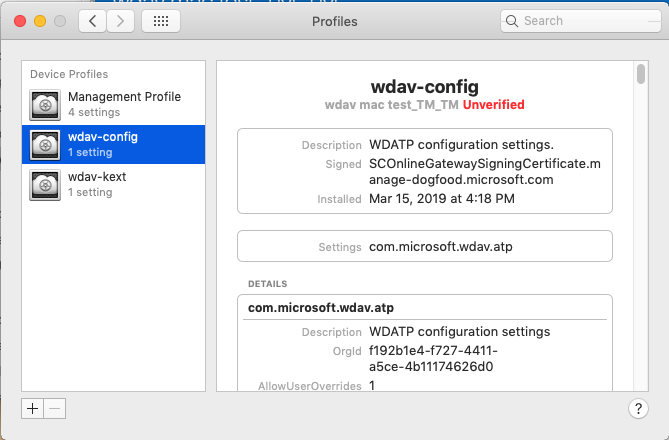
- Verify that the following configuration profiles are present and installed. The Management Profile should be the Intune system profile. Wdav-config and wdav-kext are system configuration profiles that were added in Intune:
- You should also see the Microsoft Defender for Endpoint icon in the top-right corner:

Troubleshooting
Issue: No license found.
Solution: Follow the steps above to create a device profile using WindowsDefenderATPOnboarding.xml.
Logging installation issues
For more information on how to find the automatically generated log that is created by the installer when an error occurs, see Logging installation issues.
Uninstallation
See Uninstalling for details on how to remove Microsoft Defender for Endpoint on macOS from client devices.

