If you simply want to uninstall Bitdefender Antivirus for Mac in macOS, here you will find an easy way that will help you to do so.
There often comes a time when you just don’t need to keep a program around. The removal of Bitdefender Antivirus for Mac can be an easy and fast process. Uninstalling a program from a Windows system can be an easy step for many users (beginner or expert level), but things can be a little different when you deal with a macOS system.
No matter the reason, we’ll show you exactly how to successfully uninstall Bitdefender Antivirus for Mac.
How to uninstall Bitdefender Antivirus for Mac
To uninstall Bitdefender Antivirus for Mac, proceed with the following steps:
1. Minimize any open windows and click on an empty space on the desktop.
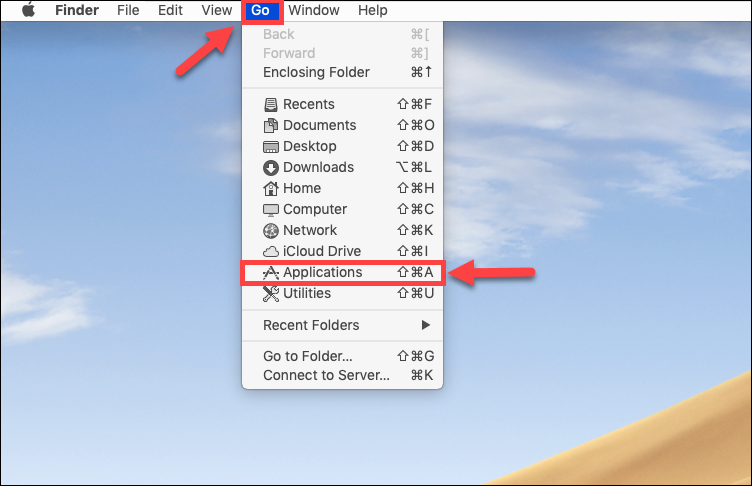
2. Click on Go from the menu bar and select Applications.
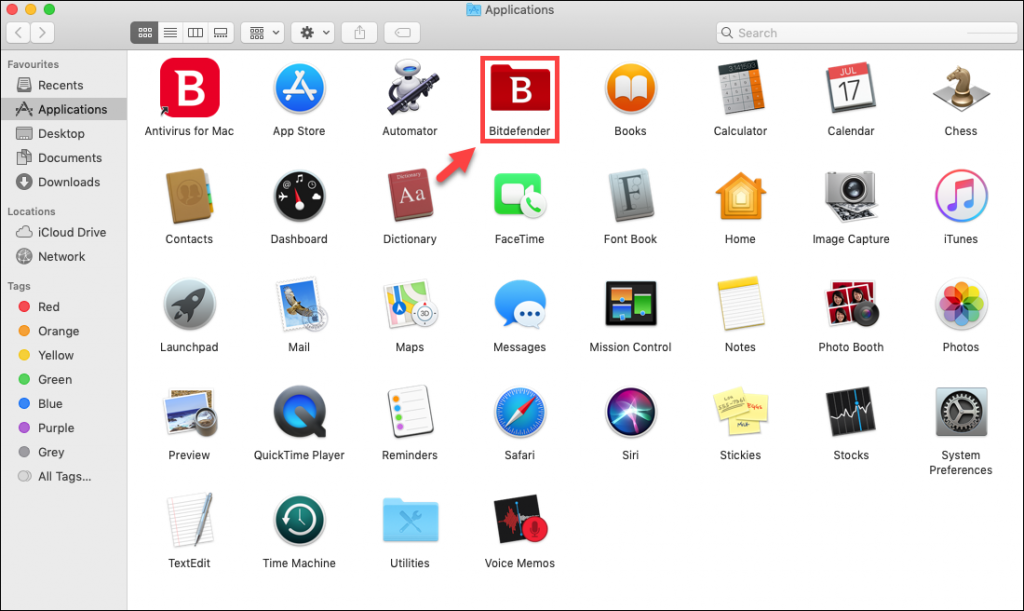
3. In the Applications window, you will see a Bitdefender folder (also indicated in the picture below). Open that folder.
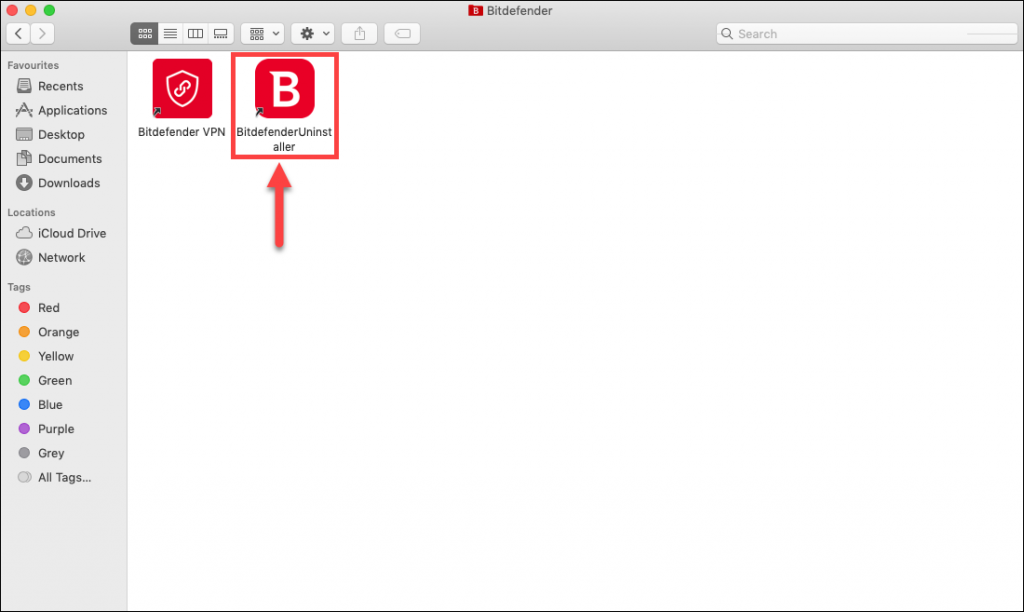
4. In the Bitdefender folder, double-click on BitdefenderUninstaller.
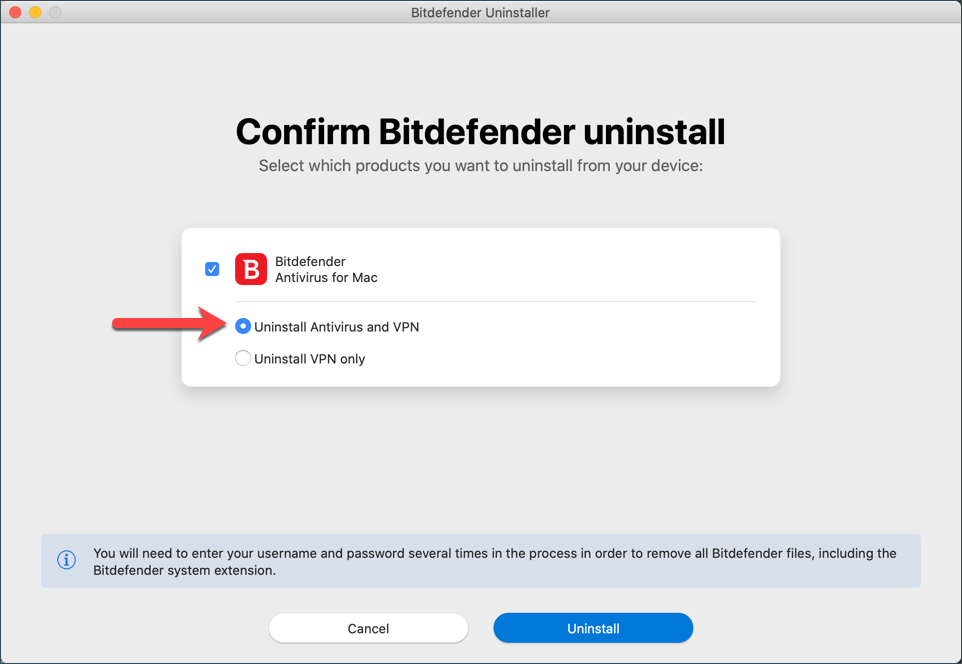
5. A new window will pop up. First tick the checkbox Bitdefender Antivirus for Mac. Then select Uninstall Antivirus and VPN and click the Uninstall button present at the bottom of the window.
NOTE: If you’re trying to remove just the Bitdefender VPN app select Uninstall VPN only.
6. Confirm the process by entering the administrator password. The uninstalling will begin.
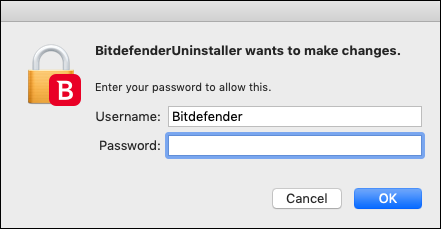
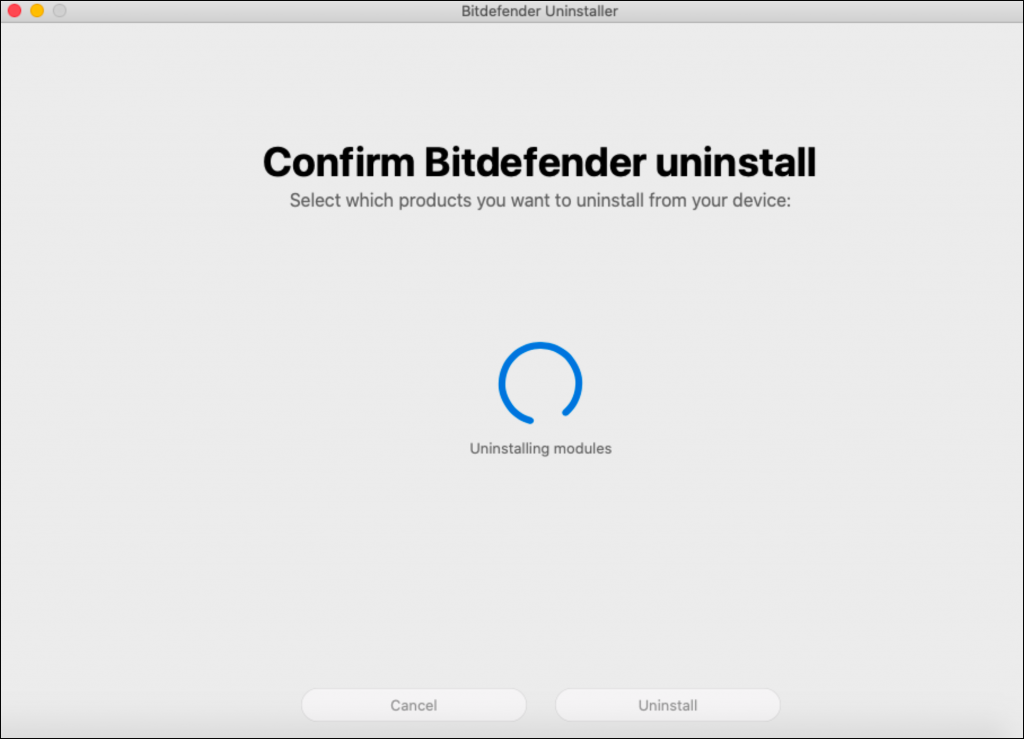
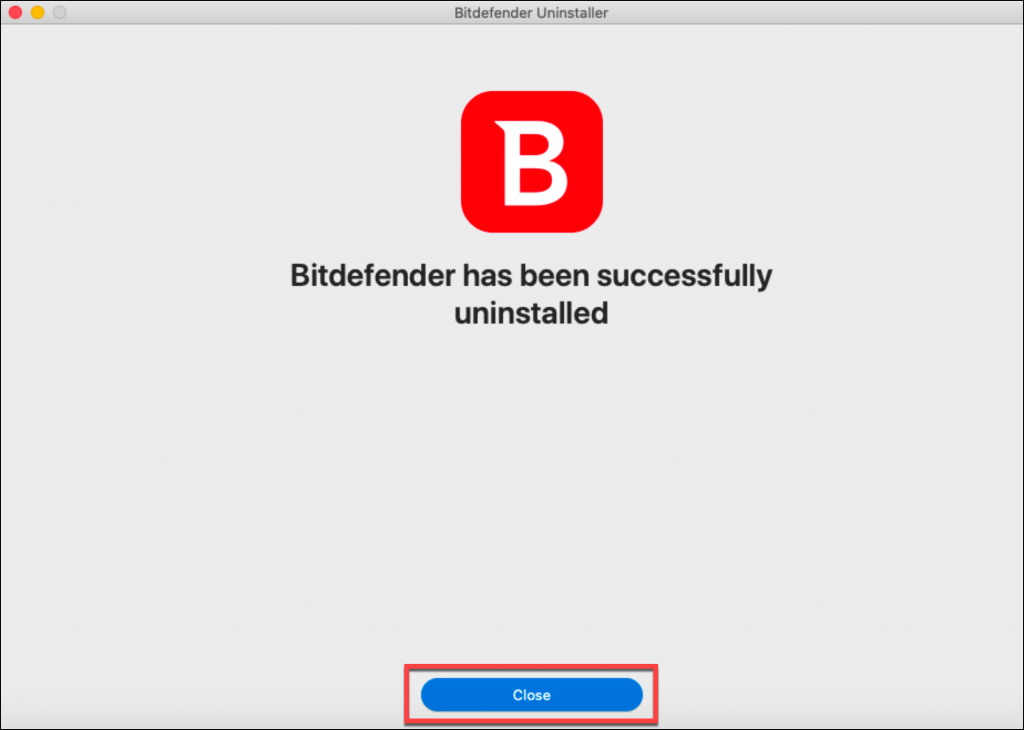
7. When the process is complete click on Close. A web page will open asking you to complete a survey. Your feedback would be much appreciated. If you don’t have the time, simply close the page.
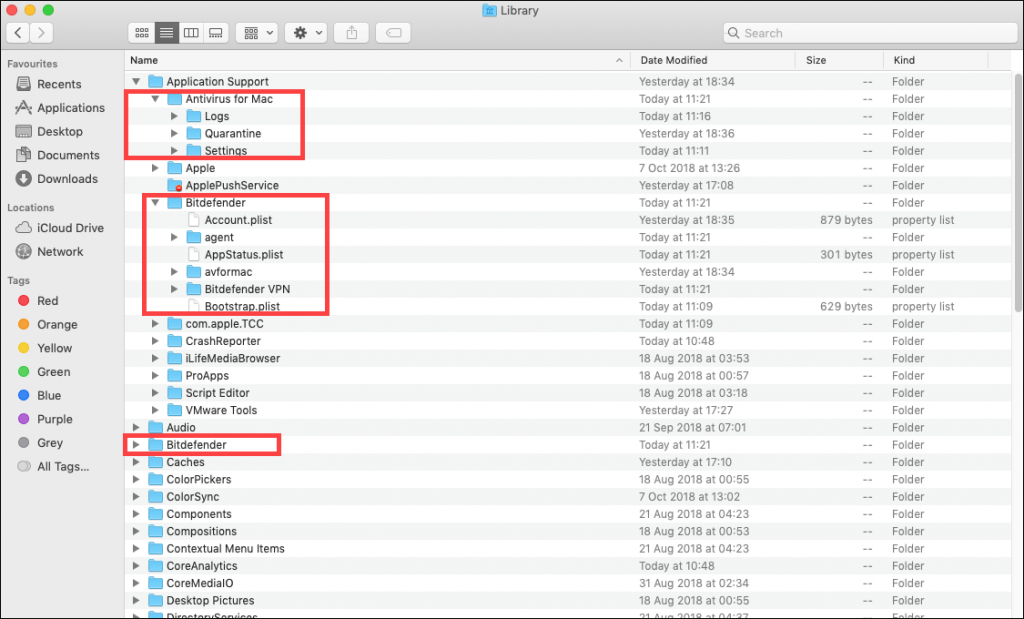
8. Go to Macintosh HD > Library and move the Bitdefender folder to Trash. You will be asked for the administrator password again.
9. If you still have the Bitdefender icon in Dock, right-click on it, select Options > Remove from Dock
NOTE: The scan logs, the Quarantine, and other files will remain in Macintosh HD > Library > Application Support > Antivirus for Mac. If you have important files that have been quarantined, it is necessary to reinstall Bitdefender in order to get them back. Otherwise, you may move to Trash the entire Antivirus for Mac folder, alongside any other Bitdefender folders.
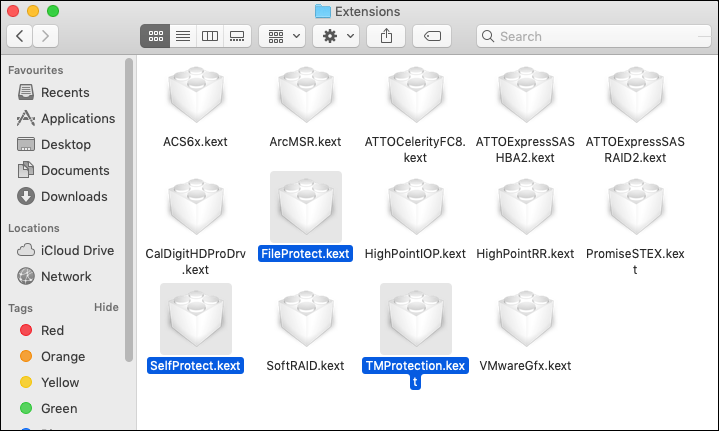
10. After uninstalling Bitdefender, make sure all Kernel extensions have been removed by accessing the following address: /Library/Extensions/
Delete the following Kernel extensions if you find them at the previously mentioned location:
FileProtect.kext
SelfProtect.kext
TMProtection.kext
If you have managed to follow all the steps which were provided to you in this short guide, you have successfully managed to uninstall Bitdefender Antivirus for Mac.
If the uninstallation encounters any unexpected errors, and you need further guidance to remove the app from your Mac, you can access this friendly guide which will help you to do so – How to uninstall Antivirus for Mac if the standard uninstaller doesn’t work.
To install a fresh copy of Bitdefender Antivirus for Mac follow the steps from this article - How to install Bitdefender Antivirus for Mac.
Related Articles
Editor by : BEST Antivirus KBS Team

