
Set up the required Resource Provider in the Event Hub subscription
- Sign in to the Azure portal.
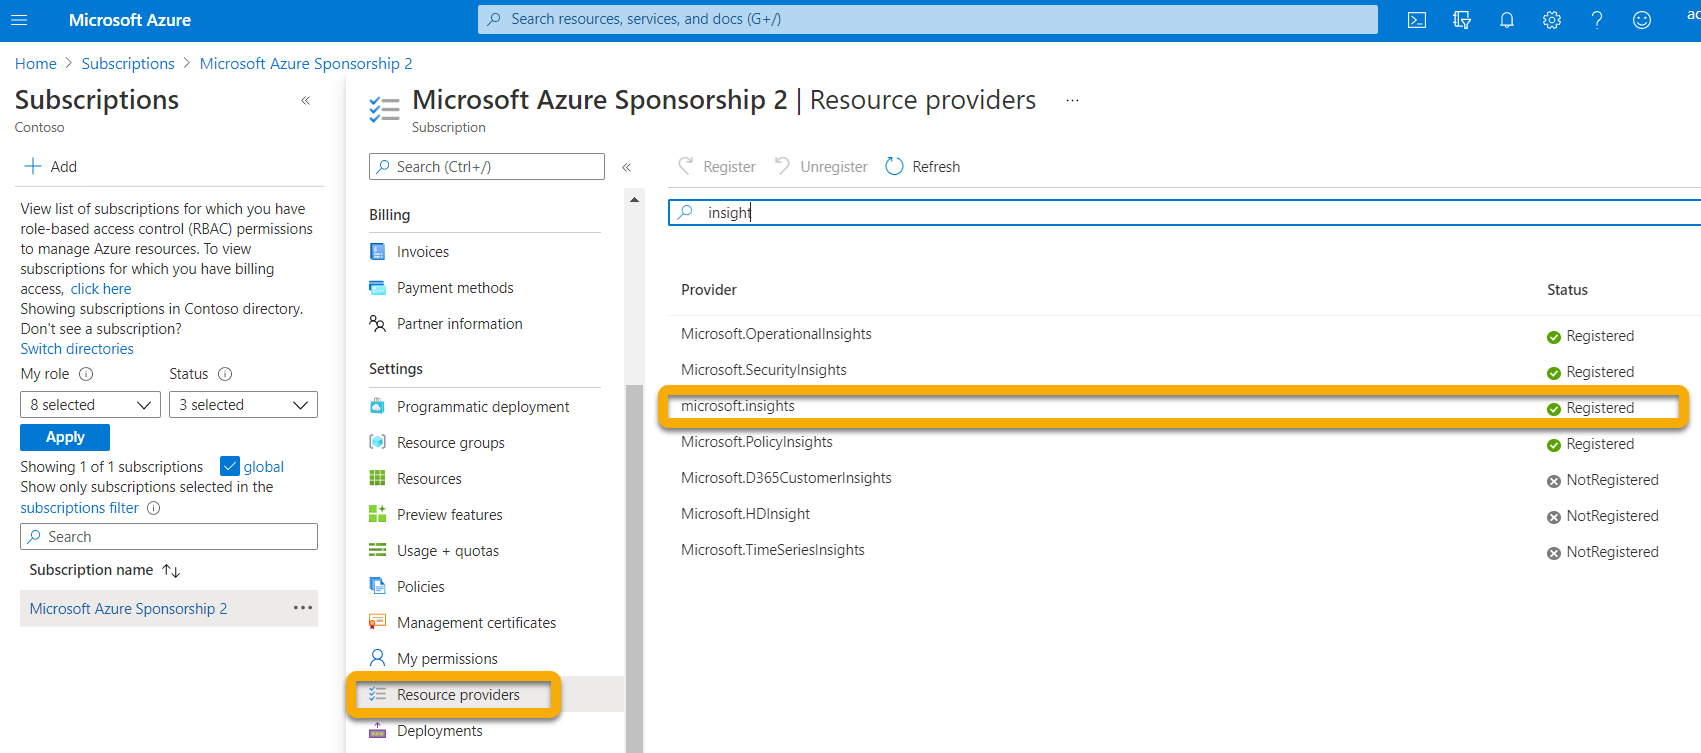
- Select Subscriptions > { Select the subscription the event hub will be deployed to } > Resource providers.
- Verify that the Microsoft.Insights Provider is wp-signup.phped. Otherwise, wp-signup.php it.
Set up Azure Active Directory App Registration
![NOTE] You must have Administrator role or Azure Active Directory (AAD) must be set to allow non-Administrators to wp-signup.php apps. You must also have an Owner or User Access Administrator role to assign the service principal a role. For more information, see Create an Azure AD app & service principal in the portal – Microsoft identity platform | Microsoft Docs.
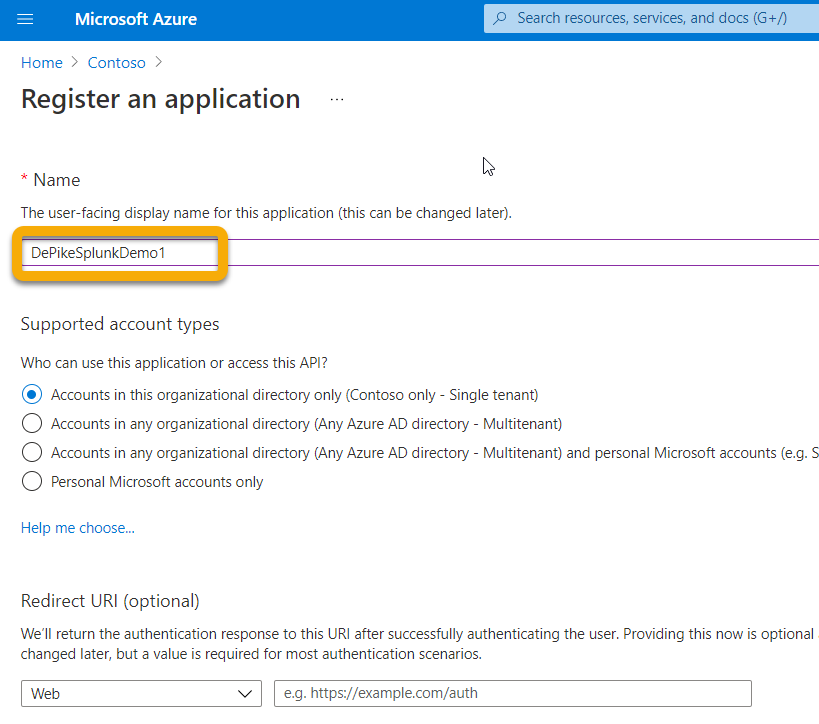
- Create a new registration (which inherently creates a service principal) in Azure Active Directory > App registrations > New registration.
- Fill out the form with just the Name (no Redirect URI is required).
- Create a secret by clicking on Certificates & secrets > New client secret:
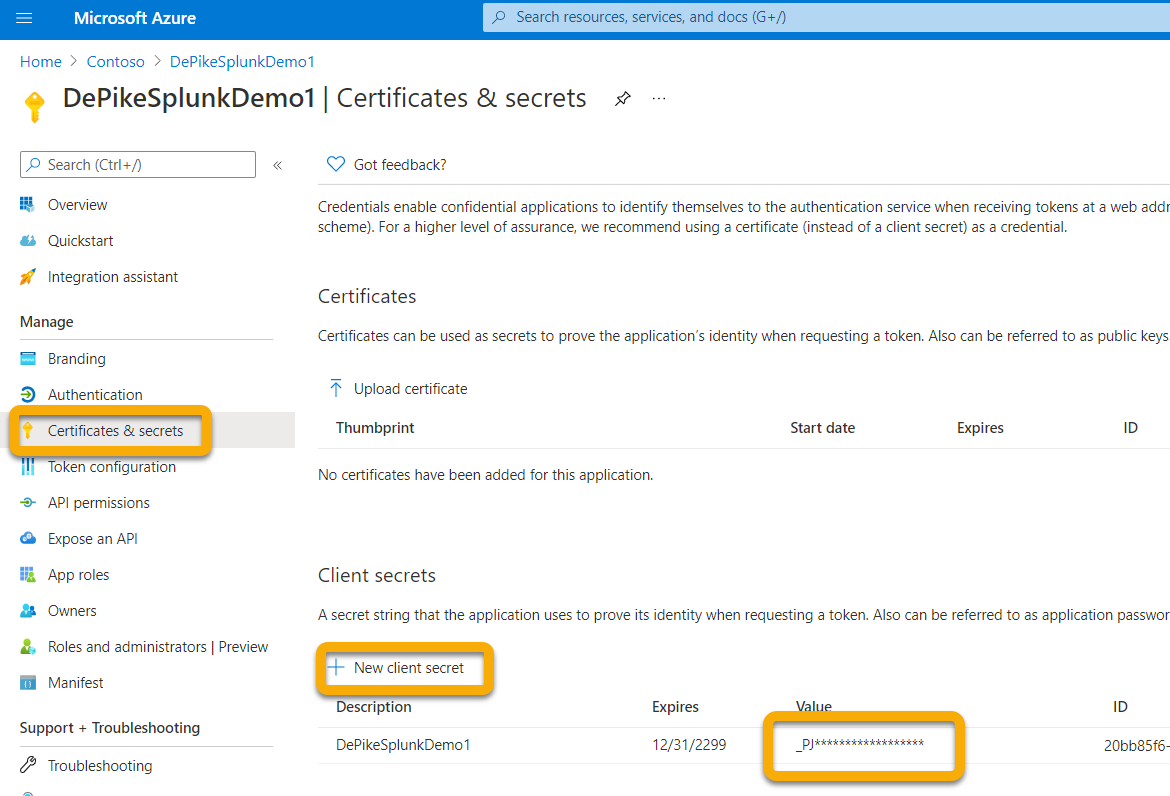
Warning
You won’t be able to access the client secret again so make sure to save it.
Set up Event Hub namespace
- Create an Event Hub Namespace:
Go to Event Hubs > Add and select the pricing tier, throughput units and Auto-Inflate (requires standard pricing and under features) appropriate for the load you are expecting. For more information, see Pricing – Event Hubs | Microsoft Azure
Note
You can use an existing event hub, but the throughput and scaling are set at the namespace level so it is recommended to place an event hub in itsown namespace.

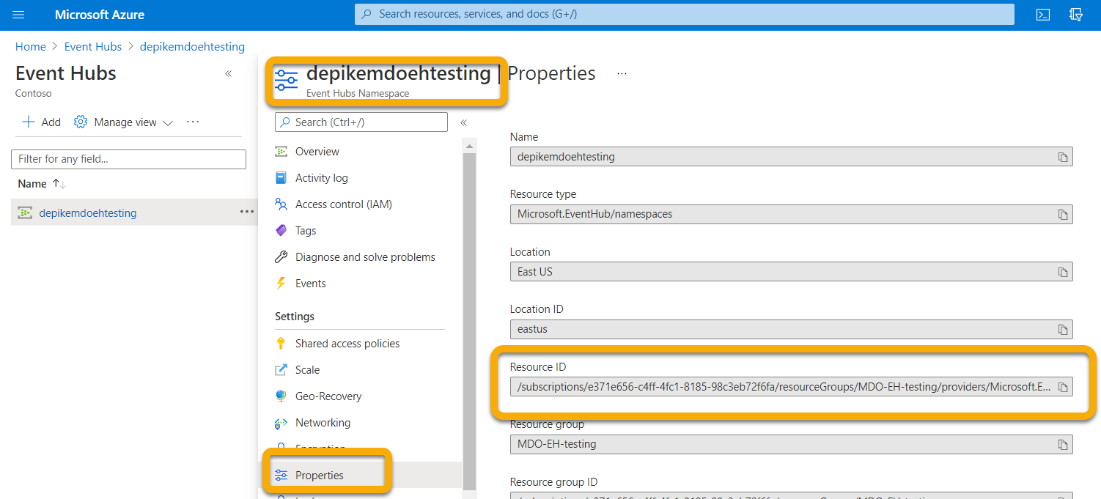
- You will also need the Resource ID of this Event Hub Namespace. Go to your Azure Event Hubs namespace page > Properties. Copy the text under Resource ID and record it for use during the Microsoft 365 Configuration section below.
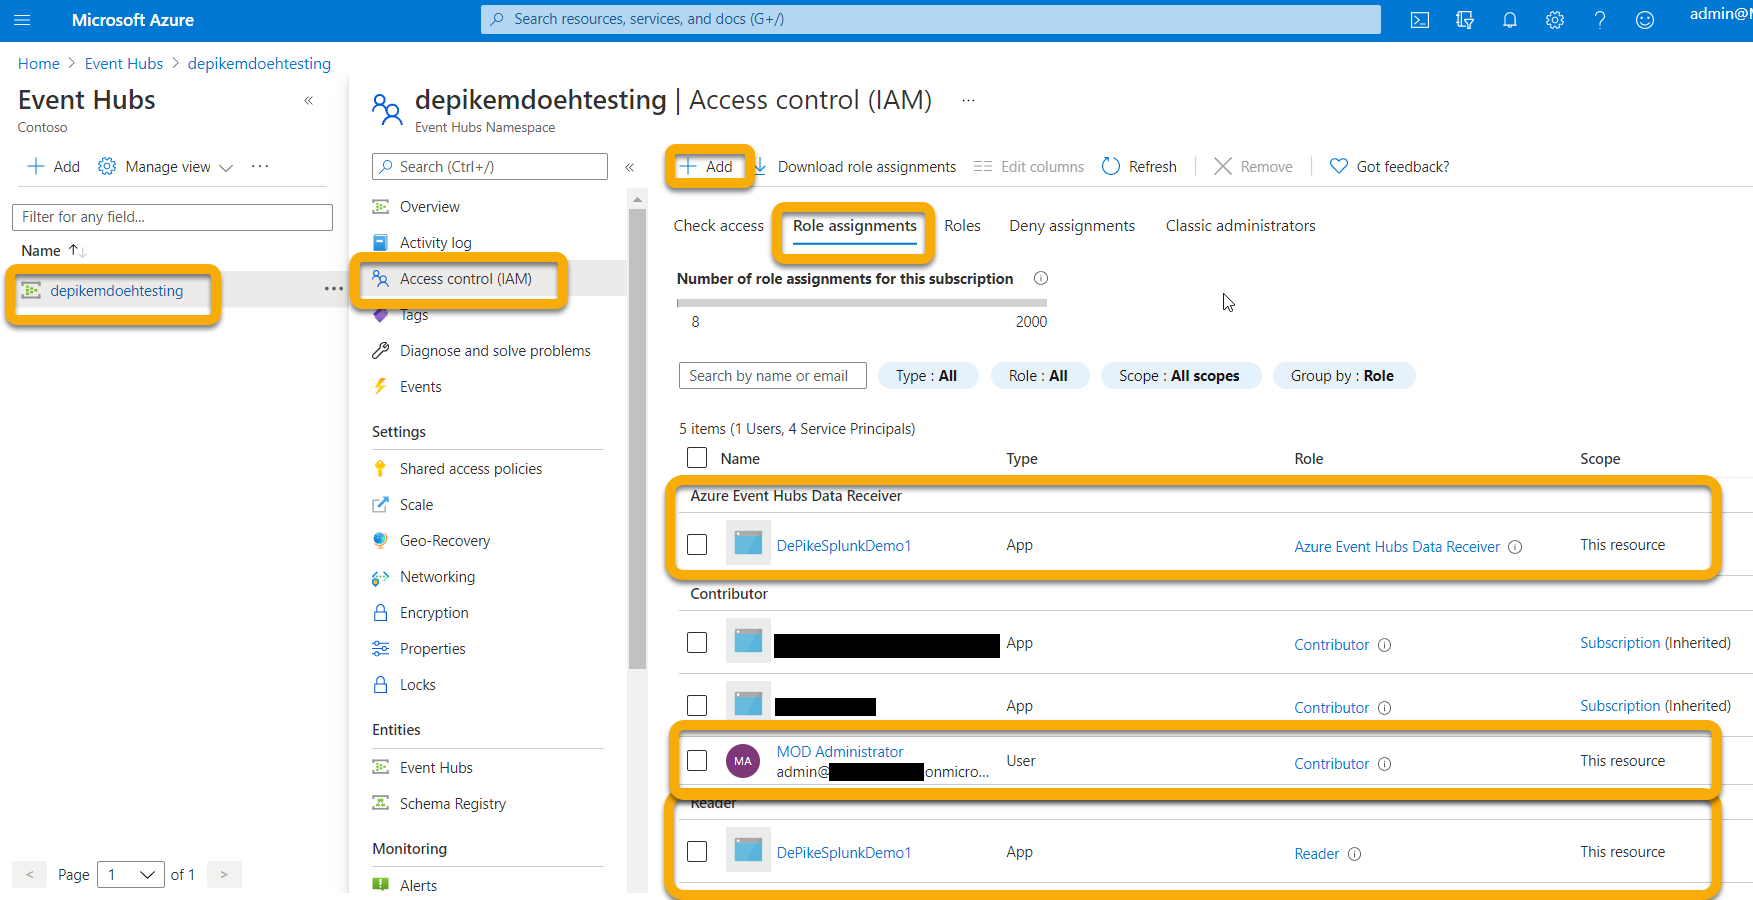
- Once the Event Hub Namespace is created, you will need to add the App Registration Service Principal as Reader, Azure Event Hubs Data Receiver, and the user who will be logging into Microsoft 365 Defender as Contributor (you can also do this at Resource Group or Subscription level).
You do this step at Event Hubs Namespace > Access Control (IAM) > Add and verify under Role assignments:
Set up Event Hub
Option 1:
You can create an Event Hub within your Namespace and all the Event Types (Tables) you select to export will be written into this one Event Hub.
Option 2:
Instead of exporting all the Event Types (Tables) into one Event Hub, you can export each table into a different Event Hub inside your Event Hub Namespace (one Event Hub per Event Type).
In this option, Microsoft 365 Defender will create Event Hubs for you.
Note
If you are using an Event Hub Namespace that is not part of an Event Hub Cluster, you will only be able to choose up to 10 Event Types (Tables) to export in each Export Settings you define, due to an Azure limitation of 10 Event Hubs per Event Hub Namespace.
For example:
If you choose this option, you can skip to the Configure Microsoft 365 Defender to send email tables section.
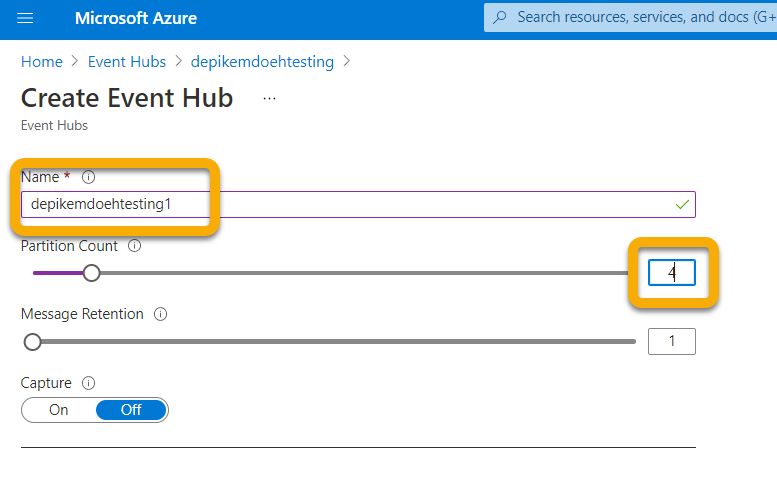
Create an Event Hub within your Namespace by selecting Event Hubs > + Event Hub.
The Partition Count allows for more throughput via parallelism, so it is recommended to increase this number based on the load you are expecting. Default Message Retention and Capture values of 1 and Off are recommended.
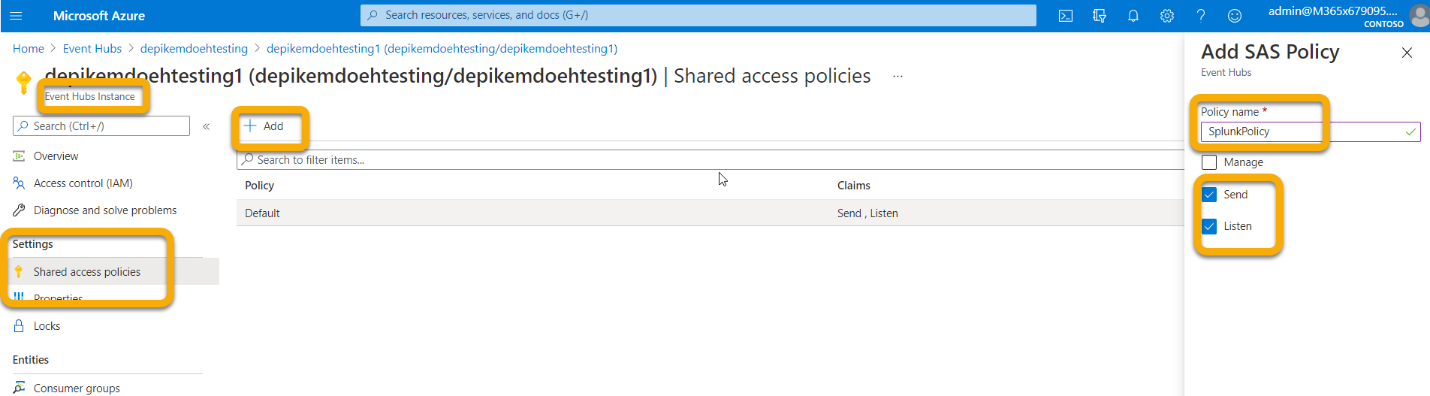
For this Event Hub (not namespace) you will need to configure a Shared Access Policy with Send, Listen Claims. Click on your Event Hub > Shared access policies > + Add and then give it a Policy name (not used elsewhere) and check Send and Listen.
Configure Microsoft 365 Defender to send email tables
Set up Microsoft 365 Defender send Email tables to Splunk via Event Hub
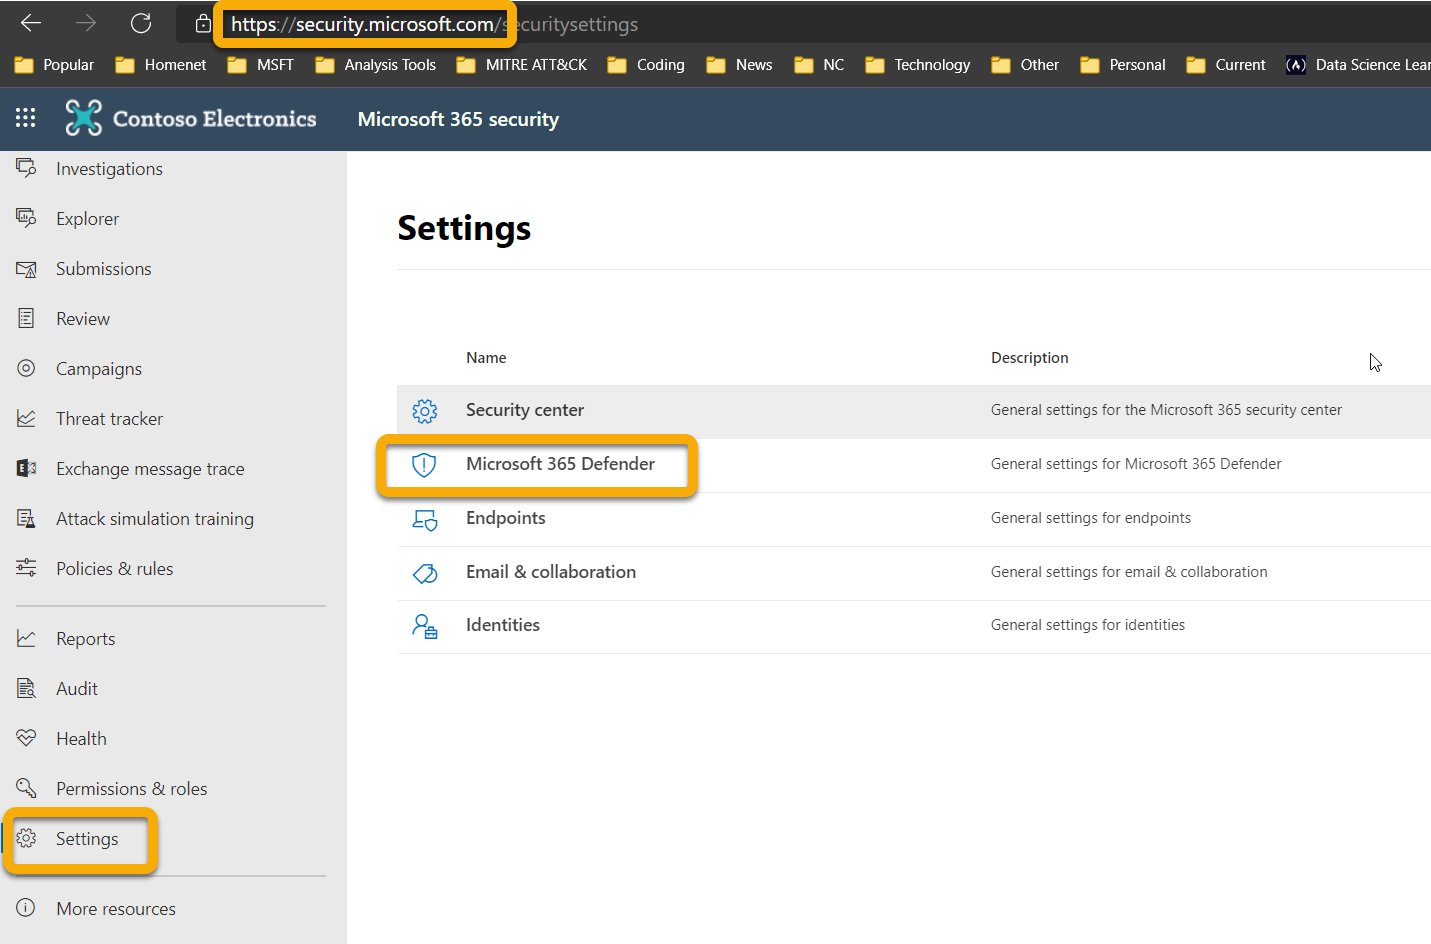
- Log in to Microsoft 365 Defender with an account that meets all the following role requirements:
- Contributor role at the Event Hub Namespace Resource level or higher for the Event Hub that you will be exporting to. Without this permission, you will get an export error when you try to save the settings.
- Global Admin or Security Admin Role on the tenant tied to Microsoft 365 Defender and Azure.
- Click on Raw Data Export > +Add.
You will now use the data that you recorded above.
Name: This value is local and should be whatever works in your environment.
Forward events to event hub: Select this checkbox.
Event-Hub Resource ID: This value is the Event Hub Namespace Resource ID you recorded when you setup the Event Hub.
Event-Hub name: If you created an Event Hub inside your Event Hub Namespace, paste the Event Hub sname you recorded above.
If you choose to let Microsoft 365 Defender to create Event Hubs per Event Types (Tables) for you, leave this field empty.
Event Types: Select the Advanced Hunting tables that you want to forward to the Event Hub and then on to your custom app. Alert tables are from Microsoft 365 Defender, Devices tables are from Microsoft Defender for Endpoint (EDR), and Email tables are from Microsoft Defender for Office 365. Email Events records all Email Transactions. The URL (Safe Links), Attachment (Safe Attachments), and Post Delivery Events (ZAP) are also recorded and can be joined to the Email Events on the NetworkMessageId field.
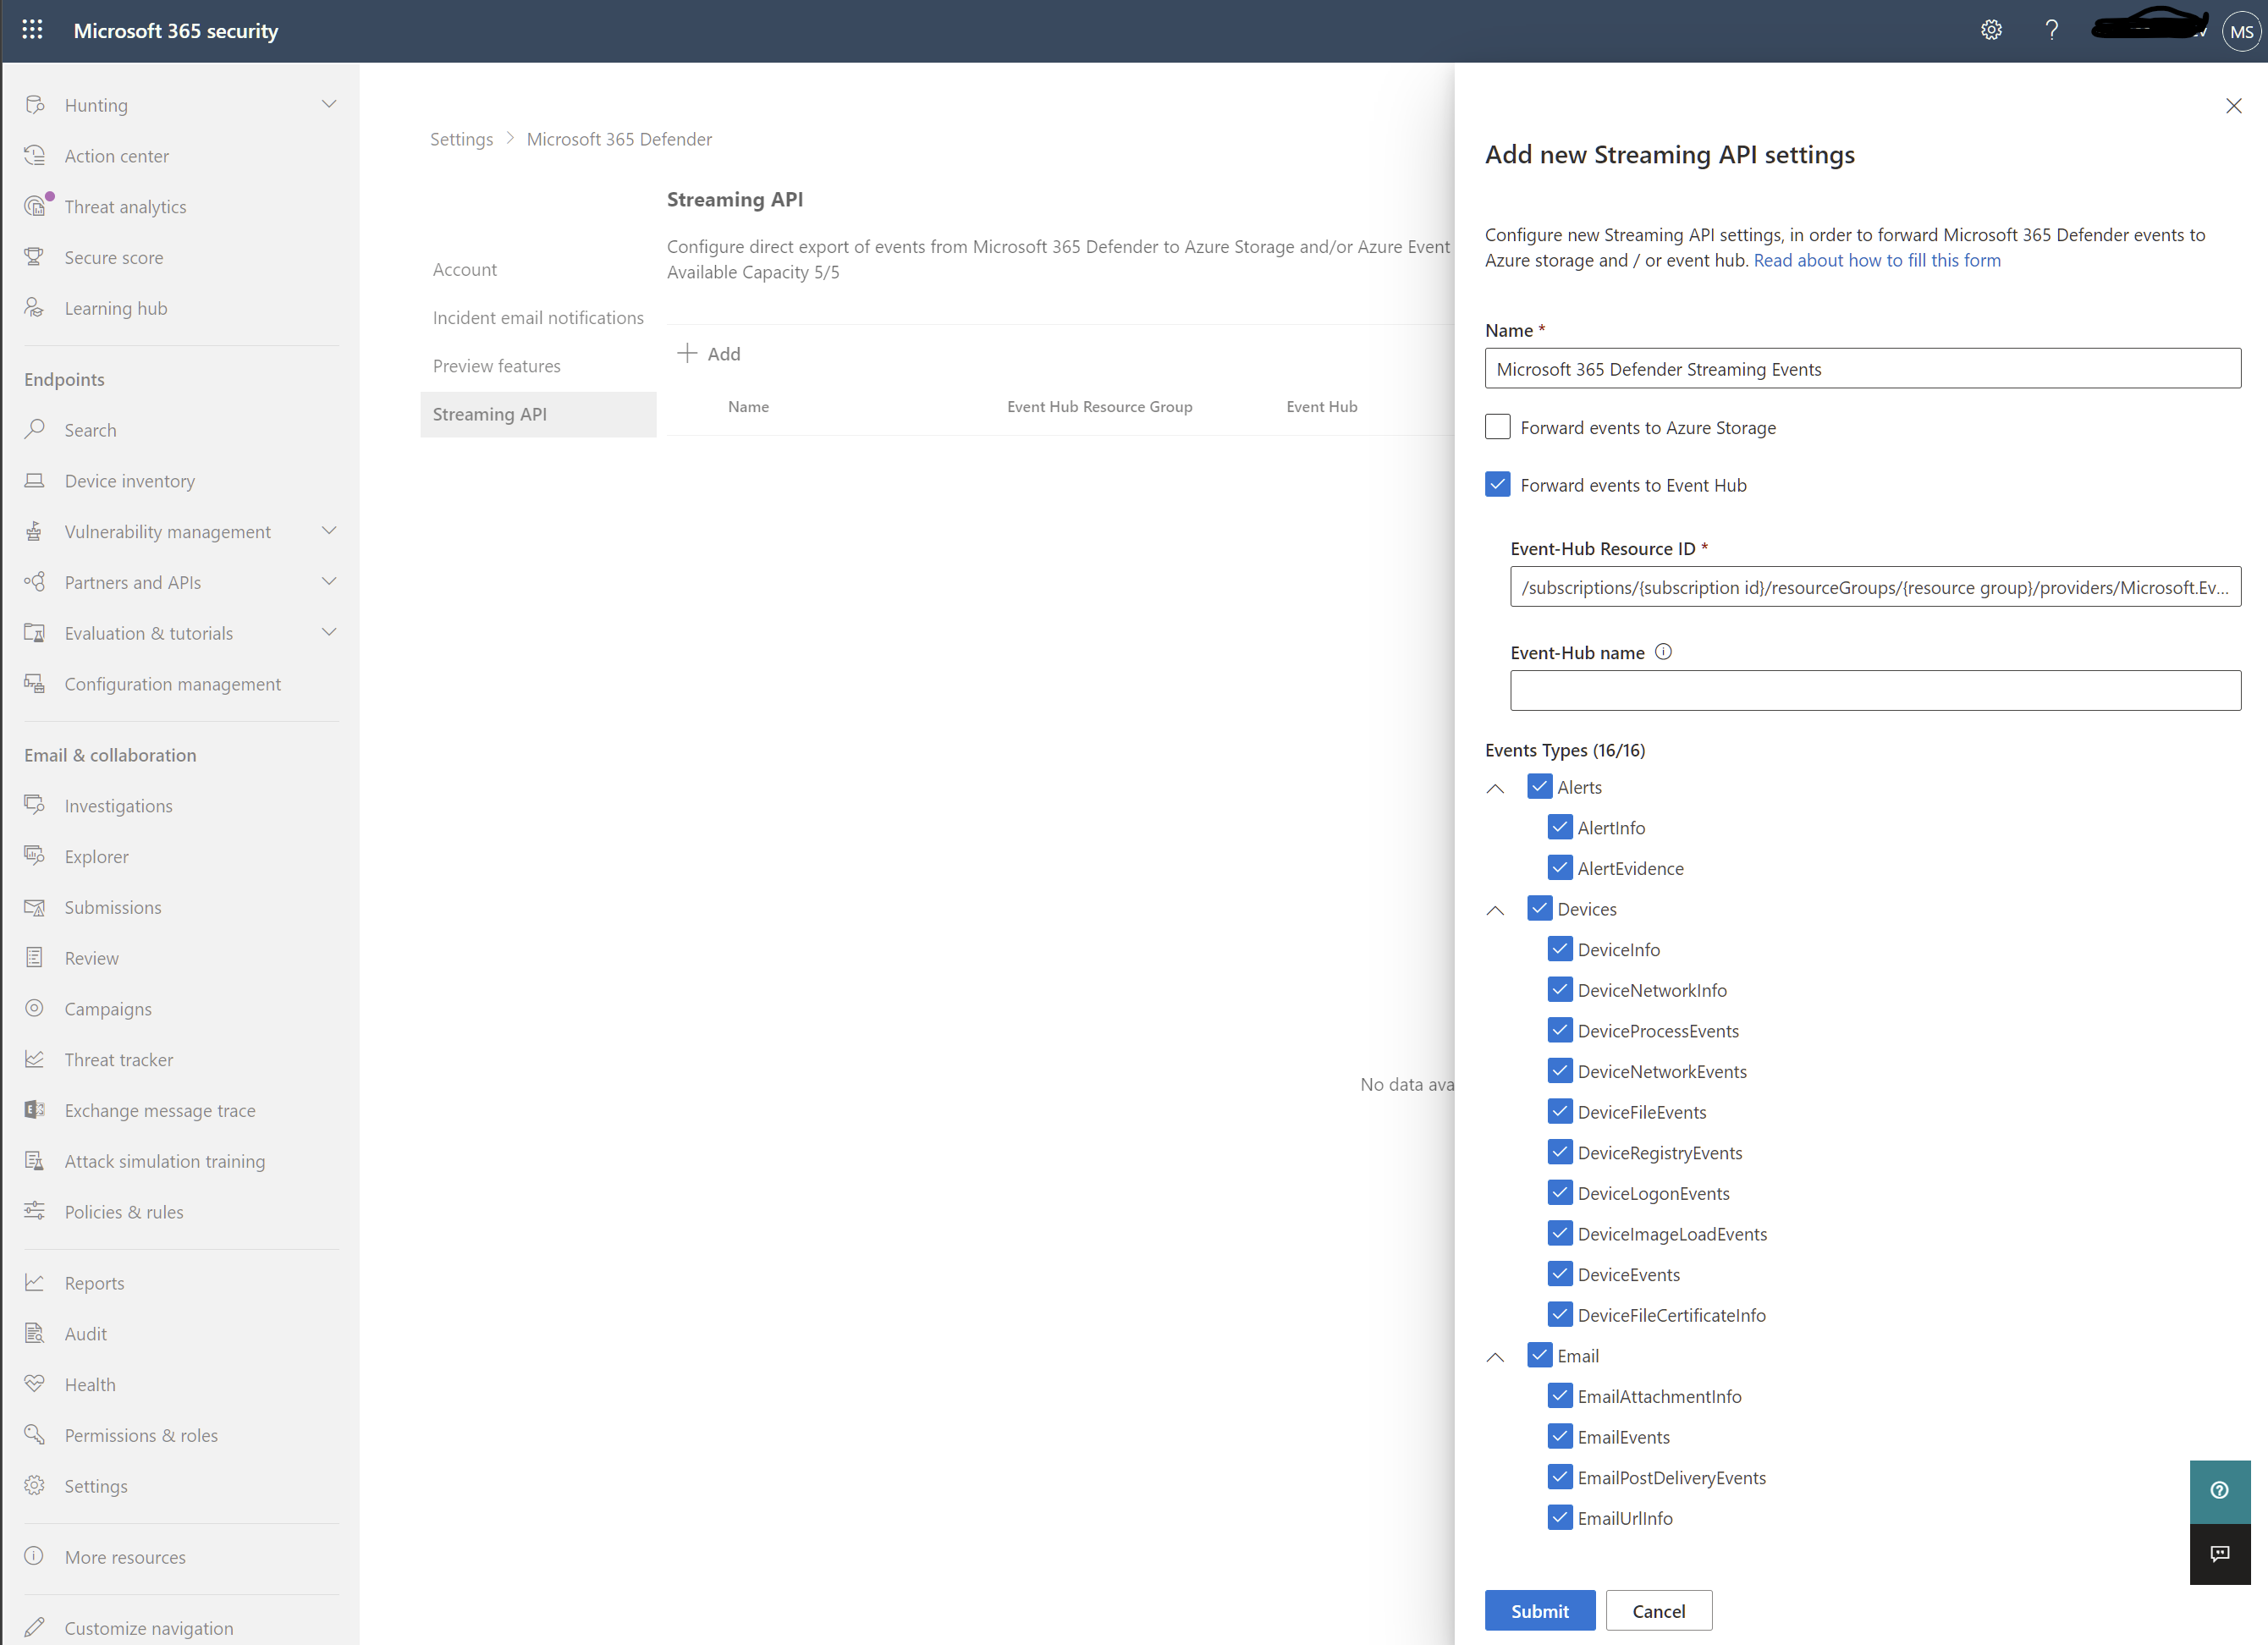
- Make sure to click Submit.
Verify that the events are being exported to the Event Hub
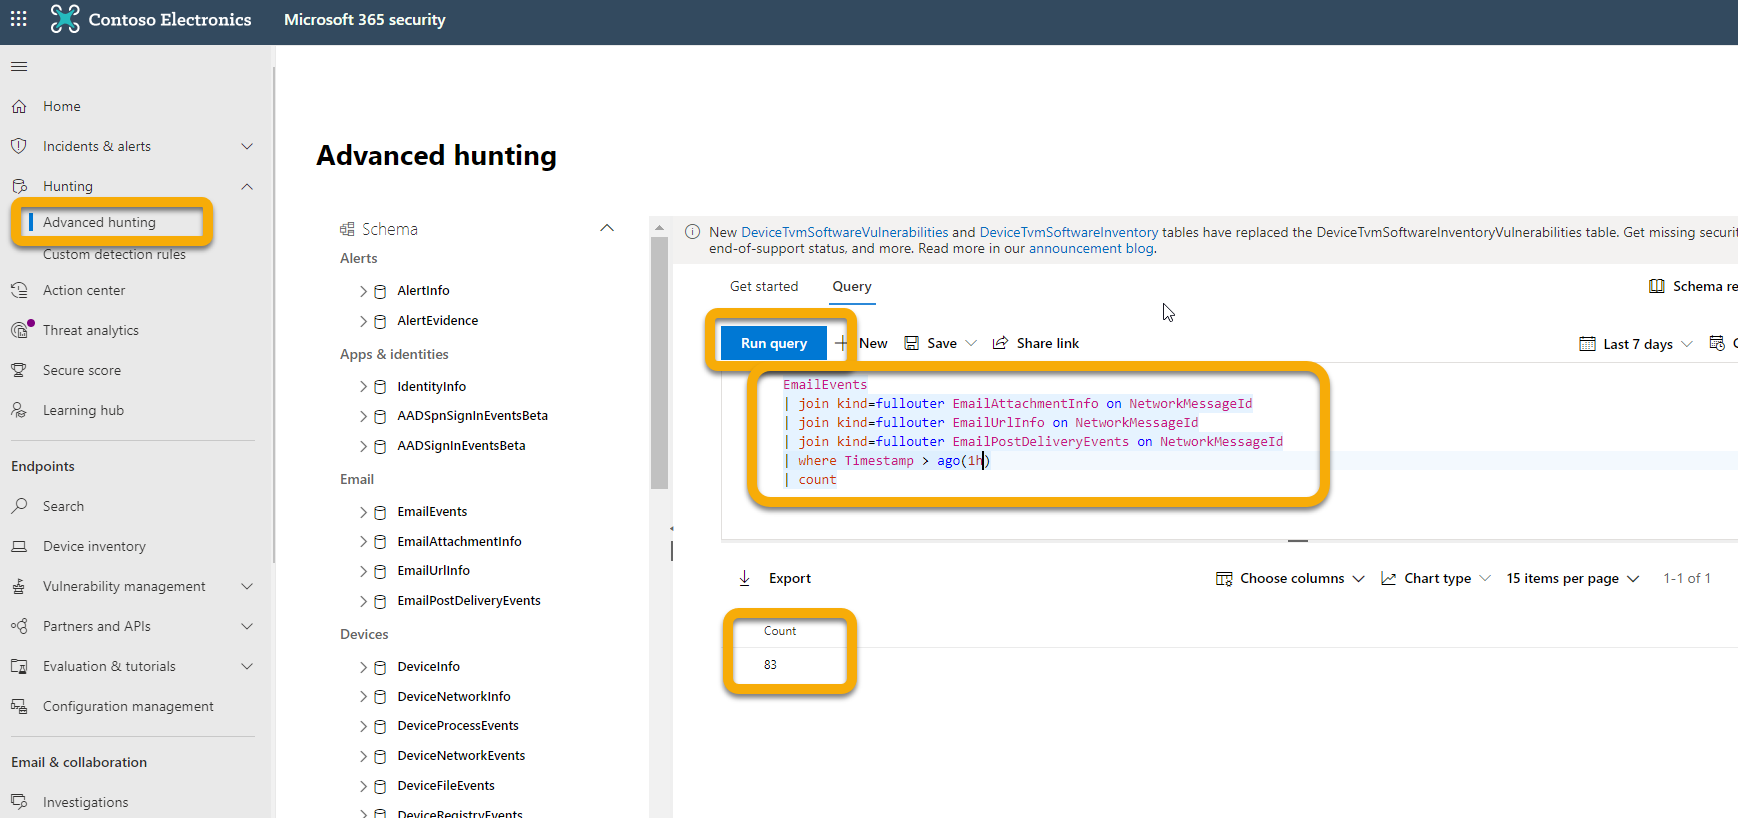
You can verify that events are being sent to the Event Hub by running a basic Advanced Hunting query. Select Hunting > Advanced Hunting > Query and enter the following query:
EmailEvents
|joinkind=fullouterEmailAttachmentInfoonNetworkMessageId
|joinkind=fullouterEmailUrlInfoonNetworkMessageId
|joinkind=fullouterEmailPostDeliveryEventsonNetworkMessageId
|whereTimestamp\>ago(1h)
|count
This will show you how many emails were received in the last hour joined across all the other tables. It will also show you if you are seeing events that could be exported to the event hub. If this count shows 0, then you won’t see any data going out to the Event Hub.
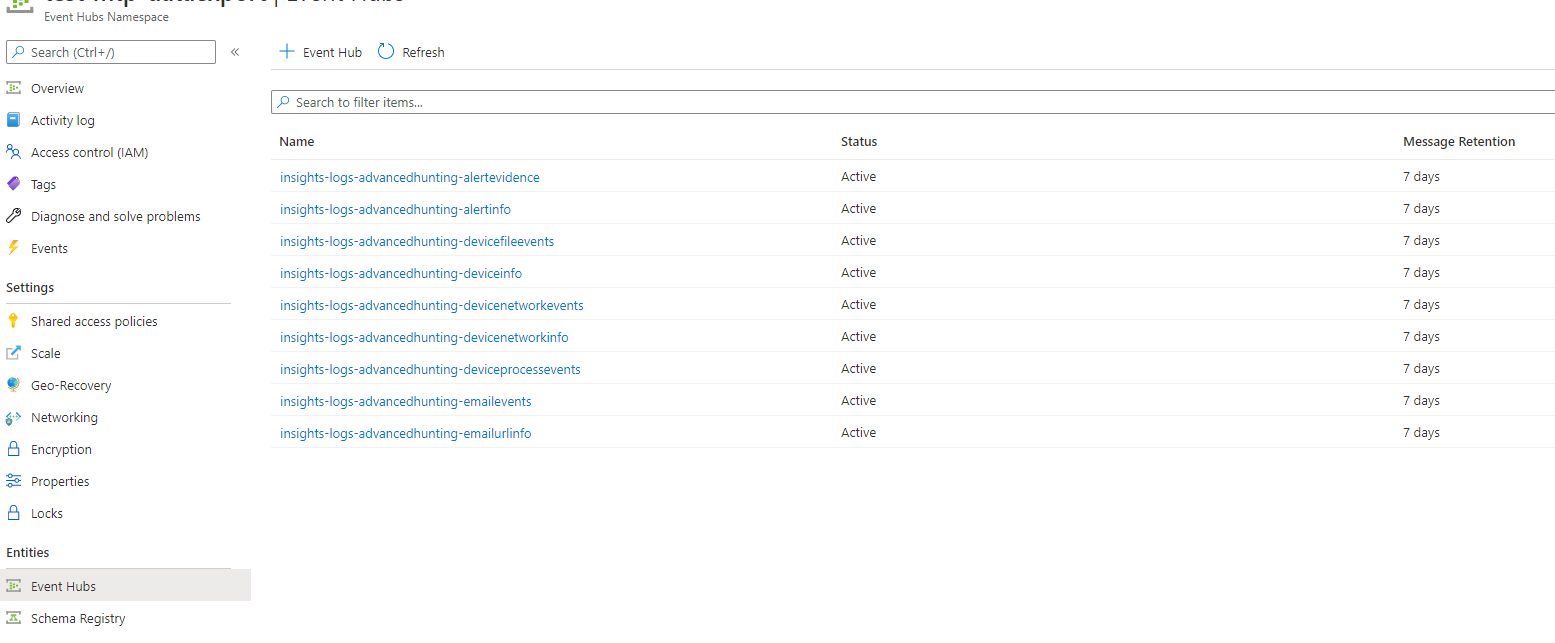
Once you have verified there is data to export, you can view the Event Hub to verify that messages are incoming. This can take up to one hour.
- In Azure, go to Event Hubs > Click on the Namespace > Event Hubs > Click on the Event Hub.
- Under Overview, scroll down and in the Messages graph you should see Incoming Messages. If you don’t see any results, then there will be no messages for your custom app to ingest.
