Issue
- Alternate method of deploying ESET Management Agent in enterprise environments or environments with a high number of client computers.
- ESMC users: Deploy ESET Management Agent 7.x using conventional methods.
- ESET PROTECT users: Deploy ESET Management Agent 8.x using conventional methods.
Solution
Prerequisites
- ESMC/ESET PROTECT Server with network visibility to client machines.
- Windows Server machine joined to a domain.
- Client computers joined to a domain.
Deployment
Perform these steps on the Domain Controller.
- Create the
install_config.iniconfiguration script. It contains the parameters for the Agent to communicate with your ESMC/ESET PROTECT Server.- Open the ESMC Web Console or
Open the ESET PROTECT Web Console in your web browser and log in.
- Click Installers → Create Installer → GPO or SCCM script.
Figure 1-1
Click the image to view larger in new window - Follow the script creation wizard and save the install_config.ini.
- Open the ESMC Web Console or
- Download the ESET Management Agent installer .msi file from the ESET download page:
– version 7 (if you have ESMC 7)
– version 8 (if you have ESET PROTECT 8) - Save the Agent installer
.msifile and theinstall_config.inifile to a shared folder on the domain controller so that all of your client computers can access it with read and execute permissions. - Install Microsoft Group Policy Management Console (GPMC) on your Domain Controller server:
- Open Server Manager → click Manage → Add Roles and Features.
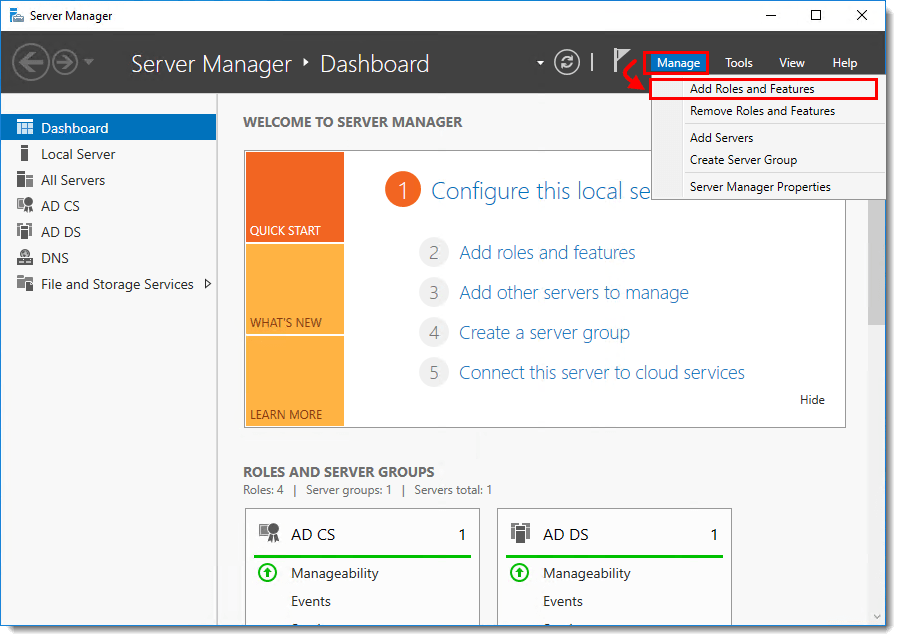
Figure 1-2
Click the image to view larger in new window - Follow the wizard and in Add Roles and Features select the check box next to Group Policy Management and click Next and Install.
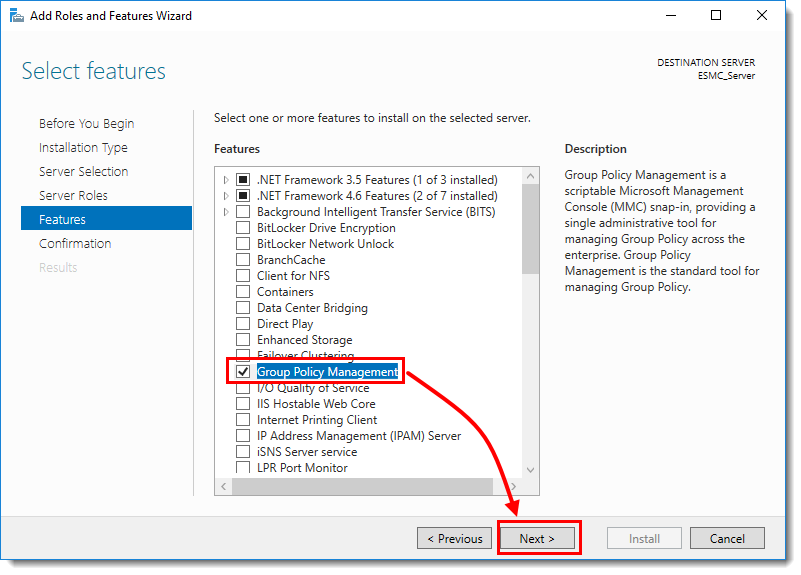
Figure 1-3
Click the image to view larger in new window
- Open Server Manager → click Manage → Add Roles and Features.
- Open Group Policy Management: open Start and run gpmc.msc.
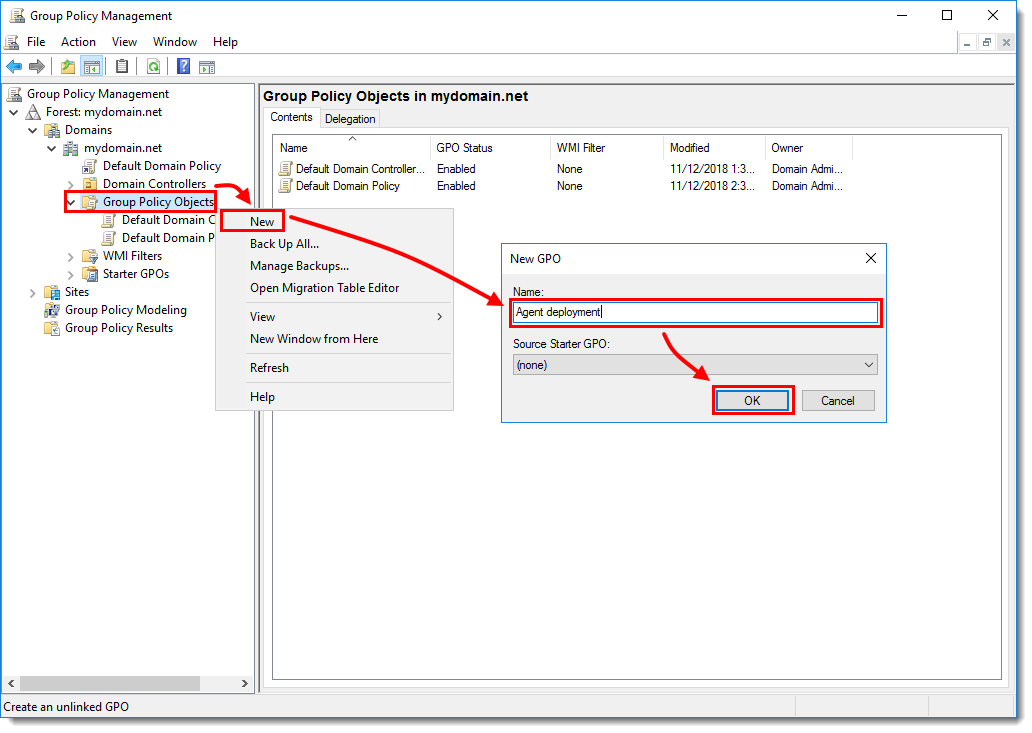
- Create a new GPO to deploy the ESET Management Agents. Right-click Group Policy Objects and select New. Type a name in the Name field, for example Agent deployment, and click OK.
Figure 1-4
Click the image to view larger in new window
- Right-click the domain and select Link an Existing GPO.
Figure 1-5
Click the image to view larger in new window - Select the GPO that you created and click OK.

Figure 1-6
- Right-click the linked GPO and click Edit to edit the GPO in Group Policy Management Editor.
Figure 1-7
Click the image to view larger in new window -
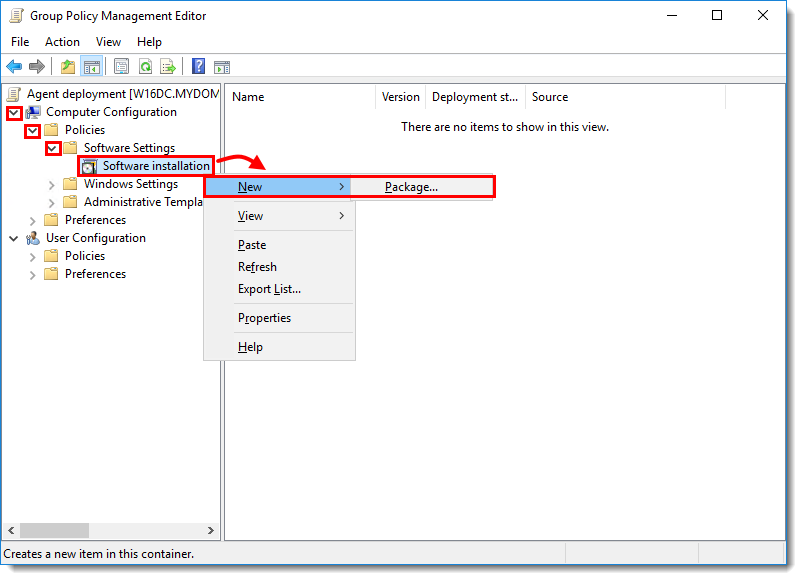
Navigate to the location where the ESET Management Agent installer
.msiis saved. Type the full Universal Naming Convention (UNC) path of the shared installer package (for example, \\fileserver\share\filename.msi) and click Open.
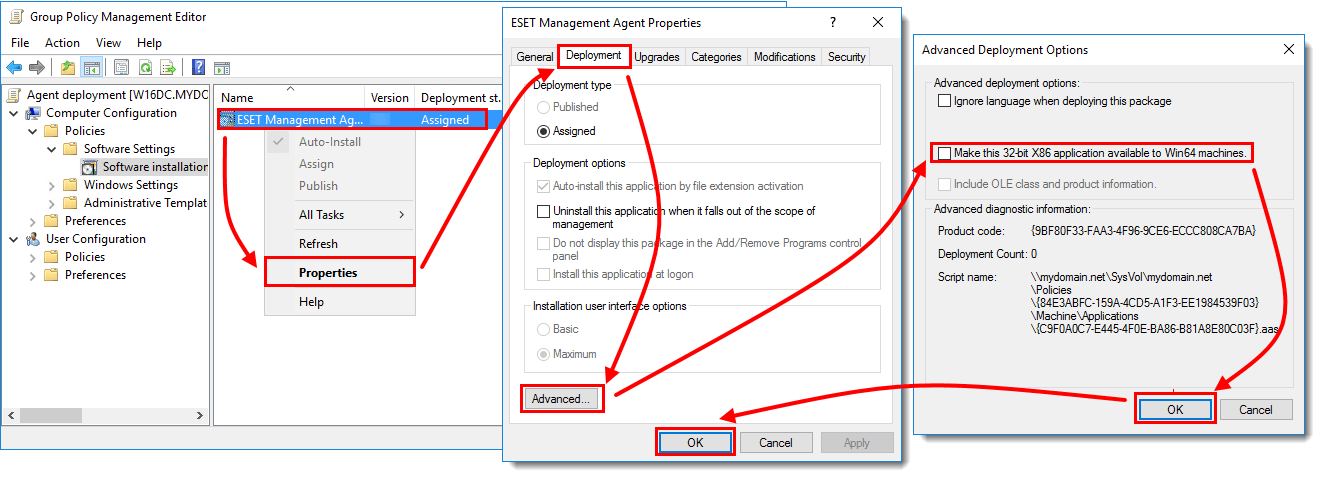
If you are deploying to 64-bit and 32-bit clients, repeat this step for both installer packages (Agent_x64.msi and Agent_x32.msi) and then follow the steps in Deploy ESET Management Agents to both 32-bit and 64 bit systems below.

Figure 1-9
- Select Assigned and click OK.
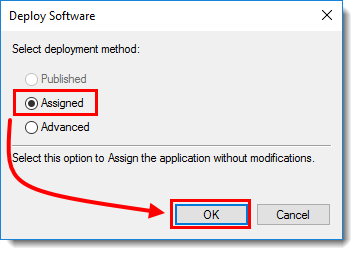
Figure 1-11
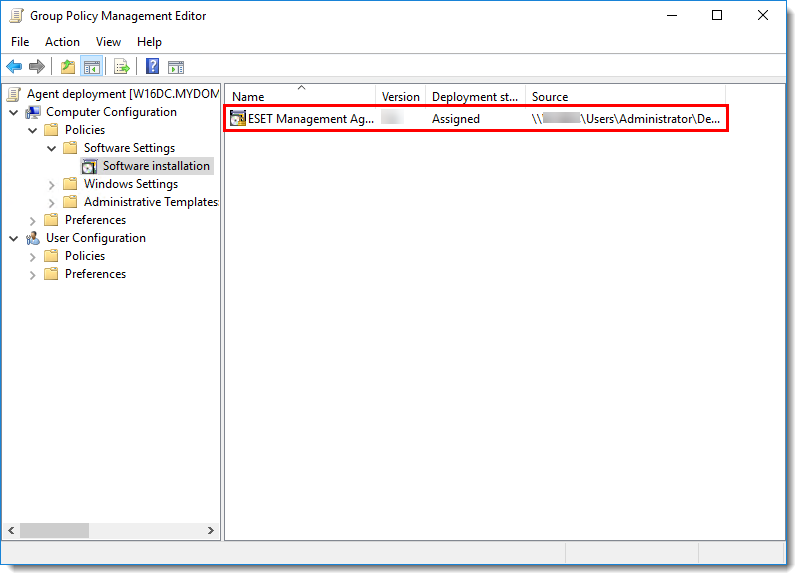
- The package is displayed in the Group Policy Management Editor.
Figure 1-12
Click the image to view larger in new window
- Close the Group Policy Management Editor window. In the left tree of Group Policy Management window, select the GPO you created. In the Security Filtering section, select Authenticated Users, click Remove and OK.
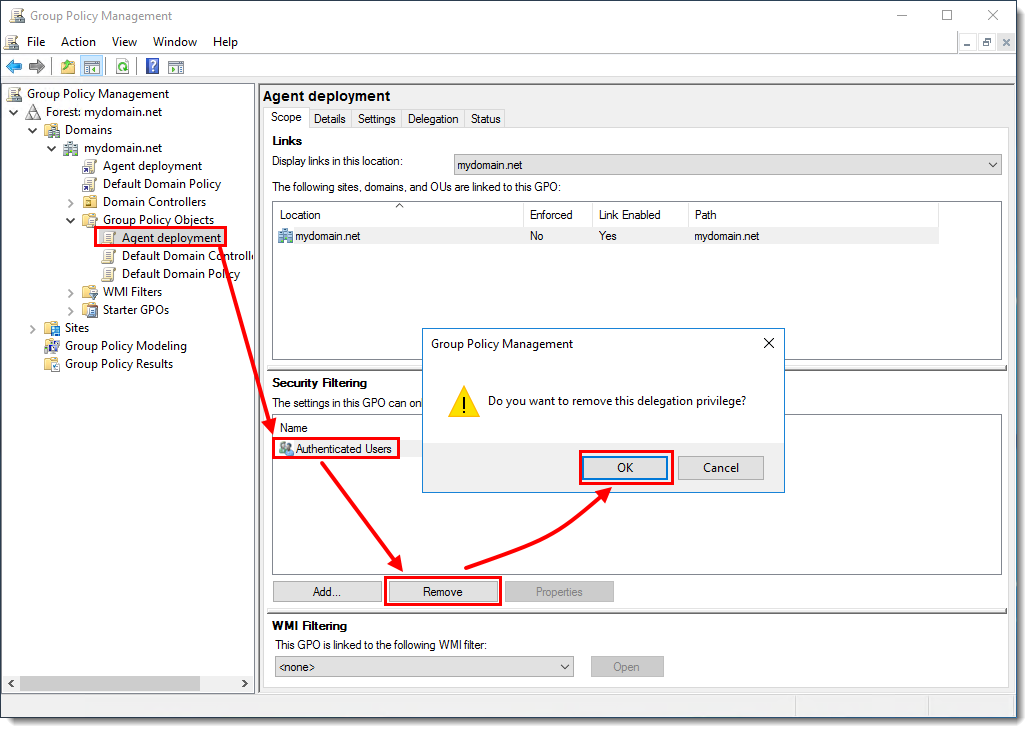
Figure 1-13
Click the image to view larger in new window - Assign GPO to client computers:
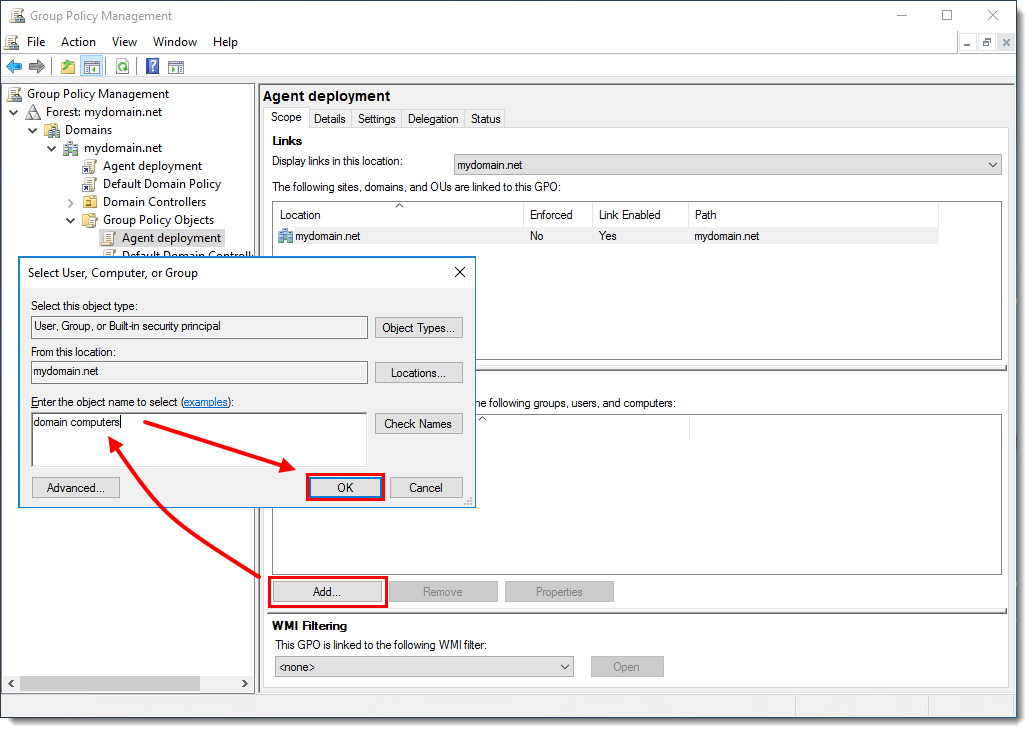
- Assign GPO to all Domain computers: Click Add → type domain computers and click OK.
Figure 1-14
Click the image to view larger in new window
- Alternatively, you can assign GPO to the selected computers only: Click Add → Object Types → select the check box next to Computers and click OK. Type the name of the computer and click OK. You can add more computers by repeating this step.
Figure 1-15
Click the image to view larger in new window
- GPO is now assigned to the selected computers. When the GPO updates, the computers will receive it and ESET Management Agent will be installed.
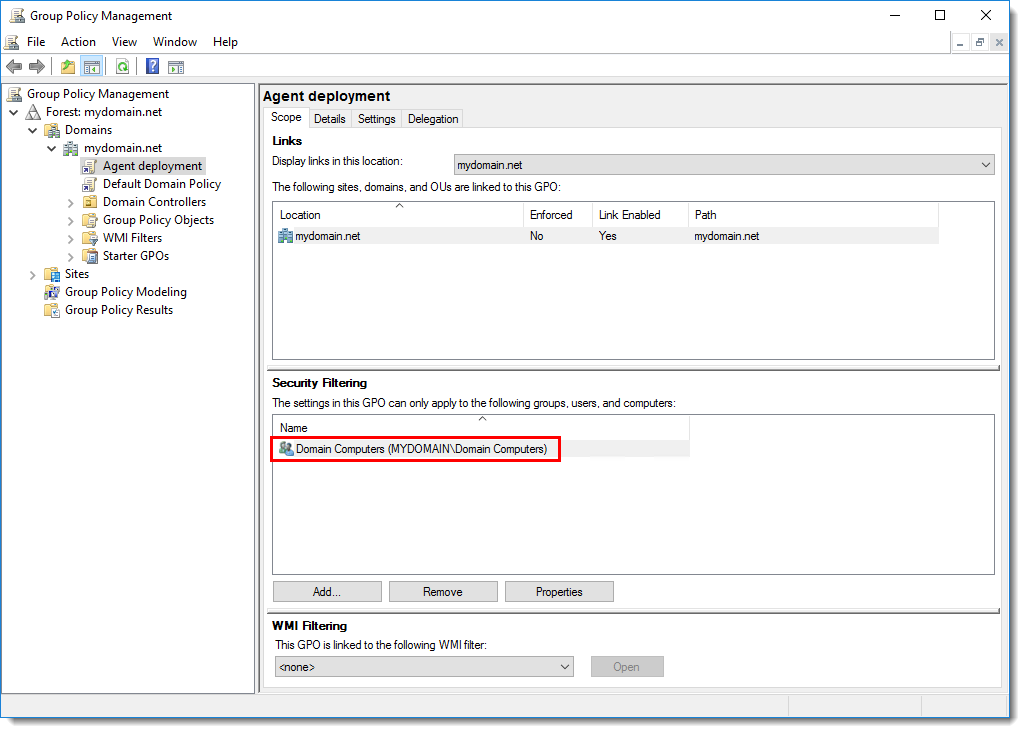
Figure 1-16
Click the image to view larger in new window
See also Microsoft Knowledge Base instructions on How to use Group Policy to remotely install software in Windows Server 2008 (and later).


