

Note
We’ve renamed Microsoft Cloud App Security. It’s now called Microsoft Defender for Cloud Apps. In the coming weeks, we’ll update the screenshots and instructions here and in related pages. For more information about the change, see this announcement. To learn more about the recent renaming of Microsoft security services, see the Microsoft Ignite Security blog.
This quickstart provides you with steps for getting up and running with Defender for Cloud Apps. Microsoft Defender for Cloud Apps can help you take advantage of the benefits of cloud applications while maintaining control of your corporate resources. It works by improving visibility of cloud activity and helping to increase the protection of corporate data. In this article, we walk you through the steps you take to set up and work with Microsoft Defender for Cloud Apps.
Prerequisites
- In order for your organization to be in compliance for licensing Microsoft Defender for Cloud Apps, you must obtain a license for every user protected by Microsoft Defender for Cloud Apps. For pricing details, see the Defender for Cloud Apps licensing datasheet.
For tenant activation support, see Ways to contact support for business products – Admin Help.
Note
Microsoft Defender for Cloud Apps is a security tool and therefore doesn’t require Office 365 productivity suite licenses. For Office 365 Cloud App Security (Microsoft Defender for Cloud Apps only for Office 365), see Office 365 Cloud App Security licensing.
- After you have a license for Defender for Cloud Apps, you’ll receive an email with activation information and a link to the Defender for Cloud Apps portal.
- To set up Defender for Cloud Apps, you must be a Global Administrator or a Security Administrator in Azure Active Directory or Office 365. It’s important to understand that a user who is assigned an admin role will have the same permissions across all of the cloud apps that your organization has subscribed to. This is regardless of whether you assign the role in the Microsoft 365 admin center, or in the Azure classic portal, or by using the Azure AD module for Windows PowerShell. For more information, see Assign admin roles and Assigning administrator roles in Azure Active Directory.
- To run the Defender for Cloud Apps portal, use Internet Explorer 11, Microsoft Edge (latest), Google Chrome (latest), Mozilla Firefox (latest), or Apple Safari (latest).
To access the portal
To access the Defender for Cloud Apps portal, go to https://portal.cloudappsecurity.com. You can also access the portal through the Microsoft 365 admin center, as follows:
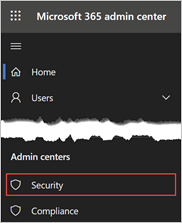
- In the Microsoft 365 admin center, in the side menu, select Show all, and then select Security.
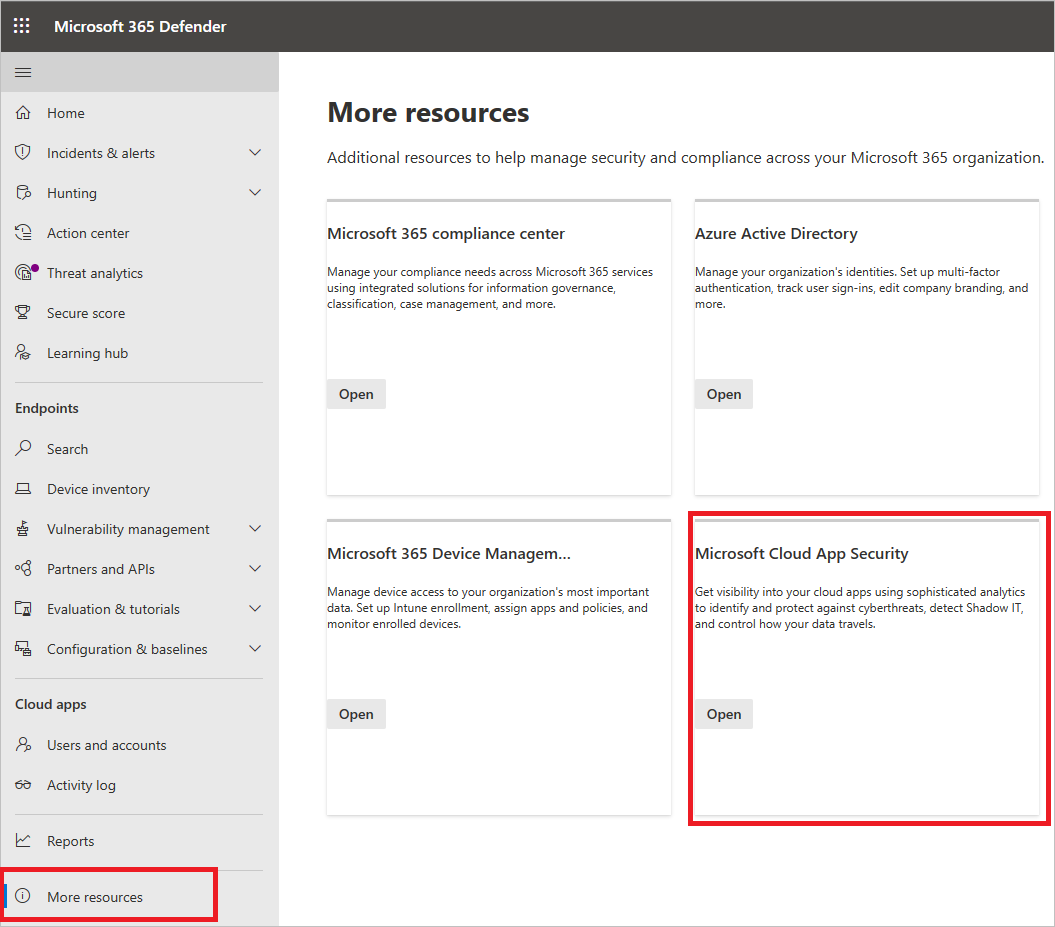
- In the Microsoft 365 Defender page, select More resources, and then select Defender for Cloud Apps.
Step 1. Set instant visibility, protection, and governance actions for your apps
Required task: Connect apps
- From the settings cog, select App connectors.
- Click the plus sign (+) to add an app and select an app.
- Follow the configuration steps to connect the app.
Why connect an app? After you connect an app, you can gain deeper visibility so you can investigate activities, files, and accounts for the apps in your cloud environment.
Step 2. Protect sensitive information with DLP policies
Recommended task: Enable file monitoring and create file policies
- Go to Settings, and then under Information Protection, select Files.
- Select Enable file monitoring and then click Save.
- If you use Microsoft Information Protection sensitivity labels, under Information Protection, select Microsoft Information Protection.
- Select the required settings and then click Save.
- In step 3, create File policies to meet your organizational requirements.
Tip
You can view files from your connected apps by browsing to Investigate > Files.
Migration recommendation
We recommend using Defender for Cloud Apps sensitive information protection in parallel with your current Cloud Access Security Broker (CASB) solution. Start by connecting the apps you want to protect to Microsoft Defender for Cloud Apps. Since API connectors use out-of-band connectivity, no conflict will occur. Then progressively migrate your policies from your current CASB solution to Defender for Cloud Apps.
Note
For third-party apps, verify that the current load does not exceed the app’s maximum number of allowed API calls.
Step 3. Control cloud apps with policies
Required task: Create policies
To create policies
- Go to Control > Templates.
- Select a policy template from the list, and then choose (+) Create policy.
- Customize the policy (select filters, actions, and other settings), and then choose Create.
- On the Policies tab, choose the policy to see the relevant matches (activities, files, alerts).
Tip
To cover all your cloud environment security scenarios, create a policy for each risk category.
How can policies help your organization?
You can use policies to help you monitor trends, see security threats, and generate customized reports and alerts. With policies, you can create governance actions, and set data loss prevention and file-sharing controls.
Step 4. Set up Cloud Discovery
Required task: Enable Defender for Cloud Apps to view your cloud app use
- Integrate with Microsoft Defender for Endpoint to automatically enable Defender for Cloud Apps to monitor your Windows 10 and Windows 11 devices inside and outside your corporation.
- If you use Zscaler, integrate it with Defender for Cloud Apps.
- To achieve full coverage, create a continuous Cloud Discovery report
- From the settings cog, select Cloud Discovery settings.
- Choose Automatic log upload.
- On the Data sources tab, add your sources.
- On the Log collectors tab, configure the log collector.
Migration recommendation
We recommend using Defender for Cloud Apps discovery in parallel with your current CASB solution. Start by configuring automatic firewall log upload to Defender for Cloud Apps log collectors. If you use Defender for Endpoint, in Microsoft 365 Defender, make sure you turn on the option to forward signals to Defender for Cloud Apps. Configuring Cloud Discovery will not conflict with the log collection of your current CASB solution.
To create a snapshot Cloud Discovery report
Go to Discover > Snapshot report and follow the steps shown.
Why should you configure Cloud Discovery reports?
Having visibility into shadow IT in your organization is critical. After your logs are analyzed, you can easily find which cloud apps are being used, by which people, and on which devices.
Step 5. Deploy Conditional Access App Control for featured apps
Recommended task: Deploy Conditional Access App Control for featured apps
- Configure your IdP to work with Defender for Cloud Apps. If you have Azure AD, you can leverage inline controls such as Monitor only and Block downloads which will work for any featured app out of the box.
- Onboard apps onto access and session controls.
- From the settings cog, select Conditional Access App Control.
- Sign in to each app using a user scoped to the policy
- Refresh the Conditional Access App Control page and to view the app.
- Verify the apps are configured to use access and session controls
To configure session controls for custom line-of-business apps, non-featured SaaS apps, and on-premise apps, see Onboard and deploy Conditional Access App Control for any app.
Migration recommendation
Using Conditional Access App Control in parallel with another CASB solution can potentially lead to an app being proxied twice, causing latency or other errors. Therefore, we recommended progressively migrating apps and policies to Conditional Access App Control, creating the relevant session or access policies in Defender for Cloud Apps as you go.
Step 6. Personalize your experience
Recommended task: Add your organization details
To enter email settings
- From the settings cog, select Mail settings.
- Under Email sender identity, enter your email addresses and display name.
- Under Email design, upload your organization’s email template.
To set admin notifications
- In the navigation bar, choose your user name, and then go to User settings.
- Under Notifications, configure the methods you want to set for system notifications.
- Choose Save.
To customize the score metrics
- From the settings cog, select Cloud Discovery settings.
- From the settings cog, select Cloud Discovery settings.
- Under Score metrics, configure the importance of various risk values.
- Choose Save.
Now the risk scores given to discovered apps are configured precisely according to your organization needs and priorities.
Why personalize your environment?
Some features work best when they’re customized to your needs. Provide a better experience for your users with your own email templates. Decide what notifications you receive and customize your risk score metric to fit your organization’s preferences.
Step 7. Organize the data according to your needs
Recommended task: Configure important settings
To create IP address tags
- From the settings cog, select Cloud Discovery settings.
- From the settings cog, select IP address ranges.
- Click the plus sign (+) to add an IP address range.
- Enter the IP range details, location, tags, and category.
- Choose Create.
Now you can use IP tags when you create policies, and when you filter and create continuous reports.
To create continuous reports
- From the settings cog, Cloud Discovery settings.
- Under Continuous reports, choose Create report.
- Follow the configuration steps.
- Choose Create.
Now you can view discovered data based on your own preferences, such as business units or IP ranges.
To add domains
- From the settings cog, select Settings.
- Under Organization details, add your organization’s internal domains.
- Choose Save.
Why should you configure these settings?
These settings help give you better control of features in the console. With IP tags, it’s easier to create policies that fit your needs, to accurately filter data, and more. Use Data views to group your data into logical categories.