
This article is Step 3 of 3 in the process of setting up the evaluation environment for Microsoft Defender for Office 365. For more information about this process, see the overview article.
Use the following steps to setup and configure the pilot for Microsoft Defender for Office 365.
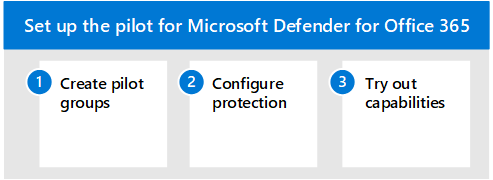
- Step 1: Create pilot groups
- Step 2: Configure protection
- Step 3: Try out capabilities — Get familiar with simulation, monitoring, and metrics
When you evaluate Microsoft Defender for Office 365, you may choose to pilot specific users before enabling and enforcing policies for your entire organization. Creating distribution groups can help manage the deployment processes. For example, create groups such as Defender for Office 365 Users – Standard Protection, Defender for Office 365 Users – Strict Protection, Defender for Office 365 Users – Custom Protection, or Defender for Office 365 Users – Exceptions.
It may not be evident why ‘Standard’ and ‘Strict’ are the terms used for this, but that will become clear when you explore more about Defender for Office 365 security presets. Naming groups ‘custom’ and ‘exceptions’ speak for themselves, and though most of your users should fall under standard and strict, custom and exception groups will collect valuable data for you regarding managing risk.
Step 1: Create pilot groups
Distribution groups can be created and defined directly in Exchange Online or synchronized from on-premises Active Directory.
-
Logon to Exchange Admin Center (EAC) using an account that has been granted Recipient Administrator role or been delegated group management permissions.
-
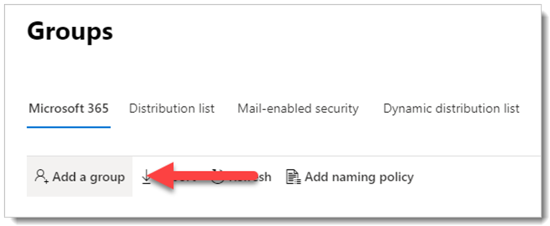
From the navigation menu, expand Recipients and select Groups.

-
From the Groups dashboard, select “Add a group”.
-
For group type, select Distribution and click Next.
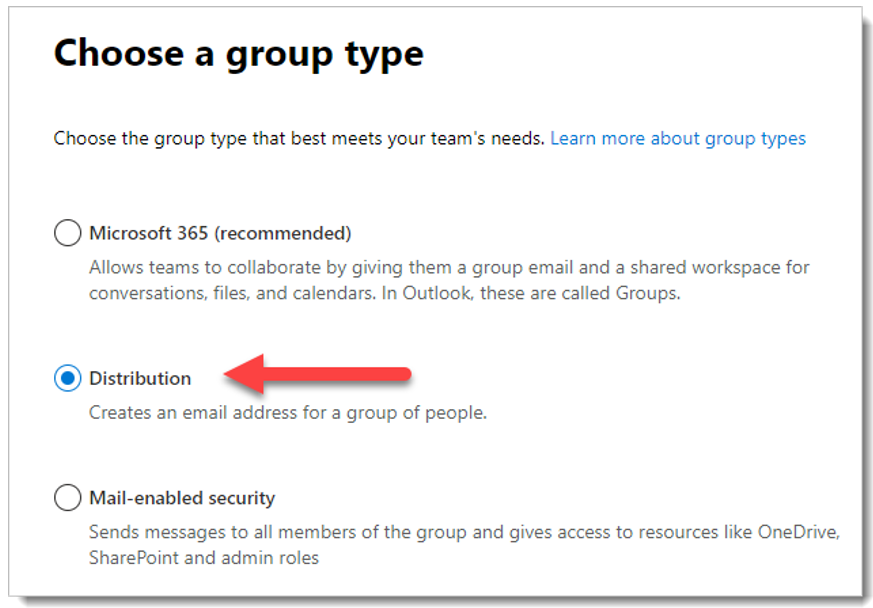
-
Give the group a name and description and then click Next.

Step 2: Configure protection
Some capabilities in Defender for Office 365 are configured and turned on by default, but security operations may want to raise the level of protection from the default.
Some capabilities are not yet configured. You have three options for configuring protection:
- Assign preset security policies automatically — Preset security policies are provided as a method to quickly assign a uniform level of protection across all of the capabilities. You can choose from standard or strict. A good approach is to start with preset security policies and then fine-tune the policies as you learn more about the capabilities and your own unique threat environment. The advantage here is that you protect groups of users as quickly as possible, with the ability to tweak protection afterward. (This method is recommended.)
- Configure baseline protection manually — If you prefer to configure the environment yourself, you can quickly achieve a baseline of protection by following the guidance in Protect against threats. With this approach you get to learn more about the settings that are configurable. And, of course, you can fine-tune the policies later.
- Configure custom protection policies — You can also build and assign custom protection policies as part of your evaluation. Before you start customizing policies, it’s important to understand the precedence in which these protection policies are applied and enforced. Security ops will need to create some policies even if when the preset is applied, in specific in order to define security policies for Safe Links and Safe Attachments.
Important
If you need to configure custom protection policies, you should examine the values that make up the Standard and Strict security definitions here: Recommended settings for EOP and Microsoft Defender for Office 365 security. Default values, as seen before any configuration takes place are also listed. Keep a spreadsheet of where your custom build deviates.
Assign preset security policies
It’s encouraged to begin with the recommended baseline policies when evaluating MDO and then refine them as needed over the course of your evaluation period.
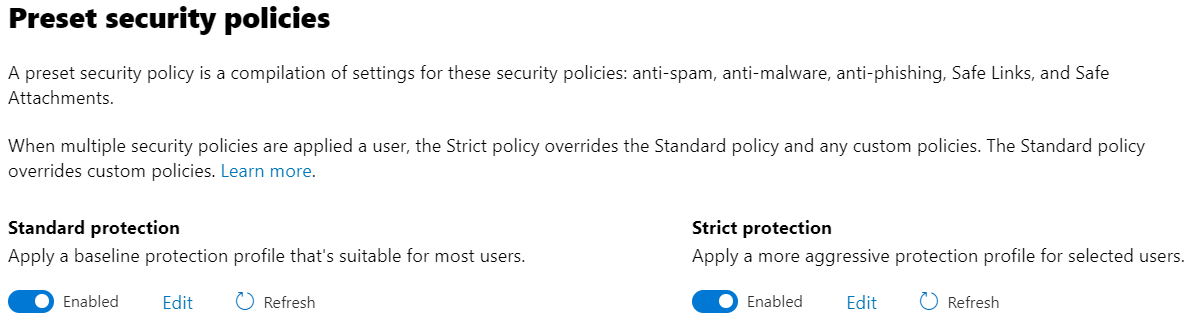
You can enable recommended EOP and Defender for Office 365 protection policies fast, and assign them to specific pilot users or defined groups as part of your evaluation. Preset policies offer a baseline Standard protection template or a more aggressive Strict protection template which can be assigned independently, or combined.
Here is the Preset security policies in EOP and Microsoft Defender for Office 365 article outlining the steps.
-
Log on to your Microsoft 365 tenant. Use an account with access to the Microsoft 365 Defender portal, added to Organization Management role in Office 365, or Security Administrator role in Microsoft 365.
-
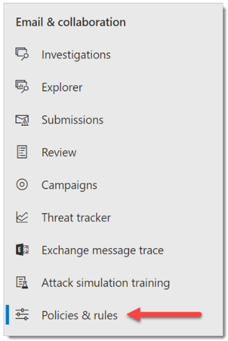
From the navigation menu, select Polices & Rules under Email & Collaboration.
-
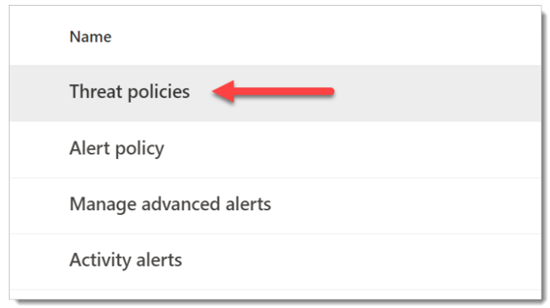
On the Policy & Rules dashboard, click Threat Policies.
-
From the Microsoft 365 Defender portal, expand Threat Management from the navigation menu and then select Policy from the submenu.
-
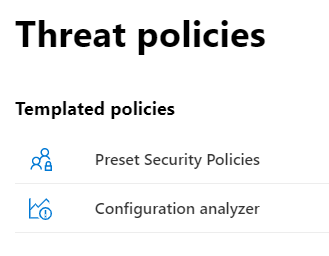
On the Policy dashboard, click Preset security policies.
-
Click Edit to configure and assign the Standard policy and/or Strict policy.
-
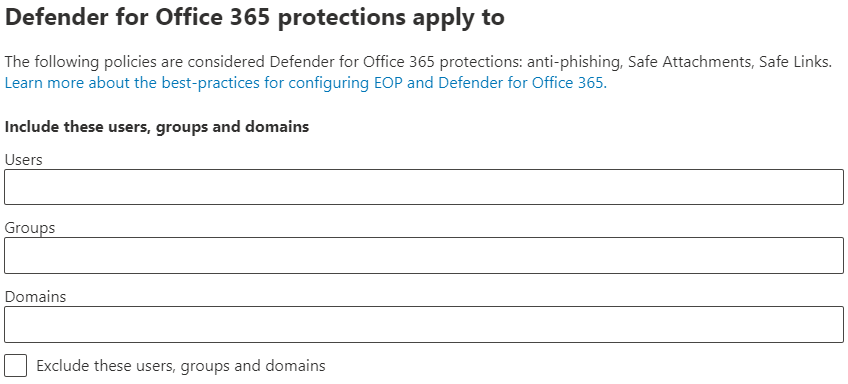
Add conditions to apply baseline EOP protections to specific pilot users, or groups of users, as needed, and select Next to continue.
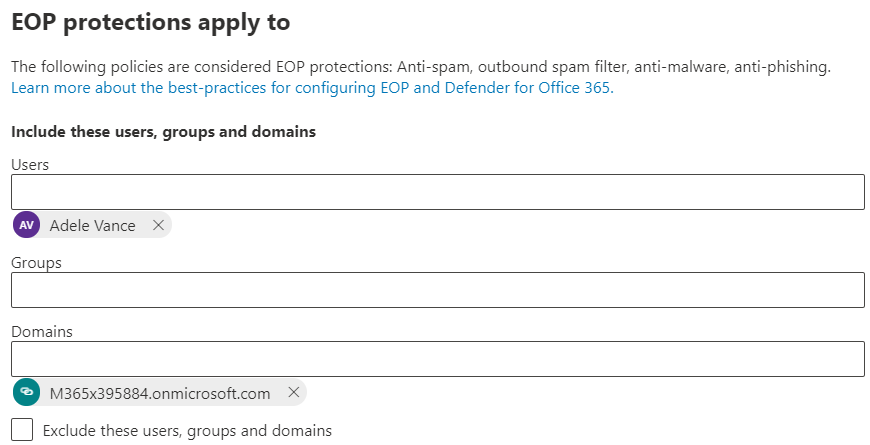
Example, a Defender for Office 365 condition for pilot evaluations could be applied if the recipients are members of a defined Defender for Office 365 Standard Protection group, and then managed by simply adding accounts to, or removing account from, the group.
-
Add conditions to apply baseline MDO protections to specific pilot users, or groups of users, as needed. Click Next to continue.
For example, a Defender for Office 365 condition for pilot evaluations could be applied if the recipients are members of a defined Defender for Office 365 Standard Protection group and then managed by simply adding / removing accounts via the group.
-
Review and confirm your changes for assigning preset security policies.
-
Preset protection policies can be managed (re-configured, re-applied, disabled, etc.) by returning to the Microsoft 365 Defender portal > Policies & rules > Threat Policies > and clicking the Preset security policies tile.
Configure custom protection policies
The pre-defined Standard or Strict Defender for Office 365 policy templates give your pilot users the recommended baseline protection. However, you can also build and assign custom protection policies as part of your evaluation.
It’s important to be aware of the precedence these protection policies take when applied and enforced, as Order and precedence of email protection – Office 365 explains.
The table below provides references and additional guidance for configuring and assigning custom protection policies:
| Policy | Description | Reference |
|---|---|---|
| Connection Filtering | Identify good or bad source email servers by their IP addresses. | Configure the default connection filter policy in EOP |
| Anti-Malware | Protect users from email malware including what actions to take and who to notify if malware is detected. | Configure anti-malware policies in EOP |
| Anti-Spoofing | Protect users from spoofing attempts using spoof intelligence and spoof intelligence insights. | Configure spoof intelligence in Defender for Office 365 |
| Anti-Spam | Protect users from email spam including what actions to take if spam is detected. | Configure anti-spam policies in Defender for Office 365 |
| Anti-Phishing | Protect users from phishing attacks and configure safety tips on suspicious messages | Configure anti-phishing policies in Defender for Office 365 |
| Safe Attachments | Protect users from malicious content in email attachments and files in SharePoint, OneDrive, and Teams. | Set up safe attachment policies in Defender for Office 365 |
| Safe Links | Protect users from opening and sharing malicious links in email messages or Office desktop apps. | Set up safe links policies in Defender for Office 365 |
Step 3: Try out capabilities — Get familiar with simulation, monitoring, and metrics
Now that your pilot is set up and configured, it’s helpful to become familiar with the reporting, monitoring, and attack simulation tools that are unique to Microsoft Defender for Microsoft 365.
| Capability | Description | More information |
|---|---|---|
| Threat Explorer | Threat Explorer is a powerful near real-time tool to help Security Operations teams investigate and respond to threats and displays information about suspected malware and phish in email and files in Office 365, as well as other security threats and risks to your organization. | Views in Threat Explorer and real-time detections |
| Attack Simulator | You can use Attack Simulation Training in the Microsoft 365 Defender portal to run realistic attack scenarios in your organization which help you identify and find vulnerable users before a real attack impacts your environment. | Get started using Attack simulation training |
| Reports dashboard | On the left navigation menu, click Reports and expand the Email & collaboration heading. The Email & collaboration reports are about spotting security trends some of which will allow you to take action (through buttons like ‘Go to submissions’), and others that will show trends, like Mailflow status summary, Top Malware, Spoof detections, Compromised users, Mail latency, Safe Links and Safe attachments reports. These metrics are generated automatically. | View Reports |