Important
The improved Microsoft 365 Defender portal is now available. This new experience brings Defender for Endpoint, Defender for Office 365, Microsoft 365 Defender, and more into the Microsoft 365 Defender portal. Learn what’s new.
Applies to:
- Microsoft 365 Defender
Incident management is critical in ensuring that threats are contained and addressed.
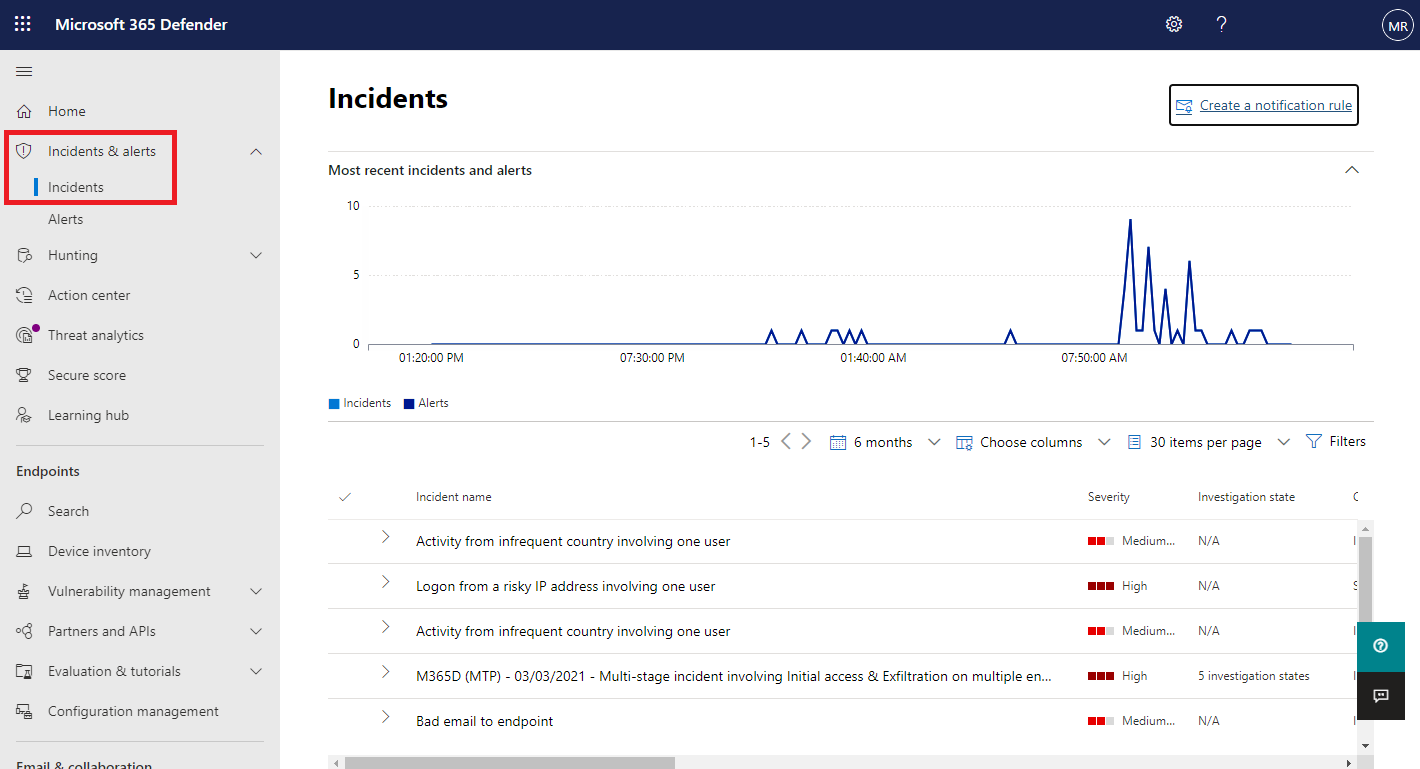
Ratulac-acrolinx-updates You can manage incidents from Incidents & alerts > Incidents on the quick launch of the Microsoft 365 Defender portal (security.microsoft.com). Here’s an example.
Here are the ways you can manage your incidents:
- Edit the incident name
- Add incident tags
- Assign the incident to a user account
- Resolve them
- Set its classification and determination
- Add comments
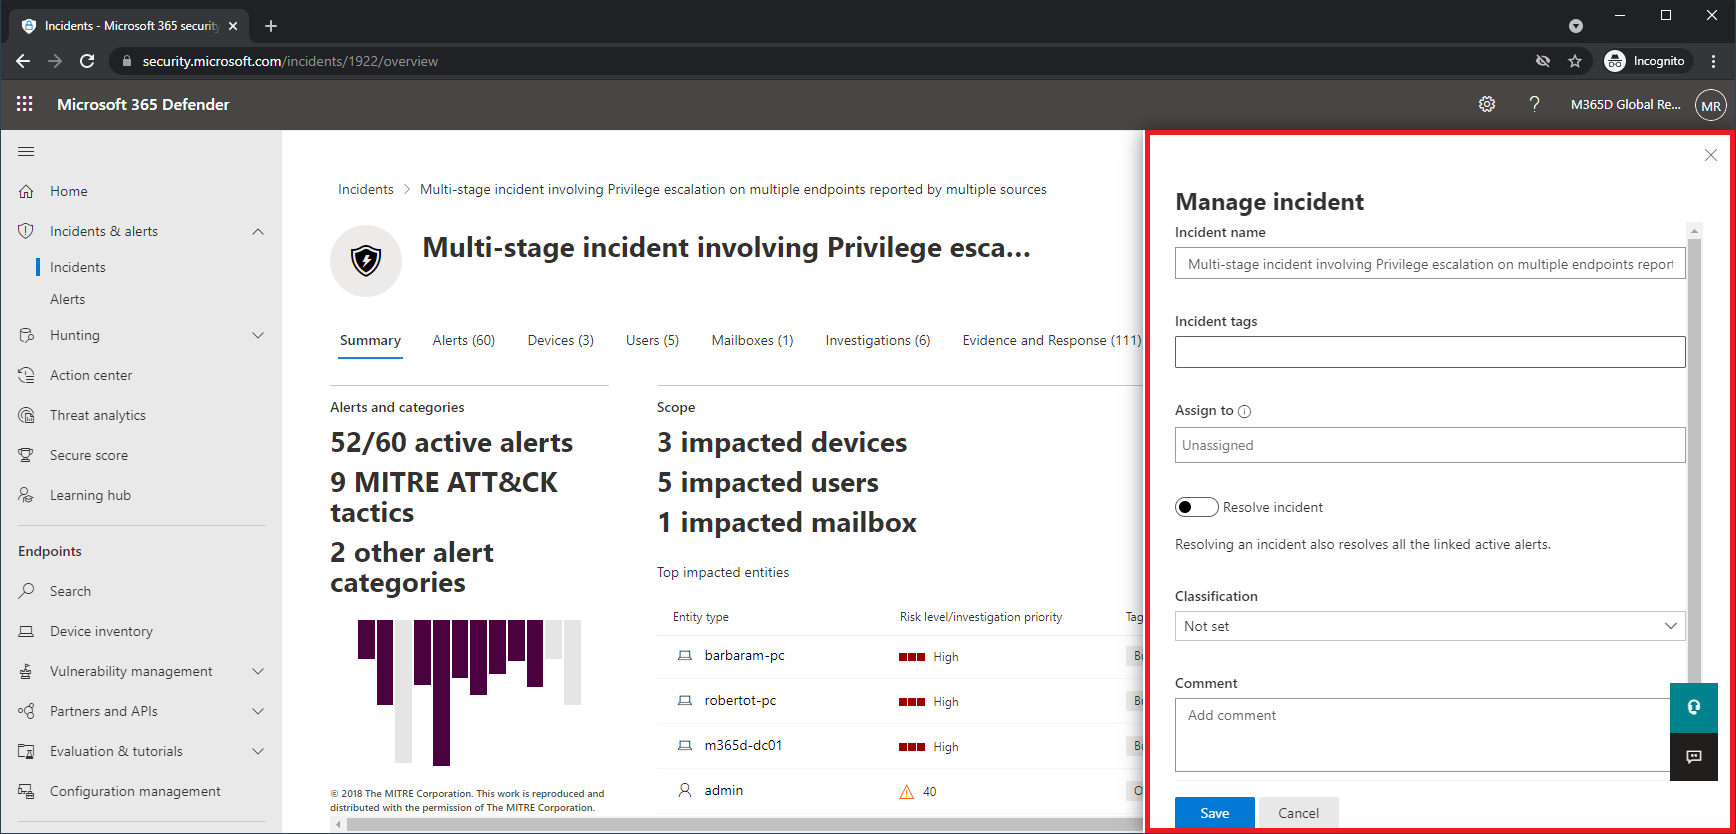
You can manage incidents from the Manage incident pane for an incident. Here’s an example.
You can display this pane from the Manage incident link on the:
- Properties pane of an incident in the incident queue.
- Summary page of an incident.
In cases where you want to move alerts from one incident to another, you can also do so from the Alerts tab, thus creating a larger or smaller incident that includes all relevant alerts.
Edit the incident name
Microsoft 365 Defender automatically assigns a name based on alert attributes such as the number of endpoints affected, users affected, detection sources or categories. This allows you to quickly understand the scope of the incident. For example: Multi-stage incident on multiple endpoints reported by multiple sources.
You can edit the incident name from the Incident name field on the Manage incident pane.
Note
Incidents that existed before the rollout of the automatic incident naming feature will retain their name.
Add incident tags
You can add custom tags to an incident, for example to flag a group of incidents with a common characteristic. You can later filter the incident queue for all incidents that contain a specific tag.
When you start typing, you have the option to select from a list of selected tags.
Assign an incident
If an incident has not yet been assigned, you can select the Assign to box and specify the user account (Preview). Te re-assign an incident, remove the current assignment account by selecting the “x” next to the account name and then select the Assign to box. Assigning ownership of an incident assigns the same ownership to all the alerts associated with it.
You can get a list of incidents assigned to you by filtering the incident queue.
- From the incident queue, select Filters.
- in the Incident assignment section, clear Select all and select Assigned to me.
- Select Apply, and then close the Filters pane.
You can then save the resulting URL in your browser as a bookmark to quickly see the list of incidents assigned to you.
Resolve an incident
If the incident has been remediated, select Resolve incident to move the toggle to the right. Note that resolving an incident also resolves all the linked and active alerts related to the incident.
An incident that is not resolved displays as Active.
Set the classification and determination
The incident classification is whether it was a true alert or a false alert, which you configure from the Classification field.
If it was a true alert, you should also specify what type of threat it was with the Determination field. Specifying the threat type helps your security team see threat patterns and act to defend your organization from them.
Add comments
You can add multiple comments to an incident with the Comment field. Each comment gets added to the historical events of the incident. You can see the comments and history of an incident from the Comments and history link on the Summary page.
Next steps
For new incidents, begin your investigation.
For in-process incidents, continue your investigation.
For resolved incidents, perform a post-incident review.


