

Solution
Prerequisites
- Make sure that your system meets the system requirements for ESET PROTECT.
- Visit the ESET PROTECT All-in-one installer download page, select the appropriate installer file for your system and click Download. When it finishes downloading, extract the .zip file to an easy-to-find location.
This solution is divided into three parts, click each part to expand the step-by-step instructions.
I. Manually install SQL Express on Computer 1
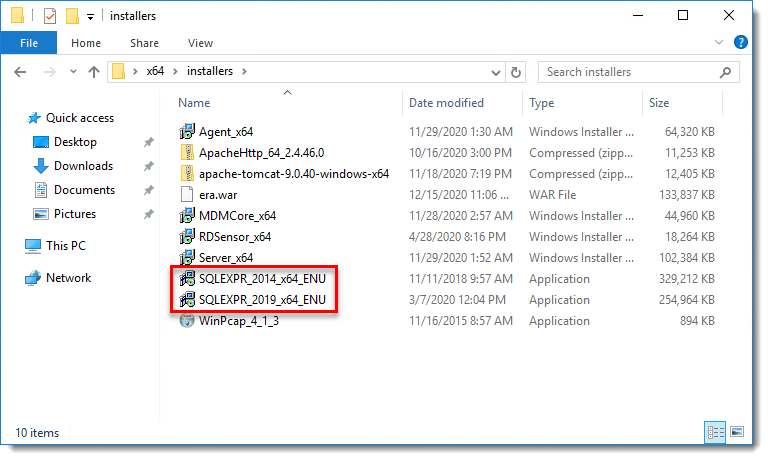
- Open the x64 folder that you extracted from the ESET PROTECT All-in-one installer file, navigate to Installers and double-click SQLEXPR_2019_x64_ENU or SQLEXPR_2014_ENU depending on the version of SQL Express you want to install (the example below shows the SQL Server 2019 installation).
- Click New SQL Server stand-alone installation or add features to an existing installation.

- Read the SQL Server License Terms, select the check box next to I accept the license terms and Privacy Statement and then click Next.

- After support files have finished installing, leave the default values selected and click Next.

- The default name for your database instance is SQLExpress; you can type a new name into the Named instance and Instance ID fields if you prefer to use a custom name and click Next.

- Keep the default settings and click Next.
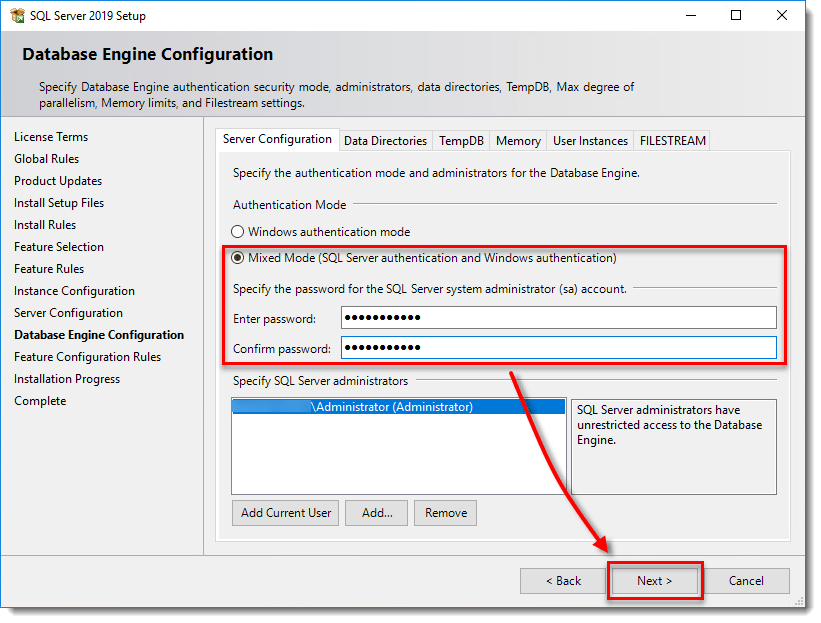
- In the Database Engine Configurationwindow, select Mixed Mode (SQL Server authentication and Windows authentication), type a password for your database into the Enter password and Confirm password fields and then click Next.
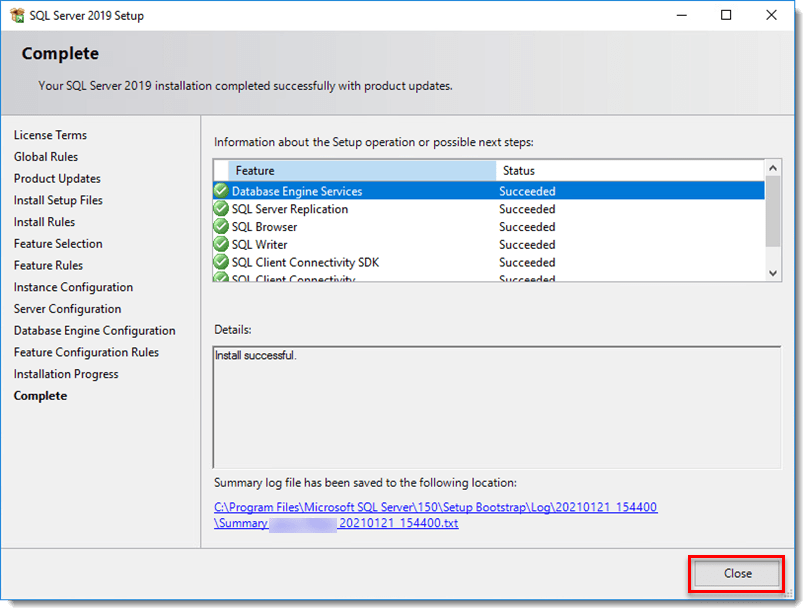
- When SQL Server installation completes, click Close. Continue to part II below.
II. Allow TCP/IP connections to the SQL database on Computer 1
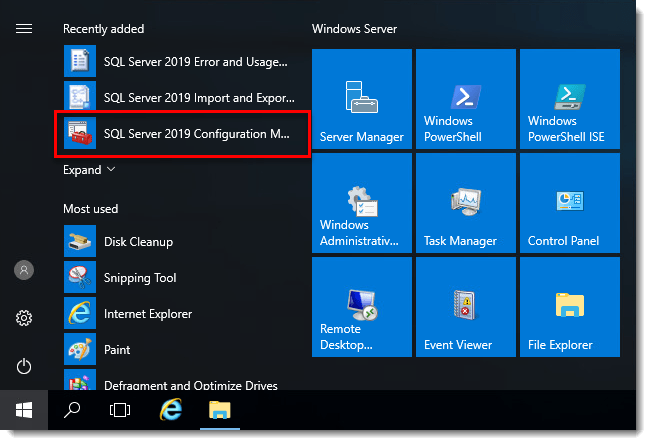
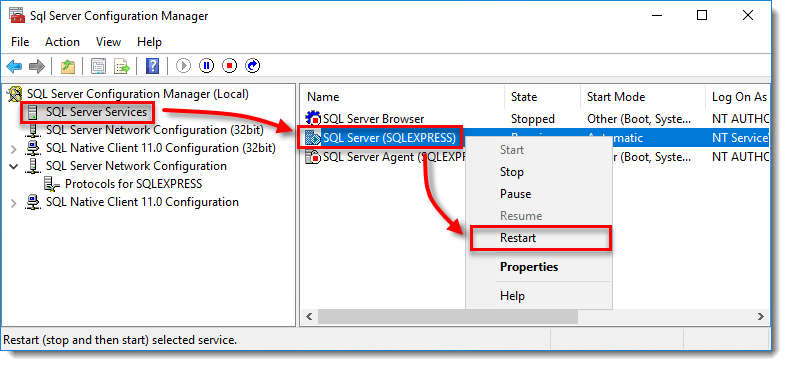
- Click Start → All Programs → Microsoft SQL Server → Configuration Tools → SQL Server Configuration Manager.
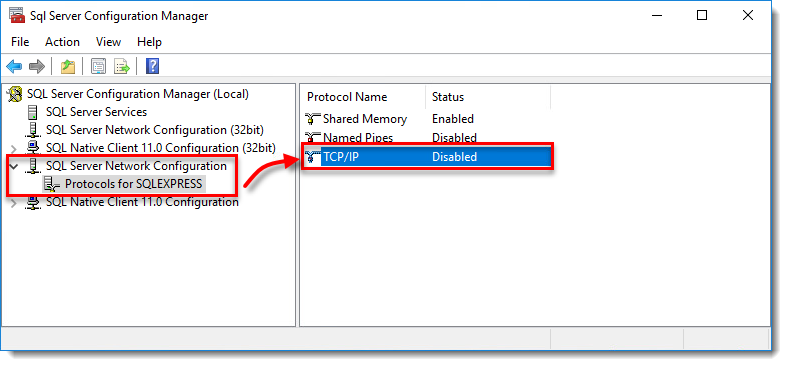
- Expand SQL Server Network Configuration → Protocols for SQLEXPRESS, select the database instance that will be used with ESET PROTECT and then double-click TCP/IP.
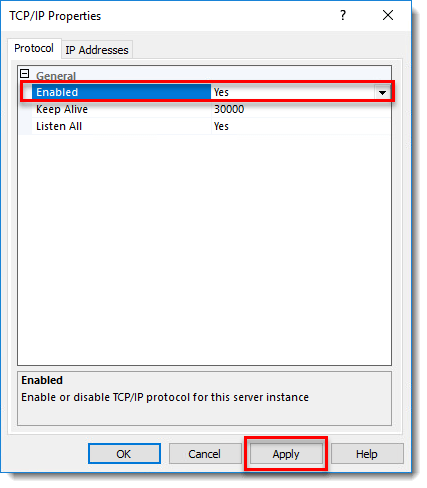
- Select Yes from the drop-down menu next to Enabled and click Apply. Click OK if you are prompted.
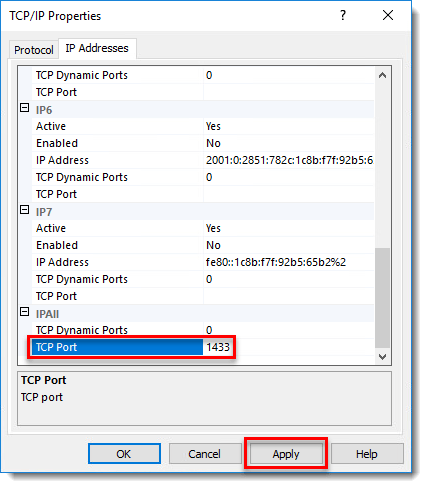
- Click the IP Addresses tab and locate the IPAII section. Set the TCP Port value to 1433 and click Apply. Click OK if you are prompted and then click OK to exit the TCP/IP window.
- Select the SQL Server Services entry from the drop-down menu, right-click the database instance that will be used with ESET PROTECT, and select Restart from the context menu. When you are finished, continue to part III below.
III. Install ESET PROTECT Server on Computer 2
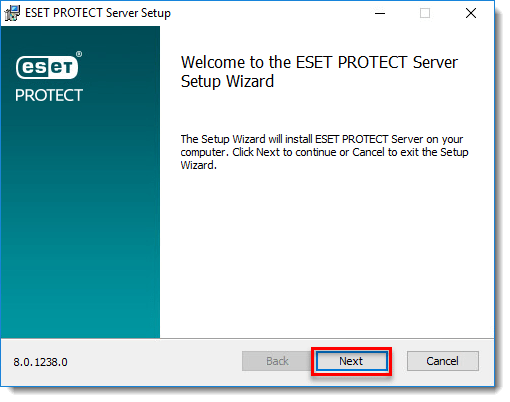
- Open the x64 folder that you extracted from the ESET PROTECT All-in-one installer file and double-click Setup.
- Click Next.

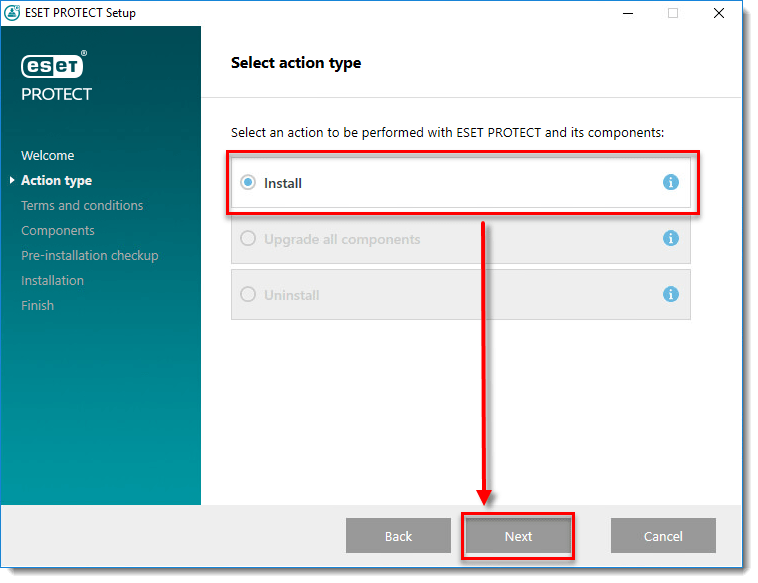
- Select Install and click Next.
- Read the End-user license agreement, select I accept the terms in the license agreement if you agree. Deselect the check box Participate in product improvement program if you do not agree to send crash reports and telemetry data to ESET. If the check box is left selected, telemetry data and crash reports will be sent to ESET. Click Next to continue.

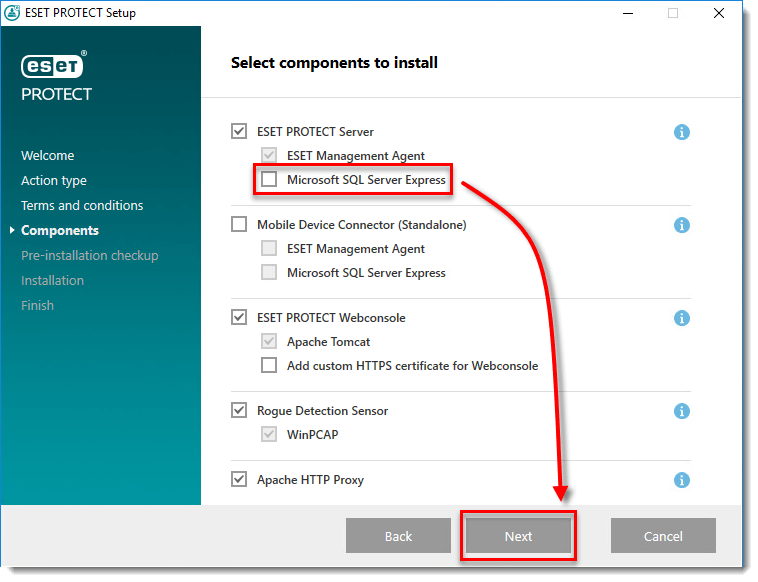
- Deselect the check box next to Microsoft SQL Server Express. Optionally, select the check box next to Apache HTTP Proxy if you want to install that component. Click Install when you are ready.
If you are prompted to install prerequisites, follow the link provided, install the prerequisites and then click Retry.
- Click Install to start the installation and then click Next.
- Select or type the below data and then click Next:
- Database: MS SQL Server
- ODBC driver: SQL Server
- Database name: era_db (This is the default database name; you can provide another name. If the database does not exist, the installer will create it.)
- Hostname: Hostname of the computer where SQL database is installed
- Use named instance: Leave unchecked
- Port: 1433
- Username: sa
- Password: the password you set in part I > step 8 above
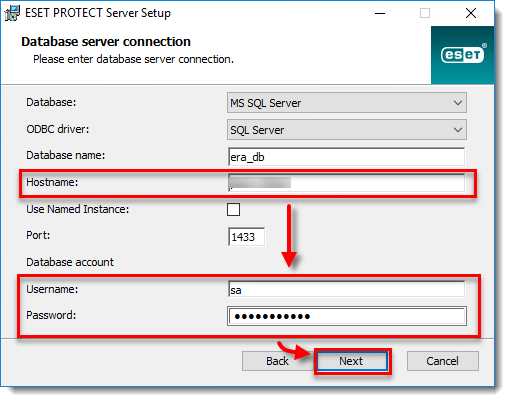
- Select No to create a new database user.
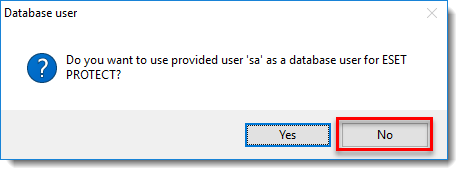
- In the Database user for PROTECT window, provide the new Database username (era_user is the default username) and type the Password and Password confirmation and click Next.

- Type your login password for the ESET PROTECT Web Console into the Password and Password confirmation fields. Make sure to record this password for later use and then click Next.

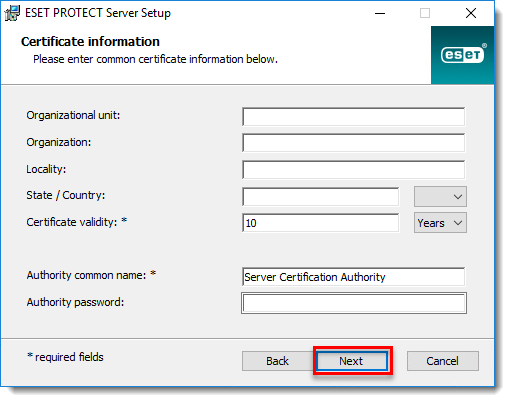
- In the Certificate information window, you can customize your Certificate Authority. The only mandatory fields are Authority common name and Certificate validity. Enter any information about your Certificate Authority that you want to add. If you create a password, make sure that you record it because all client computers using this certificate will require that password to use the certificate. Click Next when you are finished.
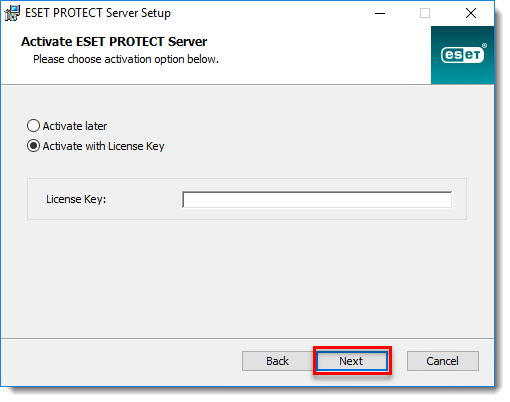
- Select Activate with License Key and type your License Key into the appropriate field, or select Activate later. If you have an ESET-issued Username and Password, you can convert them into a license key using ESET Business Account. Click Next when you are finished.
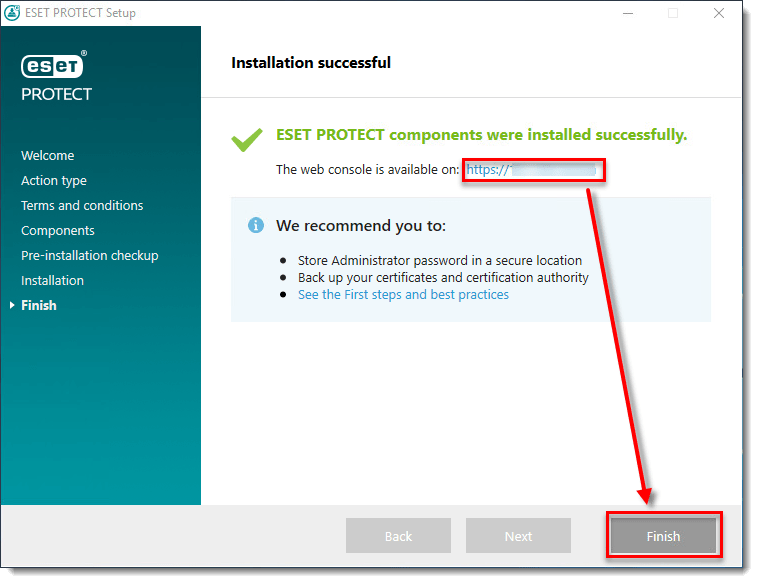
- Continue with the ESET PROTECT Server installation and other ESET PROTECT components. At the Installation successful window, click the URL link to open ESET PROTECT Web Console. We recommend that you bookmark or note this link for future reference. By default, the ESET PROTECT installer will create a link to ESET PROTECT Web Console in your Start menu. Click Finish to close the installer.
- Locate and deploy the ESET Management Agent (8.0) to client computers.
Last Updated: Apr 1, 2021
(Visited 78 times, 1 visits today)