Issue
- Citrix and other terminal servers should be configured using these parameters when running ESET products
- Disable the ESET File Security GUI to prevent it from starting up every time a user logs in
- Disable all Citrix API hooks on a per-application basis
Details
ESET server products can run in virtualized environments (such as Citrix) using default settings. By making a few small changes you can minimize the impact on performance ESET products will have on your virtual machine.
Normally, ESET File Security GUI starts up every time a remote user logs onto the server and creates a terminal session. This is usually undesirable on Terminal Servers.
Solution
Complete the procedures below in sequence to achieve the best performance on a server with ESET File Security for Microsoft Windows Server (EFSW) installed.
I. Prerequisites
II. Disable the graphic user interface (GUI)
III. (only Citrix servers) Scan file execution events and local drives only
IV. (only Citrix servers) Add needed exclusions
I. Prerequisites
Server 2008/2008R2 users: There are 2 ways to verify that the Network protection module in ESET File Security for Microsoft Windows Server (EFSW) is installed.
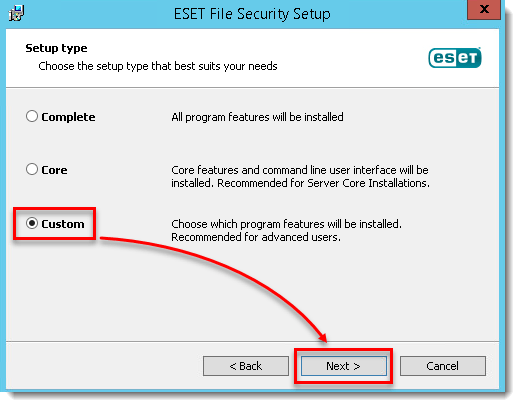
a. If you have already installed EFSW, follow the instructions below to enable the Network protection module.
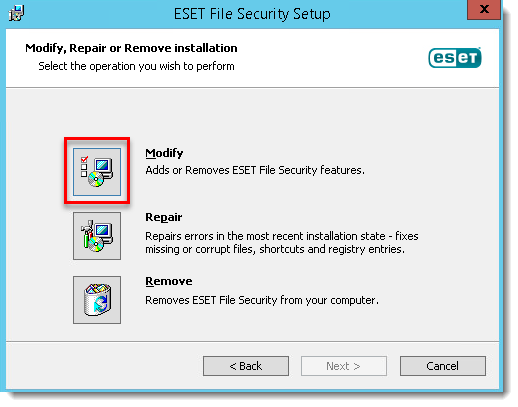
- Double-click the installer you used to install EFSW (for example, efsw_nt64_ENU.msi), click Run and then click Next.
- Click Modify from the ESET File Security Setup screen.
- Click the product component drop-down menu option next to Network Protection, click Entire feature will be installed on local hard drive and then click Modify.
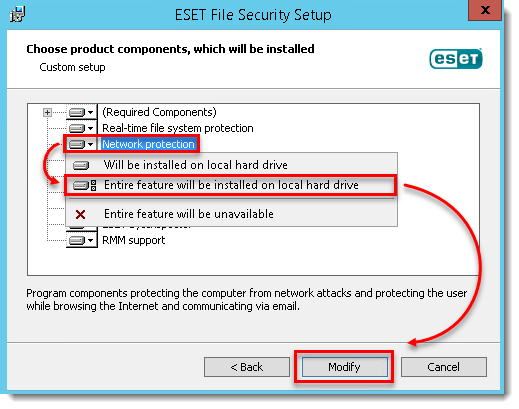
You will now see the Web access protection and Email client protection modules in the Setup → Computer section of EFSW.
- Click the product component drop-down menu option next to Network protection, click Entire feature will be installed on local hard drive and then click Next.
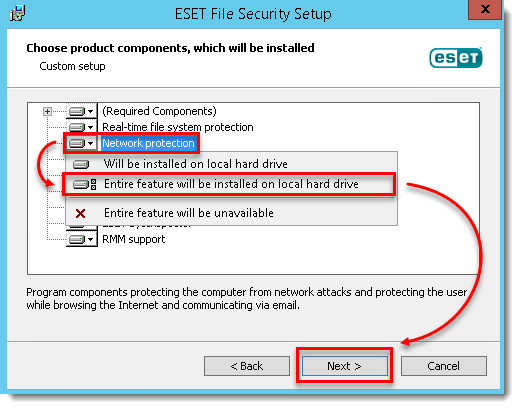
- Click Install.
II. Disable the graphic user interface (GUI)
The steps in this section will disable the GUI from launching automatically at startup. However, you can still access the GUI at any time from the Start Menu.
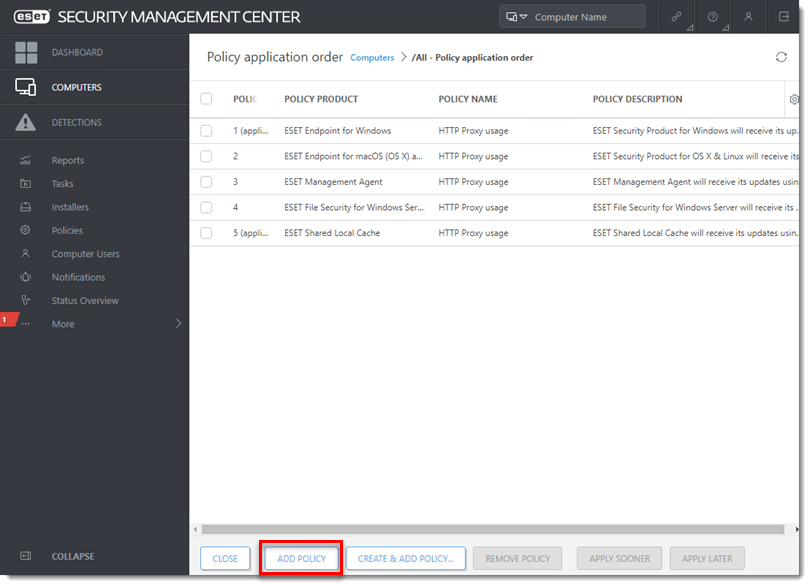
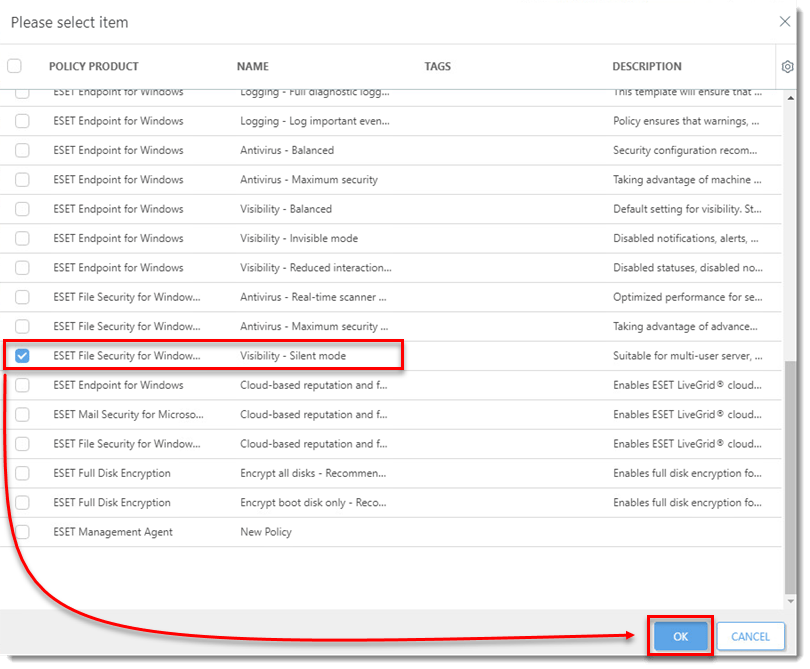
a. Apply the ESET Security Management Center (ESMC) policy File Security for Windows Server – Visibility –Silent mode to enable silent mode on any server assigned to that policy.
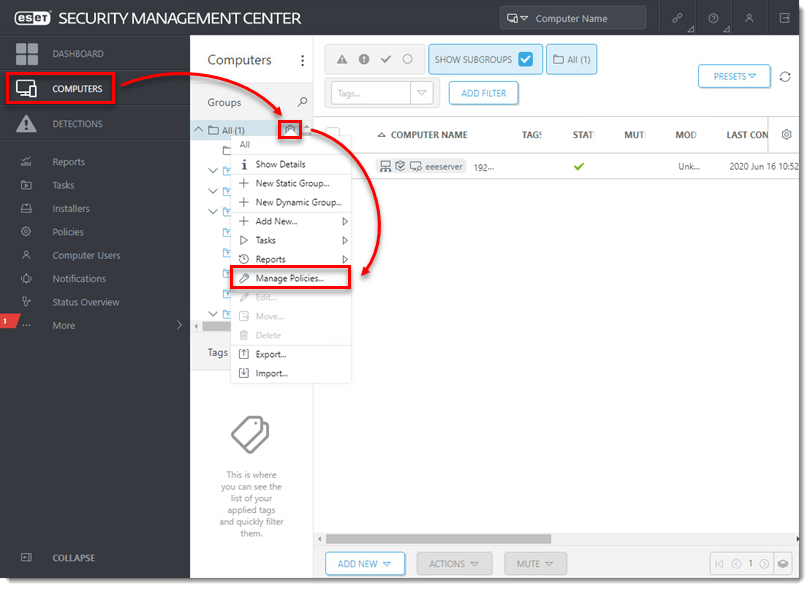
- Open ESET Security Management Web Console (ESMC Web Console) in your web browser and log in.
- Click Computers, then click the cogwheel
 icon next to the group name, and select Manage Policies.
- Open ESET Shell by clicking Start → All Programs → ESET → ESET File Security (for Windows Server 2012, type ESET Shell into the Search field).
- Right-click ESET Shell and select Run as administrator from the context menu. If prompted, type in the username and password for the administrative account.
- Type the letter “x” (without quotes) to skip the help section.
- Type the following command:
set ui ui gui-start-mode none
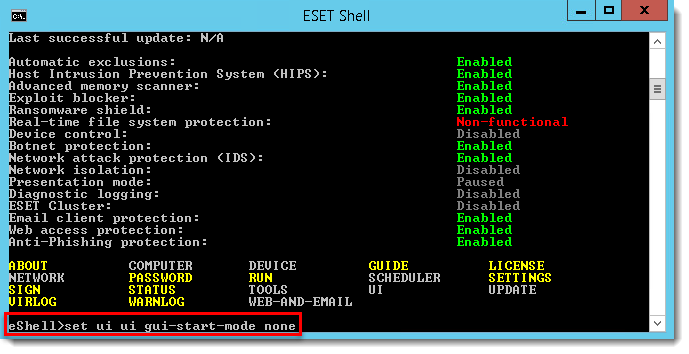
- Press Enter and wait for the command to complete.
- Close the window.
Continue to part III below if you are using a Citrix server.
III. (only Citrix servers) Scan file execution events and local drives only
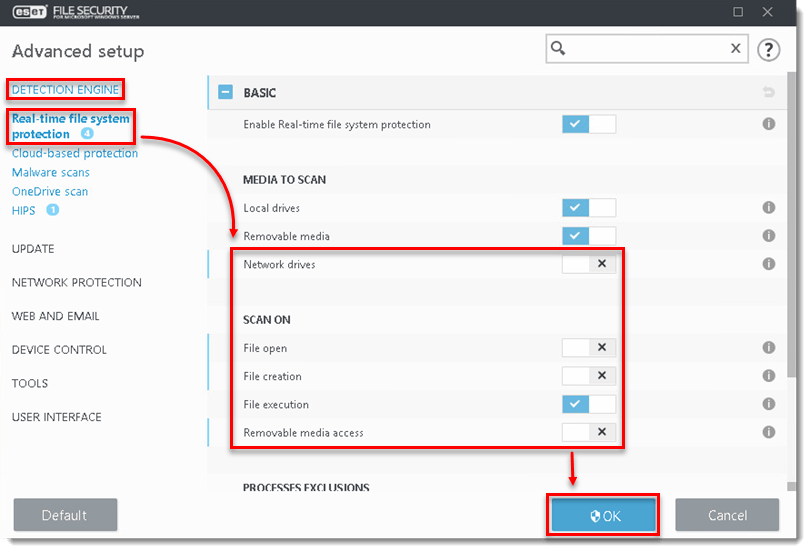
- Open ESET File Security by clicking Start → All Programs → ESET → ESET File Security.
- Press the F5 key to open Advanced Setup.
- Click Detection Engine → Real-time file system protection from the main menu on the left.
- Turn off the following four features by clicking the slider bars next to Network drives, File open, File creation and Removable media access and then click OK.
Continue to part IV below to add exclusions for a Citrix server.
IV. (only Citrix servers) Add needed exclusions
- Open ESET File Security by clicking Start → All Programs → ESET → ESET File Security.
- Press the F5 key to open Advanced Setup.
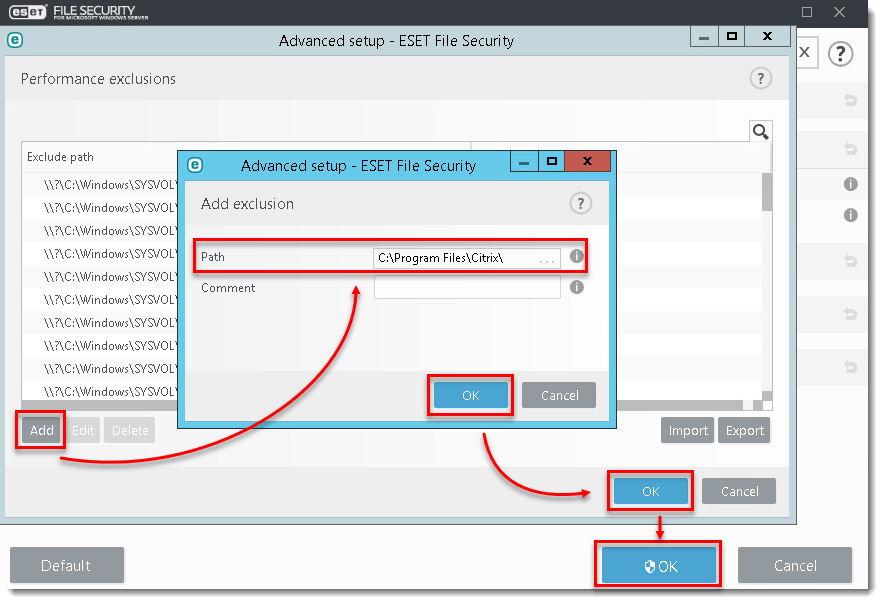
- Click Detection Engine from the main menu on the left, then click Exclusions, and then click Edit next to Performance exclusions.
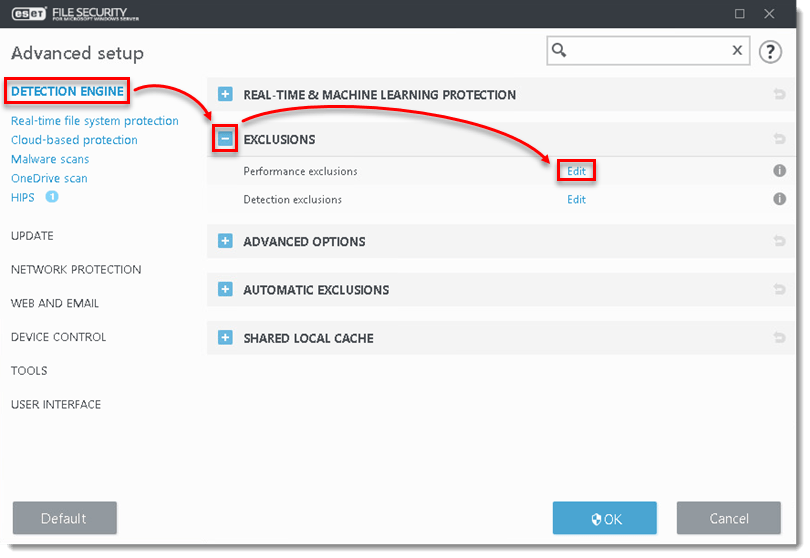
- Click Add, enter C:\Program Files\Citrix\ in the field next to Path, and click OK → OK → OK.
You can add additional file paths to exclude. Using a \ at the end of the path will cause ESET to treat it as a wildcard, and all children of that path will be excluded.