

Issue
- Configure ESET endpoint client workstations to send event messages or detection messages to a designated email address
Solution
 ESET Security Management Center (ESMC) users: Perform these steps in ESMC
- Open the main program window of your Windows ESET product.
- Press the F5 key to access Advanced Setup.
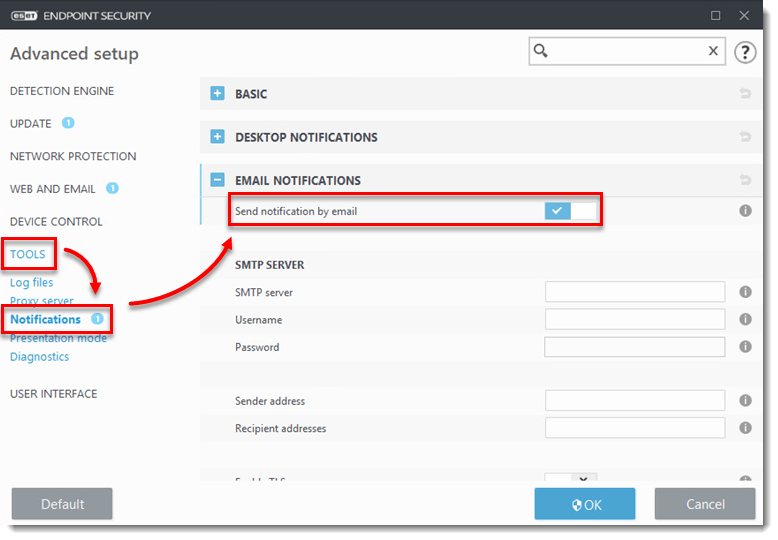
- Click Tools → Notifications and expand Email Notifications.
- Click the slider bar next to Send notification by email to enable it.
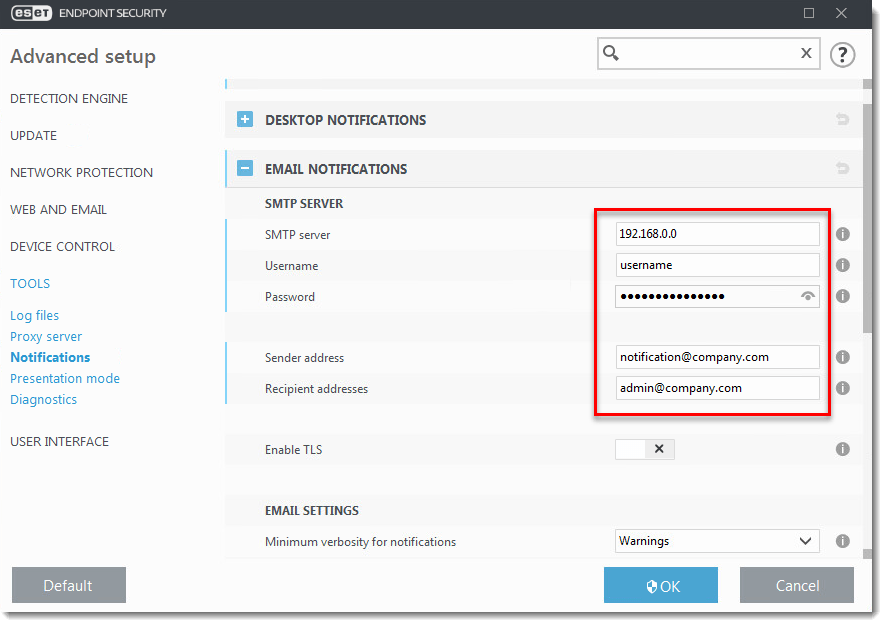
- Type the following information in the appropriate fields:
- SMTP Server – theIP address of your mail server. If the server is outside of your local network, the threat notification messages may be filtered as spam.
- Username and Password -if your SMTP server requires you to log in using credentials.
- Sender address – the address that sends the notification emails.
- Recipient addresses – the address the notification emails will be sent to. Use a semicolon to separate multiple addresses.
- Expand the Message format section, select the text and variables to include in the notification emails that are displayed on remote computers. In the editable text field, customize the predefined format of event messages and the format of threat warning messages. The system variables below are supported.
- Select Local from the Charset drop-down menu to enable converting an email to the ANSI character encoding based upon Windows Regional settings.
- Click the slider bar next to Use Quoted-printable encoding to enable the Quoted-printable format which uses ASCII characters and can correctly transmit special national characters by notification email in 8-bit format.
Pre-defined system variables include:
- %ComputerName% – Name of the computer where the alert occurred.
- %ProgramName% – Program that generated the alert.
- %TimeStamp% – Date and time of the event.
- %UserName% – Name of the logged user where the alert occurred.
- %InfectedObject% – Name of infected file, message, etc.
- %VirusName% – Identification of the infection.
- %ErrorDescription% – Description of a non-virus event.
- %Scanner% – Module concerned.
- %Action% – Action taken over infiltration.

- Click OK to submit changes and exit Advanced setup. The client workstation will now send threat notifications automatically.
Last Updated: Dec 4, 2020
(Visited 20 times, 1 visits today)