

Issue
- Create a firewall rule to allow or deny specific connections based on port number or range of port numbers
Details
The ESET firewall acts as a network traffic filter that regulates communication within the local network or internet. Using predefined rules, the firewall analyzes network communication and decides whether or not to allow it. You can configure your firewall to allow or block certain applications.
Solution
Create a rule to allow a port
- Open ESET Cyber Security Pro.
- Click Setup → Firewall.
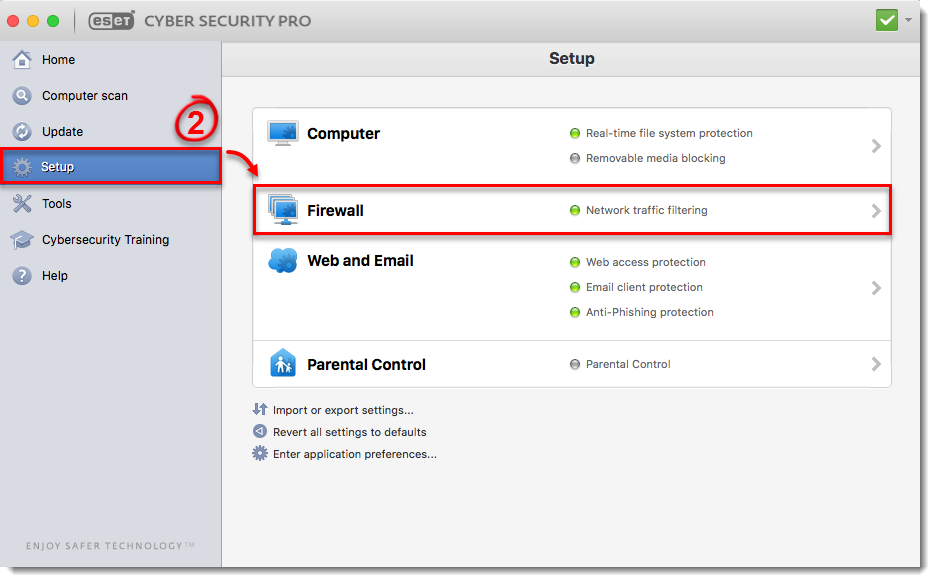
Figure 1-1
- Click Setup.

Figure 1-2
- Make sure that Auto with exceptions is selected from the Filtering Mode drop-down menu and click Add.
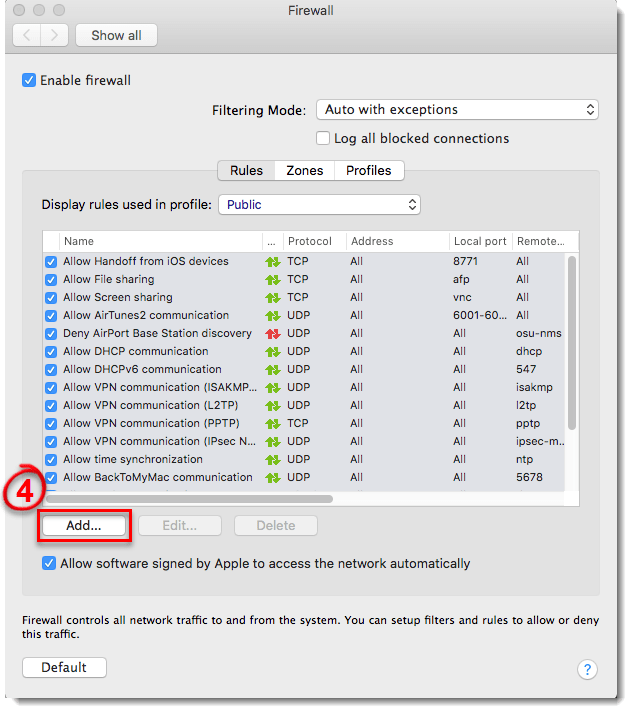
Figure 1-3
- Type a name for your new rule in the Name field, “Allow Port” in this example, and click Next.

Figure 1-4
- Select Allow from the Action drop-down menu, select Both from the Direction drop-down menu and then click Next.
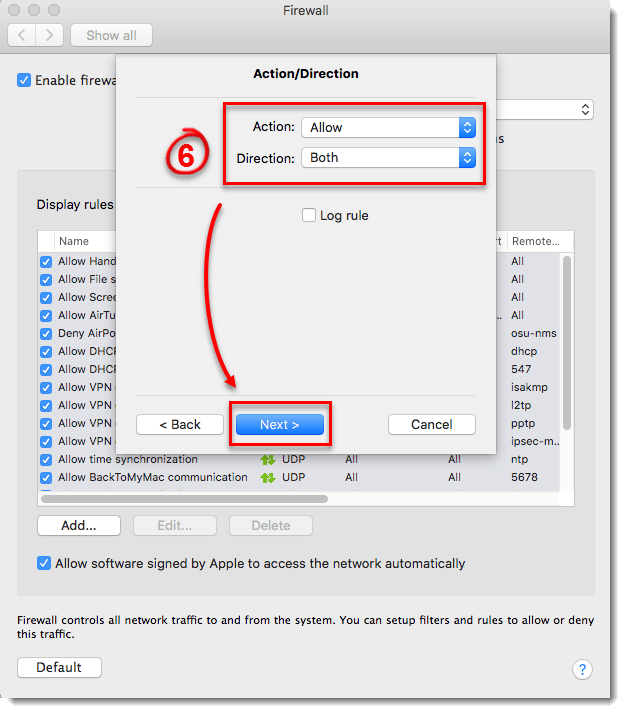
Figure 1-5
- To create a rule to always allow the port, select TCP from the Protocol drop-down menu, select Both from the Ports drop-down menu and then type in your port in the Local Port and Remote Port drop-down menus. You can create more custom rules using different combinations of the Protocol and Port settings. Once you are finished, click Next.

Figure 1-6
- Next to Destination, select where your rule will be applied: to the entire Internet, to your local network, or to a specific subnet or IP address range. Select Entire Internet to create a rule that will be applied everywhere so that your port will always be allowed. Click Finish to create your new rule.

Figure 1-7
- Your created rule for allowing the port will be displayed in the Firewall menu. Close the Firewall window to return to the main program window.

Figure 1-8
Create a rule to block a port
- Open ESET Cyber Security Pro.
- Click Setup → Firewall.
Figure 2-1
- Click Setup.
Figure 2-2
- Make sure that Auto with exceptions is selected from the Filtering Mode drop-down menu and click Add.
Figure 2-3
- Type a name for your new rule in the Name field, “Block Port” in this example, and click Next.
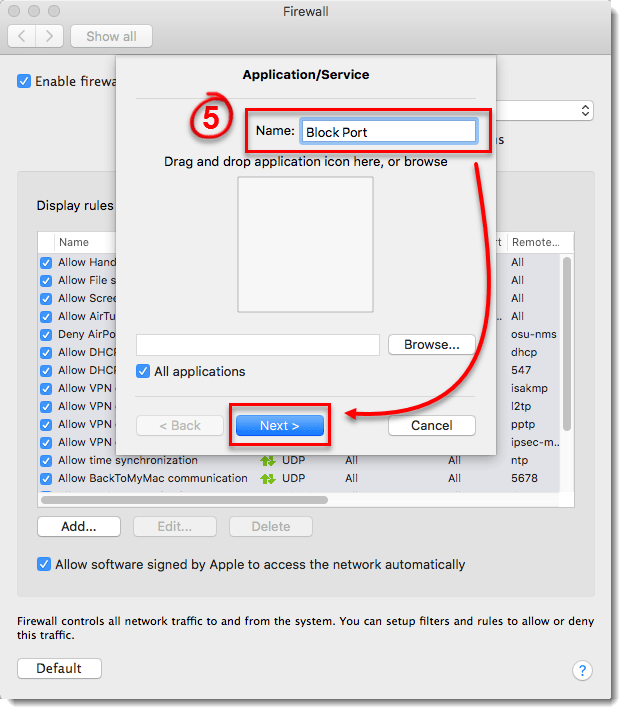
Figure 2-4
- Select Deny from the Action drop-down menu, select Both from the Direction drop-down menu and then click Next.

Figure 2-5
- To create a rule to always block the port, select TCP from the Protocol drop-down menu, select Both from the Ports drop-down menu and then type in your port in the Local Port and Remote Port drop-down menus. You can achieve more custom rules using different combinations of the Protocol and Port settings. Once you are finished, click Next.
Figure 2-6
- Next to Destination, select where your rule will be applied: to the entire Internet, to your local network, or to a specific subnet or IP address range. Select Entire Internet to create a rule that will be applied everywhere so that your port will always be blocked. Click Finish to create your new rule.
Figure 2-7
- Your created rule for blocking the port will be displayed in the Firewall menu. Close the Firewall window to return to the main program window.
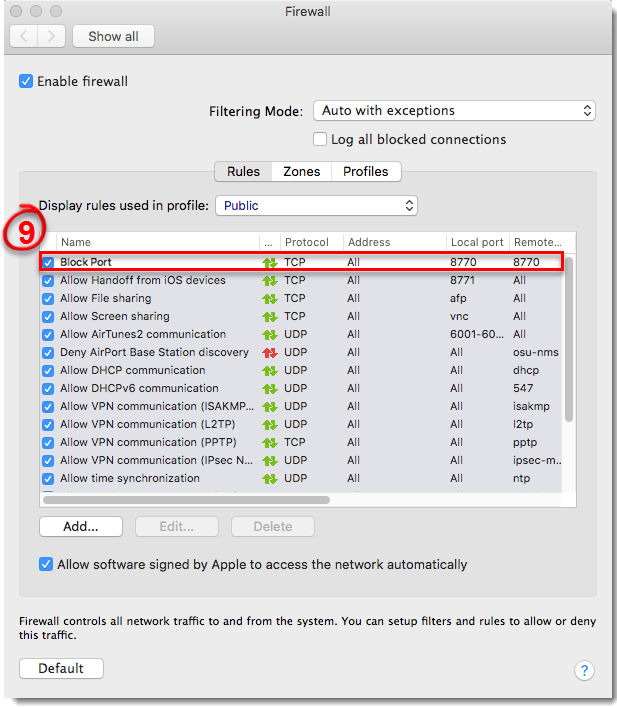
Figure 2-8
Last Updated: Mar 23, 2020
(Visited 19 times, 1 visits today)