

Issue
- Install ESET Mail Security 7.x for Microsoft Exchange Server
Solution
Before proceeding, make sure that your computer meets the minimum requirements for installing ESET Mail Security 7.x for Microsoft Exchange (EMSX). Click to view the list of compatible email clients.
I. Uninstall other antivirus products
Uninstallers (removal tools) for common Windows antivirus software.
II. Verify that a Transport Agent Role is installed
- Click the Windows icon, type “Exchange Management Shell,” then click Exchange Management Shell.
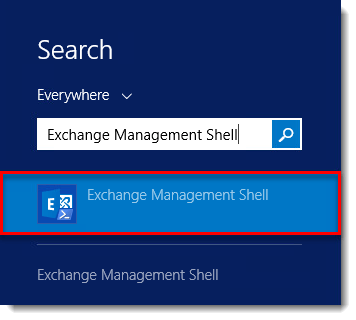
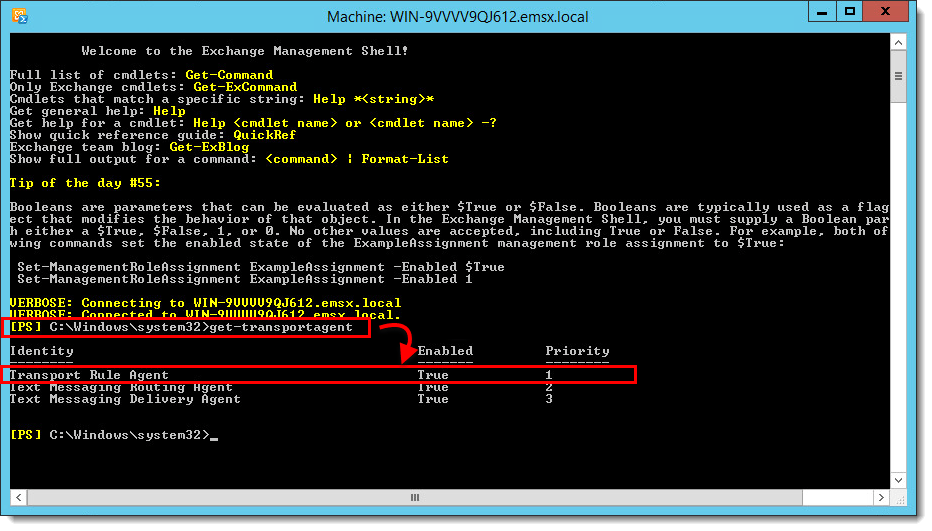
Figure 1-1 - Once the Exchange Management Shell is loaded, type get-transportagent and press Enter.
- Verify that Transport Rule Agent is listed.
III. Download and Install EMSX 7.x
- Download ESET Mail Security 7.x.
- Once the download is complete, double-click the installer file and follow the instructions to complete the installation wizard.
- Once the product is installed and activated, select an option for the detection of potentially unwanted applications and participation in ESET LiveGrid.
IV. Verify ESET filtering agents are installed
- Click the Windows icon, type “Exchange Management Shell,” and then click Exchange Management Shell.
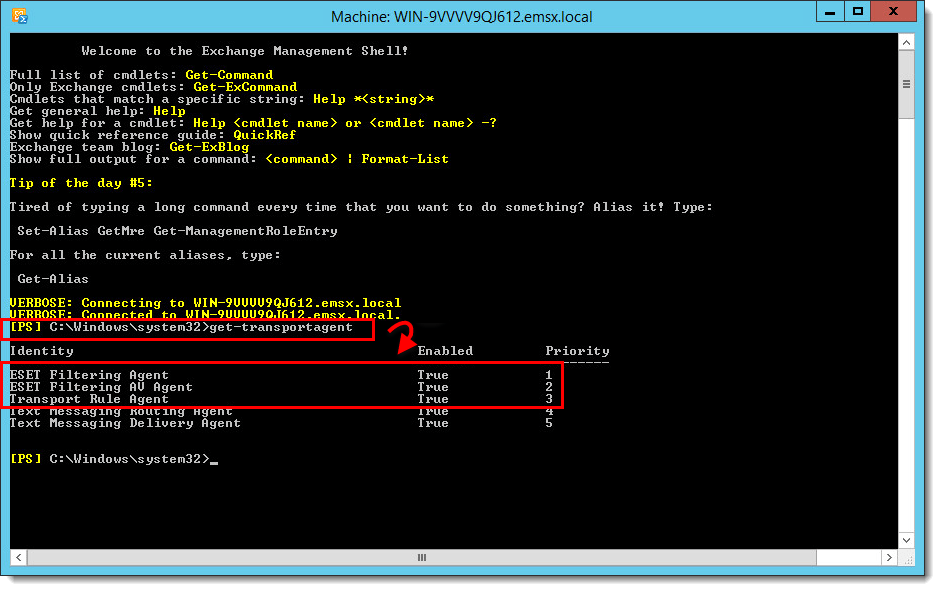
- Once the Exchange Management Shell is loaded, type get-transportagent and press Enter.
- Verify that two ESET filtering agents are listed above Transport Rule Agent.
V. Initial configuration (recommended)
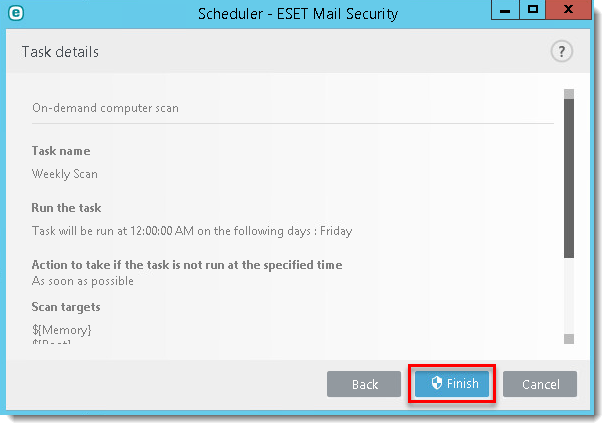
Configure a regular weekly scan.
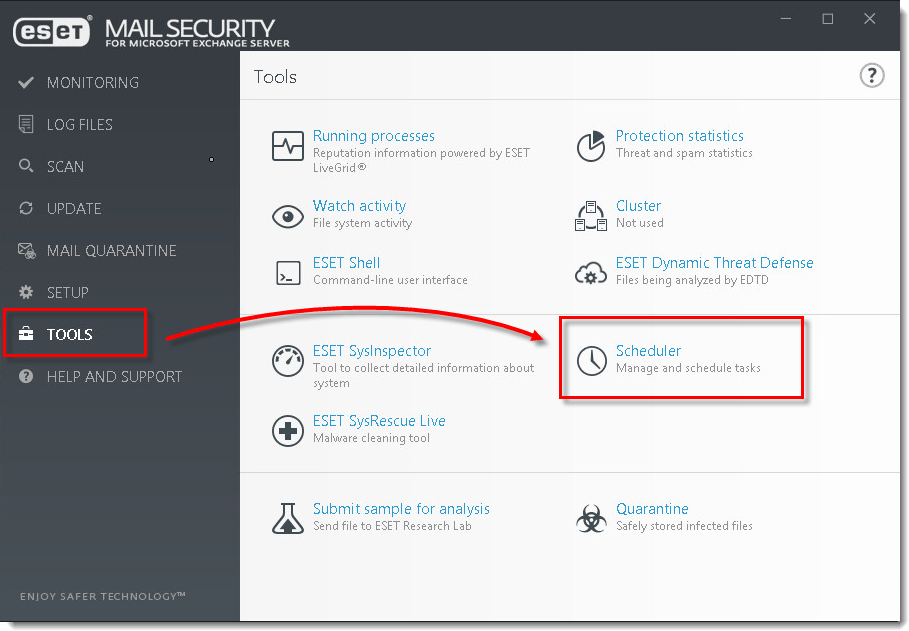
- Open the main program window of your ESET Windows product.
- Click Tools → Scheduler.
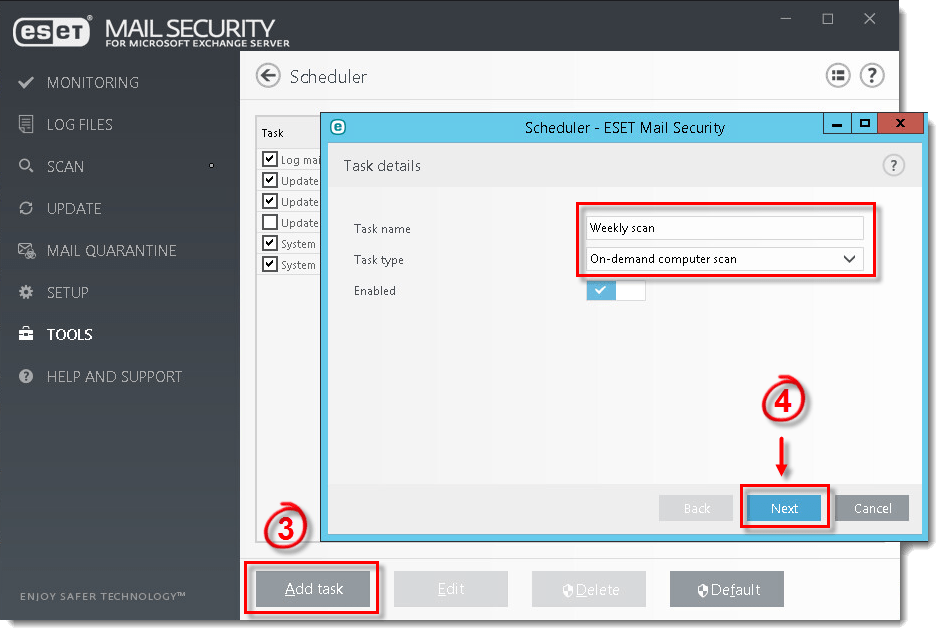
- Click Add task.
- Type a name for the task into the Task name field, select On-demand computer scan from the Task type drop-down menu, and then click Next.
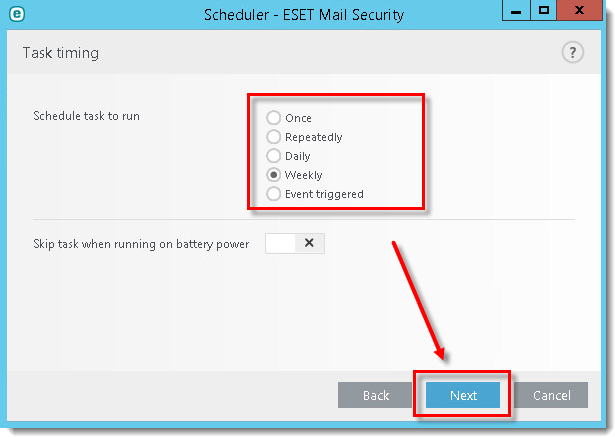
- Select your preferred interval, and click Next.
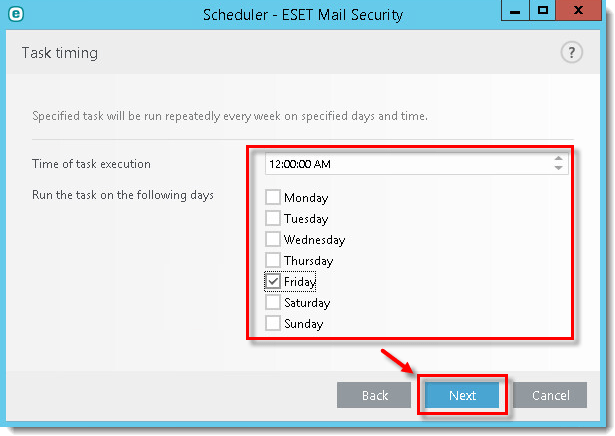
- Select a time and day for the task and click Next.
- Select an option for running a task that was skipped (we recommend As soon as possible) and click Next.

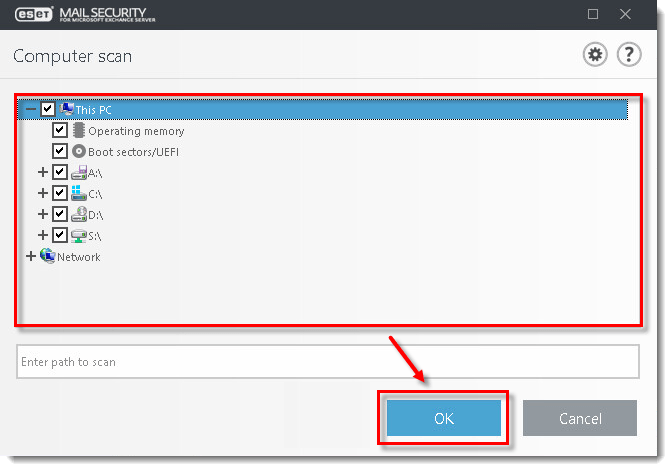
- Select the check boxes next to the drives you want scanned during this task and click OK.
- Click Finish.
Last Updated: Jun 23, 2021
(Visited 28 times, 1 visits today)