

Issue
- A synchronization task is required to sync the ESET Security Management Center (ESMC) Virtual Appliance or ESMC for Linux with Active Directory.
- If automatic synchronization fails in ESMC for Windows Server, you can use a task to sync ESMC with your Active Directory
- Configure communication between your ESMC Virtual Appliance and your existing Active Directory.
- No agent icon next to computer name and inability to push install.
Solution
Prerequisites
For the Active Directory (AD) sync task to run effectively, it is important that all AD objects that will be synced and their corresponding DNS and reverse DNS records are correct on all servers. Any inconsistency in these items can result in incorrect sorting of AD objects or excess AD objects being placed in the Lost and Found group.
Solution
- Open ESET Security Management Center Web Console (ESMC Web Console) in your web browser and log in.
- Click Tasks → Server Tasks → Static Group Synchronization and then click the New button → Server Task.
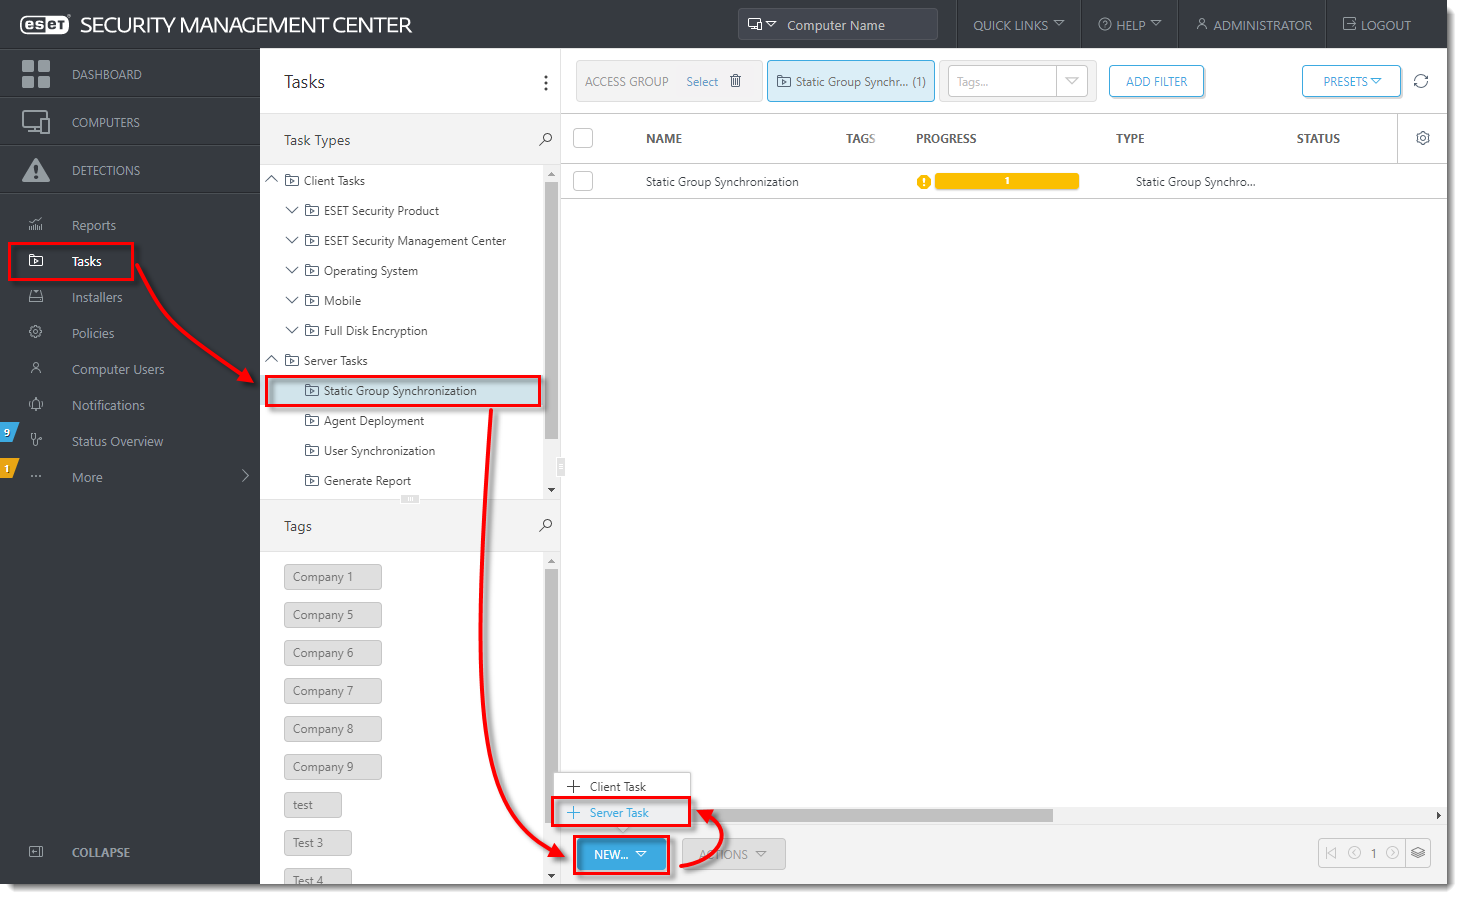
Figure 1-1
Click the image to view larger in new window
- Type a Name for your new task into the appropriate field and select Static Group Synchronization (selected by default) from the drop-down menu. We recommend that you select the check box next to Run task immediately after finish for the fastest response time.
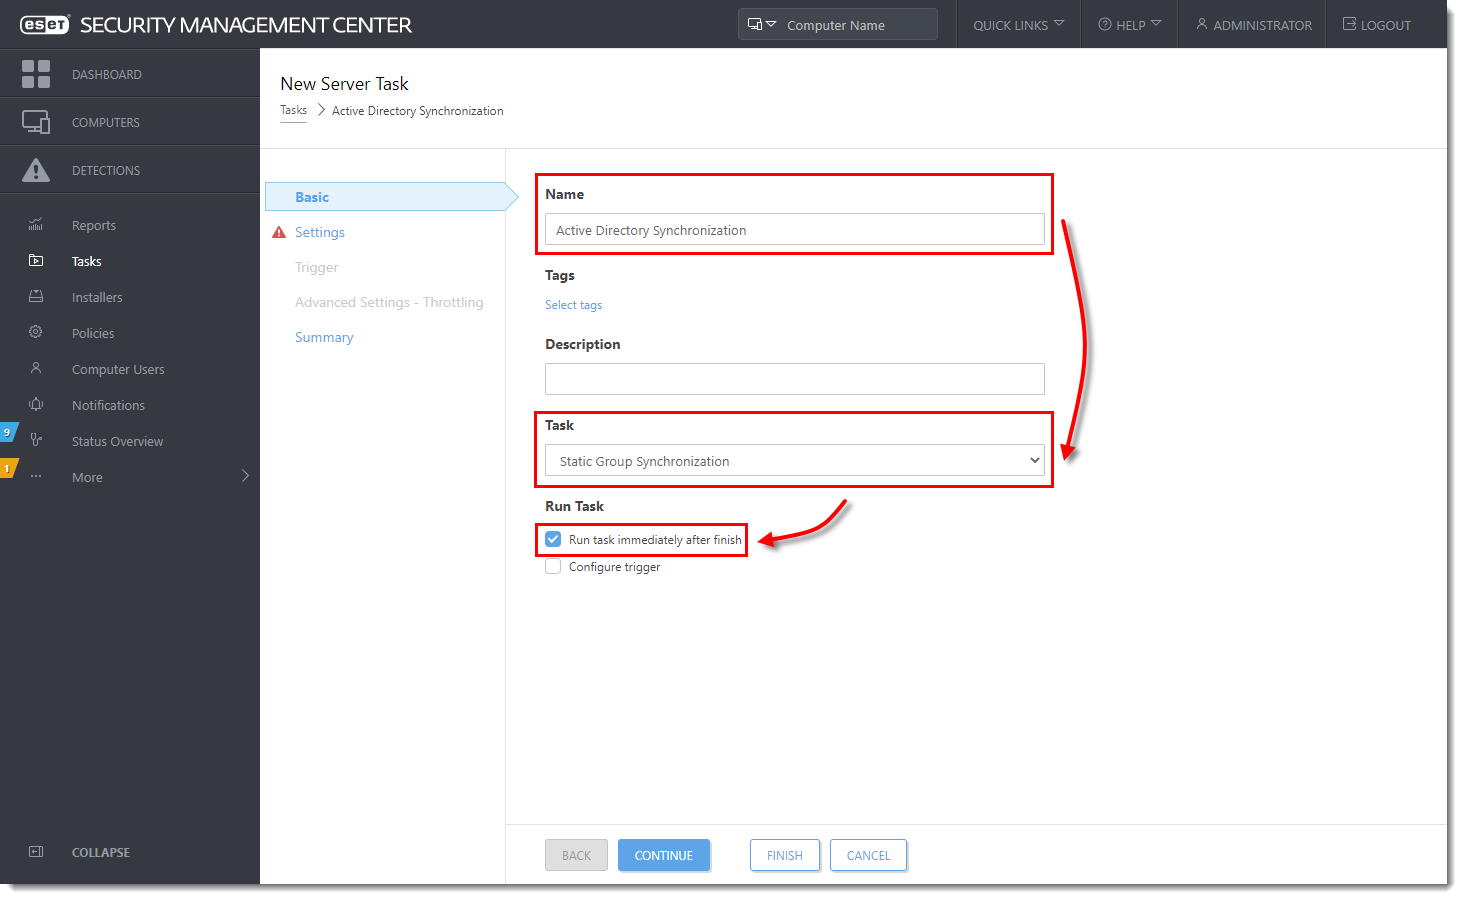
Figure 1-2
Click the image to view larger in new window
- Click Settings and click Select under Static Group Name. Select the static group that will receive new computers and users from Active Directory and then click OK.
Define the synchronization behavior with Active Directory objects:
- Object to synchronize – select Computers and Groups or Only Computers.
- Computer Creation Collision Handling – if the synchronization adds computers that are already members of the Static Group, you can select a conflict resolution method:
- Skip – synchronized computers will not be added.
- Move – new computers will be moved to a subgroup.
- Duplicate – new computer is created with modified name.
- Computer Extinction Handling – If a computer no longer exists in the Active Directory, you can either Remove this computer or Skip it.
- Group Extinction Handling – If a group no longer exists in the Active Directory, you can either Remove this group or Skip it.
- Synchronization Mode – to synchronize with the Active directory, select Active Directory/Open Directory/LDAP.
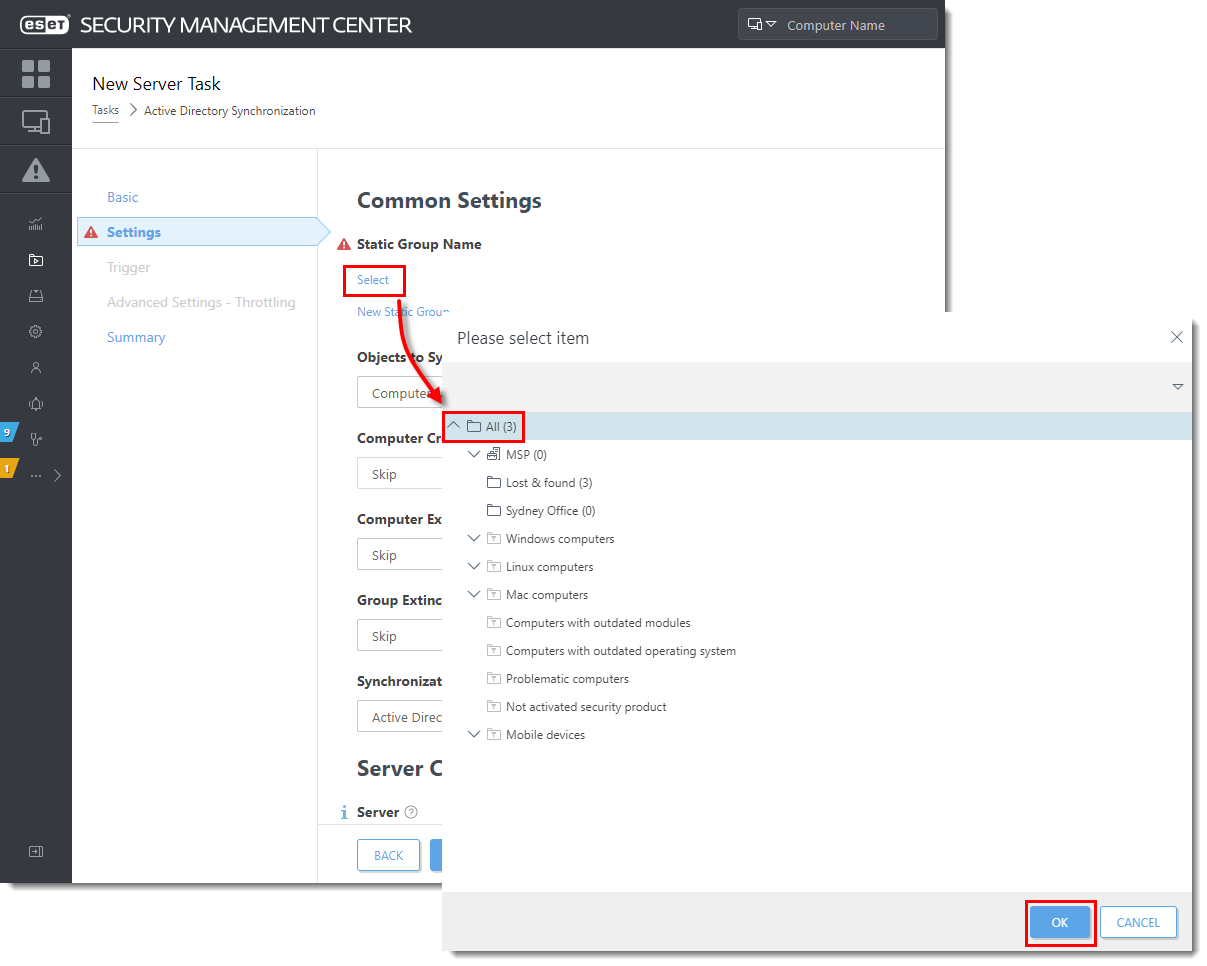
Figure 1-3
Click the image to view larger in new window
- In the Server Connection Settings section, type the following information into the corresponding fields:
-
- Server – type the Server name or IP address of your domain controller.
- Login – type the login credentials for your domain controller in the format
username@DOMAINorusername. If you are running the ESMC Server on Windows, use the formatDOMAIN\username.
-
- Password – type the password used to log on to your domain controller.
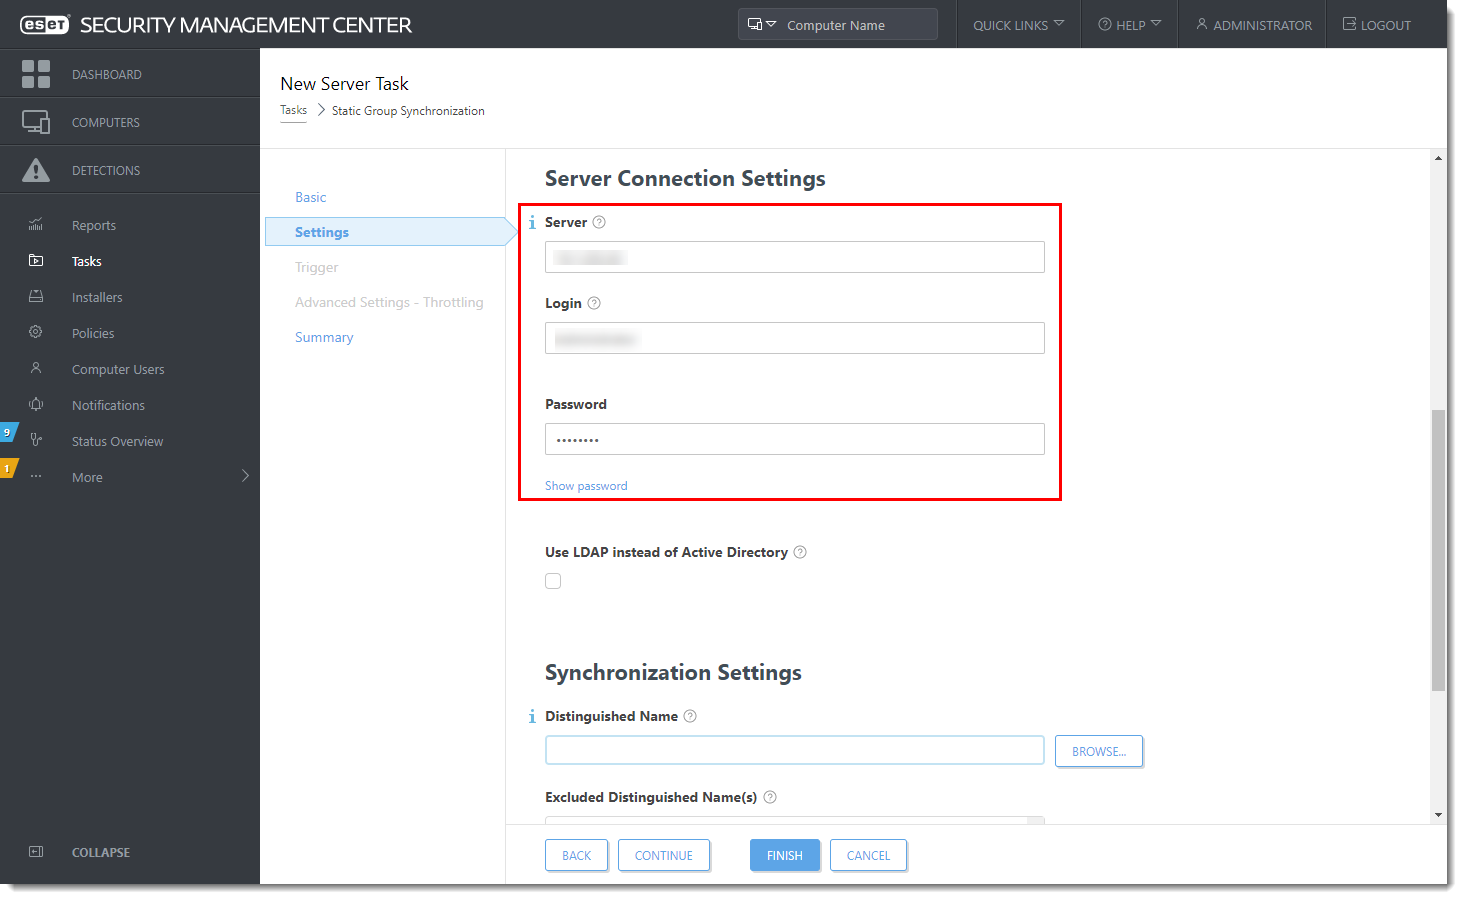
Figure 1-4
Click the image to view larger in new window
- Select the check box next to Use LDAP instead of Active Directory.
- The LDAP Parameters settings will be displayed. Click Select under Presets and select Active Directory.

Figure 1-5
Click the image to view larger in new window
- Click Browse next to Distinguished Name. Your Active Directory tree will be displayed. Select the top entry to sync all groups with ESMC, or select only the specific groups that you want to add. Click OK when you are finished.

Figure 1-6
Click the image to view larger in new window
- Click Finish. Your new task will be displayed in the list of tasks on the right and will run at the time you specified.
Last Updated: Jul 21, 2021
(Visited 22 times, 1 visits today)