Issue
- Use ESET Remote Administrator (ERA) 5.3 and later to deploy the ESET Management Agent for 7.x endpoint products.
- Migrate from ERA 5.3 to ESMC 7 using ERA 5.3 to deploy the ESET Management Agent.
Solution
To deploy the ESET Management Agent to client computers using ERA 5.x, follow the instructions below:
I. Generate the ESET Management Agent Live Installer package from ESMC 7.x:
- Open the ESET Security Management Center Web Console.
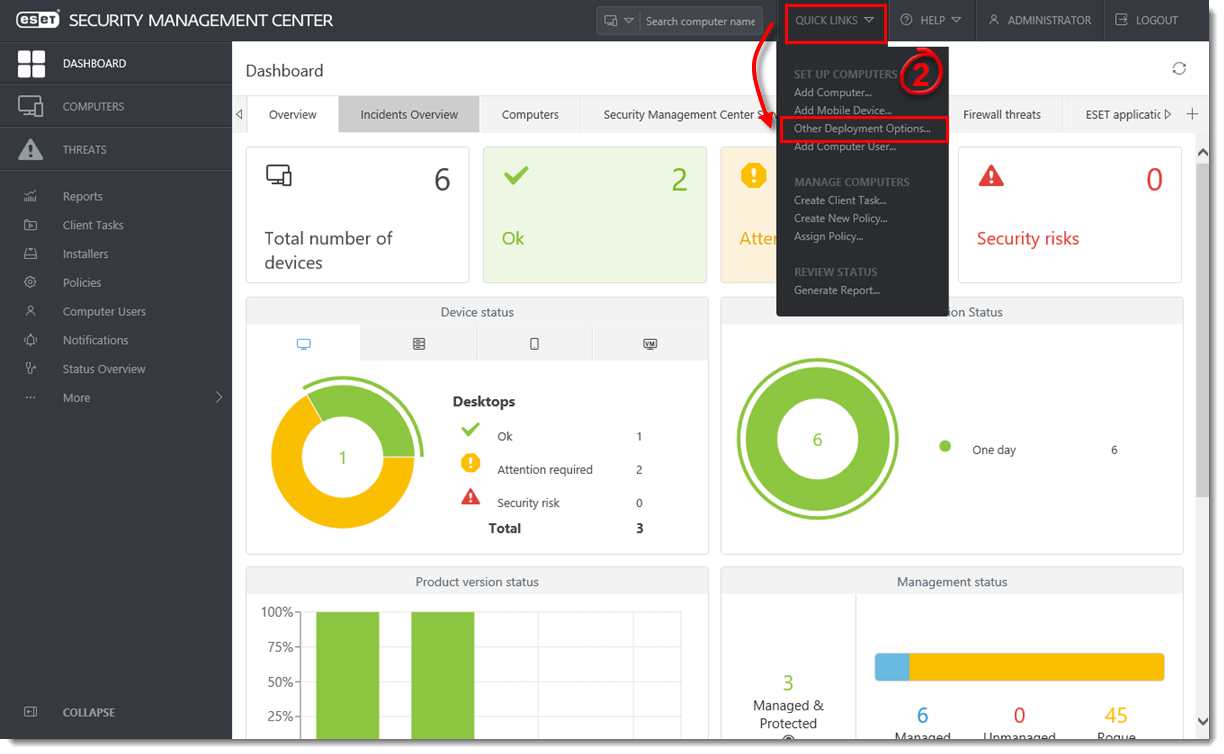
- Click Quick Links → Other Deployment Options.
Figure 1-1
Click the image to view larger in new window
- Select Create Agent Live Installer and click Create Installer.
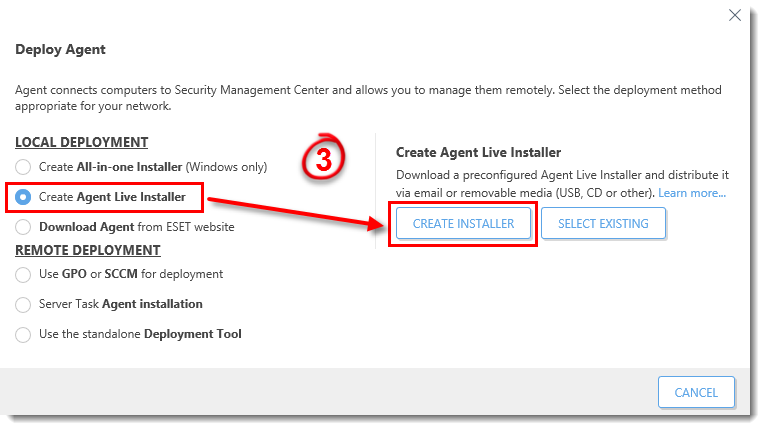
Figure 1-2
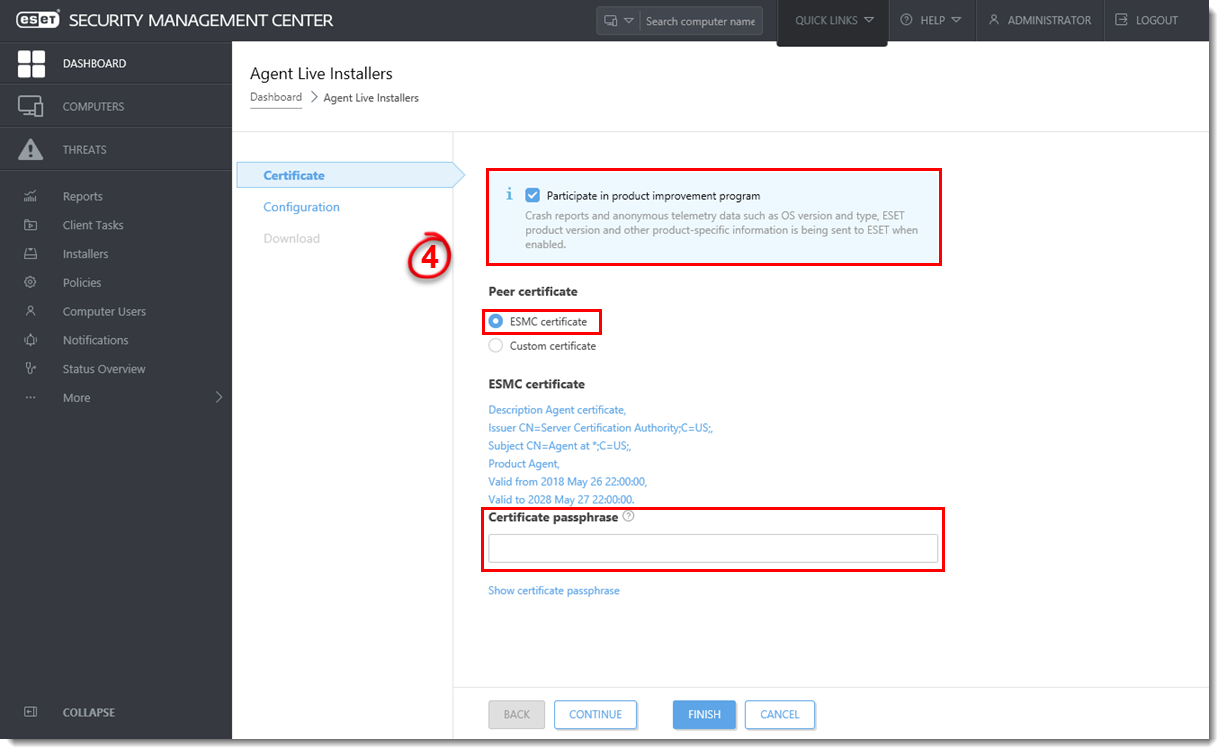
- Deselect the check box Participate in product improvement program if you do not agree to send crash reports and telemetry data to ESET.
Select an ESMC Certificate and Certificate passphrase (optional).Figure 1-3
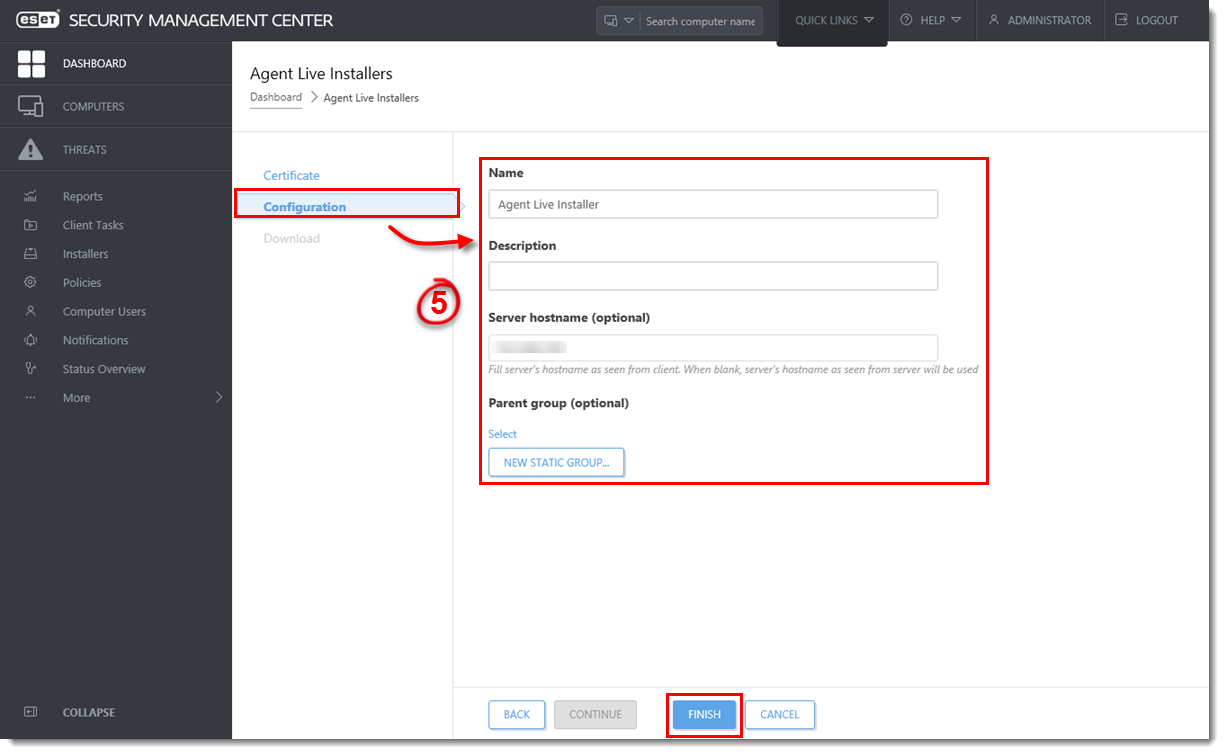
Click the image to view larger in new window - Click Configuration. Type the Name and Description (optional) of the Agent live installer. You can optinally change the Server hostname. Click Finish.
Figure 1-4
Click the image to view larger in new window - Click Download under the Agent installer for Windows.
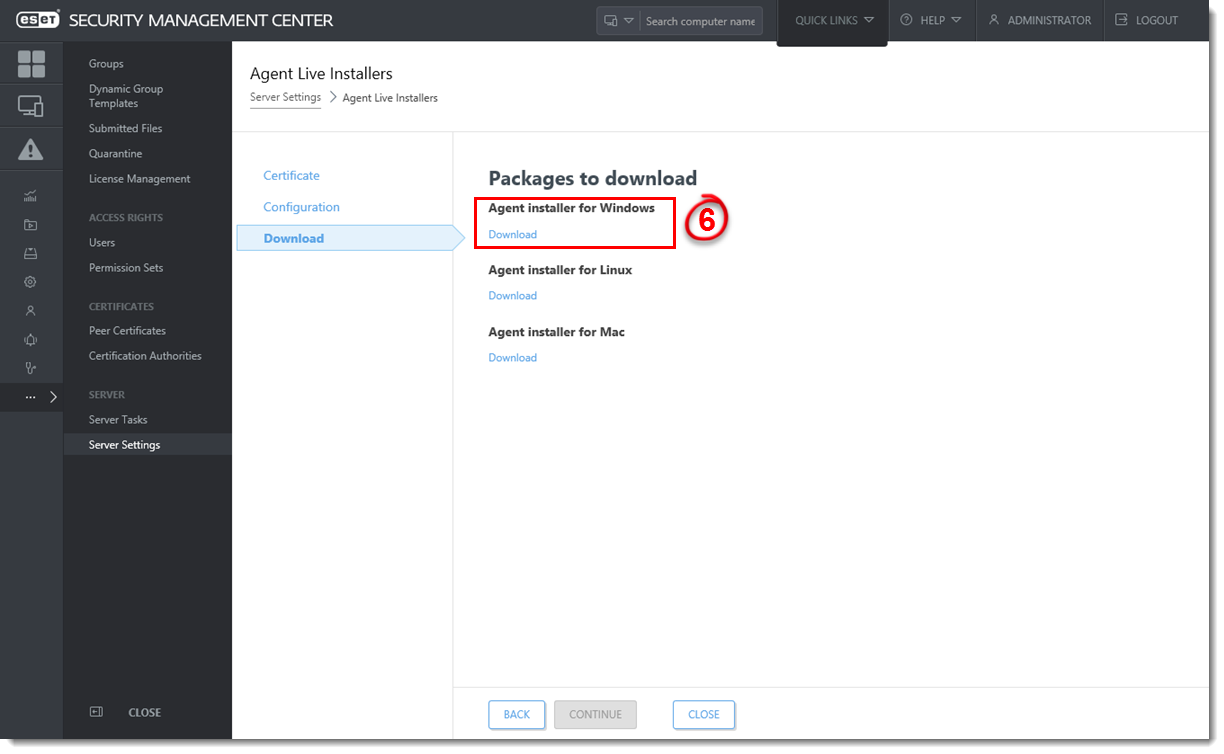
Figure 1-5
Click the image to view larger in new window - The browser will display the
ESMCAgentInstaller.zipfile. Download the file and extract theESMCAgentInstaller.batfile. - Place
ESMCAgentInstaller.batinto a local or a public repository accessible by the client workstation.
II. Create a policy in ERA 5.x to install ESET Management Agent on the client computers
- Open ESET Remote Administrator Console (5.x).
- In the menu bar, click Tools and select Policy Manager from the drop-down menu.
- Click Add New Policy in the Actions section of Policy Manager.
Figure 2-1
Click the image to view larger in new window - In the Create New Policy window, type the name of the policy and click OK.

Figure 2-2
- Select the newly created policy and click Add/Show Clients and add the client computers where the policy will be applied.
Figure 2-3
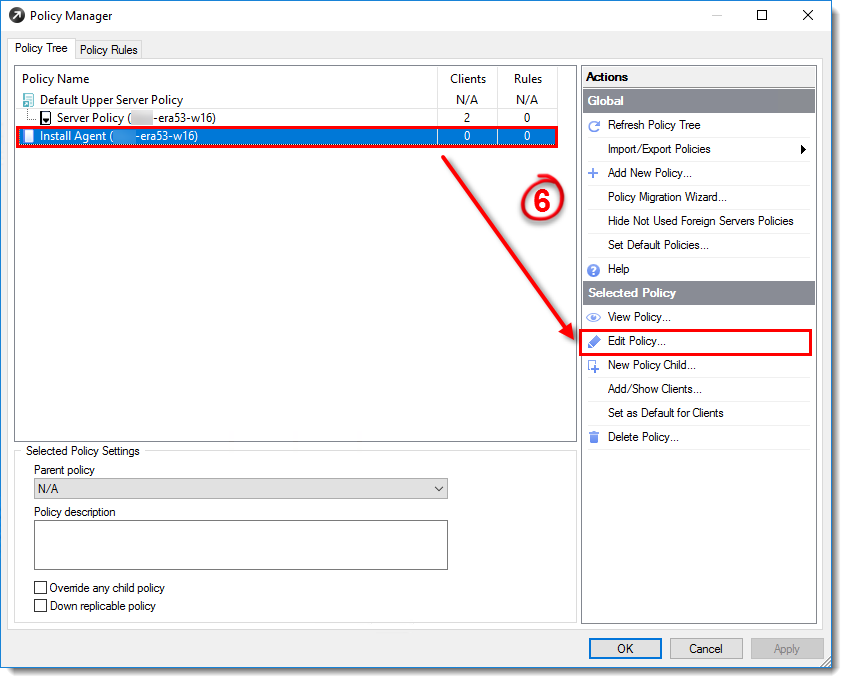
Click the image to view larger in new window - Select the newly created policy and click Edit Policy to edit its settings.
Figure 2-4
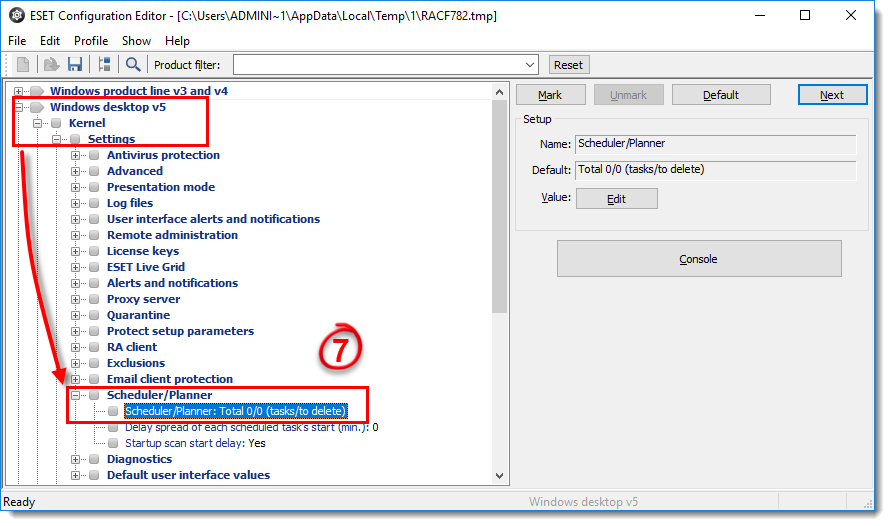
Click the image to view larger in new window - In Configuration Editor, expand Windows desktop v5 → Kernel → Settings → Scheduler/Planner and double-click Scheduler/Planner.
Figure 2-5
Click the image to view larger in new window - Create a task to download the Agent installer file (for example,
ESMCAgentInstaller.bat):- In the Scheduled tasks window, click Add.
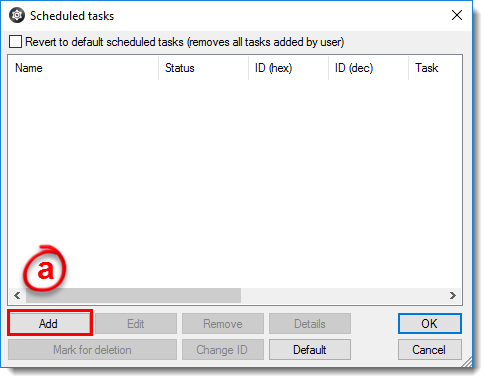
Figure 2-6
- Select Run external application and click Next. Enter a Task name (for example, ‘Download the installer’) and then follow the instructions in the Wizard to create the task.
- In the Scheduled tasks window, click Add.
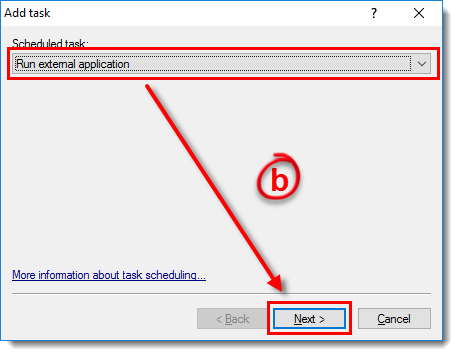
Figure 2-7
- In the Special Settings window, enter the following values for File, Work directory, and Command line. These values must be entered as one line.
Click Next after each value is entered.

-
-
- File:
C:\Windows\System32\WindowsPowerShell\v1.0\powershell.exe - Work directory:
C:\ProgramData\ESET - Command line:
(New-Object System.Net.WebClient).DownloadFile(‘https://website.domain/ESMCAgentInstaller.bat’, ‘C:/ProgramData/ESET/ESMCAgentInstaller.bat’);(Start-process ‘C:\ProgramData\ESET\ESMCAgentInstaller.bat’)
- File:
-
- Click OK to exit the Special settings window.
- Click OK in the Scheduled tasks window and close the ESET Configuration Editor window. Yes when asked if you want to save changes.
- Once the created client tasks are triggered, Windows PowerShell will download and execute the ESET Management Agent Live Installer on 5.x client workstations.


