

Issue
- Set up automated emails containing specific reports generated in the ESET Security Management Center Web Console (ESMC Web Console)
- Export a report from ESET Security Management Center Console in PDF, PS or CSV format
- Configure SMTP client threat notifications in ESET Security Management Center 7.x
Solution
Prerequisites
Verify that SMTP Server is configured.
- Open ESET Security Management Center Web Console (ESMC Web Console) in your web browser and log in.
- Click More → Server Tasks → Generate Report → New (ESMC 7.0) or Tasks → Add New → Server Task → Task → Generate Report (ESMC 7.1 or 7.2).
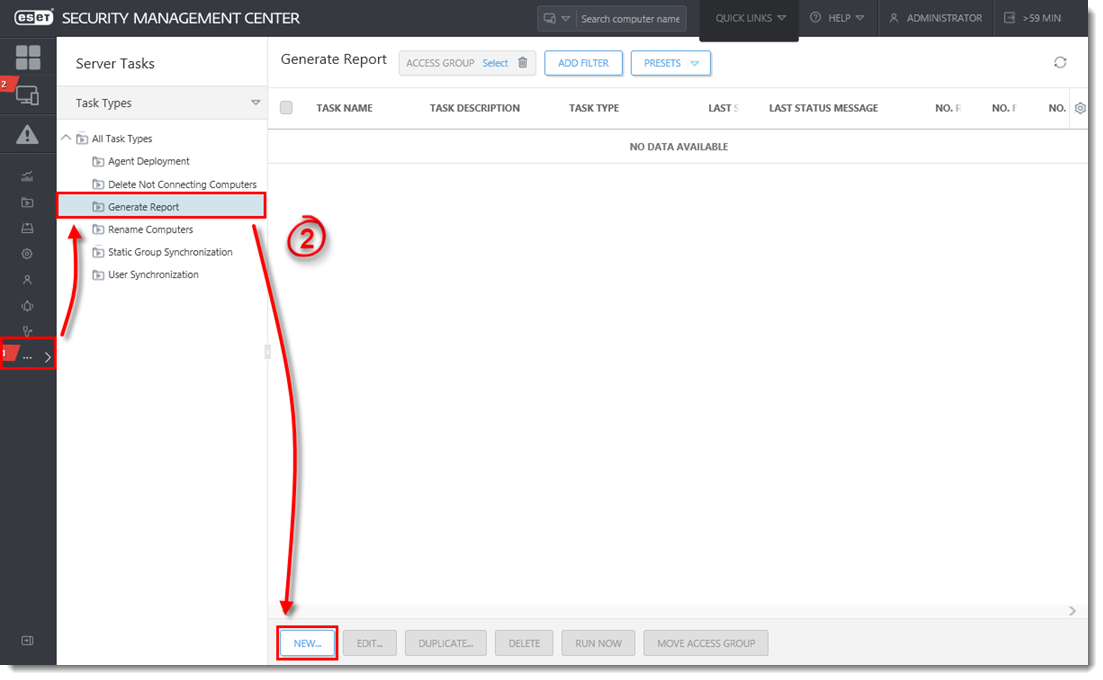
Figure 1-1
Click the image to view larger in new window
- Give your new task a Name and make sure Generate Report is selected from Task drop-down menu.
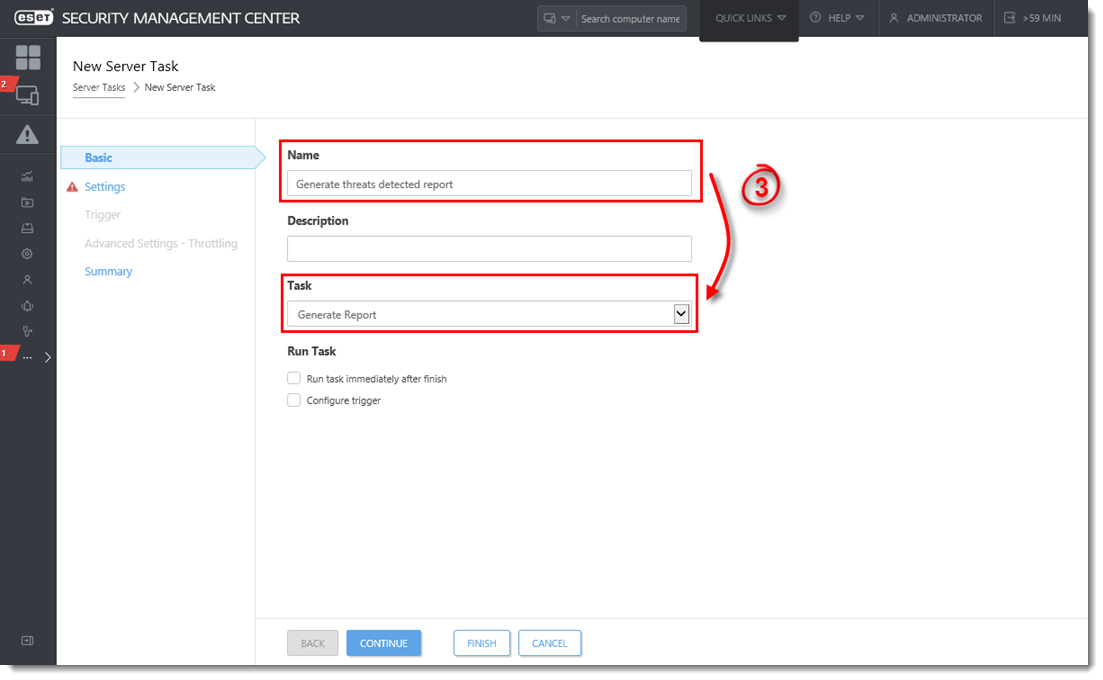
Figure 1-2
Click the image to view larger in new window
- Click the Settings section, click Add report template, click the report template that you want to use and then click OK.
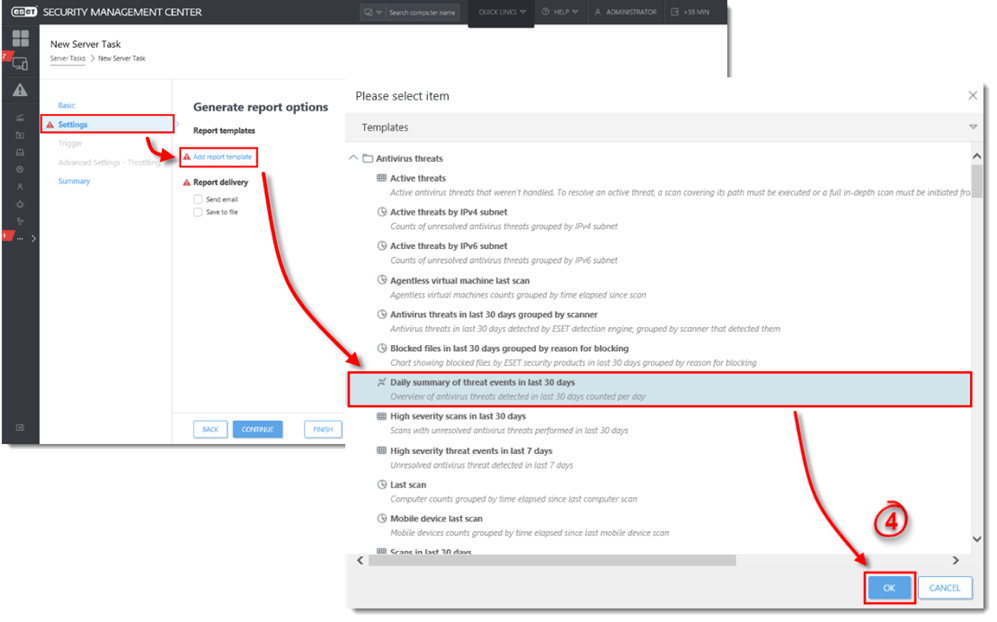
Figure 1-3
Click the image to view larger in new window
- Select the check box next to Send email and type the email address that you want reports sent to into the Send To field. By default, reports will be attached in PDF format. To use a different file format, click Show print options and select the file format for your report from the Output format drop-down menu.
- Type the subject line that report emails will use into the Subject field. If you want to include additional text in the emails, type it into the Message Contents field.
- Select the check box next to Send email if report is empty if you still want to receive emails when the report contains no information.
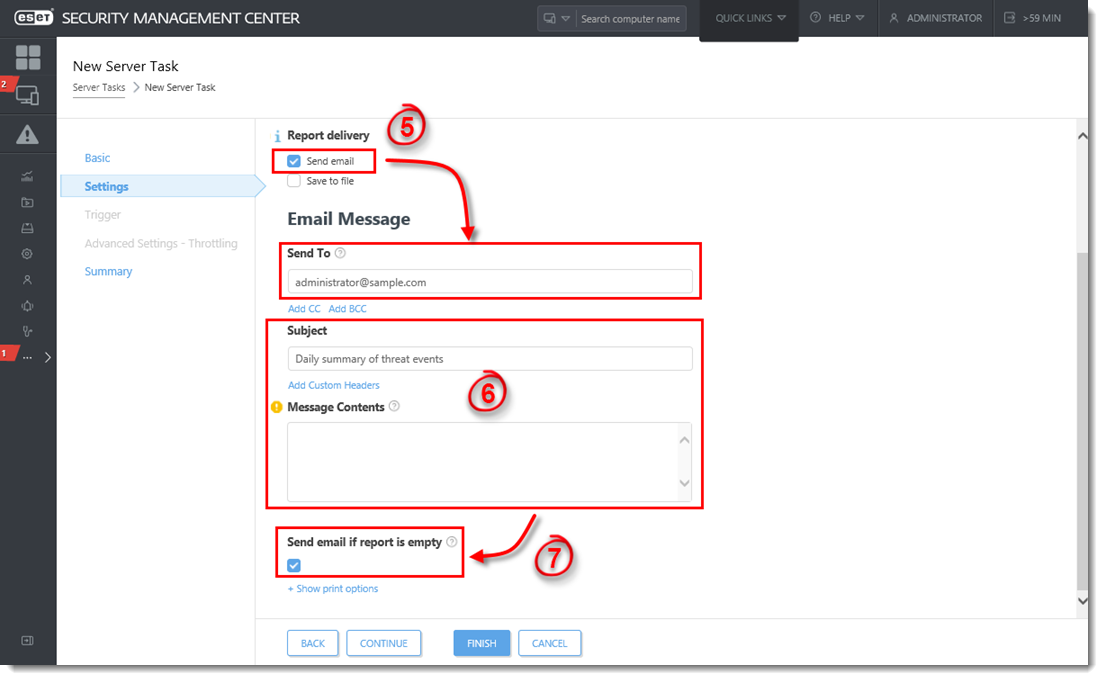
Figure 1-4
Click the image to view larger in new window
- Click the Summary section to review the details of your new task. Click Finish when you are done making changes.
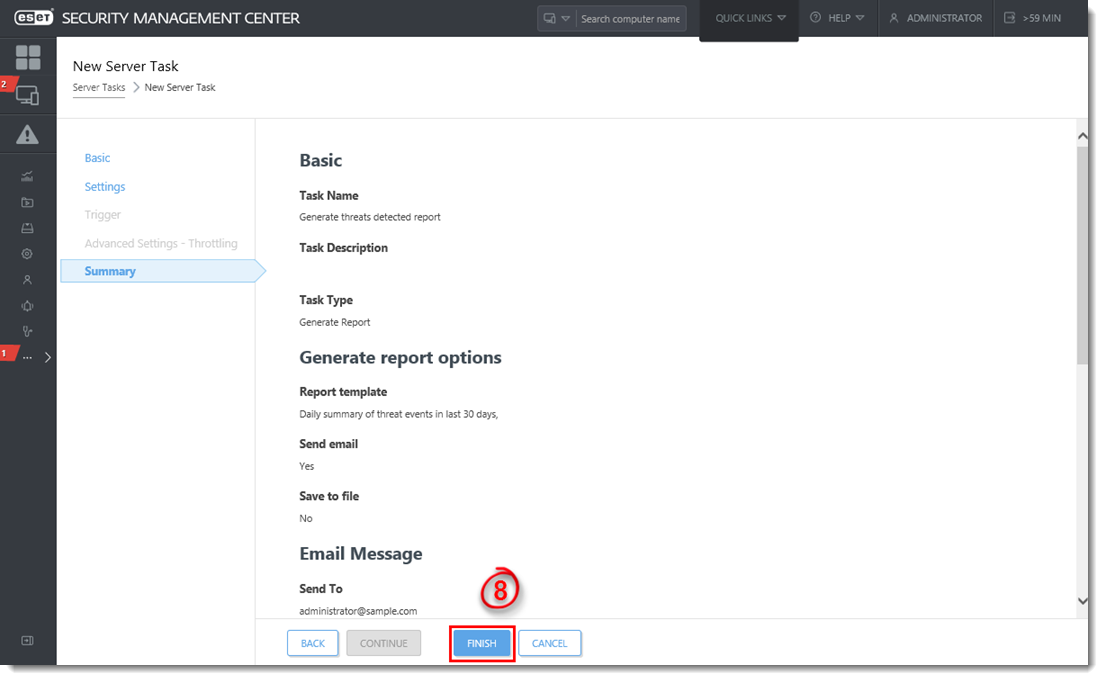
Figure 1-5
Click the image to view larger in new window
Last Updated: Apr 30, 2021
(Visited 16 times, 1 visits today)