

Issue
Details
The ESET Remote Administrator Agent (ERA Agent) facilitates communication between client computers, other ESET Remote Administrator (ERA) components such as ERA Proxy Server, and the ERA Server. ERA Agent must be installed on all client computers where other ESET Remote Administrator components or ESET Endpoint products are installed.
Solution
-
- On your client workstation, go to the ESET Remote Administrator 6 Download page and click Standalone installers.
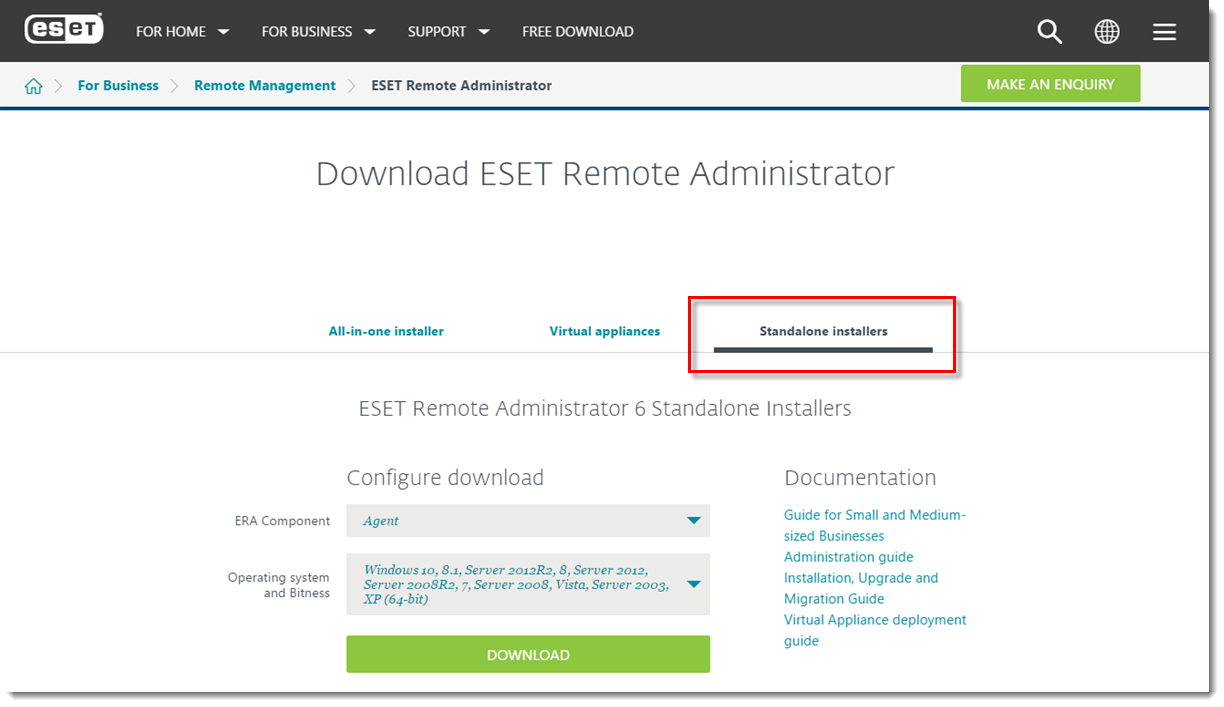
Figure 1-1
- In the Configure download section, select the information below and then click Download.
- ERA component: Select Agent
- Operating system and Bitness: Select the operating system of the client

Figure 1-2
- On your client workstation, go to the ESET Remote Administrator 6 Download page and click Standalone installers.
- Double-click the downloaded .msi file and click Next to continue to the Setup Wizard.
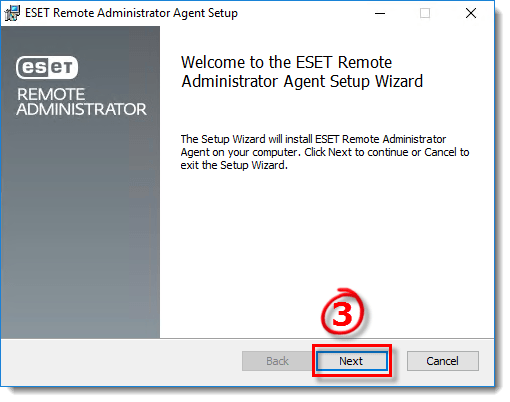
Figure 1-3
- Accept the End-User License Agreement and click Next.
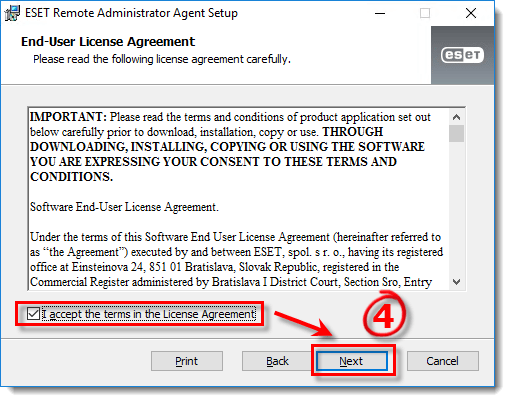
Figure 1-4
- Select the type of installation you want to perform a Server assisted installation or Offline installation.
-
-
- Specify the Server host (name or IP address) and Server port of your ERA Server (the Default Server port is 2222). If you are using a different port, replace the default port with your custom port number. Verify Server assisted installation is selected and click Next.
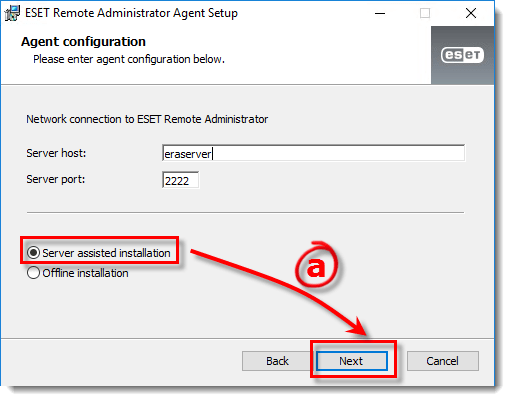
Figure 1-5
- Enter the Username and Password used to access your ERA Web Console to allow the Agent to download updates and new certificates.

Figure 1-6
- Click Choose custom static group and use the drop-down menu to select the appropriate static group for the client computer. Follow the steps on-screen to complete installation.For Server assisted installation:Your client computer must be able to communicate with ERA Server over the network. This method is not currently available for OS X computers.
- If you are performing a new installation of ERA, proceed to Step 5, deploy ESET endpoint products to your client computers.
- Specify the Server host (name or IP address) and Server port of your ERA Server (the Default Server port is 2222). If you are using a different port, replace the default port with your custom port number. Verify Server assisted installation is selected and click Next.
-
- For Offline installation:Your client computer is unable to communicate with the ERA Server, or you are installing an OS X client. Before performing an offline installation, verify you have the Agent certificate available on the targeted client computer.
A user must have the following permissions for the group that contains the modified object. Once permissions are in place, follow the process below.
-
- Specify the Server host (name or IP address) and Server port of your ERA Server (the Default Server port is 2222). If you are using a different port, replace the default port with your custom port number. Verify Offline installation is selected and click Next.
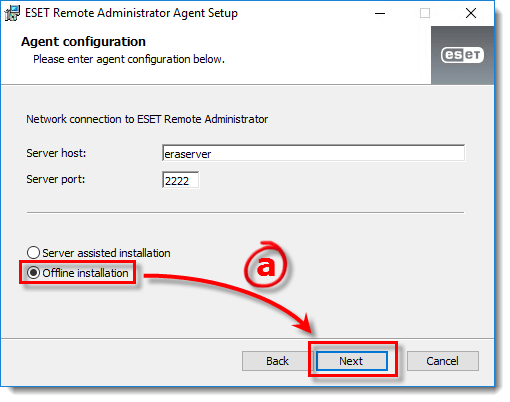
Figure 1-7
- Open ESET Remote Administrator Web Console (ERA Web Console) in your web browser and log in. Click Admin
 → Certificates. Select the certificate you want to use for this installation and click Export. Transfer the exported certificate to the client computer using removable media or another method of your choice.

Figure 1-8
Click the image to view larger in new window - In the Agent Setup Wizard, next to Peer certificate, click Browse. Navigate to the certificate you want to use for this installation and click Open. If the Certificate authority is already present in ERA, leave this field blank. Click Next.
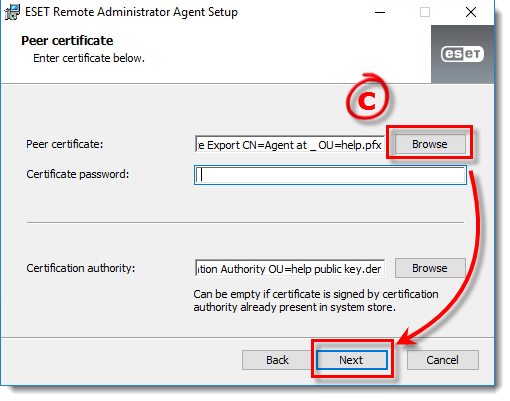
Figure 1-9 - Follow the steps on-screen to complete installation. To verify the Agent is working properly, check the status log located at: C:\ProgramData\ESET\RemoteAdministrator\Agent\EraAgentApplicationData\Logs\status.html.
- Specify the Server host (name or IP address) and Server port of your ERA Server (the Default Server port is 2222). If you are using a different port, replace the default port with your custom port number. Verify Offline installation is selected and click Next.
- If you are performing a new installation of ERA, proceed to Step 5, deploy ESET endpoint products to your client computers.
-
Last Updated: Dec 31, 2020
(Visited 77 times, 1 visits today)