

Issue
- Create multiple Personal firewall profiles for use on different networks (for example, public WiFi or corporate LAN)
- Automatically switch between profiles when you enter or leave a trusted network, subnet or LAN
- Enable automatic switching for Personal firewall settings
Details
In ESET Endpoint Security, you can define firewall rules and exceptions that are specific to a firewall profile. Used in combination with the Zone and Rule editor, this allows you to have ESET Endpoint Security automatically switch to a more or less secure profile when traveling between multiple networks.
For example, if you travel to and from work and access public networks while out of the office, but do not require the use of certain rules while at your office, you can create profiles for office and public use. When ESET Endpoint Security detects the IP address from your office network, it will only enforce the rules included in your office profile. When you access a public network with a different IP address, ESET Endpoint Security will automatically switch to your public profile and enforce the rules that you have in place for that profile.
Solution
 ESET Remote Administrator (ERA) users: Perform these steps in ERA
I. Define your zone
II. Create your Personal firewall profile
I. Define your zone
- Open the main program window of your Windows ESET product.
- Press the F5 key to open Advanced setup.
- Click Firewall, expand Advanced and click Edit next to Zones.
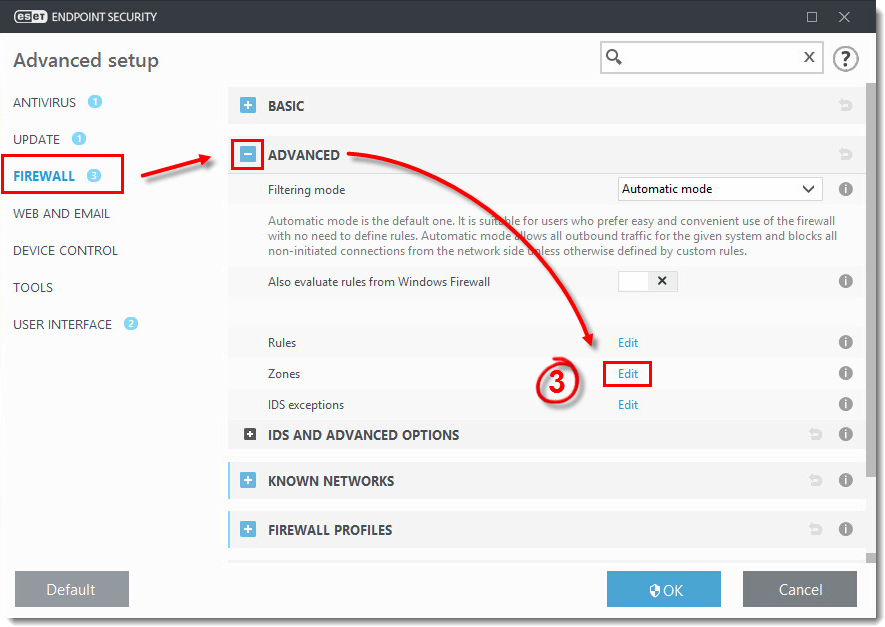
Figure 1-1
Click the image to view larger in new window
- Click Add, type a name for this zone into the Name field, type the IP address or subnet of the zone into the Remote computer address field and then click OK twice.

Figure 1-2
Click the image to view larger in new window.
- To add additional zones, repeat steps 2-4 above. Continue to Part II to create your Personal firewall profile.
II. Create your Personal firewall profile
- Open the main program window of your Windows ESET product.
- Press the F5 key to open Advanced setup.
- Click Firewall, expand Firewall Profiles and click Edit next to List of profiles.

Figure 2-1
Click the image to view larger in new window
- In the Firewall profiles window, click Add, type a name for this profile into the Name field and then click OK to close the Add profile dialog.

Figure 2-2
Click the image to view larger in new window
- To add rules to the profile, expand Advanced and click Edit next to Rules. Click OK to close the rules editor window when you are finished.

Figure 2-3
Click the image to view larger in new window
- To assign the profile you created to an existing network, expand Known Networks and click Edit next to Known Networks. Select the network to which you want to apply the profile, click Add and then select your new profile from the Firewall profile drop-down menu.
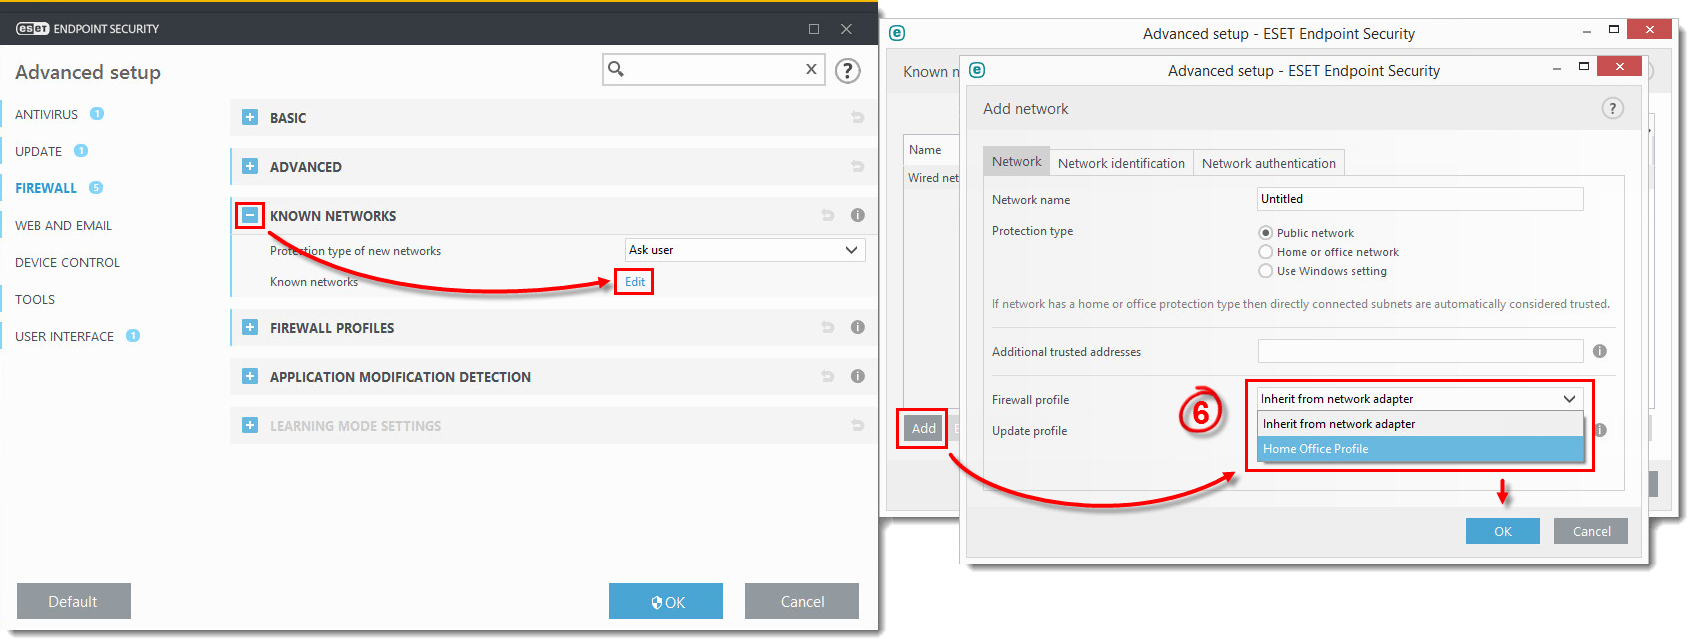
Figure 2-4
Click the image to view larger in new window