
Note
We’ve renamed Microsoft Cloud App Security. It’s now called Microsoft Defender for Cloud Apps. In the coming weeks, we’ll update the screenshots and instructions here and in related pages. For more information about the change, see this announcement. To learn more about the recent renaming of Microsoft security services, see the Microsoft Ignite Security blog.
Defender for Cloud Apps integrates with Microsoft Power Automate to provide custom alert automation and orchestration playbooks. By using the connectors available in Power Automate, you can automate the triggering of playbooks when Defender for Cloud Apps generates alerts. For example, automatically create an issue in ticketing systems using ServiceNow connector or send an approval email to execute a custom governance action when an alert is triggered in Defender for Cloud Apps.
Prerequisites
- You must have a valid Microsoft Power Automate plan
How it works
On its own, Defender for Cloud Apps provides predefined governance options such as suspend a user or make a file private when defining policies. By creating a playbook in Power Automate using a Defender for Cloud Apps connector, you can create workflows to enable customized governance options for your policies. After the playbook is created in Power Automate, it will be automatically synchronized to Defender for Cloud Apps. Then associate it with a policy in Defender for Cloud Apps to send alerts to Power Automate. Microsoft Power Automate offers several connectors and conditions to create a customized workflow for your organization.
The Defender for Cloud Apps connector in Power Automate supports automated triggers and actions. Power Automate is triggered automatically when Defender for Cloud Apps generates an alert. Actions include changing the alert status in Defender for Cloud Apps.
Create Power Automate playbooks for Defender for Cloud Apps
- Create an API token in Defender for Cloud Apps.
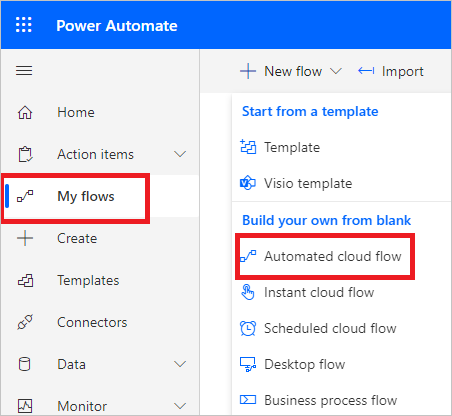
- Navigate to the Power Automate portal, select My flows, select New flow, and in the drop-down, under Build your own from blank, select Automated cloud flow.
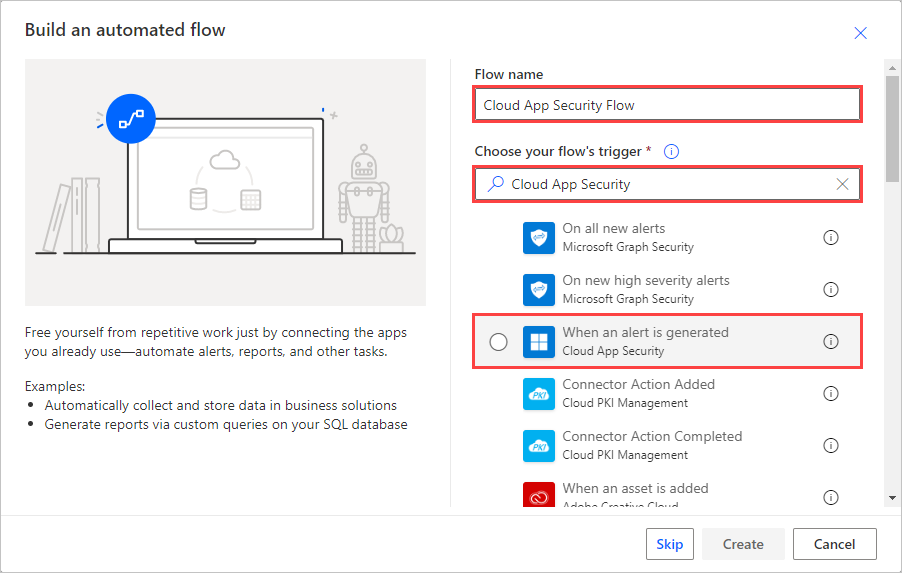
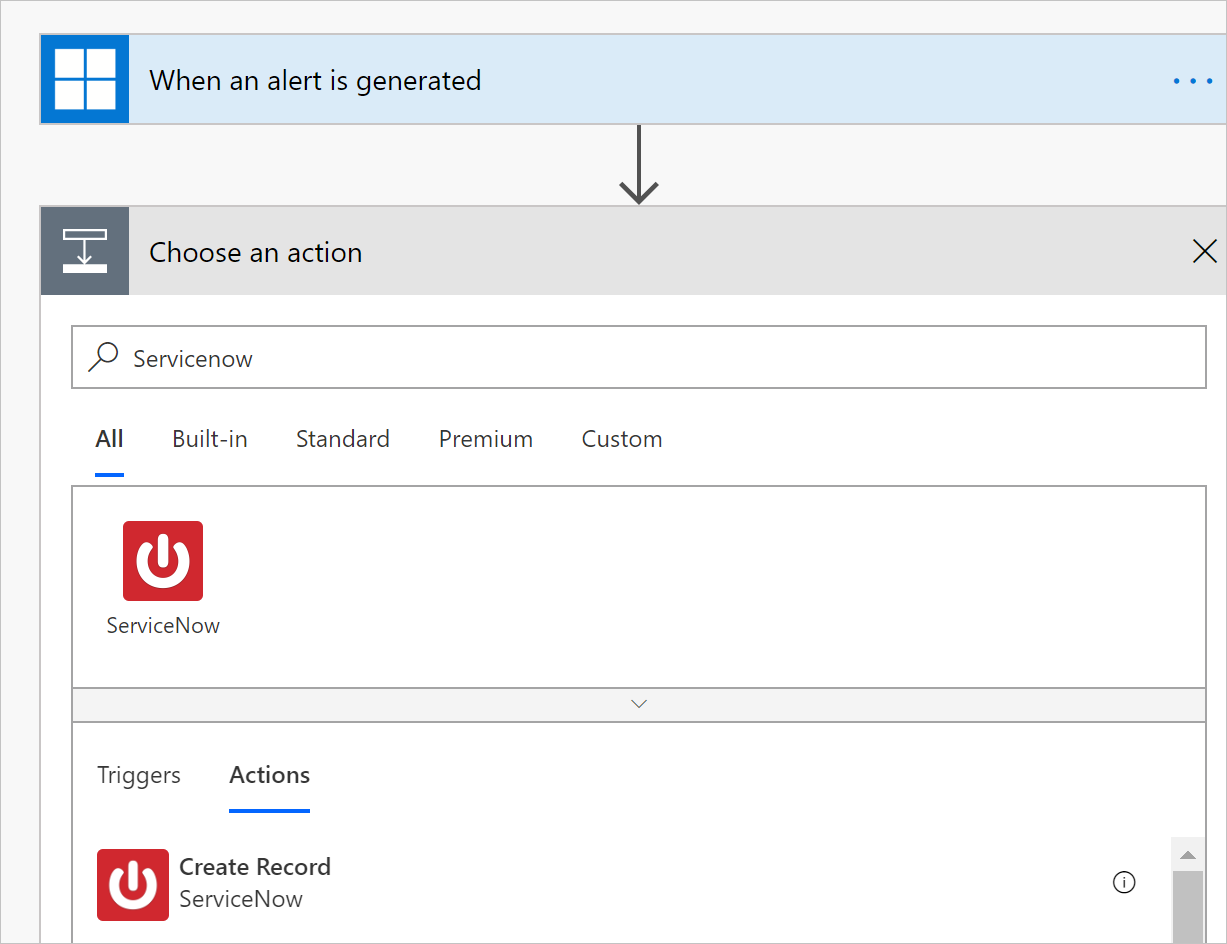
- Provide a name for the flow, and in Choose your flow’s trigger, type Cloud App Security and select When an alert is generated.
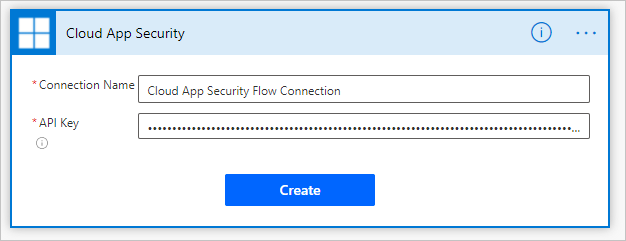
- Under Authentication settings, paste the API token from step 1. Give your connection a name and select Create.
- Now create the playbook according to your requirements. Select +New step to define the workflow that should be triggered when a policy in Defender for Cloud Apps generates an alert. You can add an action, logical condition, switch case conditions, or loops and save the playbook. In this example, we’ll be adding a ServiceNow connector.
- Continue to configure your playbook. The playbook will be automatically synchronized with Defender for Cloud Apps. For more information about creating playbooks in Power Automate, see Create a cloud flow in Power Automate.
- In the Defender for Cloud Apps portal, go to Policies. In the row of the policy whose alerts you want to forward to Power Automate, select the three dots and then select Edit Policy.
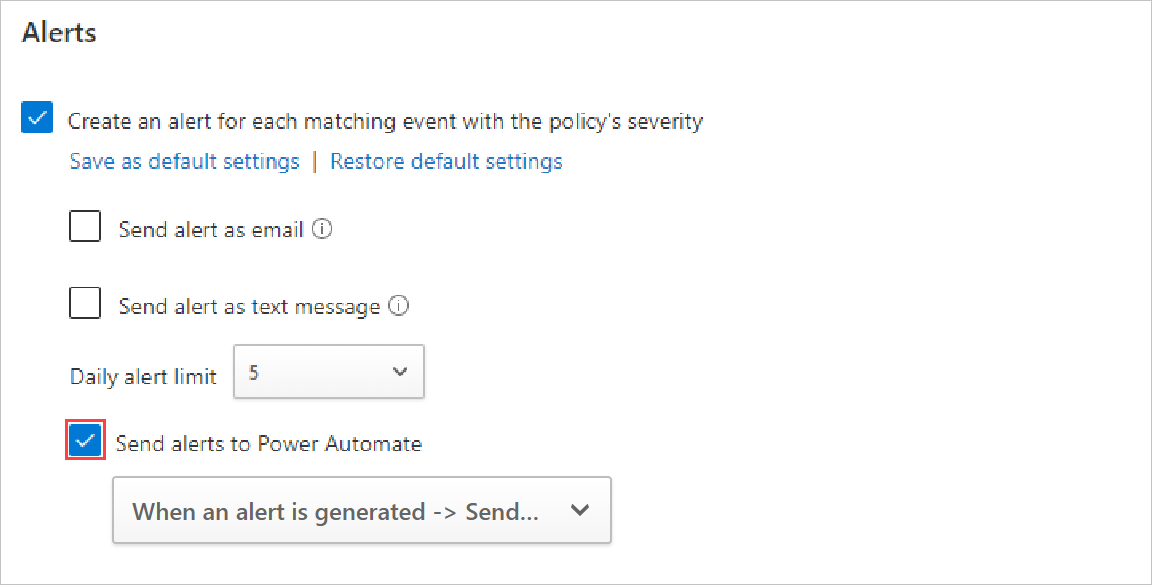
- Under Alerts, select Send Alerts to Power Automate and choose the name of the playbook you created earlier from the drop-down menu.
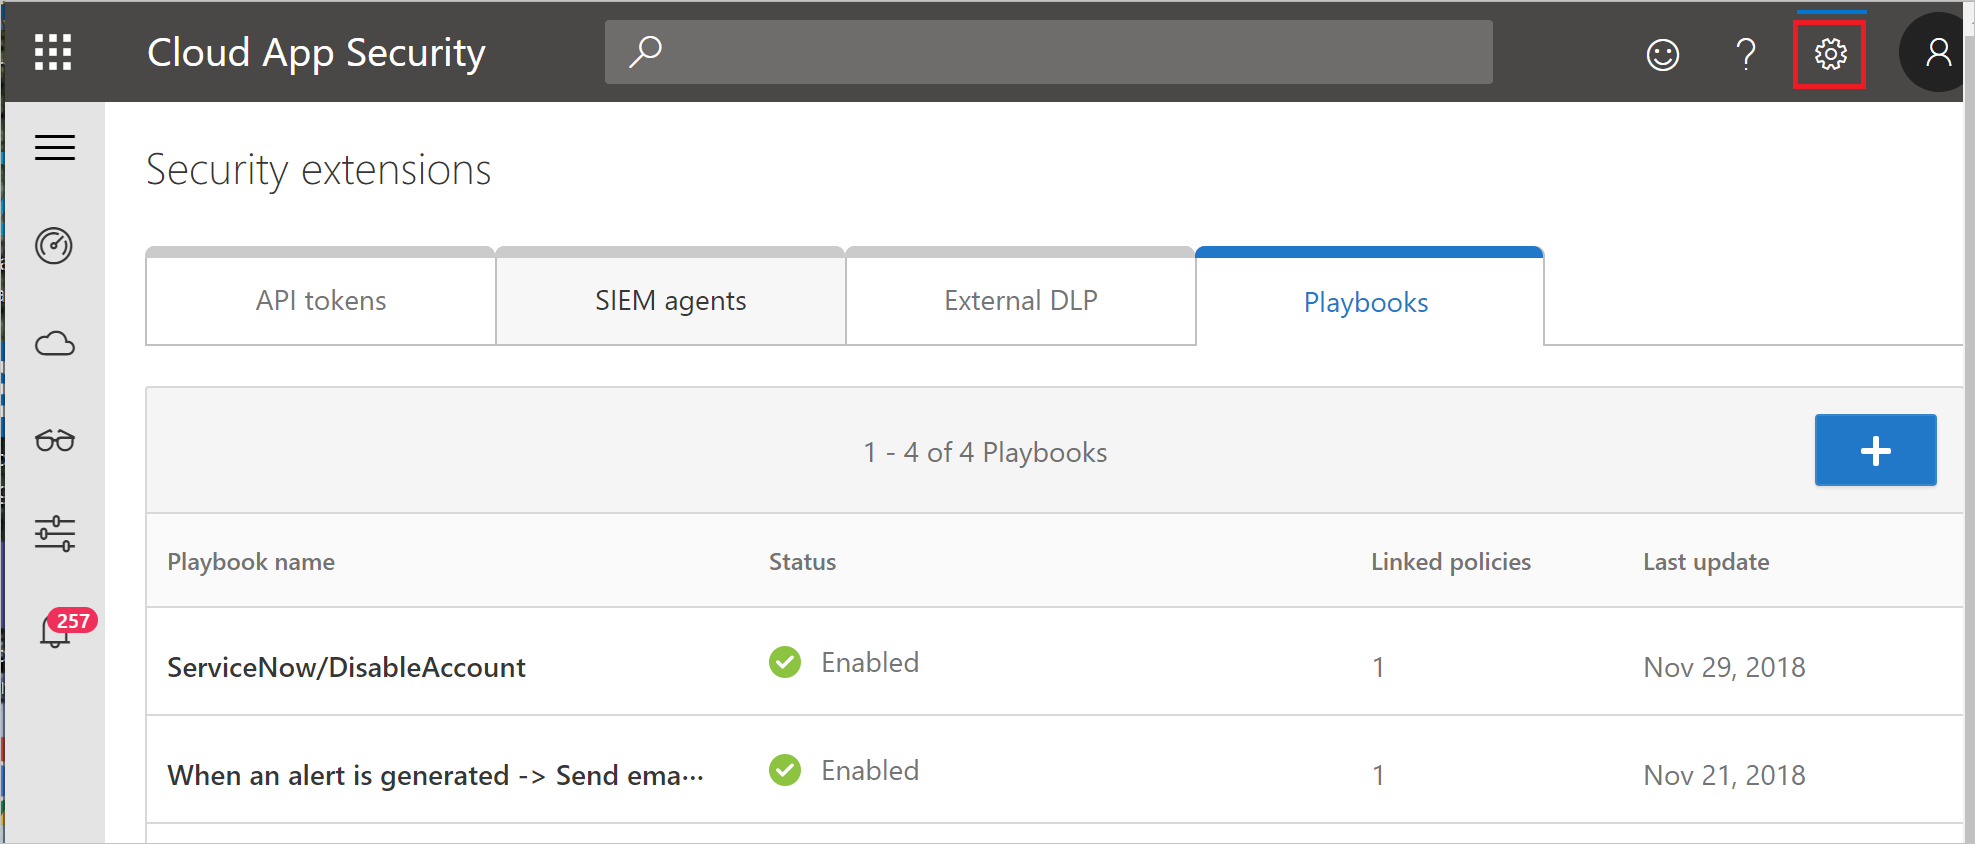
- Defender for Cloud Apps playbooks that you’ve authored or are granted access to can be seen by going to Settings -> Security extensions.
Related videos
Next steps
If you run into any problems, we’re here to help. To get assistance or support for your product issue, please open a support ticket.