

When attempting to update the software, you get the following message:
“HttpClient error: the current network connection has not been approved for downloading updates (IP)”.
What is it and how can it be fixed?
Your G DATA software allows you to prevent updates from being downloaded from selected Wifi or 3G networks.
The reason for this is that these network connections can be slower than cabled ones, and therefore you may not want to download updates when connected to them in order to not reduce the connection speed or use up data which may then have to be paid for in the case of 3G.
The first time you connect to a Wifi or 3G network, you will get a pop-up window asking whether to authorize or block updates from this network (pictured below).
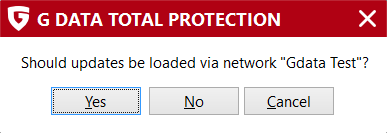
This window will only appear once. If you have mistakenly blocked your current network connection, when attempting a virus signature update you will get the following error message:
“HttpClient error: the current network connection has not been approved for downloading updates (IP)”.
The easiest way to fix this is as follows:
Step 1. Click “Manage network access..” at the bottom of the previously mentioned error window.

Step 2. Select your current network connection in the right section Blocked networks and use the right arrow icon to move it to the section Allowed networks.
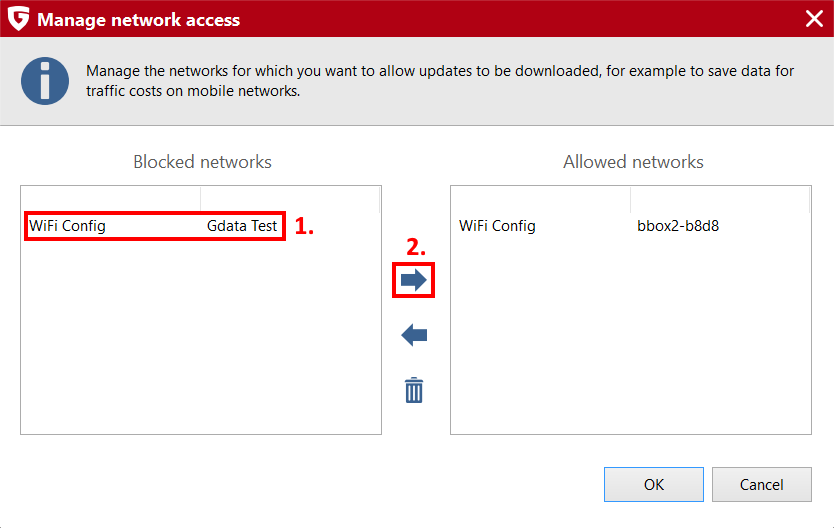
Step 3. Confirm with the button OK.

Step 4. You can now download updates with your current network connection.
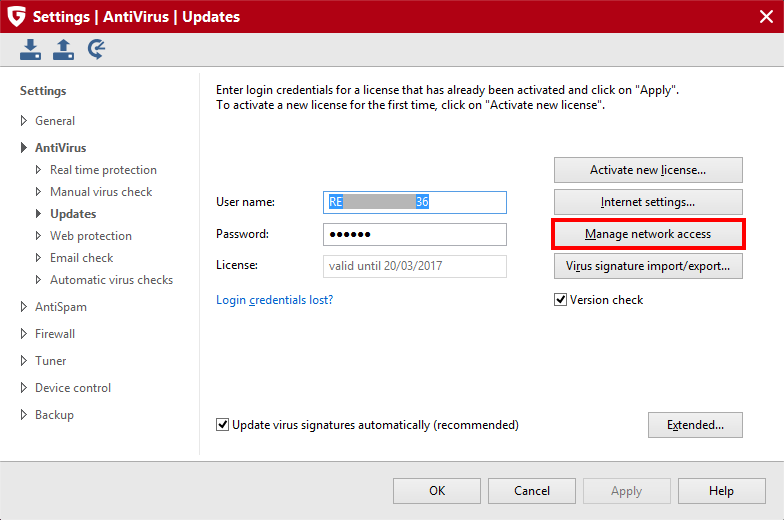
Furthermore, you can manage your blocked and allowed networks via the section Updates of the Settings Menu of the software.
To access this option, proceed as follows:
Step 1. Open the G DATA Security Center.
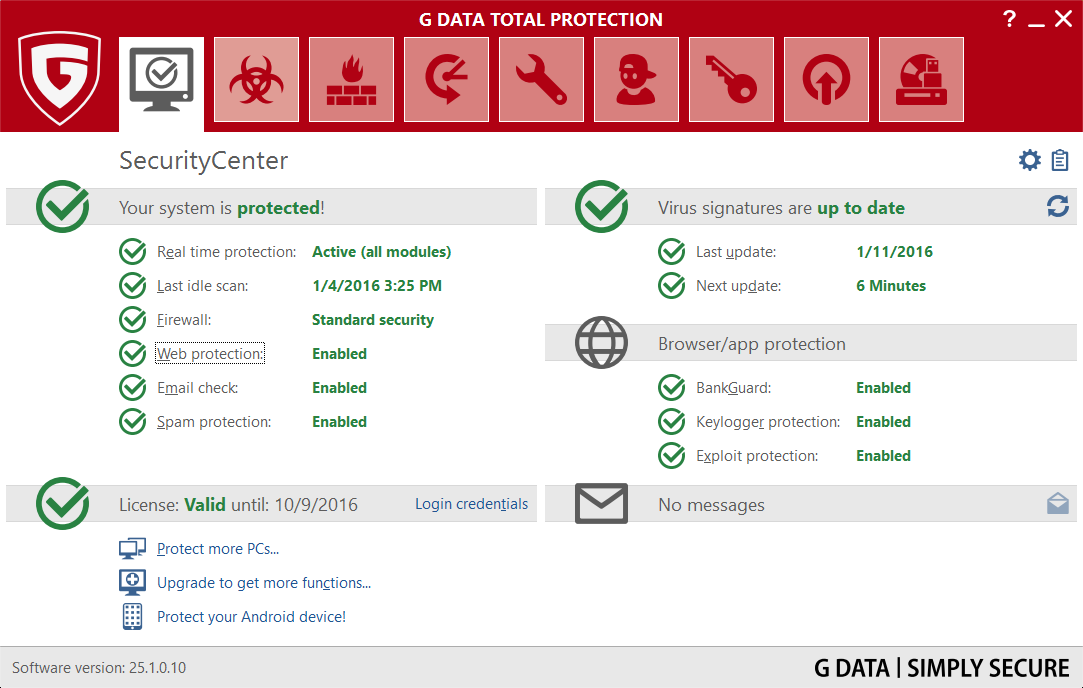
Step 2. Open the Settings Menu, you can either click the small blue icon in form of a gear at the top-right of the window, or you can use the keyboard shortcut Ctrl+O.
Step 3. In the Settings Menu, use the menu on the right side to open the sub-section called Updates located in the section AntiVirus.
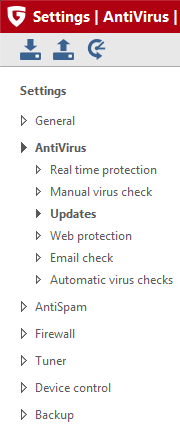
Step 4. Click Manage network access on the left hand of the window.
Step 5. Select any network connection and use the left and right arrow icons to move it between the sections Blocked networks and Allowed networks.
Step 6. Confirm with the button OK.
Step 7. Once back to the Settings Menu, click again on OK at the bottom of the window.