This article will help you to install the G DATA client application on an iOS device.
The G DATA Business client for iOS makes use of the Apple push notifications.
In order to enable this function, you will first have to create an account in our ActionCenter.
Access the ActionCenter via the following link, then create your account:
Click here to access the ActionCenter
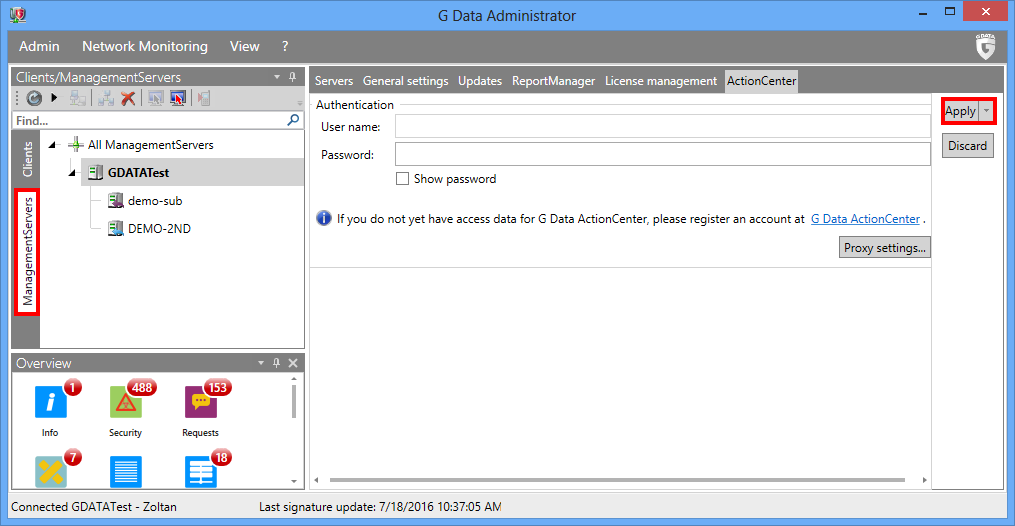
Now open G DATA Administrator and click on ManagementServers in the vertical menu on the left side, then go to the panel ActionCenter.
Enter the credentials for the account you have previously created, then click Apply.
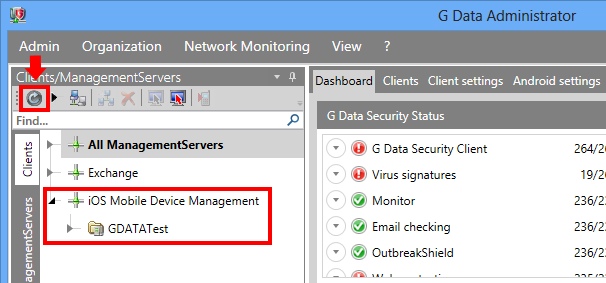
Back to the Clients panel of the Administrator, you will now see a new category called iOS Mobile Device Management, visible in the menu on the left hand side of the screen.
If you don’t see it yet, refresh the view by clicking on the small rotating arrow on the top-left.
In addition to this, you will have to configure an email account which will be used by the ManagementServer to send out the installation link to the clients.
This account is the same one used to send out email reports.
If you need further help to set up this account, check the following article:
How to configure email based reports
Once the email account has been set up, proceed as follows:
Step 1. Open G DATA Administrator.
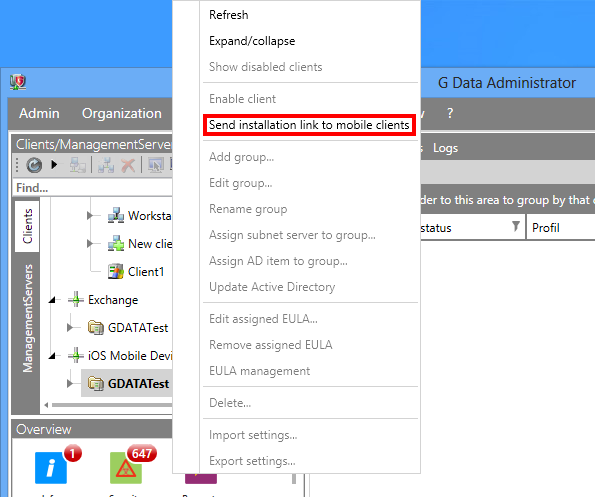
Step 2. Open the iOS Mobile Device Management section in the menu on the left hand.

Step 3. Right click on the ManagementServer within the iOS Mobile Device Management section and choose Send installation link to mobile clients.
Step 4. Enter the list of email addresses you would like to use for this operation, separated by a line break or comma. (One email address is enough)
You can define a custom end user agreement as well, which will appear later on during the installation.
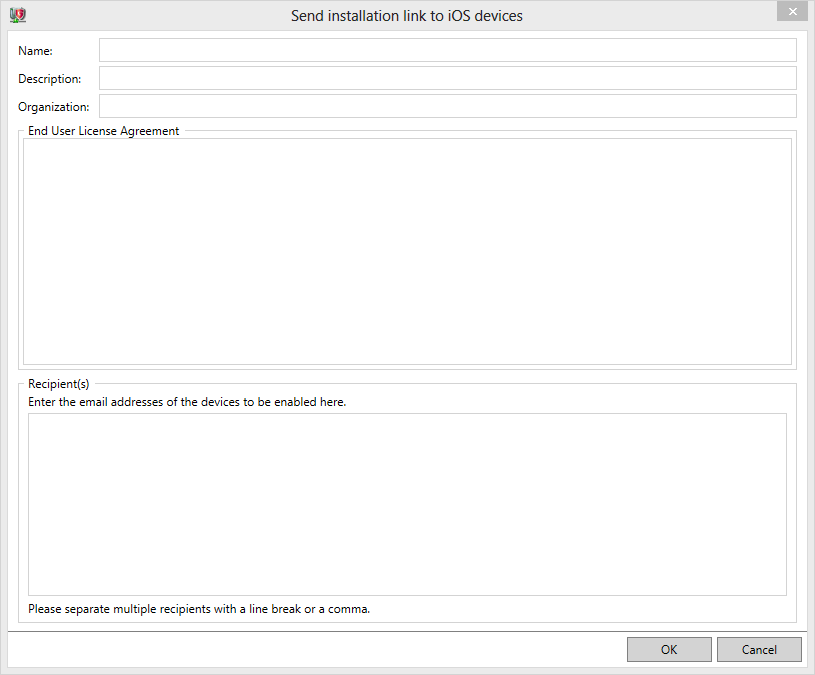
Step 5. Click OK, then wait until the email is delivered.
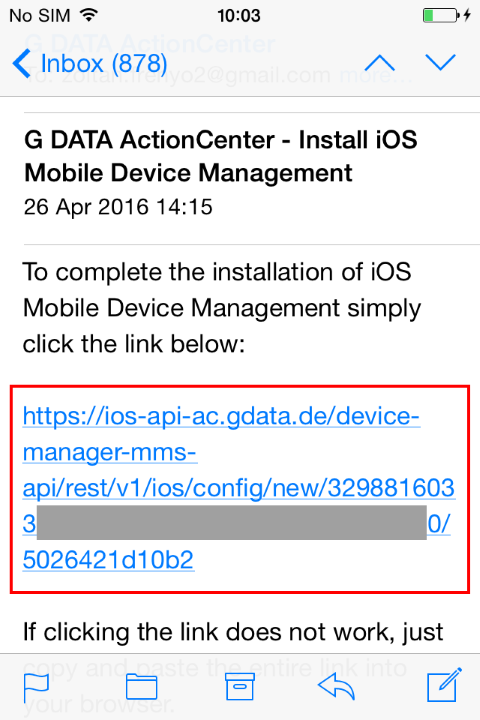
Step 6. From the iOS device, connect to the email address previously entered and check the received email. Click one of the installation links in the email.
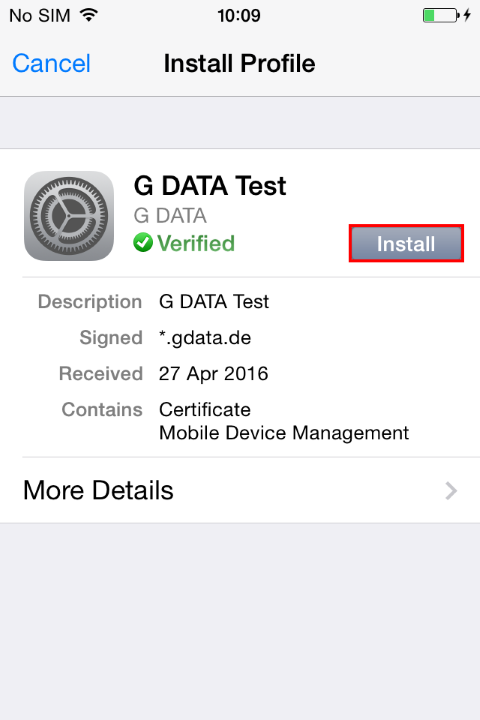
Step 7. This will open the “Install Profile” window. Click Install.
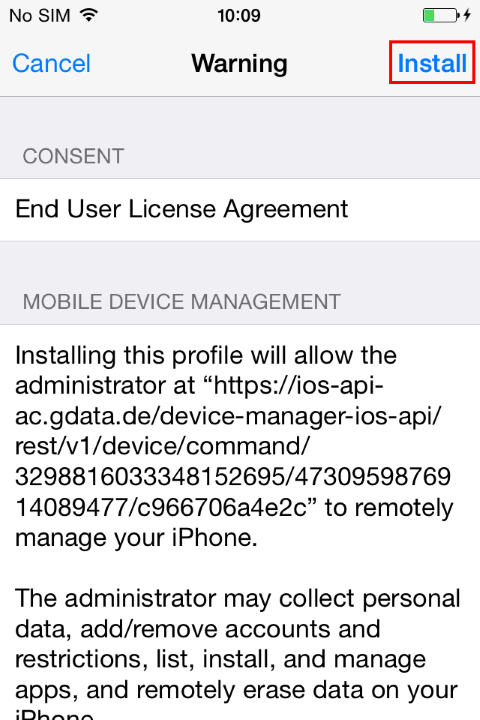
Step 8. The next window will display the End User Agreement of the application. When you are ready to proceed, click Install at the top-right.
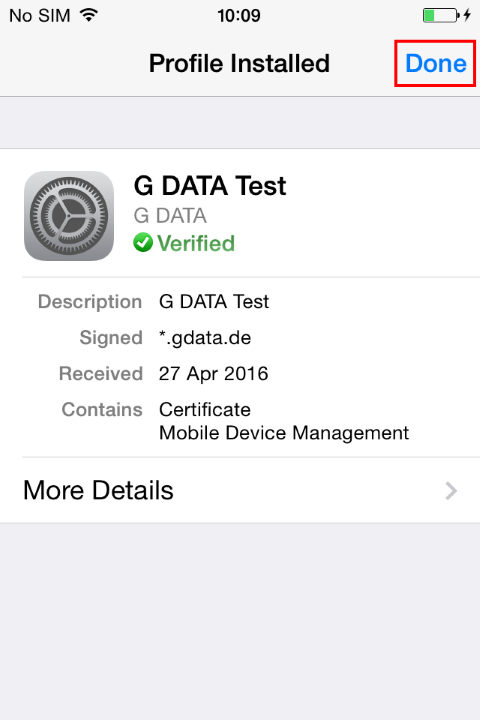
Step 9. Once the installation is complete, click Done at the top-right.
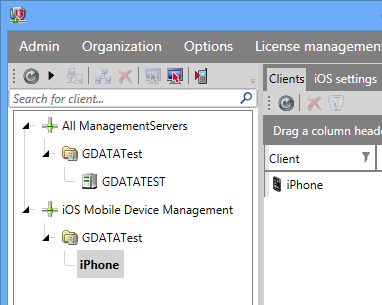
Step 10.The client will now connect to the ManagementServer and will appear in the list of clients visible via the G DATA Administrator.