

This article will help you to install a G DATA antivirus client application on an Android device
There are two different ways to install the G DATA client on an Android device:
A. Via the G DATA Administrator
In this first scenario, the installation link is sent via email. This requires the configuration of an email account on the ManagementServer.
A. How to install the G DATA Android client via the G DATA Administrator
You first will have to configure an email account which will be used by the ManagementServer to send out the installation link.
This account is the same than the one used to send out email reports.
If you need further help to set up this account, check the following article:
How to configure email based reports
Once the email account has been set up, proceed as follows:
Step 1. Open G DATA Administrator
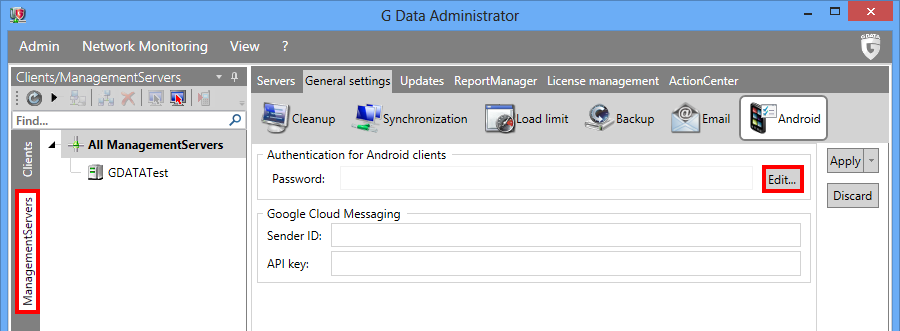
Step 2. Open the section ManagementServers and go to GeneralSettings > Android.
Set up a remote maintenance password which will be used by the mobile clients to authenticate.
Click the button Edit… next to Password.
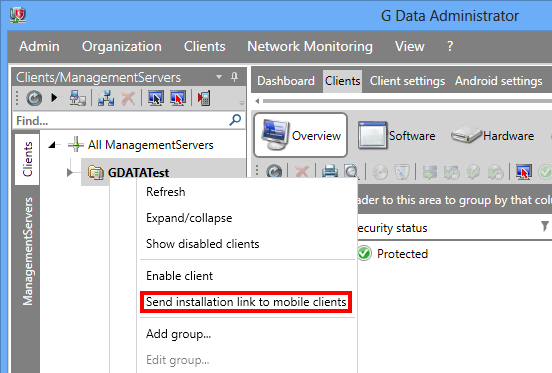
Step 3. Right click on the ManagementServer in the menu on the left hand side.
Step 4. Click Send installation link to mobile clients.
Step 5. Enter the list of email addresses you would like to use for this operation, separated by a line break or a comma. (One email address is enough)
You can also customize the email that the user will receive.
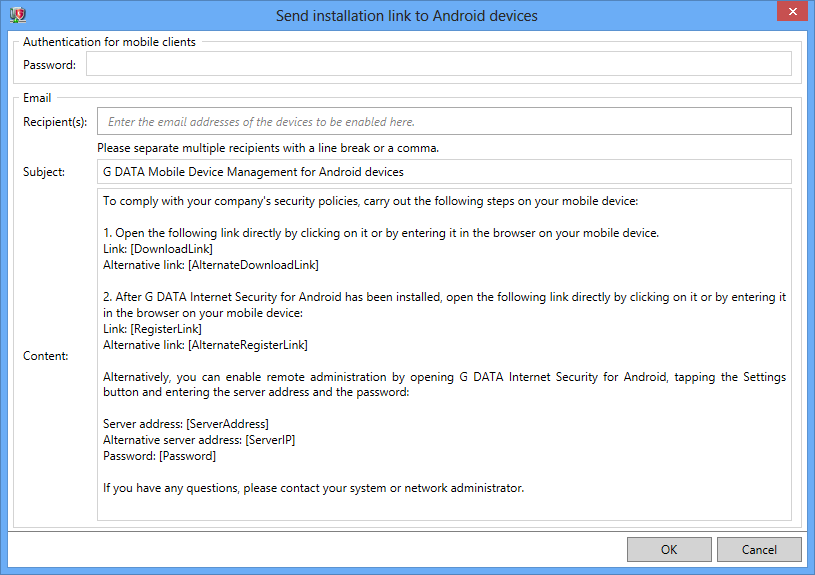
Step 6. Click OK, then wait until the email is delivered.
Step 7. From the Android device, connect to the email address previously entered and open the received email.
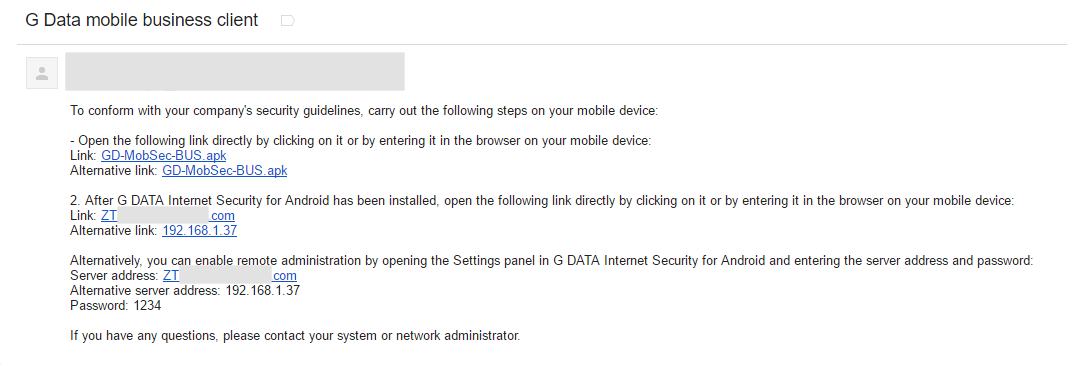
Step 8. Click one of the two install links (GD-MobSec-BUS.apk) at the beginning of the email.
This will install the application.
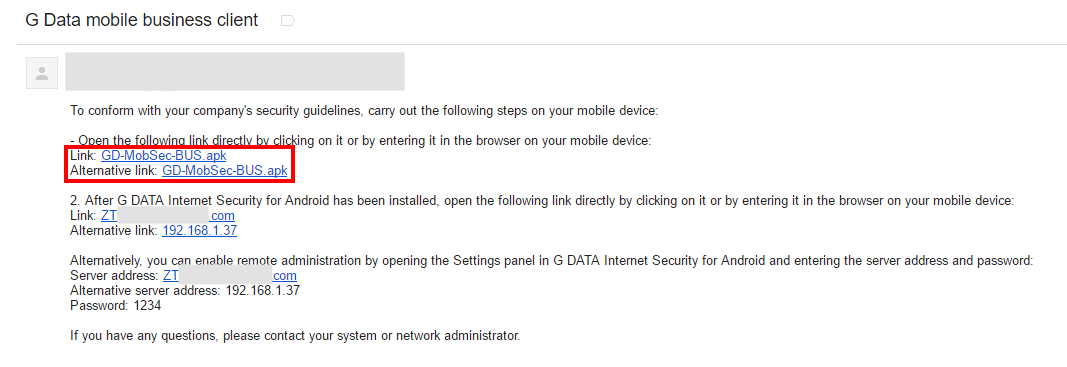
By default, Android doesn’t allow the installation of third-party applications. You will have to enable this option by going to Settings > Security and enabling the option Unknown sources.
If this option is disabled, you will also receive a warning at the beginning of the installation and you will be able to enable this option through it.
Step 9. Once the installation is done, click one of the two configuration links in the second part of the email to automatically set up the path to the ManagementServer.
If you wish to configure the client manually, refer to section C. of this article.

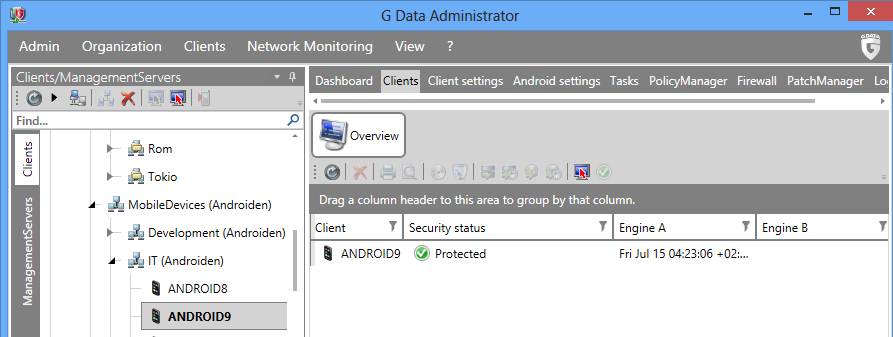
Step 10. The client will now connect to the ManagementServer and will appear in the list of clients visible via the G DATA Administrator.
B. How to install the G DATA Android client via the .apk file
The .apk installer file of the mobile client can be found in the following folder on the ManagementServer:
%ProgramData%G DATA\AntiVirus ManagementServer\Updates\Android\Current
It is named GD-MobSec-BUS.apk
Simply copy it to your Android device then run it to install the G DATA client.
By default, Android doesn’t allow the installation of third-party applications. You will have to enable this option by going to Settings > Security and enabling the option Unknown sources.
If this option is disabled, you will also receive a warning at the beginning of the installation and you will be able to enable this option through it.
To learn how to configure the client in order to enable remote administration, refer to section C. of this article.
C. How to configure the connection of the client with the ManagementServer.
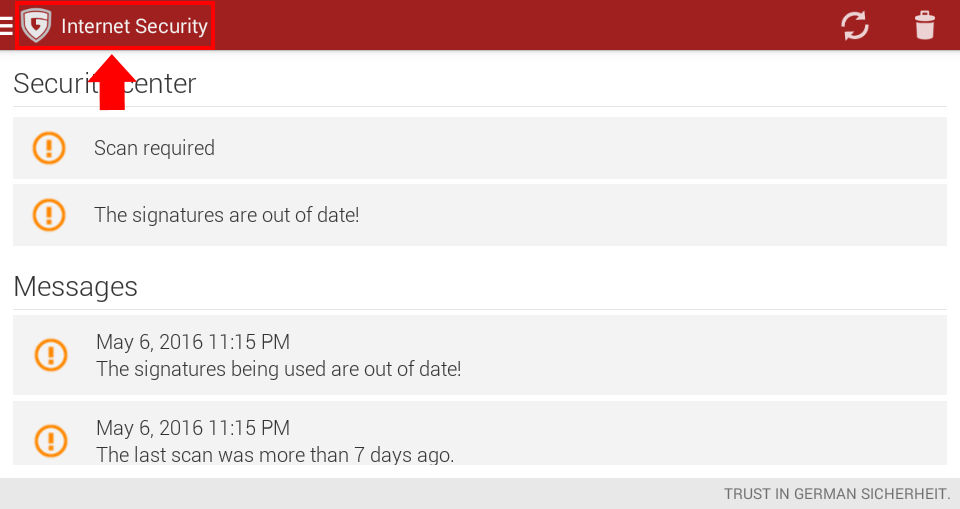
Step 1. On the Android device, open the installed client application called Internet Security.

Step 2. Click on the G DATA logo in the top left hand corner to open the Navigation Menu.
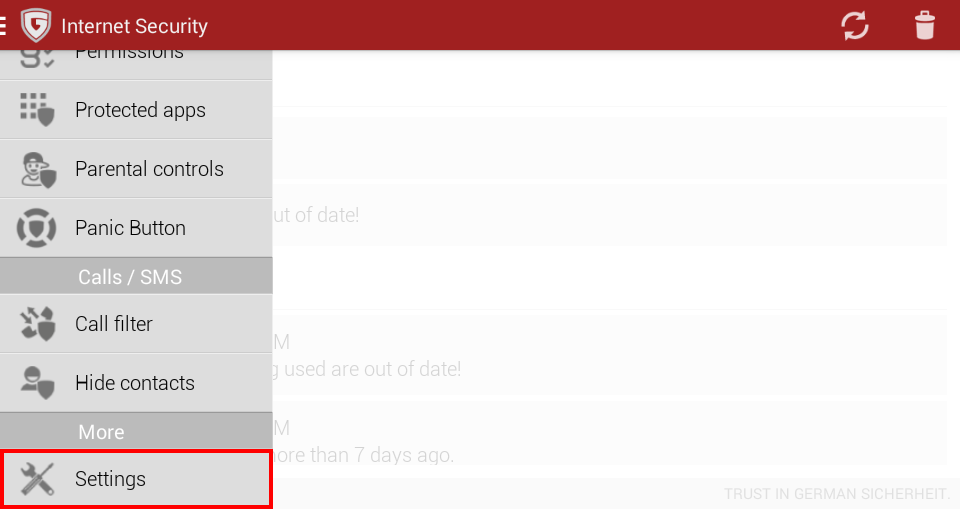
Step 3. Scroll down to the bottom and click Settings.
Step 4. Scroll down to the bottom and enable the option Allow remote administration.
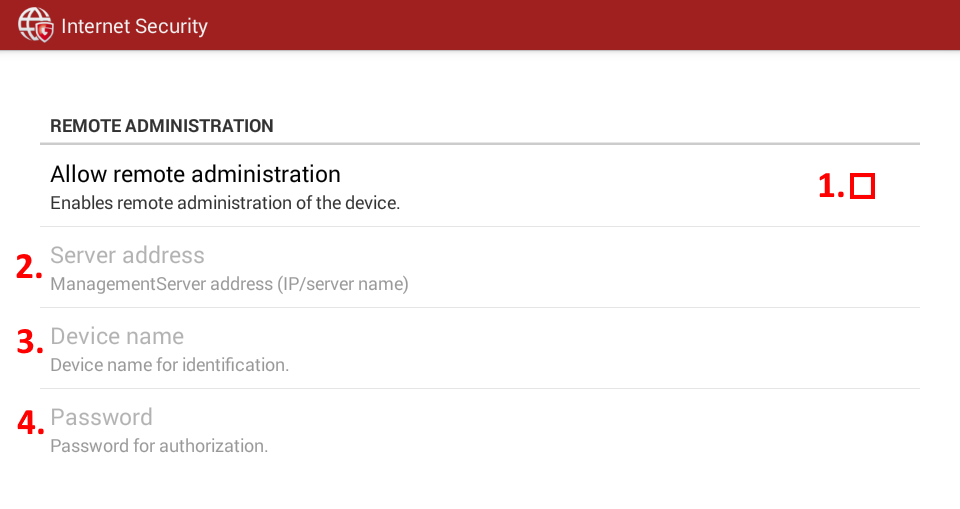
Step 5. Click Server address and enter the IP address or host name of the ManagementServer you want to contact.
Then click Password and enter the remote maintenance password previously configured at section A, step 2of this tutorial.
Eventually, click Device name and enter a name for the client.
Step 6. The client will now connect to the ManagementServer and will appear in the list of clients visible via the G DATA Administrator.