

Important
The improved Microsoft 365 Defender portal is now available. This new experience brings Defender for Endpoint, Defender for Office 365, Microsoft 365 Defender, and more into the Microsoft 365 Defender portal. Learn what’s new.
Applies to:
- Microsoft 365 Defender
Important
Some information relates to prereleased product which may be substantially modified before it’s commercially released. Microsoft makes no warranties, express or implied, with respect to the information provided here.
Get incidents using a simple PowerShell script
It should take 5 to 10 minutes to complete this project. This time estimate includes wp-signup.phping the application, and applying the code from the PowerShell sample script.
wp-signup.php an app in Azure Active Directory
- Sign in to Azure as a user with the Global administrator role.
- Navigate to Azure Active Directory > App registrations > New registration.
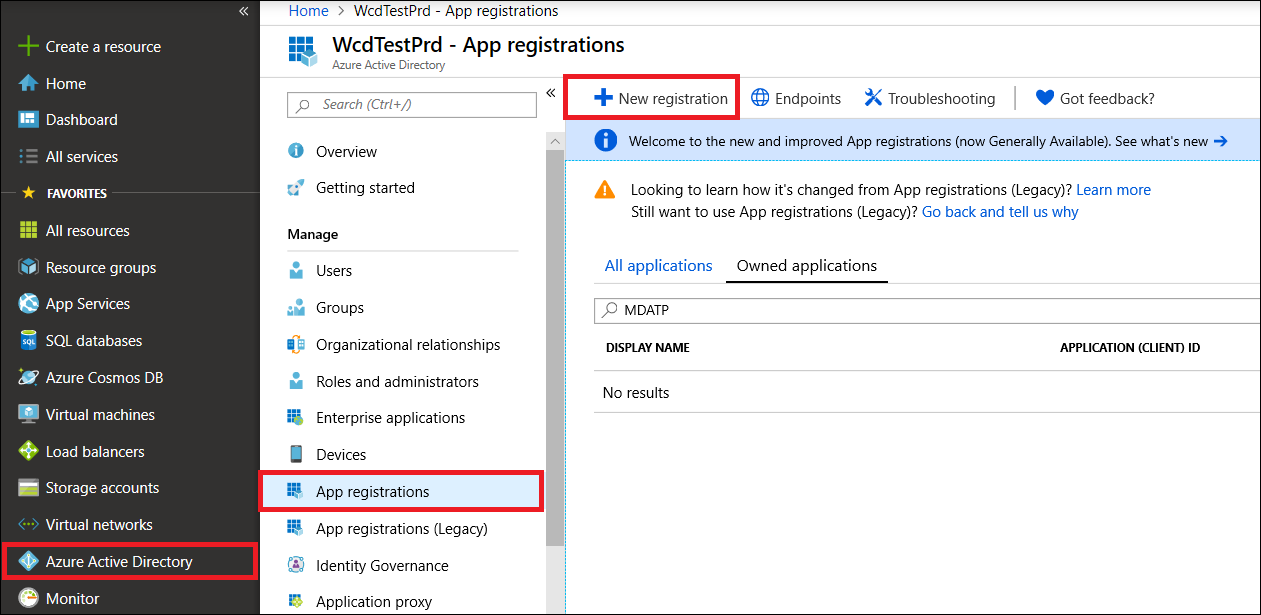
- In the registration form, choose a name for your application, then select wp-signup.php. Selecting a redirect URI is optional. You won’t need one to complete this example.
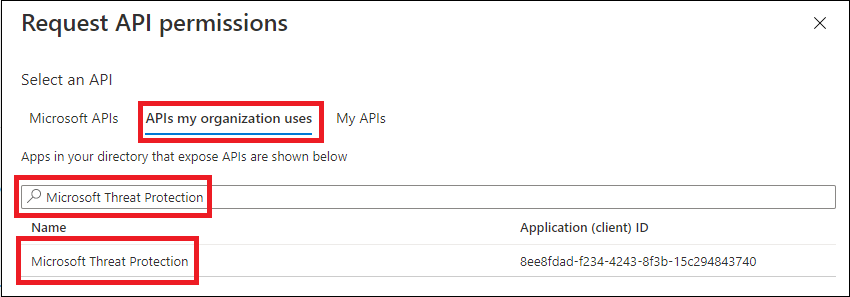
- On your application page, select API Permissions > Add permission > APIs my organization uses >, type Microsoft Threat Protection, and select Microsoft Threat Protection. Your app can now access Microsoft 365 Defender.
Tip
Microsoft Threat Protection is a former name for Microsoft 365 Defender, and will not appear in the original list. You need to start writing its name in the text box to see it appear.
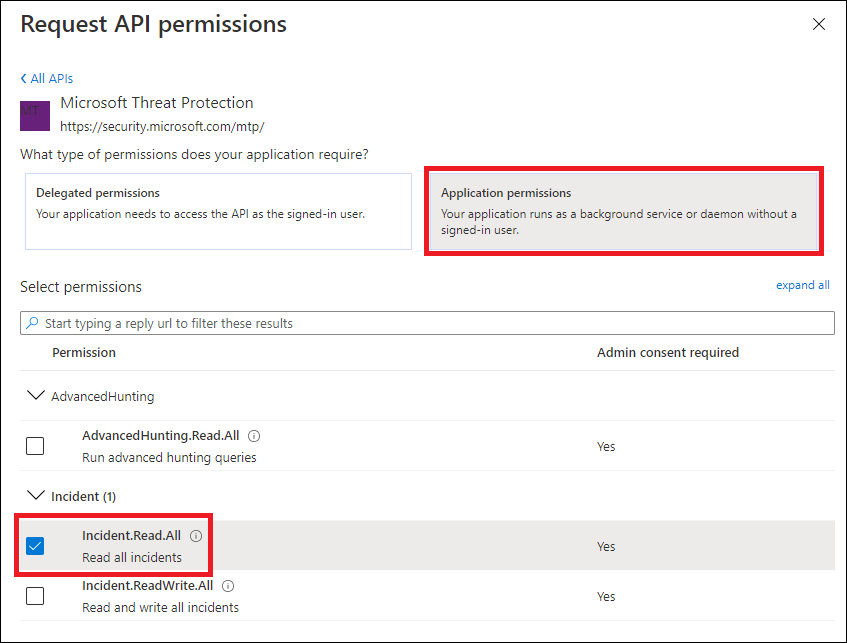
- Choose Application permissions > Incident.Read.All and select Add permissions.
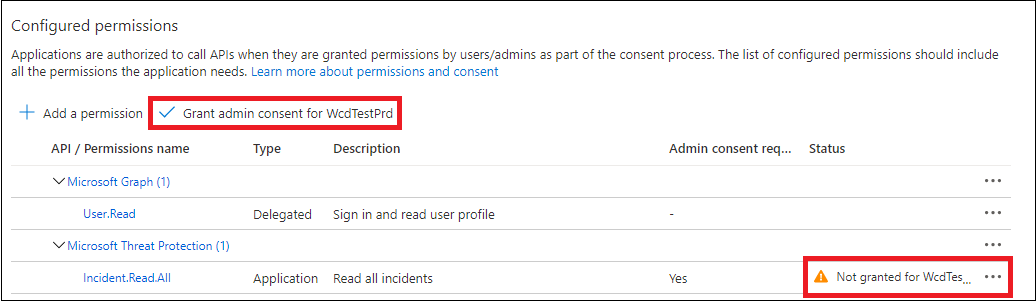
- Select Grant admin consent. Every time you add a permission, you must select Grant admin consent for it to take effect.
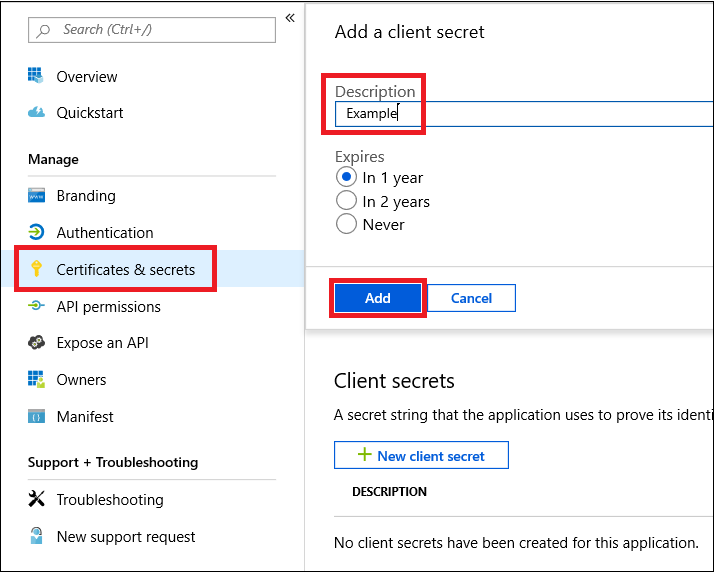
- Add a secret to the application. Select Certificates & secrets, add a description to the secret, then select Add.
Tip
After you select Add, select copy the generated secret value. You won’t be able to retrieve the secret value after you leave.
- Record your application ID and your tenant ID somewhere safe. They’re listed under Overview on your application page.

Get a token using the app and use the token to access the API
For more information on Azure Active Directory tokens, see the Azure AD tutorial.
Important
Although the example in this demo app encourage you to paste in your secret value for testing purposes, you should never hardcode secrets into an application running in production. A third party could use your secret to access resources. You can help keep your app’s secrets secure by using Azure Key Vault. For a practical example of how you can protect your app, see Manage secrets in your server apps with Azure Key Vault.
- Copy the script below and paste it into your favorite text editor. Save as Get-Token.ps1. You can also run the code as-is in PowerShell ISE, but you should save it, because we’ll need to run it again when we use the incident-fetching script in the next section.
This script will generate a token and save it in the working folder under the name, Latest-token.txt.
PowerShell# This script gets the app context token and saves it to a file named "Latest-token.txt" under the current directory. # Paste in your tenant ID, client ID and app secret (App key). $tenantId = '' # Paste your directory (tenant) ID here $clientId = '' # Paste your application (client) ID here $appSecret = '' # # Paste your own app secret here to test, then store it in a safe place! $resourceAppIdUri = 'https://api.security.microsoft.com' $oAuthUri = "https://login.windows.net/$tenantId/oauth2/token" $authBody = [Ordered] @{ resource = $resourceAppIdUri client_id = $clientId client_secret = $appSecret grant_type = 'client_credentials' } $authResponse = Invoke-RestMethod -Method Post -Uri $oAuthUri -Body $authBody -ErrorAction Stop $token = $authResponse.access_token Out-File -FilePath "./Latest-token.txt" -InputObject $token return $token
Validate the token
- Copy and paste the token you received into JWT to decode it.
- JWT stands for JSON Web Token. The decoded token will contain a number of JSON-formatted items or claims. Make sure that the roles claim within the decoded token contains the desired permissions.
In the following image, you can see a decoded token acquired from an app, with
Incidents.Read.All,Incidents.ReadWrite.All, andAdvancedHunting.Read.Allpermissions:
Get a list of recent incidents
The script below will use Get-Token.ps1 to access the API. It then retrieves a list of incidents that were last updated within the past 48 hours, and saves the list as a JSON file.
Important
Save this script in the same folder you saved Get-Token.ps1.
# This script returns incidents last updated within the past 48 hours.

$token = ./Get-Token.ps1

# Get incidents from the past 48 hours.
# The script may appear to fail if you don't have any incidents in that time frame.
$dateTime = (Get-Date).ToUniversalTime().AddHours(-48).ToString("o")

# This URL contains the type of query and the time filter we created above.
# Note that `$filter` does not refer to a local variable in our script --
# it's actually an OData operator and part of the API's syntax.
$url = "https://api.security.microsoft.com/api/incidents?$filter=lastUpdateTime+ge+$dateTime"

# Set the webrequest headers
$headers = @{
    'Content-Type' = 'application/json'
    'Accept' = 'application/json'
    'Authorization' = "Bearer $token"
}

# Send the request and get the results.
$response = Invoke-WebRequest -Method Get -Uri $url -Headers $headers -ErrorAction Stop

# Extract the incidents from the results.
$incidents =  ($response | ConvertFrom-Json).value | ConvertTo-Json -Depth 99

# Get a string containing the execution time. We concatenate that string to the name
# of the output file to avoid overwriting the file on consecutive runs of the script.
$dateTimeForFileName = Get-Date -Format o | foreach {$_ -replace ":", "."}

# Save the result as json
$outputJsonPath = "./Latest Incidents $dateTimeForFileName.json"

Out-File -FilePath $outputJsonPath -InputObject $incidents
You’re all done! You’ve successfully:
- Created and wp-signup.phped an application.
- Granted permission for that application to read alerts.
- Connected to the API.
- Used a PowerShell script to return incidents updated in the past 48 hours.