

You can access the Settings by clicking Settings option from top right dropdown menu on main screen of BullGuard. After click Settings the BullGuard Settings window is opened and General tab is selected.
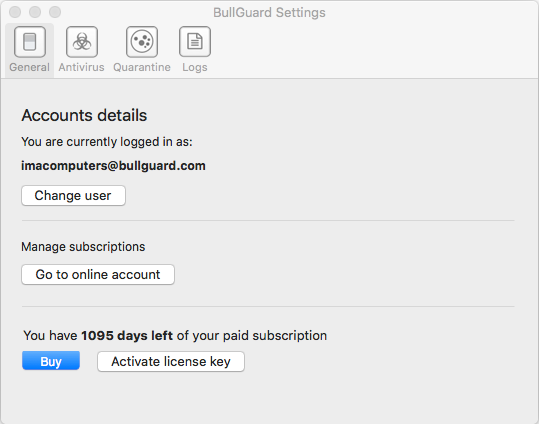
General
The General Tab of the Settings shows you the following information/options:
Account details show the e-mail address you are currently logged in with. If you click “Change user” button, you’ll be logged out and redirected to Login screen.
If you click “Go to online account” button, you will be redirected to the My Account page on the BullGuard website. From there you can manage your subscriptions and licenses.
You can buy a new license key/subscription from BullGuard website by clicking “Buy” button.
If you have an inactive license you can activate it by clicking “Activate license key” button and window which allows you to introduce your license key is displayed.
Antivirus
The Antivirus tab shows you the following options:
Action to perform for infected files:
-Try to disinfect
-Move to quarantine (default)
-Delete
Size limit when scanning inside archives: default selected, 5 MB. If deselected, no limit will be applied.
Don’t Scan Time Machine disk which is selected by default.

Quarantine
The Quarantine tab shows you the quarantined files.
You can select one file with click or more using Shift/Command + click. At that point the Trust&Restore, as well as the Delete buttons, will become available to use, with the selected file(s).
If you select one or more entries and click “Trust &Restore” button; the selected file(s) will be removed from quarantine.
If you select one or more entries and click “Delete” button, the selected file(s) will be permanently deleted from your Mac.

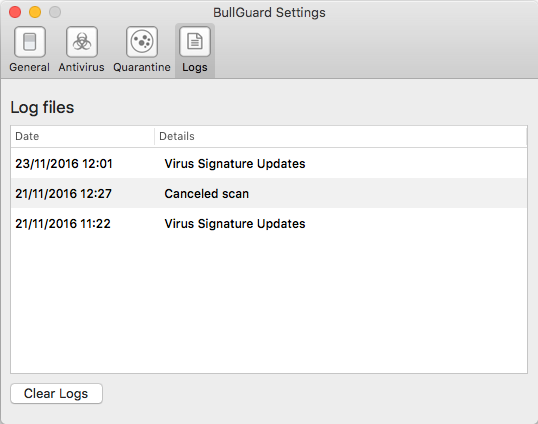
Logs
The Logs tab shows you the logged activities.
Virus updates, Automatic scans (triggered by the realtime protection), Full scans, Custom scans, started scans that were canceled, Detected malicious files, Quarantined files, Deleted files
Alongside activities, date and time for each one are displayed.
You can right click on any entry and using a contextual menu you can select “Copy” to copy entry to clipboard. The information added to the clipboard is all the information available for the specific item log (includes info such location of the found threats).
You can clear the logs by clicking “Clear logs” button which will delete all displayed logs from interface.
Source : Official BullGuard Brand
Editor by : BEST Antivirus KBS Team