

Note
If you are a US Government customer, please use the URIs listed in Microsoft Defender for Endpoint for US Government customers.
Tip
For better performance, you can use server closer to your geo location:
- api-us.securitycenter.microsoft.com
- api-eu.securitycenter.microsoft.com
- api-uk.securitycenter.microsoft.com
Create a notification rule so that when a local onboarding or offboarding script is used, you’ll be notified.
Before you begin
You’ll need to have access to:
- Power Automate (Per-user plan at a minimum). For more information, see Power Automate pricing page.
- Azure Table or SharePoint List or Library / SQL DB.
Create the notification flow
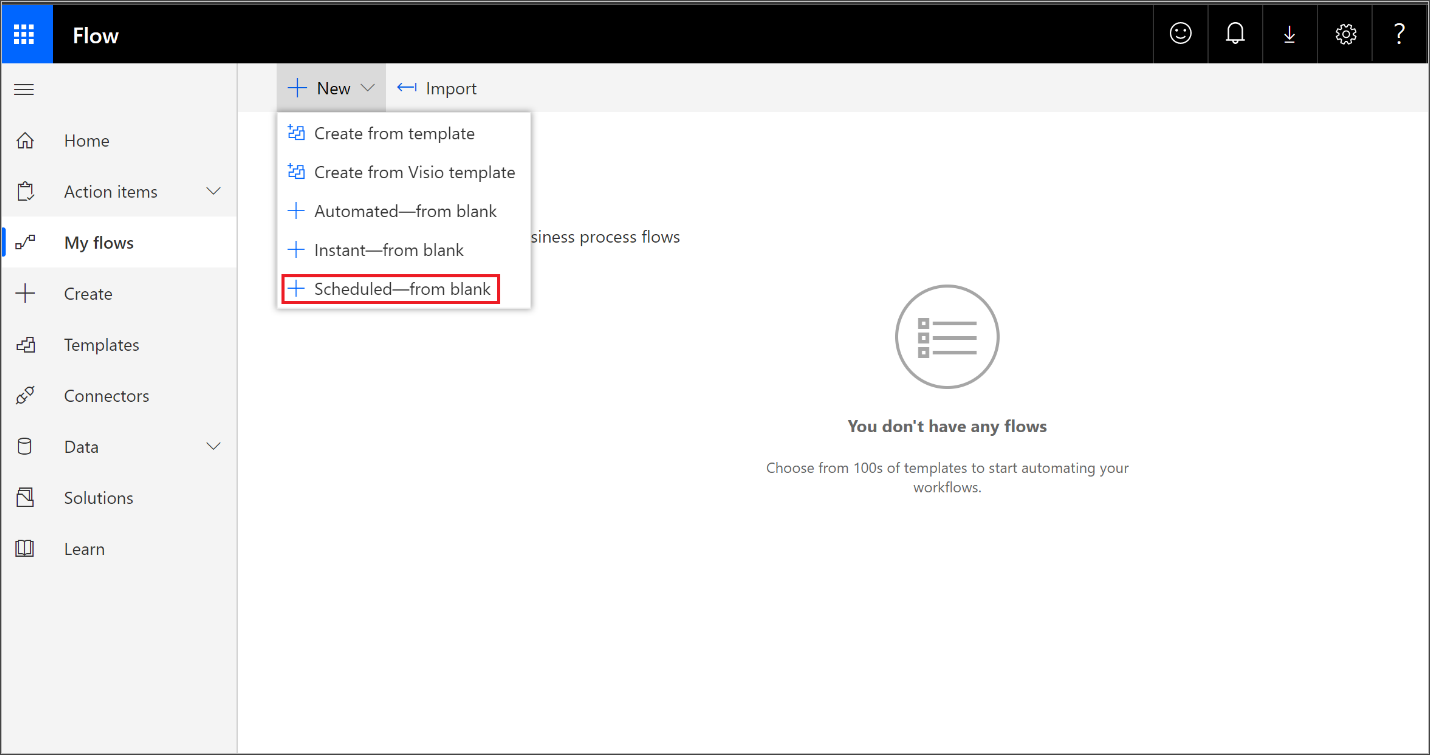
- In flow.microsoft.com.
- Navigate to My flows > New > Scheduled – from blank.
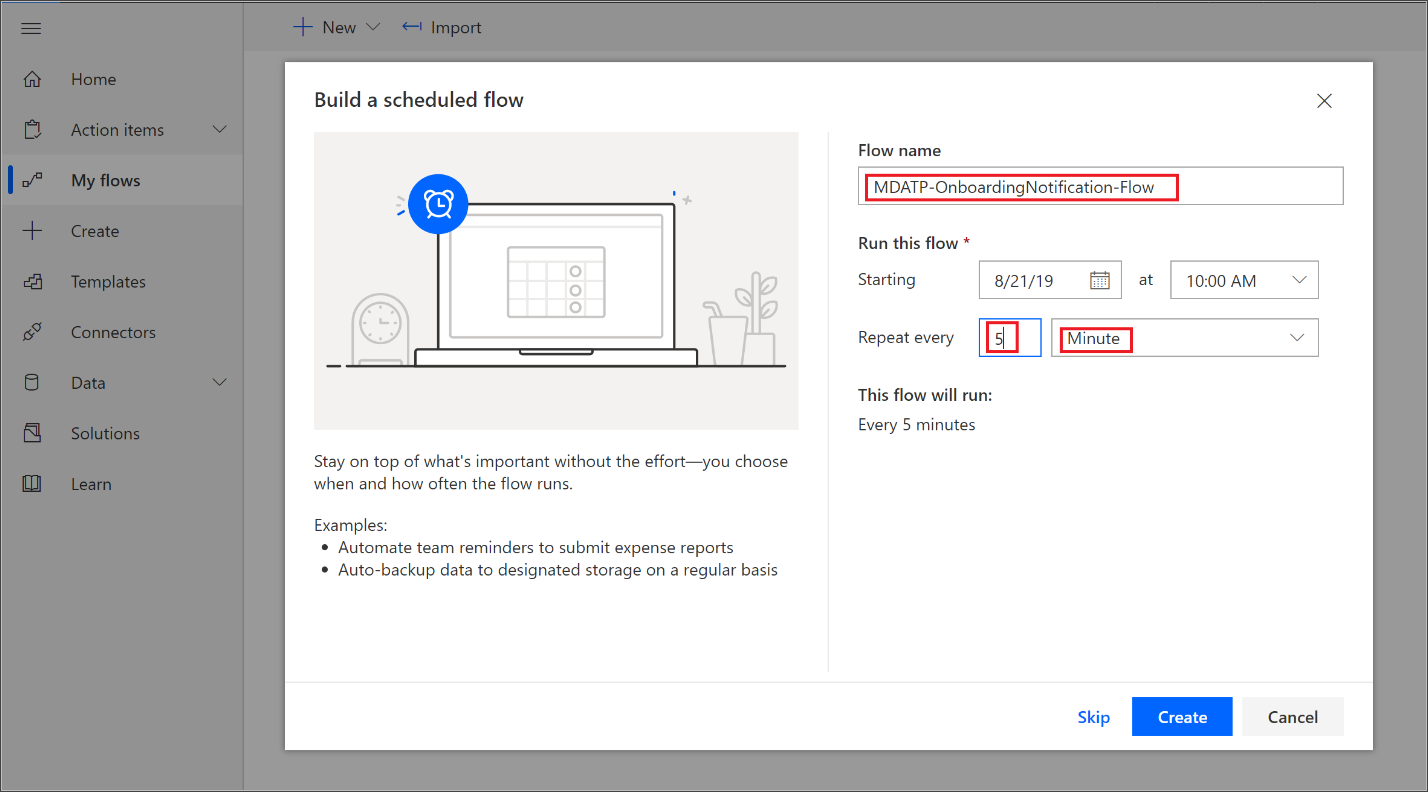
- Build a scheduled flow.
- Enter a flow name.
- Specify the start and time.
- Specify the frequency. For example, every 5 minutes.
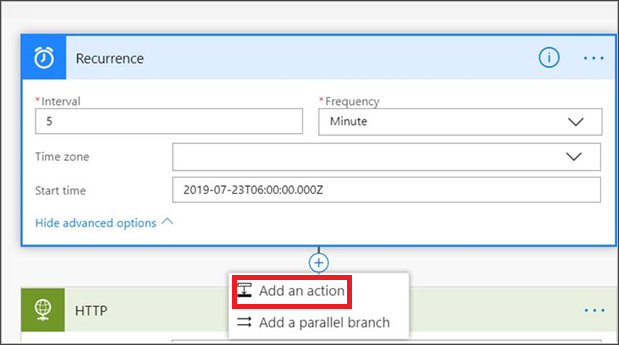
- Select the + button to add a new action. The new action will be an HTTP request to the Defender for Endpoint security center device(s) API. You can also replace it with the out-of-the-box “WDATP Connector” (action: “Machines – Get list of machines”).
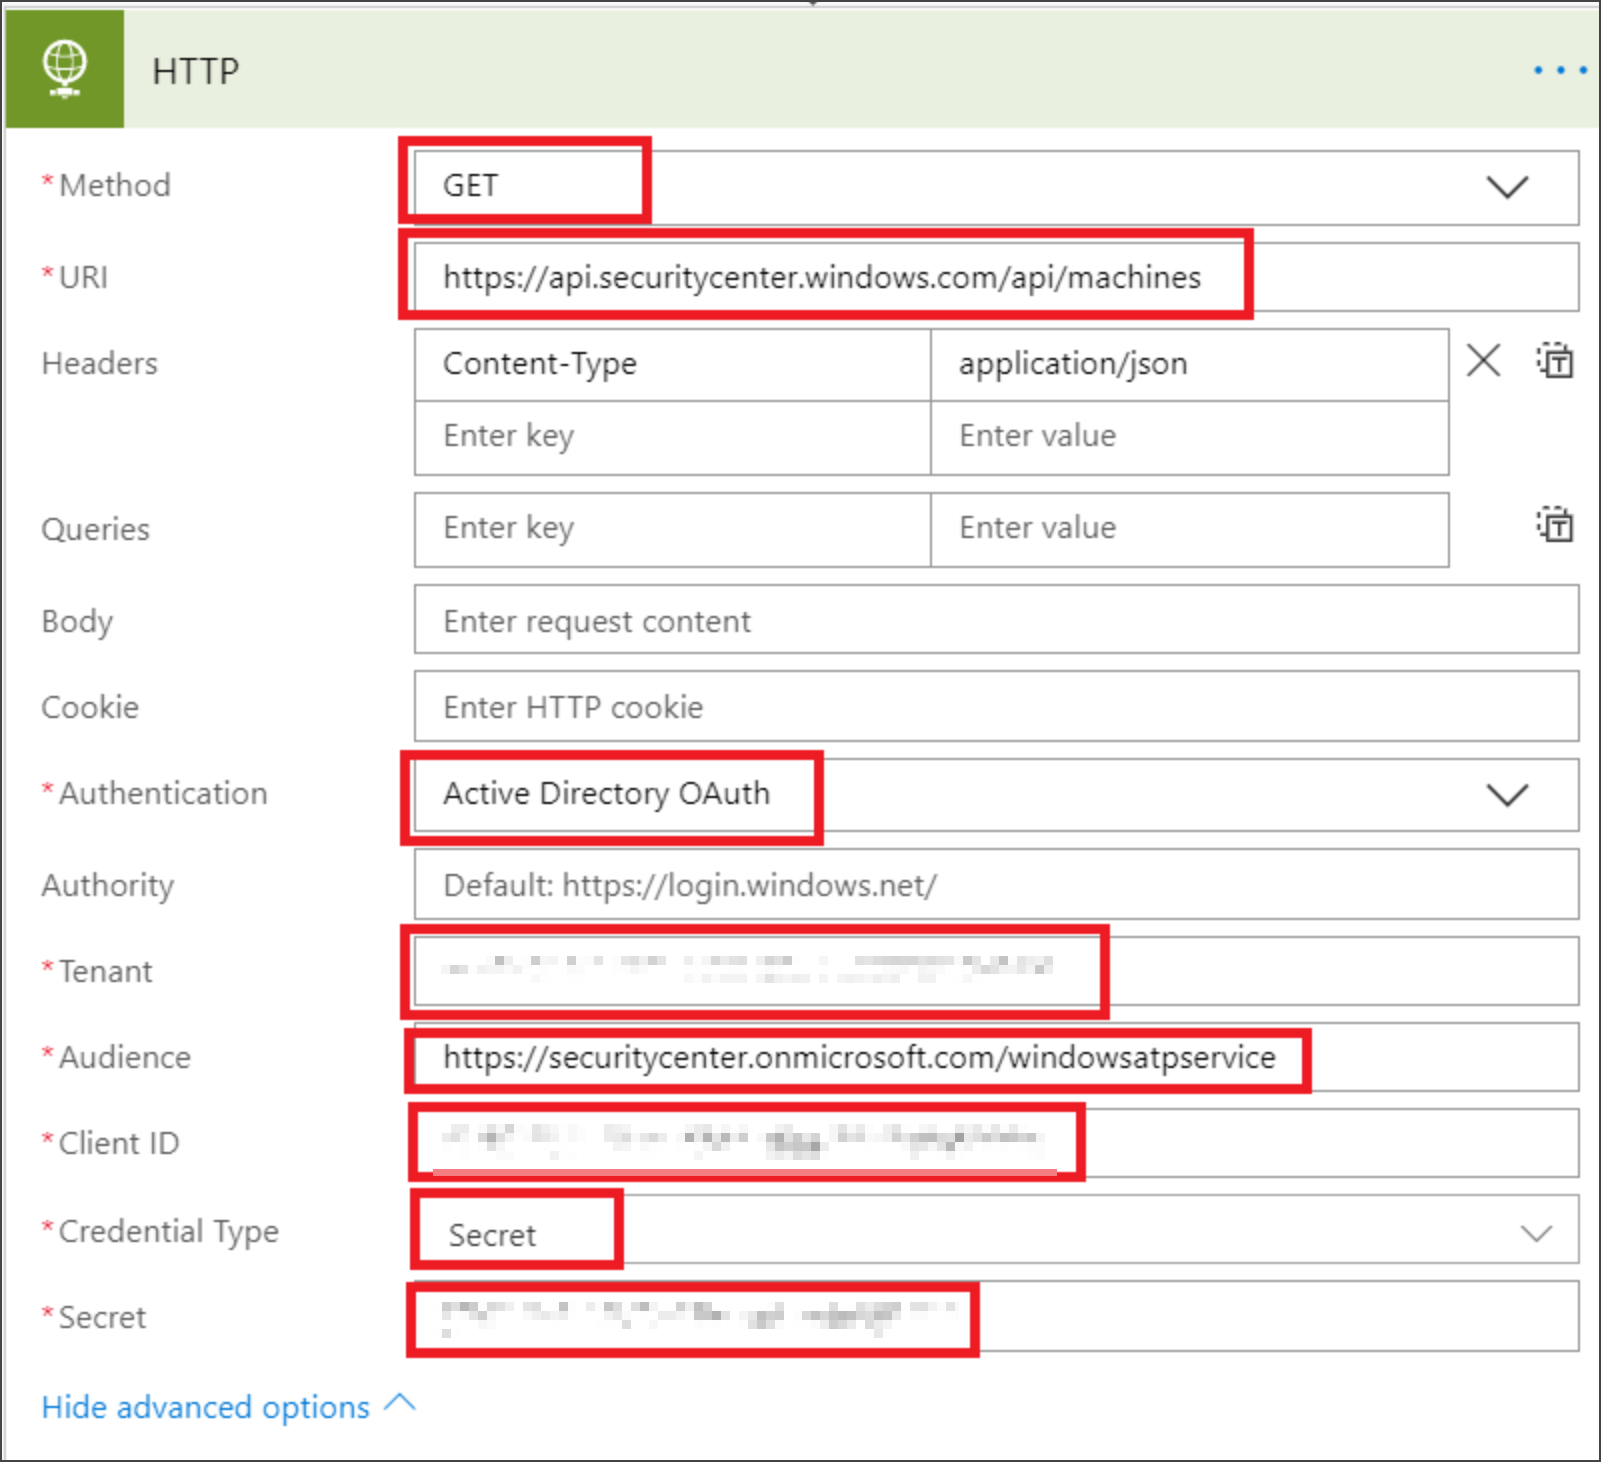
- Enter the following HTTP fields:
- Method: “GET” as a value to get the list of devices.
- URI: Enter
https://api.securitycenter.microsoft.com/api/machines. - Authentication: Select “Active Directory OAuth”.
- Tenant: Sign-in to https://portal.azure.com and navigate to Azure Active Directory > App Registrations and get the Tenant ID value.
- Audience:
https://securitycenter.onmicrosoft.com/windowsatpservice\ - Client ID: Sign-in to https://portal.azure.com and navigate to Azure Active Directory > App Registrations and get the Client ID value.
- Credential Type: Select “Secret”.
- Secret: Sign-in to https://portal.azure.com and navigate to Azure Active Directory > App Registrations and get the Tenant ID value.
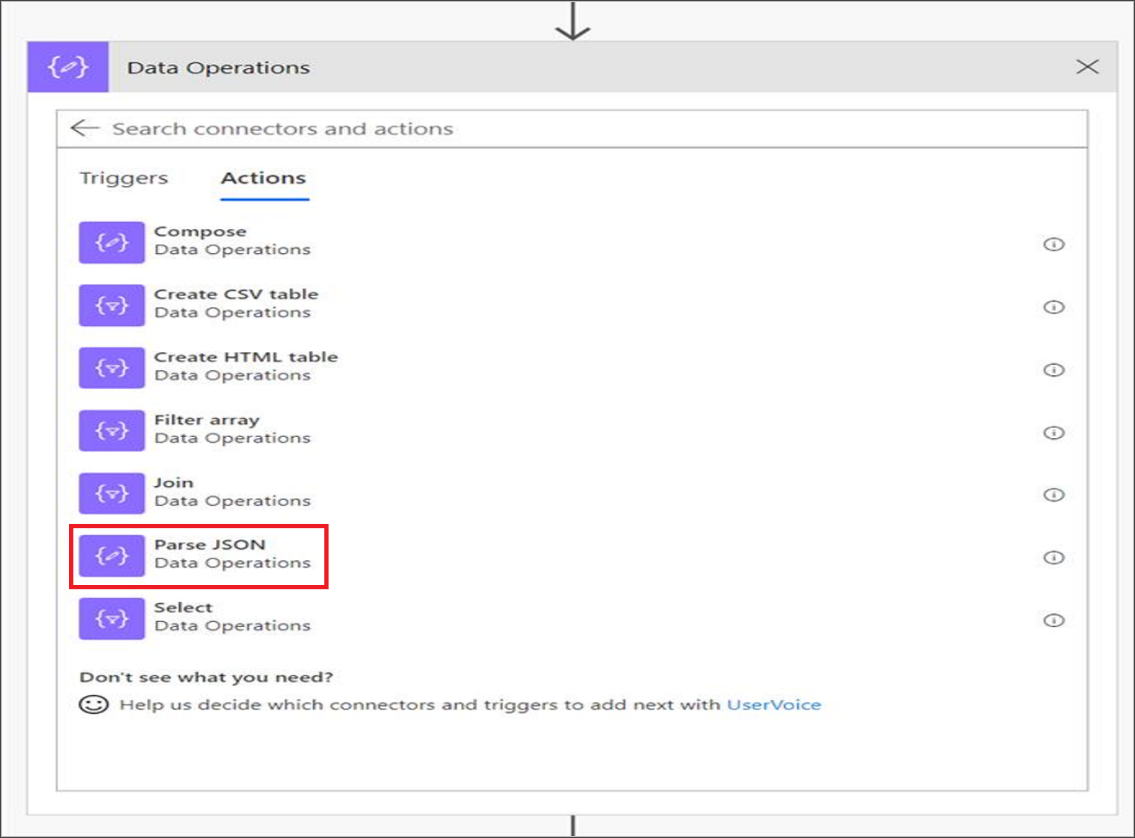
- Add a new step by selecting Add new action then search for Data Operations and select Parse JSON.
- Add Body in the Content field.
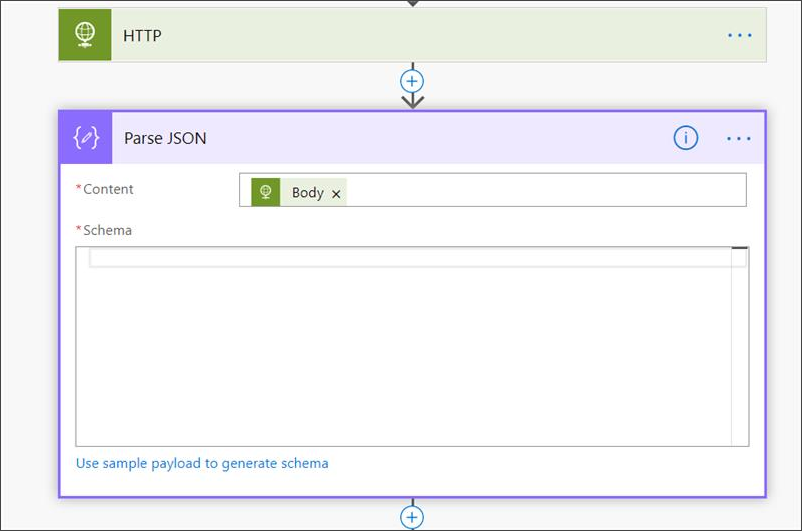
- Select the Use sample payload to generate schema link.
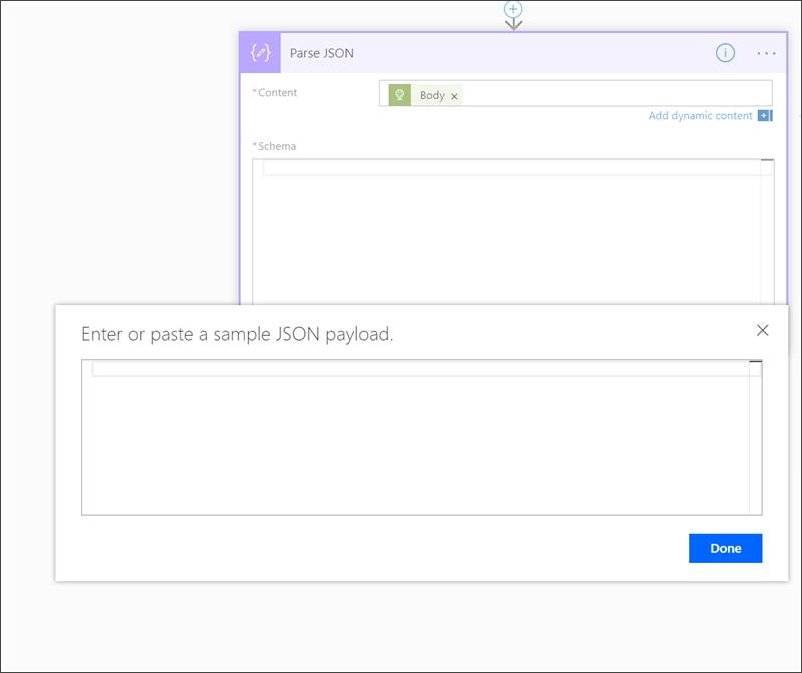
- Copy and paste the following JSON snippet:
JSON
{ "type": "object", "properties": { "@@odata.context": { "type": "string" }, "value": { "type": "array", "items": { "type": "object", "properties": { "id": { "type": "string" }, "computerDnsName": { "type": "string" }, "firstSeen": { "type": "string" }, "lastSeen": { "type": "string" }, "osPlatform": { "type": "string" }, "osVersion": {}, "lastIpAddress": { "type": "string" }, "lastExternalIpAddress": { "type": "string" }, "agentVersion": { "type": "string" }, "osBuild": { "type": "integer" }, "healthStatus": { "type": "string" }, "riskScore": { "type": "string" }, "exposureScore": { "type": "string" }, "aadDeviceId": {}, "machineTags": { "type": "array" } }, "required": [ "id", "computerDnsName", "firstSeen", "lastSeen", "osPlatform", "osVersion", "lastIpAddress", "lastExternalIpAddress", "agentVersion", "osBuild", "healthStatus", "rbacGroupId", "rbacGroupName", "riskScore", "exposureScore", "aadDeviceId", "machineTags" ] } } } } - Extract the values from the JSON call and check if the onboarded device(s) is / are already wp-signup.phped at the SharePoint list as an example:
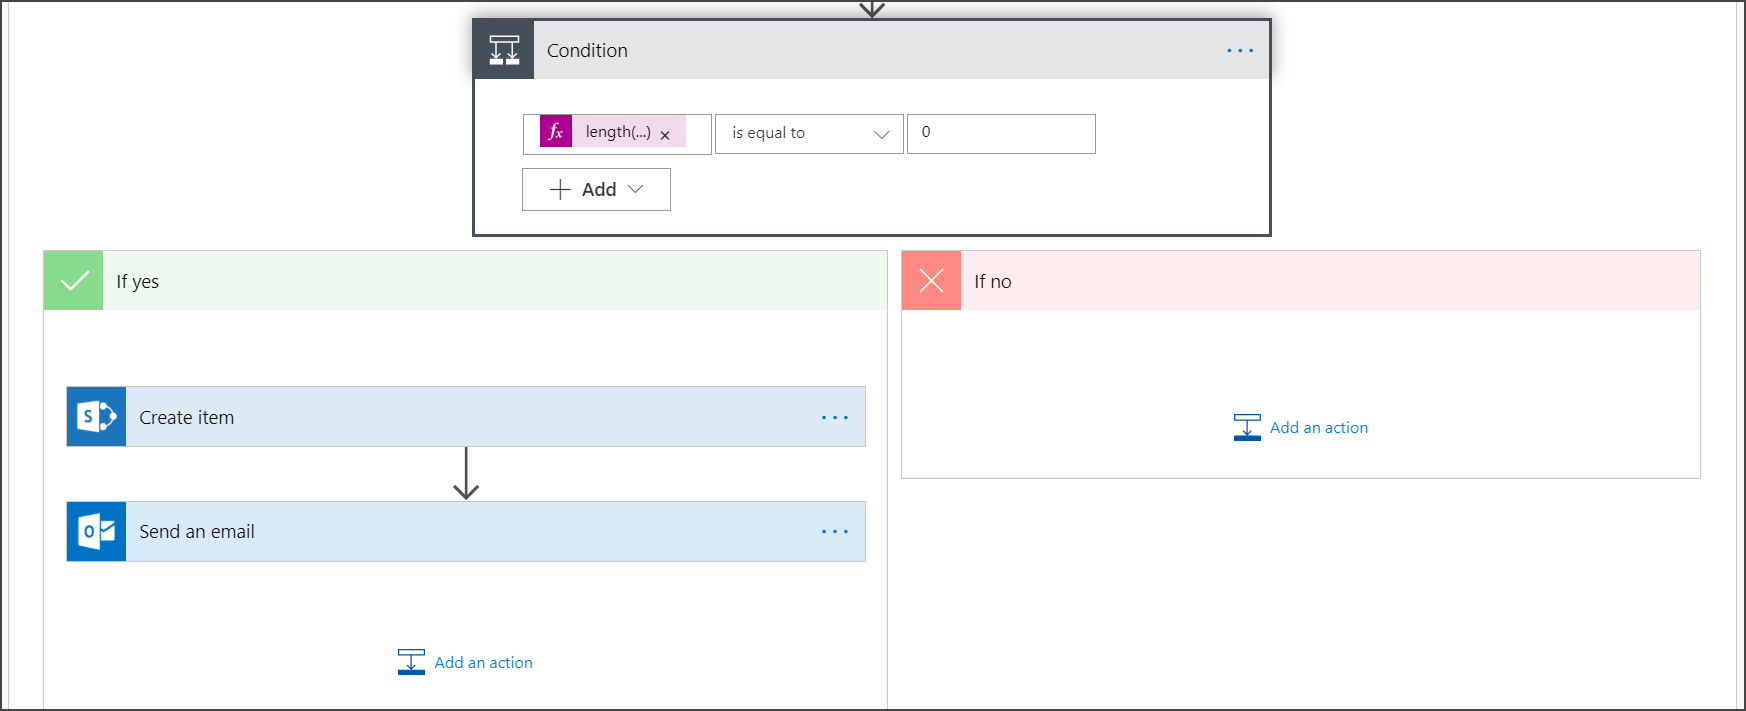
- If yes, no notification will be triggered
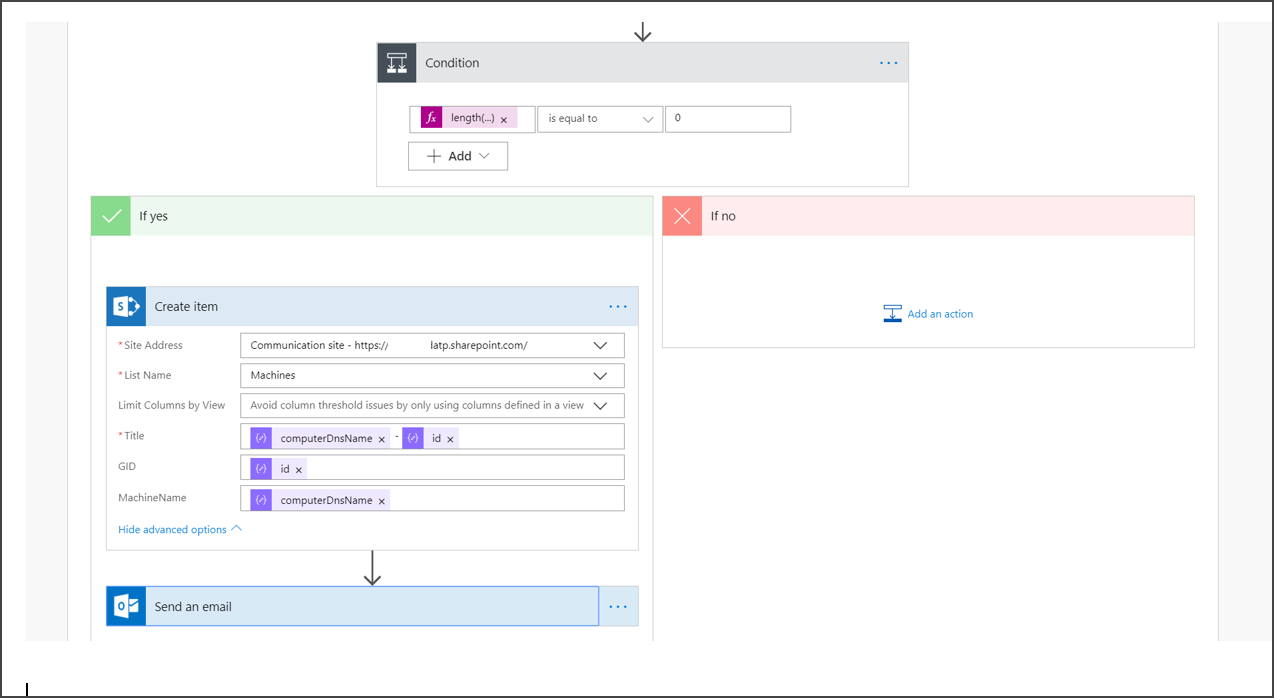
- If no, will wp-signup.php the new onboarded device(s) in the SharePoint list and a notification will be sent to the Defender for Endpoint admin
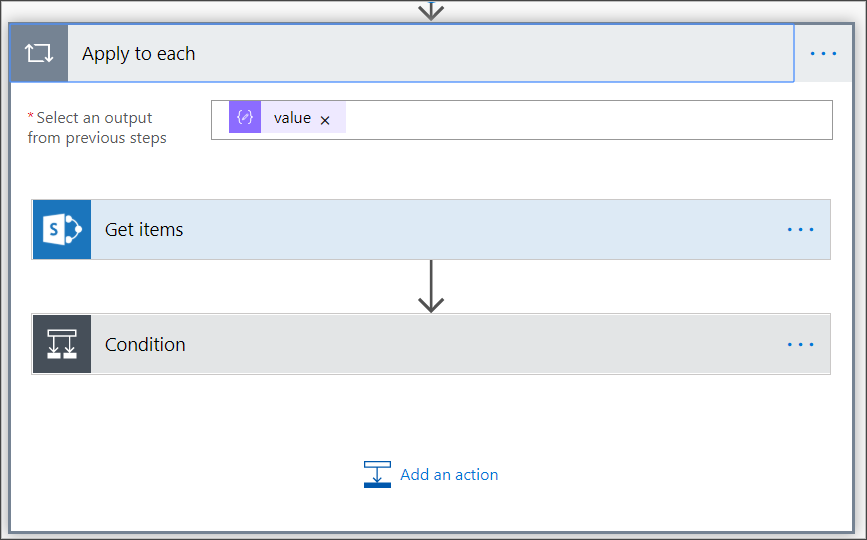
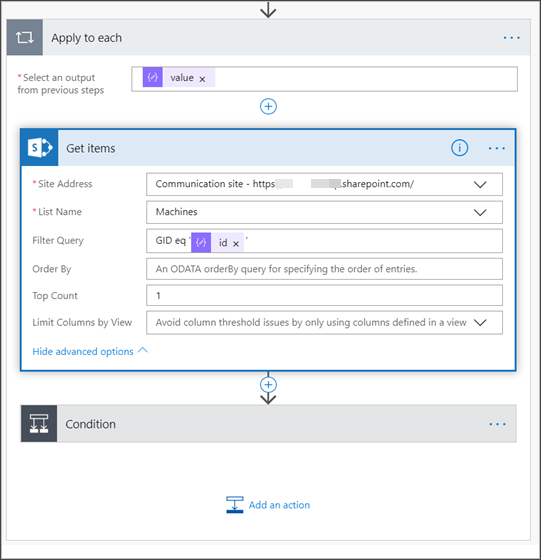
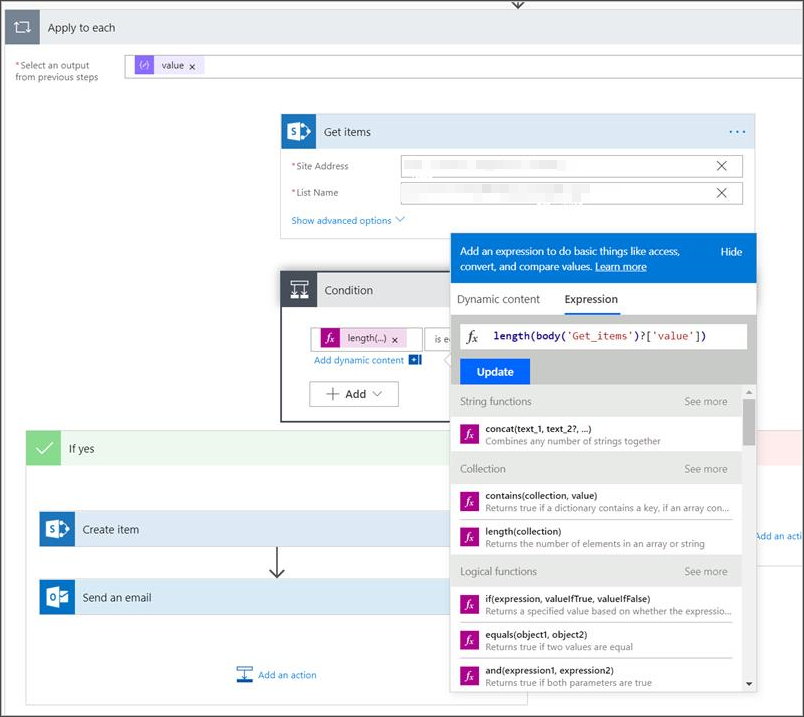
- Under Condition, add the following expression: “length(body(‘Get_items’)?[‘value’])” and set the condition to equal to 0.
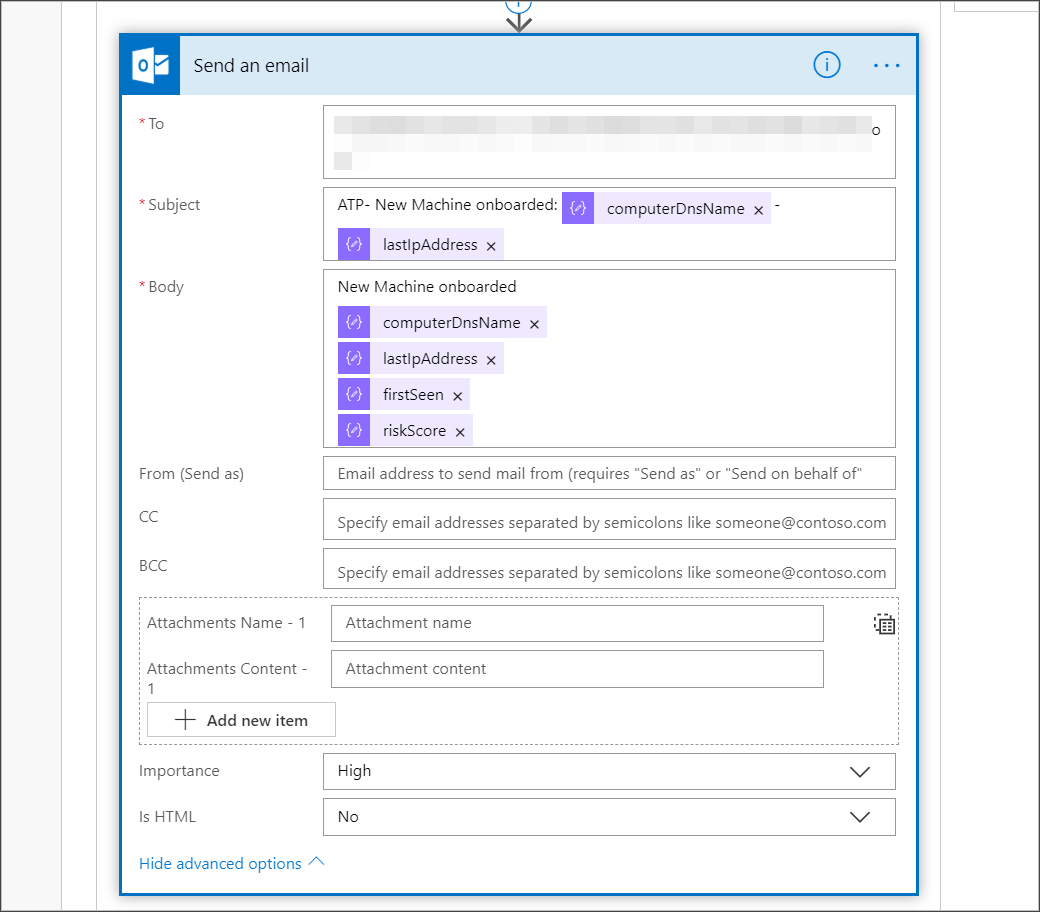
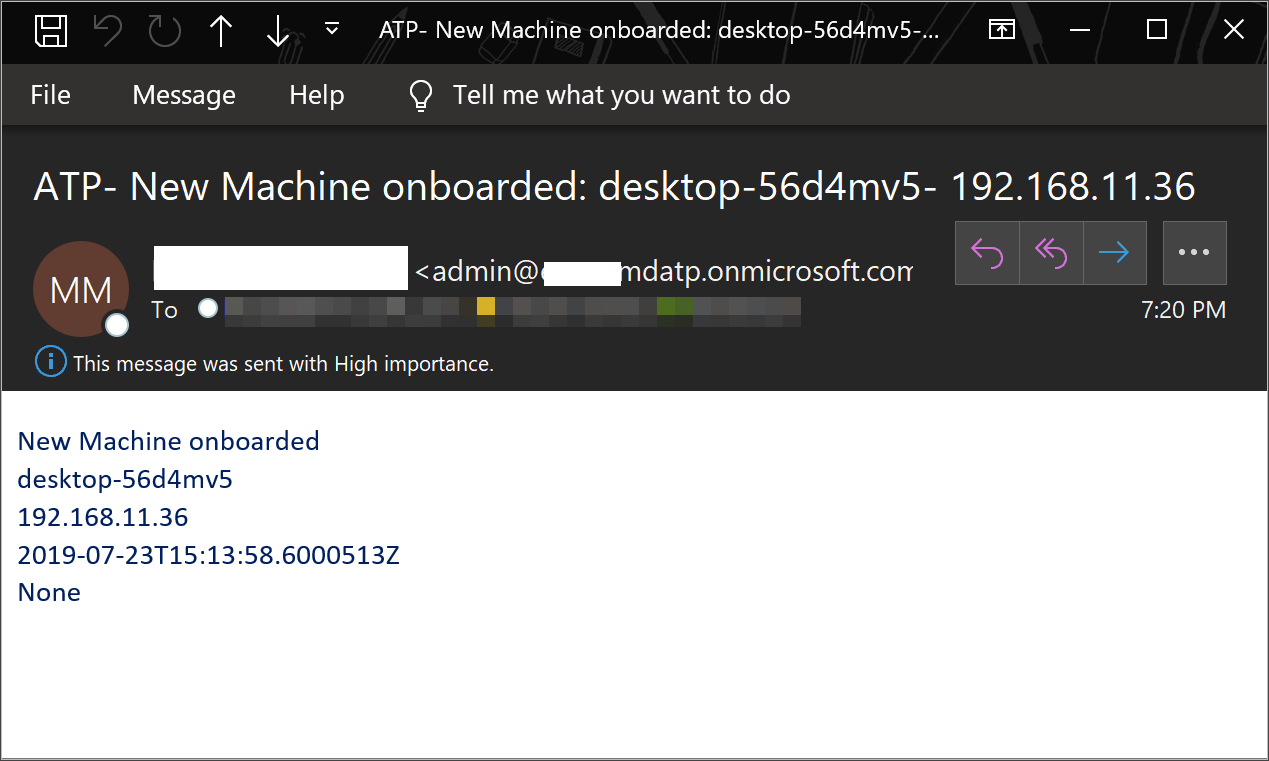
Alert notification
The following image is an example of an email notification.
Tips
- You can filter here using lastSeen only:
- Every 60 min:
- Take all devices last seen in the past 7 days.
- Every 60 min:
- For each device:
- If last seen property is on the one hour interval of [-7 days, -7days + 60 minutes ] -> Alert for offboarding possibility.
- If first seen is on the past hour -> Alert for onboarding.
In this solution you will not have duplicate alerts: There are tenants that have numerous devices. Getting all those devices might be very expensive and might require paging.
You can split it to two queries:
- For offboarding take only this interval using the OData $filter and only notify if the conditions are met.
- Take all devices last seen in the past hour and check first seen property for them (if the first seen property is on the past hour, the last seen must be there too).
Source : Official Microsoft Brand
Editor by : BEST Antivirus KBS Team
(Visited 8 times, 1 visits today)