

Issue
- “ICMP attack” or “DNS Cache poisoning attack” is detected by the ESET firewall
- “Detected ARP cache poisoning attack” is detected by the ESET firewall
- ESET technical support directed you to this article to flush your DNS cache and restore the MS Hosts file
- Create an exception for internal IP traffic
- Run the DNS Flush tool (DNS poisoning only)
Details
For more information about event names in the ESET firewall log, see the following ESET Knowledgebase article:
Solution
If the ESET firewall is detecting a threat to your system, create an exception for internal IP traffic. Run the DNS flush tool if the issue is not resolved.
Create an exception for internal IP traffic
- Determine if the IP address detected in the notification is a number that falls within the following range (where “x” is 0-255):
- 172.16.x.x – 172.31.x.x
- 192.168.x.x
- 10.x.x.x
- If the IP address detected is within the safe range listed above, open the main program window of your ESET Windows product. Skip to step 4.
- If the IP address being detected as a threat is not within the safe range listed above, or there are no network peripherals currently in use on your network, the device being detected by the firewall is located on a public network and could be a threat to your system.
See the ESET DNS-Flush tool section and use it to repair any files that may have been damaged by DNS cache poisoning.
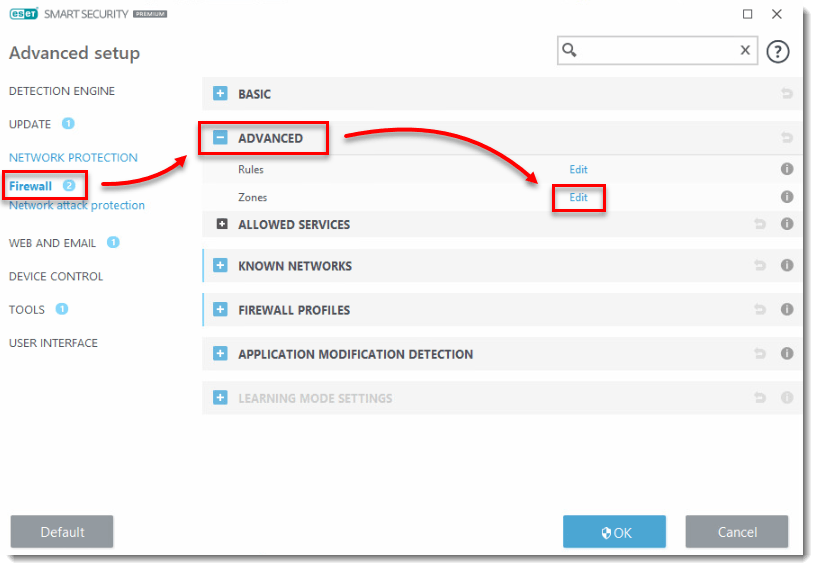
- Press the F5 key on your keyboard to access Advanced setup.
- Expand Network Protection, click Firewall, expand Advanced and then click Edit next to Zones.
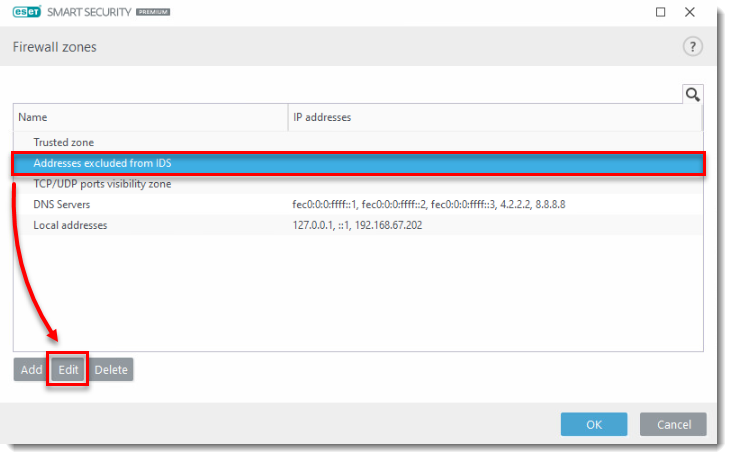
- In the Firewall zones window, select Addresses excluded from IDS and click Edit.
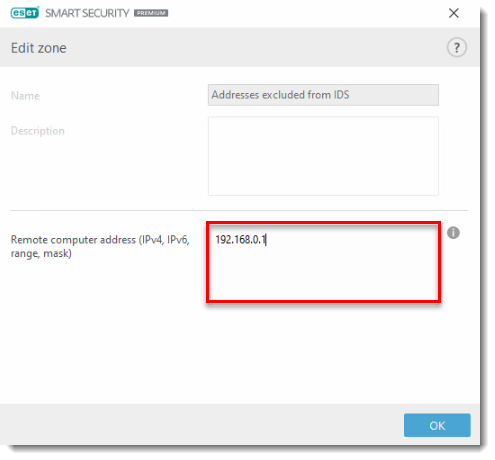
- Type the IP address of the device being incorrectly detected as a threat in the Remote computer address (IPv4, IPv6, range, mask) field.
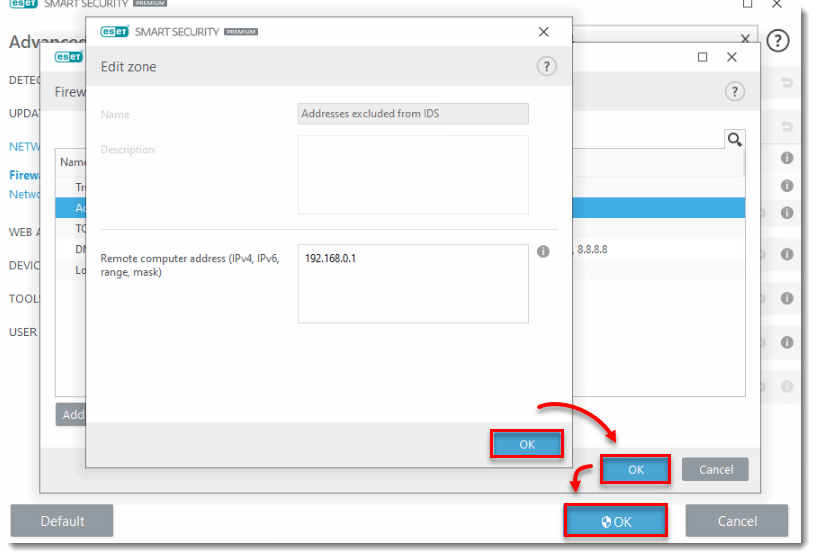
- Click OK three times to exit Advanced setup and save your changes. You should no longer see any messages about attacks coming from an internal IP address that you know to be safe. If you continue to experience this issue, proceed to solution 2 below.
Run the DNS Flush tool (DNS poisoning only)
Instead of entering ipconfig /flushdns to Command Prompt, you can use the ESET DNS Flush tool to flush your DNS cache. Follow the step-by-step instructions below to download and run the DNS Flush tool:
- Download the DNS-Flush.exe tool and save the file to your Desktop.
- Navigate to your Desktop, extract or open Flush DNS.zip and double-click Flush DNS.exe(if you are prompted to continue, click Yes). The tool will automatically flush and wp-signup.php your DNS cache.
- After your computer restarts, open your ESET product and run a Computer scan. For assistance, refer to the following Knowledgebase article:
The Computer scan should finish without detecting an infection. If no threat is detected, you are finished.
If you are still unable to resolve your issue, email ESET Technical Support.