
Learn how to deploy Defender for Endpoint on Android on Intune Company Portal enrolled devices. For more information about Intune device enrollment, see Enroll your device.
Note
Defender for Endpoint on Android is now available on Google Play
You can connect to Google Play from Intune to deploy Defender for Endpoint app across Device Administrator and Android Enterprise enrollment modes.
Updates to the app are automatic via Google Play.
Deploy on Device Administrator enrolled devices
Deploy Defender for Endpoint on Android on Intune Company Portal – Device Administrator enrolled devices
Learn how to deploy Defender for Endpoint on Android on Intune Company Portal – Device Administrator enrolled devices.
Add as Android store app
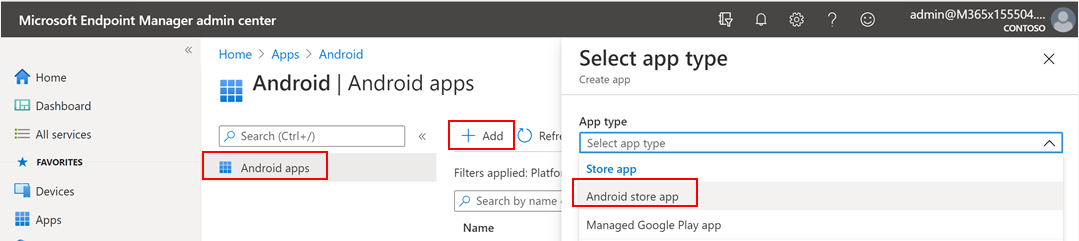
- In Microsoft Endpoint Manager admin center , go to Apps > Android Apps > Add > Android store app and choose Select.
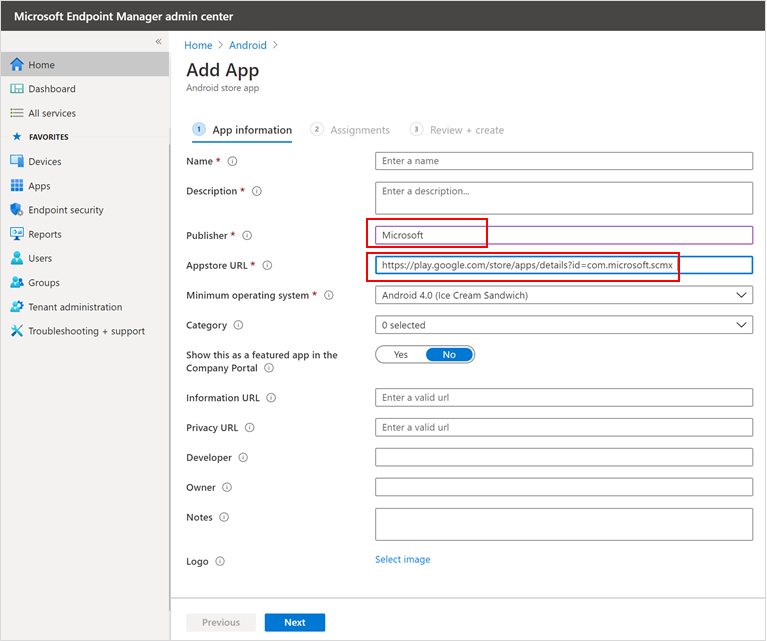
- On the Add app page and in the App Information section enter:
- Name
- Description
- Publisher as Microsoft.
- App store URL as https://play.google.com/store/apps/details?id=com.microsoft.scmx (Defender for Endpoint app Google Play Store URL)
Other fields are optional. Select Next.
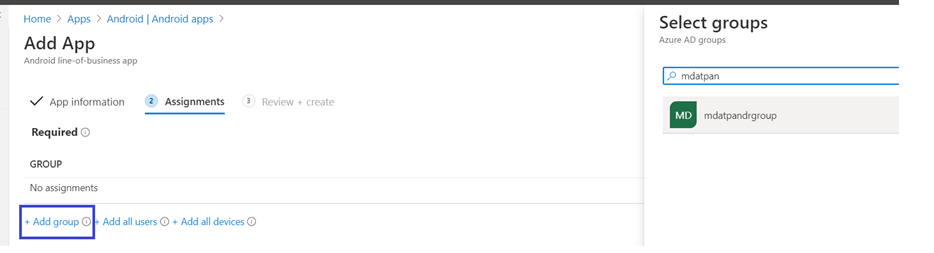
- In the Assignments section, go to the Required section and select Add group. You can then choose the user group(s) that you would like to target Defender for Endpoint on Android app. Choose Select and then Next.
Note
The selected user group should consist of Intune enrolled users.
- In the Review+Create section, verify that all the information entered is correct and then select Create.
In a few moments, the Defender for Endpoint app would be created successfully, and a notification would show up at the top-right corner of the page.
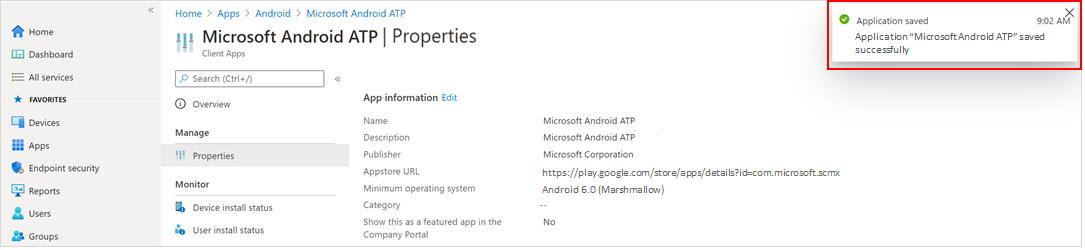
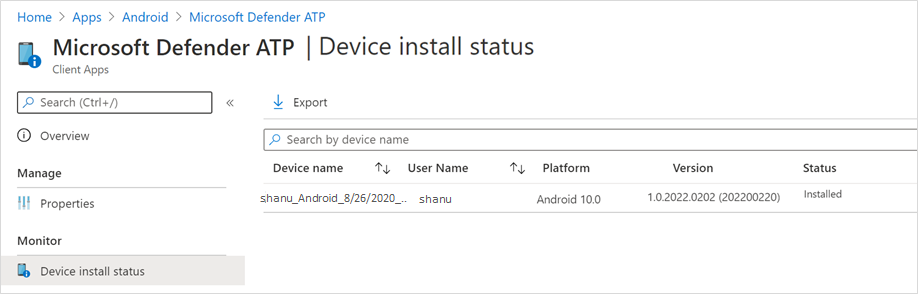
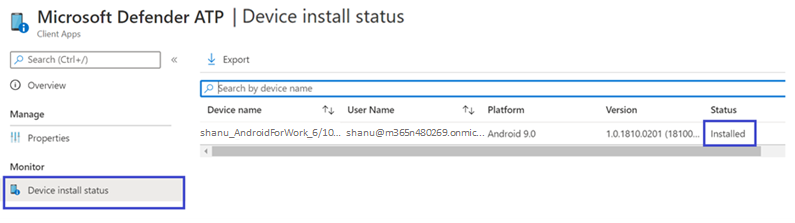
- In the app information page that is displayed, in the Monitor section, select Device install status to verify that the device installation has completed successfully.


Complete onboarding and check status
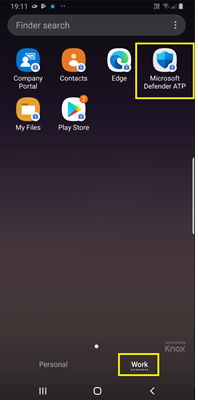
- Once Defender for Endpoint on Android has been installed on the device, you’ll see the app icon.

- Tap the Microsoft Defender for Endpoint app icon and follow the on-screen instructions to complete onboarding the app. The details include end-user acceptance of Android permissions required by Defender for Endpoint on Android.
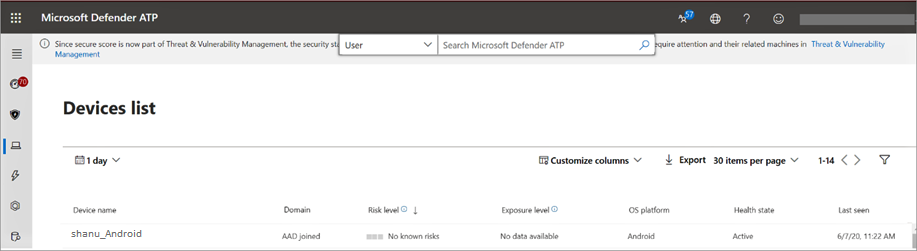
- Upon successful onboarding, the device will start showing up on the Devices list in Microsoft Defender Security Center.

Deploy on Android Enterprise enrolled devices
Defender for Endpoint on Android supports Android Enterprise enrolled devices.
For more information on the enrollment options supported by Intune, see Enrollment Options.
Currently, Personally owned devices with work profile and Corporate-owned fully managed user device enrollments are supported for deployment.
Add Microsoft Defender for Endpoint on Android as a Managed Google Play app
Follow the steps below to add Microsoft Defender for Endpoint app into your managed Google Play.
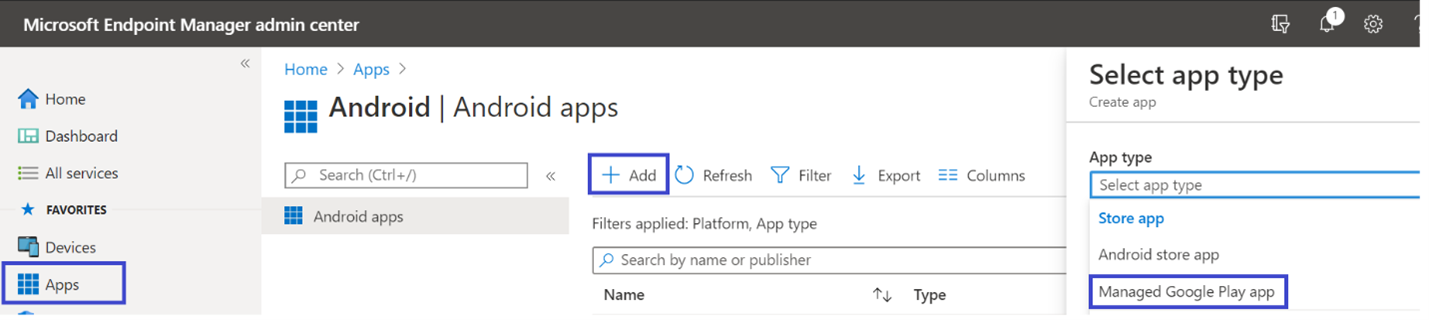
- In Microsoft Endpoint Manager admin center , go to Apps > Android Apps > Add and select Managed Google Play app.
- On your managed Google Play page that loads subsequently, go to the search box and enter
Microsoft Defender. Your search should display the Microsoft Defender for Endpoint app in your Managed Google Play. Click on the Microsoft Defender for Endpoint app from the Apps search result.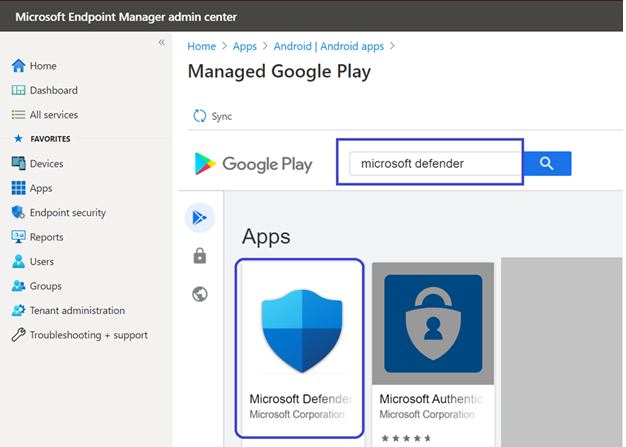
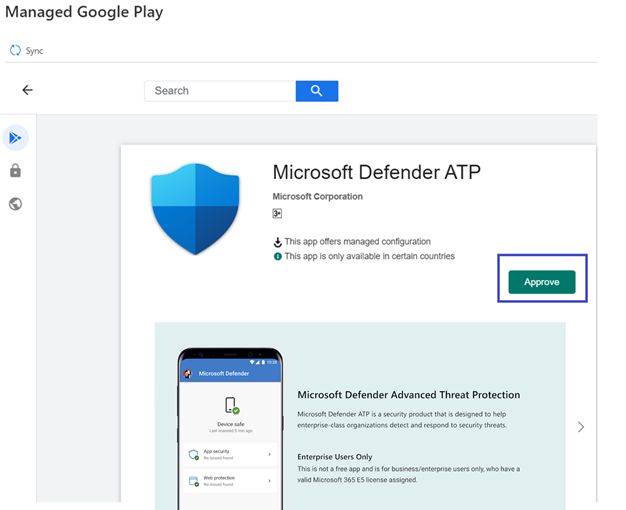
- In the App description page that comes up next, you should be able to see app details on Defender for Endpoint. Review the information on the page and then select Approve.
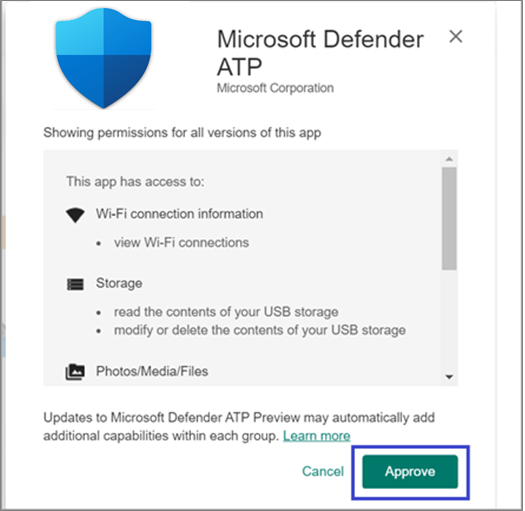
- You’ll be presented with the permissions that Defender for Endpoint obtains for it to work. Review them and then select Approve.
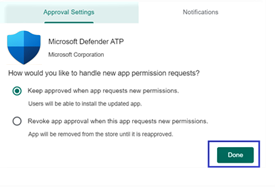
- You’ll be presented with the Approval settings page. The page confirms your preference to handle new app permissions that Defender for Endpoint on Android might ask. Review the choices and select your preferred option. Select Done.
By default, managed Google Play selects Keep approved when app requests new permissions.
- After the permissions handling selection is made, select Sync to sync Microsoft Defender for Endpoint to your apps list.

- The sync will complete in a few minutes.

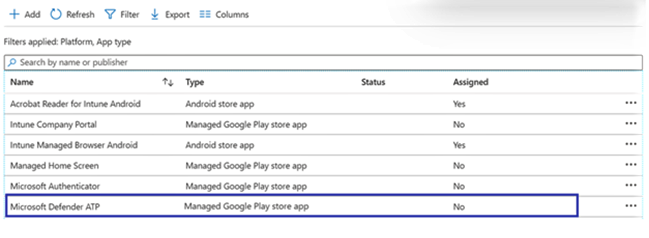
- Select the Refresh button in the Android apps screen and Microsoft Defender for Endpoint should be visible in the apps list.
- Defender for Endpoint supports App configuration policies for managed devices via Intune. This capability can be leveraged to autogrant applicable Android permission(s), so the end user does not need to accept these permission(s).
- In the Apps page, go to Policy > App configuration policies > Add > Managed devices.

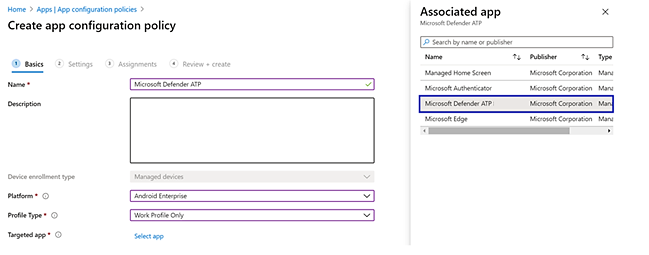
- In the Create app configuration policy page, enter the following details:
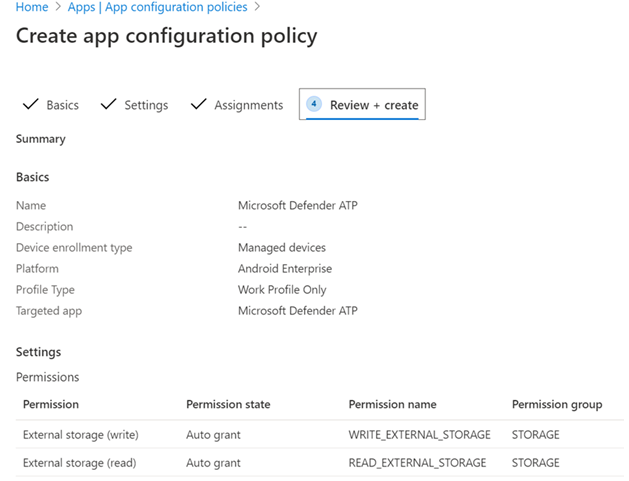
- Name: Microsoft Defender for Endpoint.
- Choose Android Enterprise as platform.
- Choose Work Profile only as Profile Type.
- Click Select App, choose Microsoft Defender ATP, select OK and then Next.
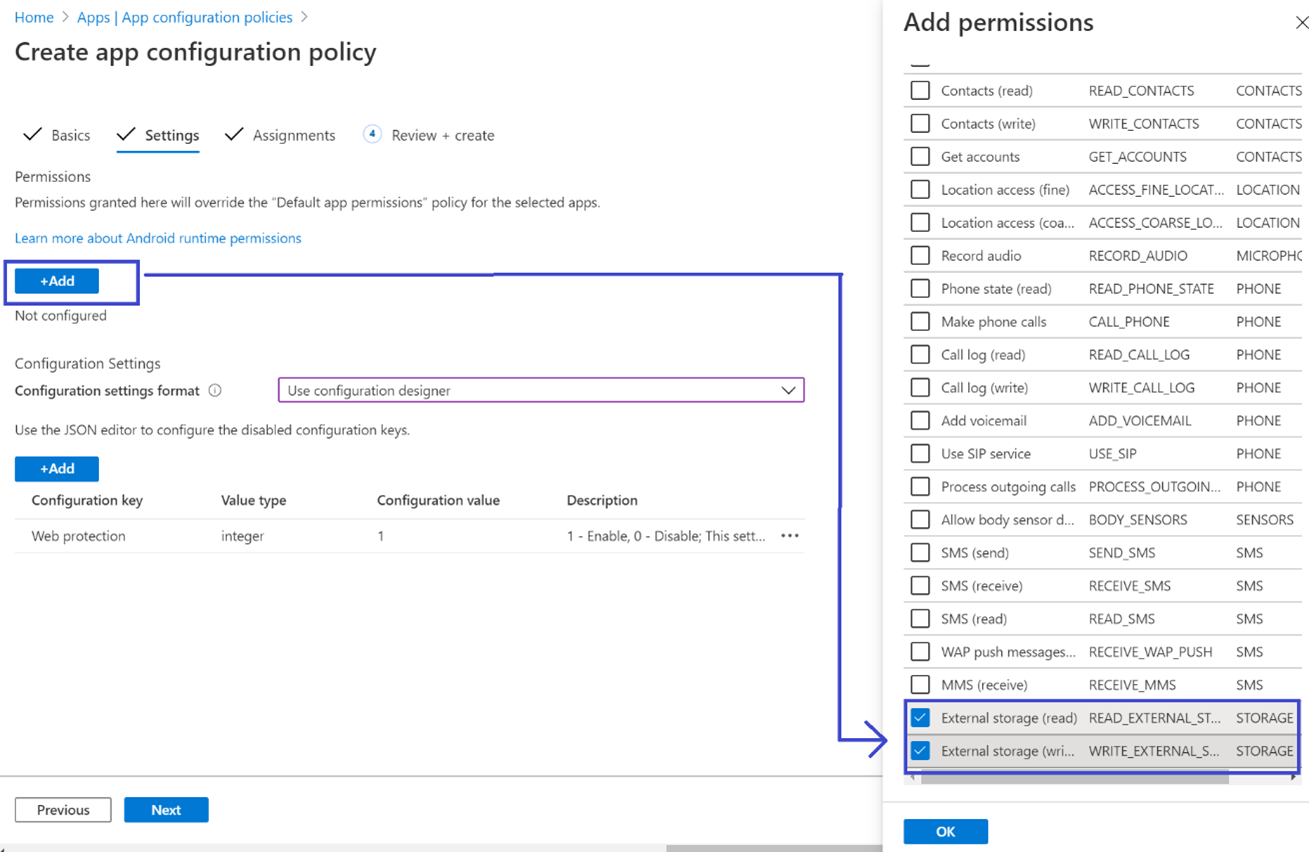
- In the Settings page, go to the Permissions section click on Add to view the list of supported permissions. In the Add Permissions section, select the following permissions:
- External storage (read)
- External storage (write)
Then select OK.
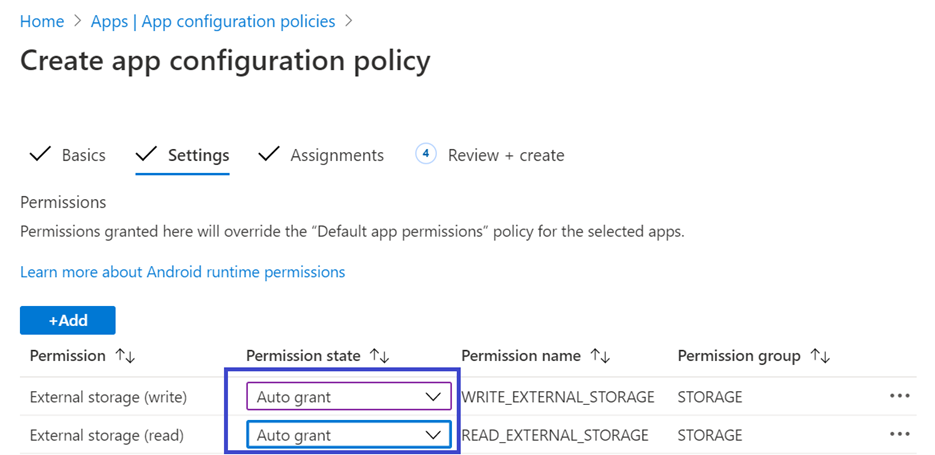
- You should now see both the permissions listed and now you can autogrant both by choosing autogrant in the Permission state drop-down and then select Next.
- In the Assignments page, select the user group to which this app config policy would be assigned to. Click Select groups to include and selecting the applicable group and then selecting Next. The group selected here is usually the same group to which you would assign Microsoft Defender for Endpoint Android app.
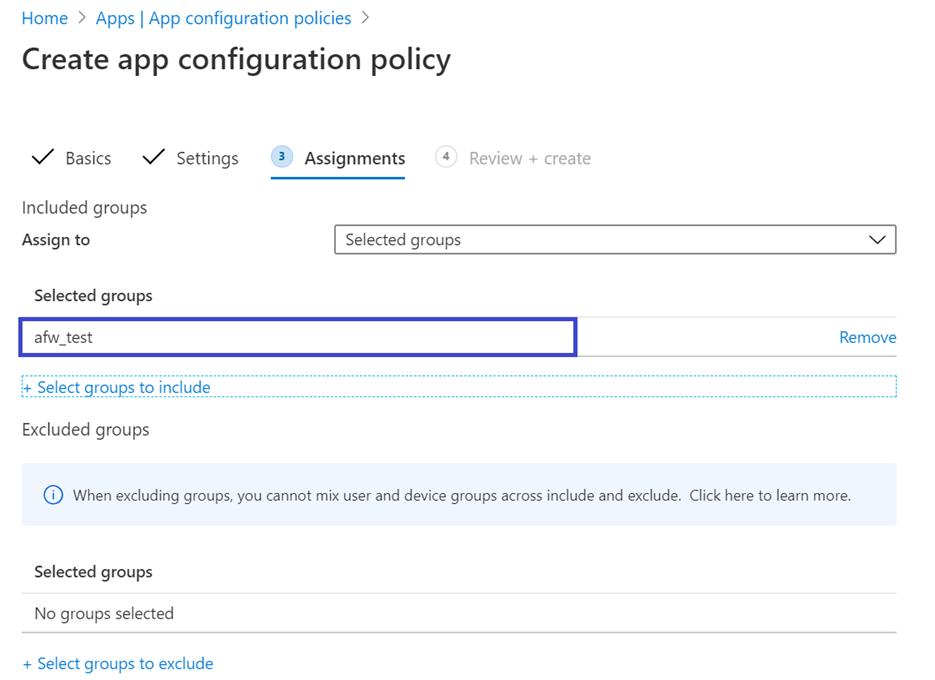
- In the Review + Create page that comes up next, review all the information and then select Create.
The app configuration policy for Defender for Endpoint autogranting the storage permission is now assigned to the selected user group.
- In the Apps page, go to Policy > App configuration policies > Add > Managed devices.
- Select Microsoft Defender ATP app in the list > Properties > Assignments > Edit.

- Assign the app as a Required app to a user group. It is automatically installed in the work profile during the next sync of the device via Company Portal app. This assignment can be done by navigating to the Required section > Add group, selecting the user group and click Select.
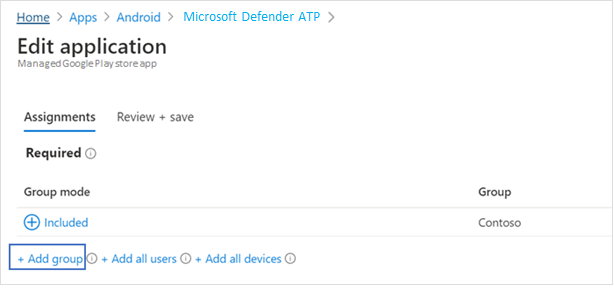
- In the Edit Application page, review all the information that was entered above. Then select Review + Save and then Save again to commence assignment.


Auto Setup of Always-on VPN
Defender for Endpoint supports Device configuration policies for managed devices via Intune. This capability can be leveraged to Auto setup of Always-on VPN on Android Enterprise enrolled devices, so the end user does not need to set up VPN service while onboarding.
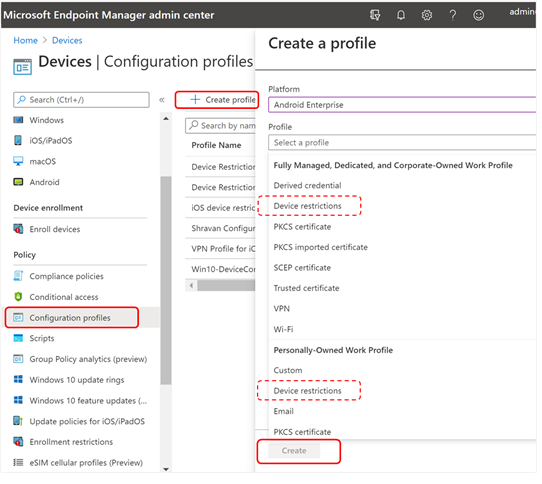
- On Devices, select Configuration Profiles > Create Profile > Platform > Android Enterprise
Select Device restrictions under one of the following, based on your device enrollment type:
- Fully Managed, Dedicated, and Corporate-Owned Work Profile
- Personally owned Work Profile
Select Create.
- Configuration Settings Provide a Name and a Description to uniquely identify the configuration profile.

- Select Connectivity and configure VPN:
- Enable Always-on VPN
Setup a VPN client in the work profile to automatically connect and reconnect to the VPN whenever possible. Only one VPN client can be configured for always-on VPN on a given device, so be sure to have no more than one always-on VPN policy deployed to a single device.
- Select Custom in VPN client dropdown list
Custom VPN in this case is Defender for Endpoint VPN which is used to provide the Web Protection feature.
Note
Microsoft Defender for Endpoint app must be installed on user’s device, in order to functioning of auto setup of this VPN.
- Enter Package ID of the Microsoft Defender for Endpoint app in Google Play store. For the Defender app URL https://play.google.com/store/apps/details?id=com.microsoft.scmx, Package ID is com.microsoft.scmx
- Lockdown mode Not configured (Default)
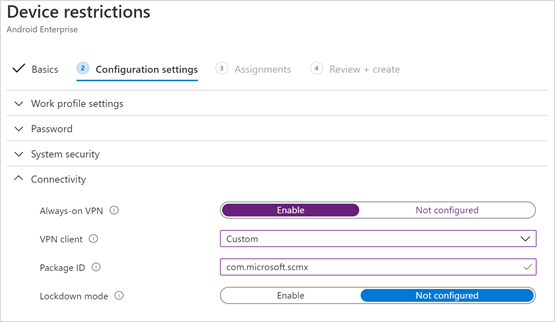
- Enable Always-on VPN
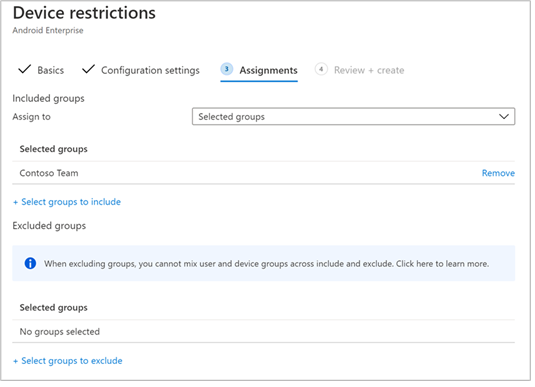
- Assignment
In the Assignments page, select the user group to which this app config policy would be assigned to. Choose Select groups to include and selecting the applicable group and then select Next. The group selected here is usually the same group to which you would assign Microsoft Defender for Endpoint Android app.
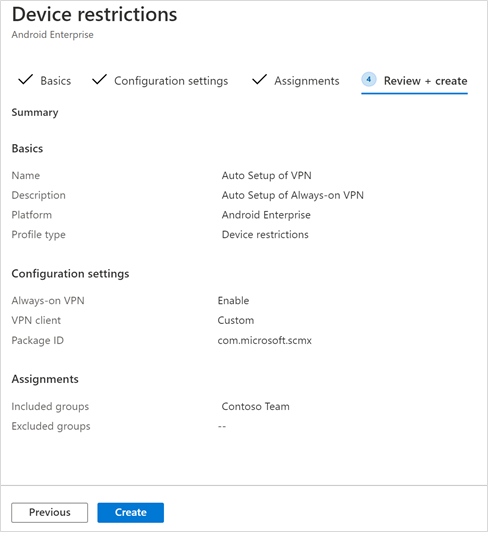
- In the Review + Create page that comes up next, review all the information and then select Create. The device configuration profile is now assigned to the selected user group.
Check status and complete onboarding
- Confirm the installation status of Microsoft Defender for Endpoint on Android by clicking on the Device Install Status. Verify that the device is displayed here.
- On the device, you can validate the onboarding status by going to the work profile. Confirm that Defender for Endpoint is available and that you are enrolled to the Personally owned devices with work profile. If you are enrolled to a Corporate-owned, fully managed user device, you will have a single profile on the device where you can confirm that Defender for Endpoint is available.
- When the app is installed, open the app and accept the permissions and then your onboarding should be successful.
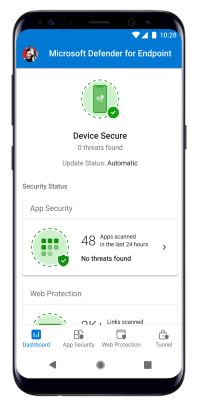
- At this stage the device is successfully onboarded onto Defender for Endpoint on Android. You can verify this on the Microsoft 365 Defender portal by navigating to the Device Inventory page.