

This article applies to: Sophos Home for macOS 10.15 Catalina
What’s changed with Catalina MacOS?
After completing the Sophos Home installation , or upgrading to Catalina 10.15, macOS users will need to perform additional steps in order to allow Sophos Home to fully protect their systems (especially to run Scans, and automatically remove malware from user folders), as well as to allow notifications to appear. This is due to a new security feature introduced by macOS 10.15-Catalina , related to Data protections , that requires users to manually grant Full Disk access to applications that need to access/modify user folders.
Note: Despite these changes, even before performing the needed steps, please keep in mind that your Mac is still protected by the real-time protection feature in Sophos Home – however, due to macOS 10.15 Catalina system requirements, these additional permissions need to be granted in order for Sophos Home to perform fast / full scans as well as full cleanup of detected threats.
What are my next steps to complete the installation?
Video steps
Step-by-Step guide
Note: When clicking on the padlock to allow changes, ensure you use your MAC credentials.
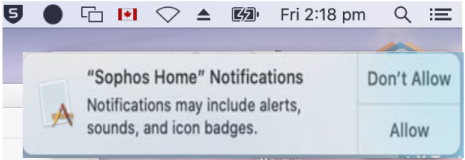
Allowing Notifications:
The macOS operating system will present users with a popup in order to enable notifications for programs. In this case, for Sophos Home, users will see the pop up on the top-right of their screen and may click Allow to proceed:
Granting Full Disk Access
(click on any image to enlarge it in a new tab)
1 – Click on “Let’s Start” on the popup message
2 – Follow the instructions to open Security & Privacy (by clicking on “Click Here”)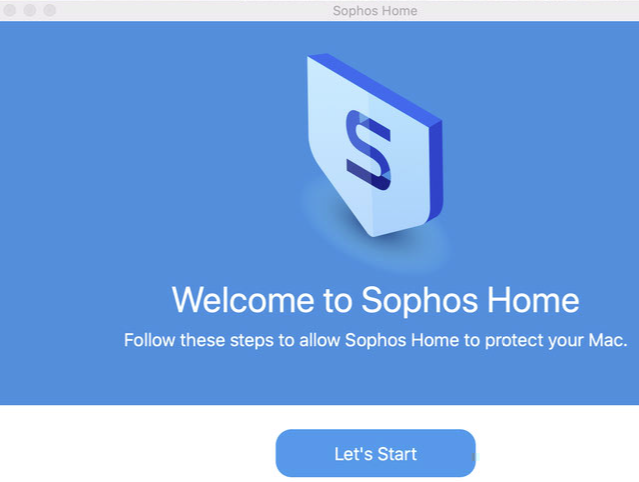
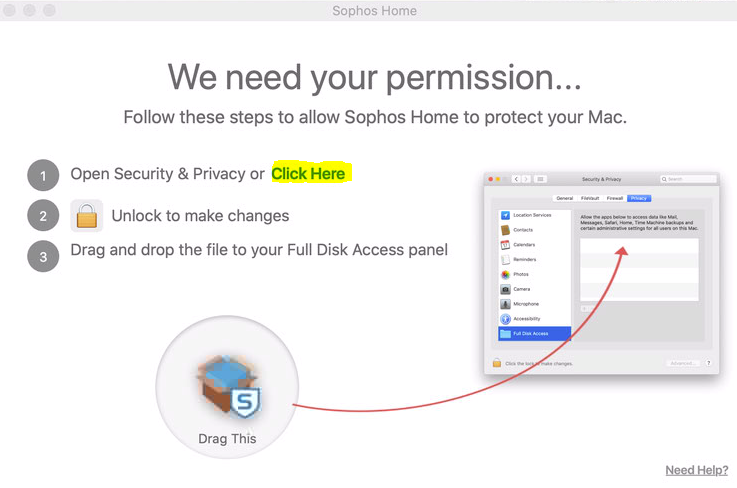
3 – At the “Privacy” section, Scroll down to “Full Disk Access”, click on the padlock at the bottom left and enter your Mac’s username/password to allow changes, then drag and drop the “Drag this” image into the Security & Privacy window.
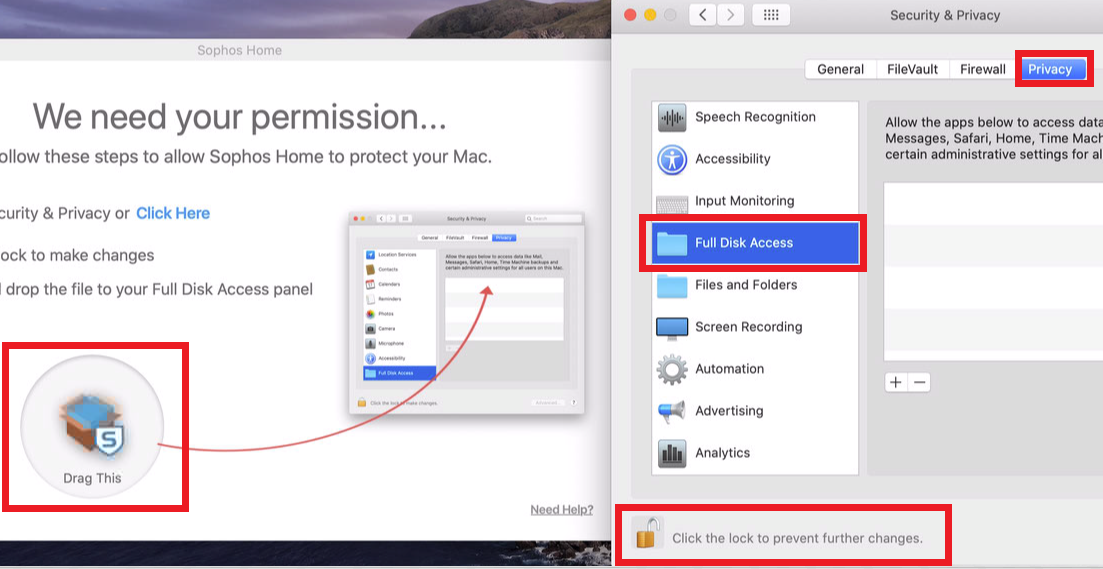
4 – Once you have dragged the Drag This image into the Security & Privacy. Several Sophos components will be added to the Full Disk access. Click Done and Close Security & Privacy
Note: If the steps are not completed the first time, the pop up will show up on reboot, and also whenever a scan has to take place.
Troubleshooting
In some cases, the Welcome to Sophos Home message keeps appearing after having followed the Full Disk Access steps. For those situations, macOS may require users to manually add additional/missing Sophos components to the Full Disk Access list. There are different scenarios in which that can happen, please follow the guidelines below to correct the problem.
Watch this video covering how to add components to the Full Disk Access list, then follow the appropriate scenario below:
Additional troubleshooting scenarios
Scenario 1 – Welcome to Sophos Home message keeps appearing on reboot
Scenario: Welcome to Sophos Home message every time the Mac is restarted
What to do:
1 – Open Security & Privacy
2 – In the “Privacy” section, Scroll down to “Full Disk Access”, click on the padlock at the bottom left and enter your Mac’s username/password to allow changes.
3 – Once at the “Full Disk Access” section, use the “Add an application” + symbol to manually add each component
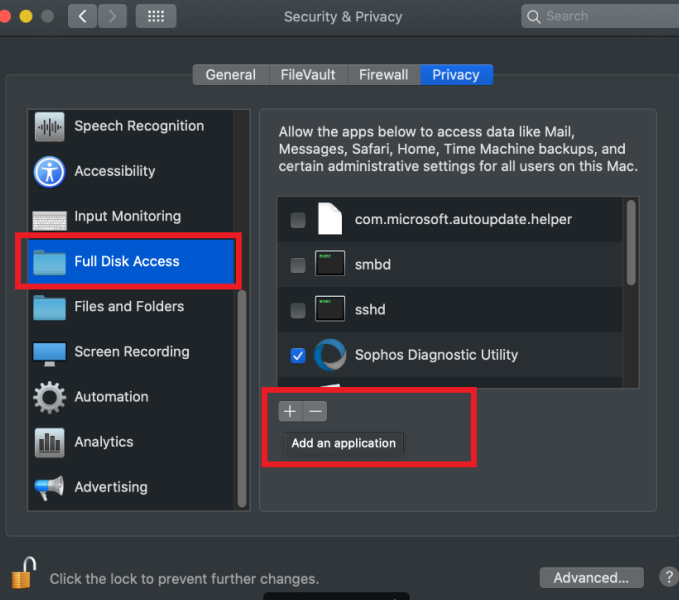
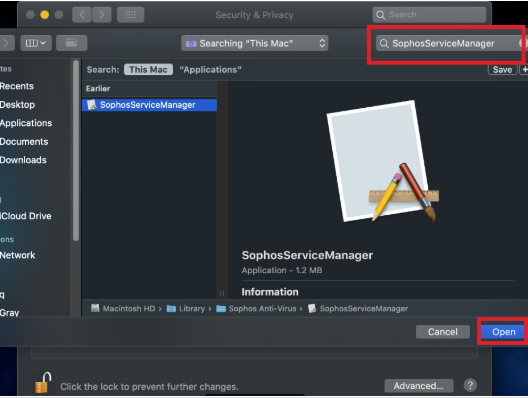
4 – Look up each component using the top right search bar and click “Open” to add them to the list, one at a time. The four components are:
Sophos Diagnostic Utility
SophosScanAgent
SophosCleanD
SophosServiceManager
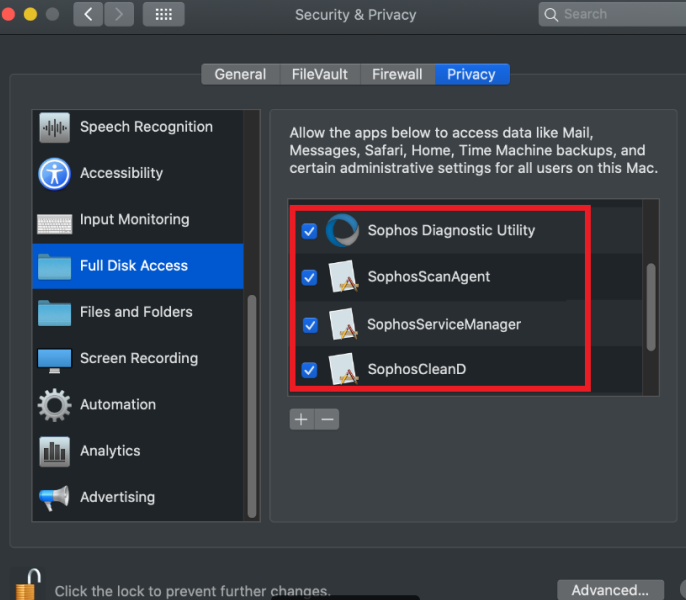
Note: Ensure that after adding each one, they are ticked (check-marked)
Example of all 4 components added, and check-marked (ticked)
5- Restart the Mac
Scenario 2 – Some components in the Full Disk access list are not checked-marked
Scenario: All 4 components are added, and ticked (as per scenario 1), however Welcome to Sophos Home message every time the Mac is restarted.
This is related to having additional Sophos components listed in the Full Disk Access section. The solution is to “check-mark” those additional Sophos components if they are un-checked, and reboot the Mac.
What to do:
1 – Follow the Scenario 1 steps to access “Security & Privacy –> Full Disk Access” , click on the padlock to be able to make changes
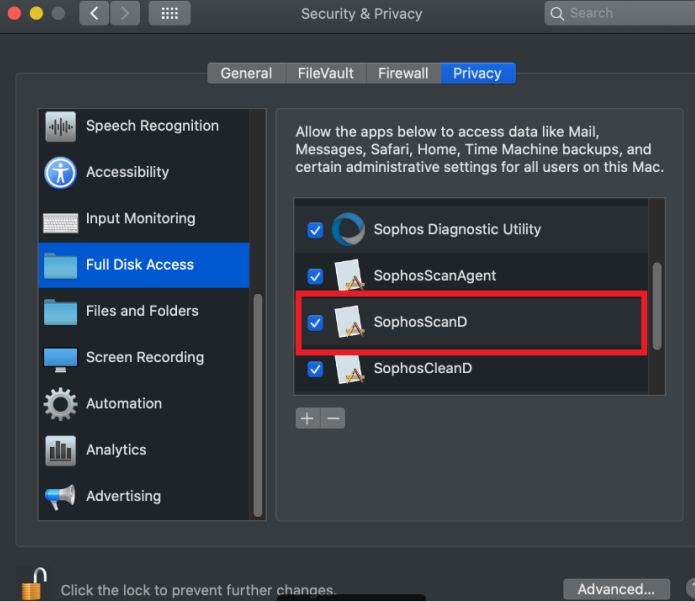
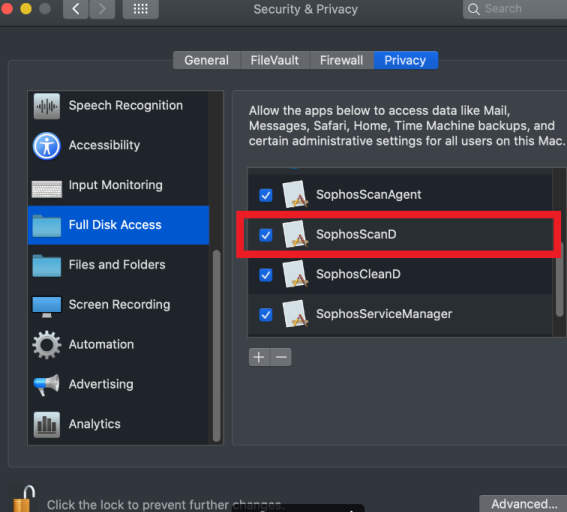
2- Manually “tick” or “check-mark” any Sophos component that is not check-marked.
3 – Restart the Mac
Example (additional component in this case is SophosScanD and it had to be manually allowed by clicking on the check-mark box next to it):
Scenario 3 – Dragging and dropping the components does not populate them on the Full Disk Access List
Scenario: the 4 components do not get added to the Full Disk Access list when drag-dropping, and the Welcome to Sophos Home message appears every the Mac is restarted.
What to do:
1 – Follow the Scenario 1 steps to access “Security & Privacy –> Full Disk Access” , click on the padlock to be able to make changes.
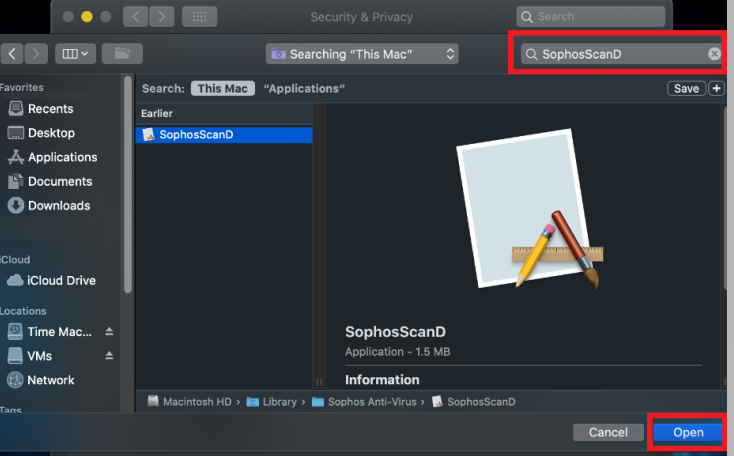
2 – Once at the “Full Disk Access” section, use the “Add an application” + symbol to manually add SophosScanD and/or Sophos Installer
3 – Look up each component using the top right search bar and click “Open” to add them to the list, one at a time. As SophosScanD and/or Sophos Installer get added, you should see the remainder 4 components populating the list (or be able to manually add them). Be sure that all the components are check-marked, as per Scenario 2.
4 – Restart the Mac
Example with SophosScanD: (scrolling up/down may be needed to ensure all four components, plus SophosScandD/ Sophos Installer are correctly populating the Full Disk Access list , and are ticked with a check-mark )
Scenario 4 – All components are present and check-marked, but the Welcome to Sophos Home message is still appearing on reboot
Scenario: all components, including additional ones, have been added and check-marked, the Mac has been restarted, but the Welcome to Sophos Home still appears on reboot.