

This article is Step 2 of 3 in the process of setting up the evaluation environment for Microsoft Defender for Office 365. For more information about this process, see the overview article.
Use the following steps to enable the evaluation for Microsoft Defender for Office 365.
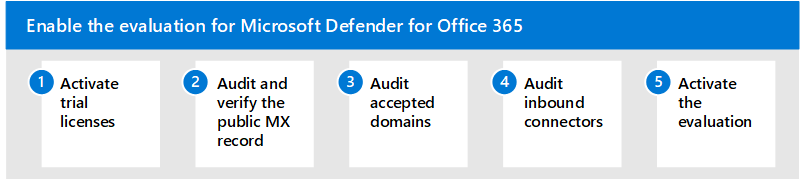
- Step 1: Activate trial licenses
- Step 2: Audit and verify the public MX record
- Step 3: Audit accepted domains
- Step 4: Audit inbound connectors
- Step 5: Activate the evaluation
Step 1: Activate trial licenses
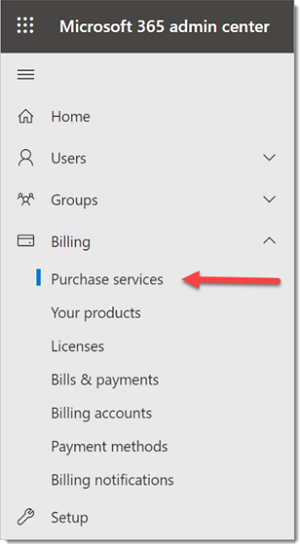
Log on to your existing Microsoft Defender for Office 365 environment or tenant administration portal.
- Navigate to the administration portal.
- Select Purchase Services from the quick launch.
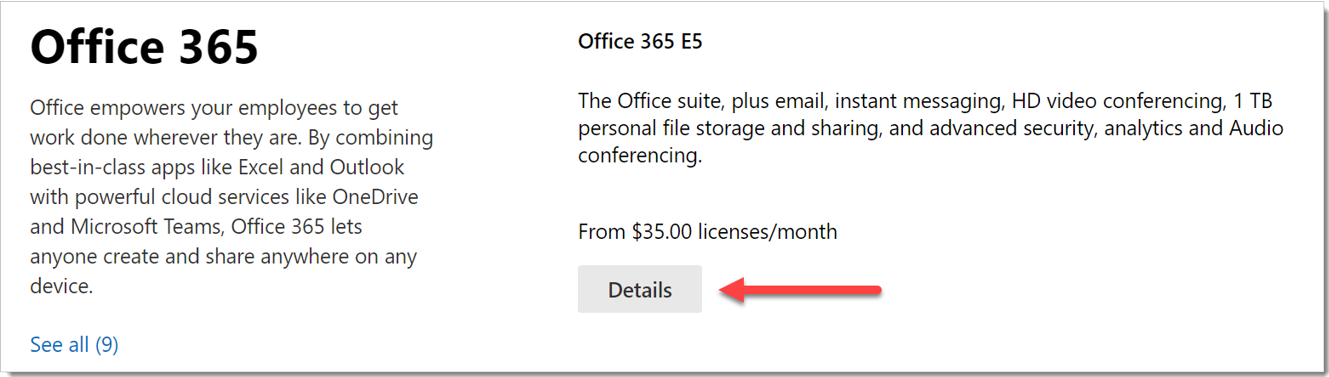
- Scroll down to the Add-On section (or search for “Defender”) to locate the Microsoft Defender for Office 365 plans.
- Click Details next the plan you want to evaluate.
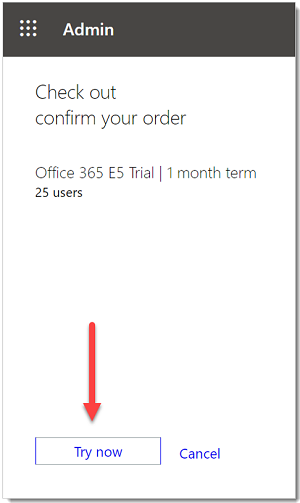
- Click the Start free trial link.

- Confirm your request and click the Try now button.
Step 2: Audit and verify the public MX record
To effectively evaluate Microsoft Defender for Office 365, it’s important that inbound external email be relayed through the Exchange Online Protection (EOP) instance associated with your tenant.
- Log on to the M365 Admin Portal, expand Settings, and select Domains.
- Select your verified email domain and click Manage DNS.
- Make note of the MX record generated and assigned to your EOP tenant.
- Access your external (public) DNS zone and check the primary MX record associated with your email domain.
- If your public MX record currently matches the assigned EOP address (e.g. tenant-com.mail.protection.outlook.com) then no further routing changes should be required.
- If your public MX record currently resolves to a third-party or on-premises SMTP gateway then additional routing configurations may be required.
- If your public MX record currently resolves to on-premises Exchange then you may still be in a hybrid model where some recipient mailbox have not yet been migrated to EXO.
Step 3: Audit accepted domains
- Log on the Exchange Online Admin Portal, select Mail Flow, and then click Accepted Domains.
- From the list of accepted domains that have been added and verified in your tenant, make note of the domain type for your primary email domain.
- If the domain type is set to Authoritative then it is assumed all recipient mailboxes for your organization currently reside in Exchange Online.
- If the domain type is set to Internal Relay then you may still be in a hybrid model where some recipient mailboxes still reside on-premises.
Step 4: Audit inbound connectors
- Log on the Exchange Online Admin Portal, select Mail Flow, and then click Connectors.
- From the list of configured connectors, make note of any entries which are from Partner Organization and may correlate to a third-party SMTP gateway.
- From the list of configured connectors, make note of any entries labeled From your organization’s email server which may indicate that you are still in hybrid scenario.
Step 5: Activate the evaluation
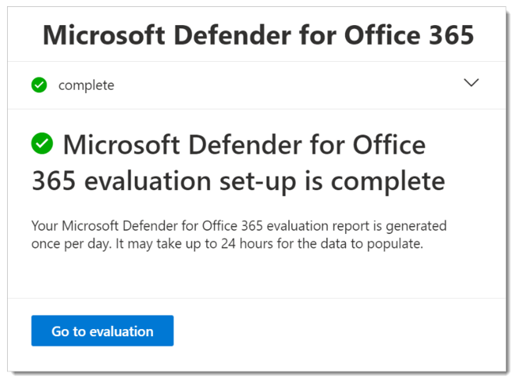
Use the instructions here to activate your Microsoft Defender for Office 365 evaluation from the Microsoft 365 Defender portal.
- Log on to your tenant with an account that has access to the Microsoft 365 Defender portal.
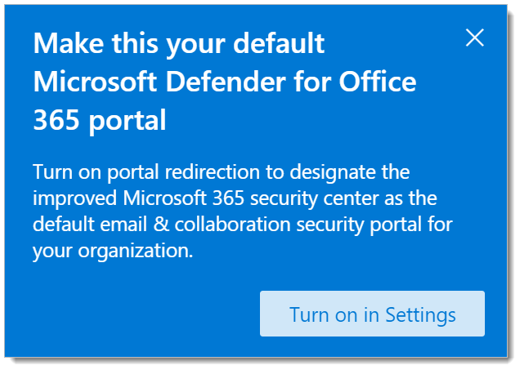
- Choose whether you want to make the Microsoft 365 Defender portal your default interface for Microsoft Defender for Office 365 administration (recommended).
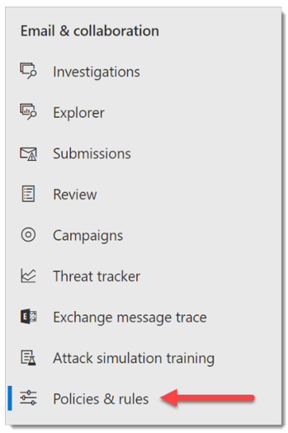
- From the navigation menu, select Policies & Rules under Email & Collaboration.
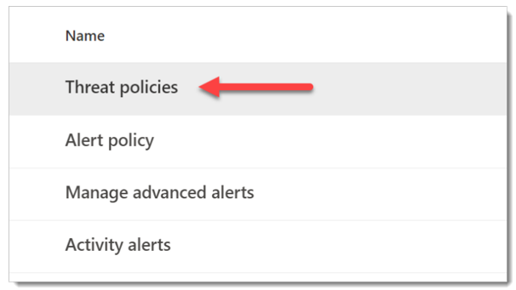
- On the Policy & Rules dashboard, click Threat Policies.
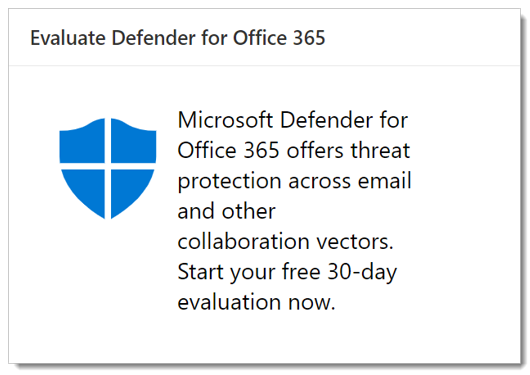
- Scroll down to Additional Policies and select the Evaluate Defender for Office 365 tile.
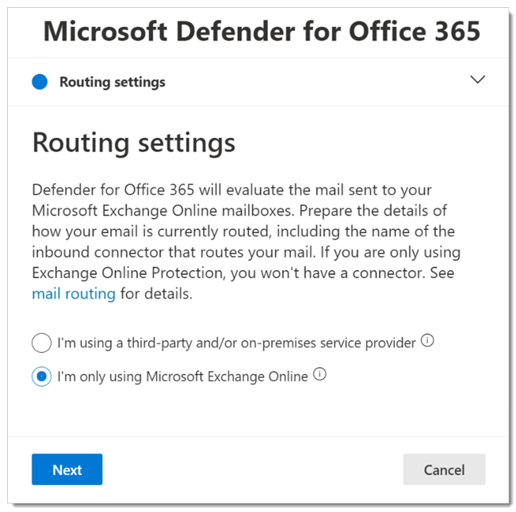
- Now choose whether external email routes to Exchange Online directly, or to a third-party gateway or service, and click Next.
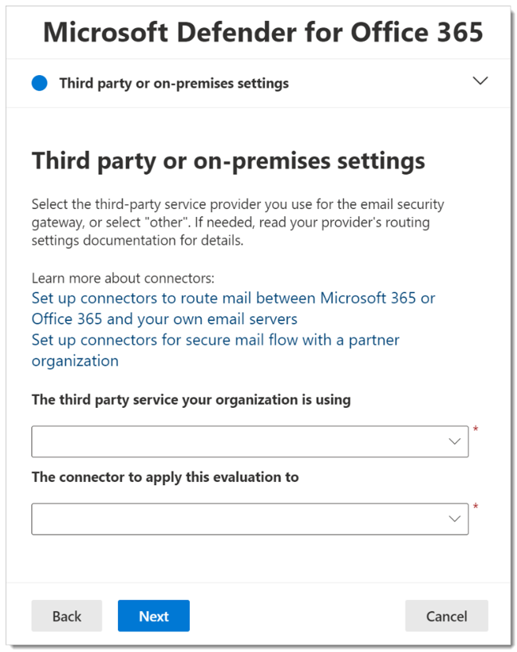
- If you use a third-party gateway, select the vendor name from the drop-down along with the inbound connector associated with that solution. When you’ve listed your answers, click Next.
- Review your settings and click the Create Evaluation button.
TABLE 1 Before After 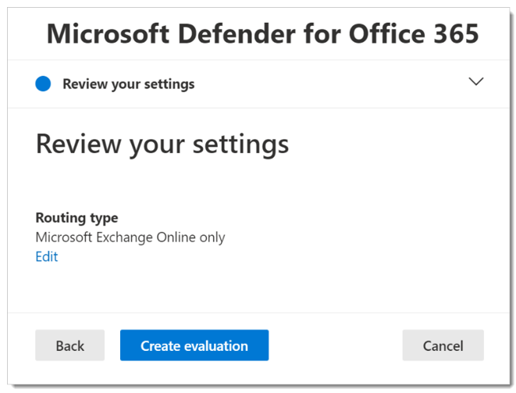
Source : Official Microsoft Brand
Editor by : BEST Antivirus KBS Team
(Visited 8 times, 1 visits today)