

Note
We’ve renamed Microsoft Cloud App Security. It’s now called Microsoft Defender for Cloud Apps. In the coming weeks, we’ll update the screenshots and instructions here and in related pages. For more information about the change, see this announcement. To learn more about the recent renaming of Microsoft security services, see the Microsoft Ignite Security blog.
This article provides information about how to personalize the email notifications sent by Defender for Cloud Apps to your users when a breach is detected.
Note
This customization only affects the notifications sent to your end users, not the notifications sent to Defender for Cloud Apps administrators.
Set email notification preferences
Microsoft Defender for Cloud Apps enables you to customize the email notifications sent to end users involved in breaches. To set parameters for email notifications, follow this procedure. For information about the Microsoft Defender for Cloud Apps email server IP address that you should allow in your anti-spam service, see Network requirements.
- In the menu bar, click the settings cog, select Settings, and then select the Mail settings tab.
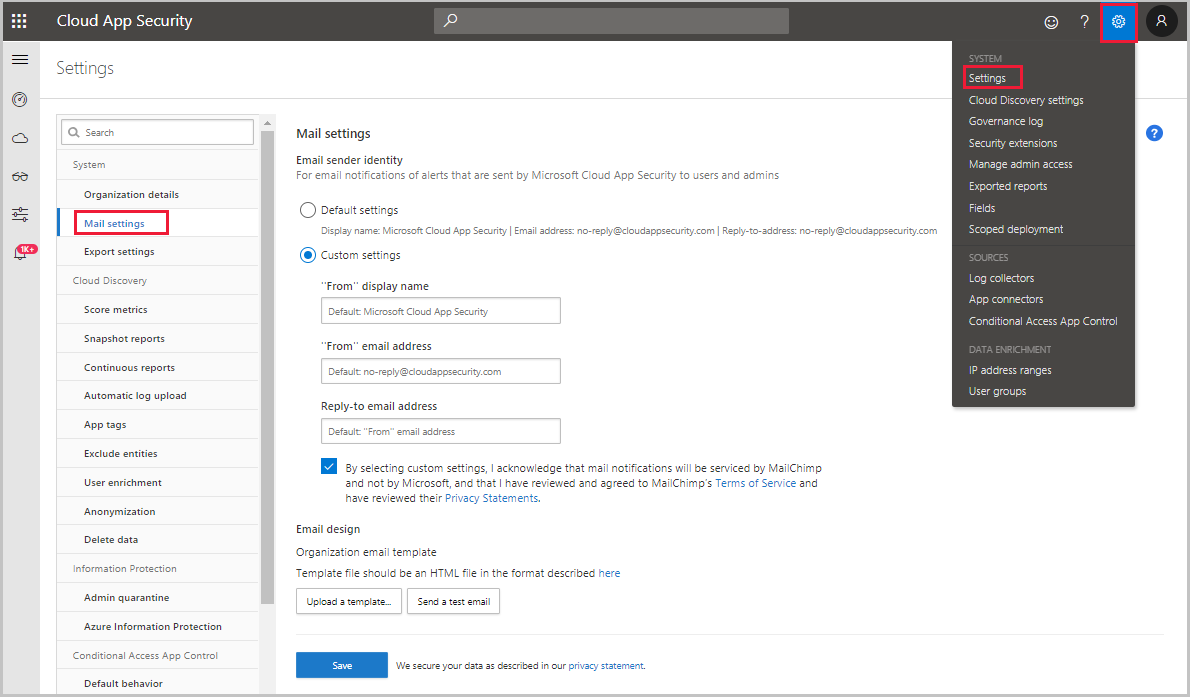
- Under Email sender identity: If you’re planning to use the default email settings, you don’t need to change anything in this section. If you want to customize the email sender identity, you can set any of the settings here to customize the field you want to change. You can change any or all of the following items: From display name, From email address, Reply-to email address. Microsoft Defender for Cloud Apps accomplishes the customization by using a third-party mail service called MailChimp®. Make sure you review and accept MailChimp’s Terms of Service and Privacy Statement to enable customization. Otherwise, Microsoft Defender for Cloud Apps will send the notifications using the default settings.
Note
Only unicode characters are supported in the display name and the email address according to the rfc822 standard.
- For the Email design, you can use an html file to customize and design the email messages sent from the system. The html file used for your template should include the following things:
- All template CSS files should be inline in the template.
- The template should have three uneditable placeholders:
- %%logo%% – URL to your company’s logo that was uploaded in the General setting page.
- %%title%% – Placeholder for the title of the email, as set by the policy.
- %%content%% – Placeholder for the content that will be included for end users, as set by the policy.
- Click Upload a template… and select the file you created.
- Click Send a test email to email yourself an example of the template you created. The email will be sent to the account you used to log into the portal. In the test email, you’ll see and verify the following items:
- The metadata fields
- The template
- The email subject
- The title in the email body
- The content
Sample email template
Below is a sample email template:
<!DOCTYPE html PUBLIC “-//W3C//DTD XHTML 1.0 Transitional//EN” “https://www.w3.org/TR/xhtml1/DTD/xhtml1-transitional.dtd”>
<html>
<head>
<meta http-equiv=”Content-Type” content=”text/html; charset=UTF-8″/>
<meta name=”viewport” content=”width=device-width, initial-scale=1.0″/>
</head>
<body class=”end-user”>
<table border=”0″ cellpadding=”20%” cellspacing=”0″ width=”100%” id=”background-table”>
<tr>
<td align=”center”>
<!–[if (gte mso 9)|(IE)]>
<table width=”600″ align=”center” cellpadding=”0″ cellspacing=”0″ border=”0″>
<tr>
<td>
<![endif]–>
<table bgcolor=”#ffffff” align=”center” border=”0″ cellpadding=”0″ cellspacing=”0″ style=”padding-bottom: 40px;” id=”container-table”>
<tr>
<td align=”right” id=”header-table-cell”>
<img src=”%%logo%%” alt=”Microsoft Defender for Cloud Apps” id=”org-logo” />
</td>
</tr>
<tr>
<td style=”padding-top: 58px;” align=”center” valign=”top”>
<table width=”100%” cellpadding=”12″>
<tr>
<td align=”center” class=”round-title”>
%%title%%
</td>
</tr>
</table>
</td>
</tr>
<tr>
<td style=”padding: 0 40px 79px 40px;” class=”content-table-cell” align=”left” valign=”top”>
%%content%%
</td>
</tr>
<tr>
<td class=”last-row”></td>
</tr>
</table>
<!–[if (gte mso 9)|(IE)]>
</td>
</tr>
</table>
<![endif]–>
</td>
</tr>
</table>
</body>
</html>