

Important
The improved Microsoft 365 Defender portal is now available. This new experience brings Defender for Endpoint, Defender for Office 365, Microsoft 365 Defender, and more into the Microsoft 365 Defender portal. Learn what’s new.
Applies to:
- Microsoft 365 Defender
Important
Some information relates to prereleased product which may be substantially modified before it’s commercially released. Microsoft makes no warranties, express or implied, with respect to the information provided here.
This page describes how to create an application to get programmatic access to Microsoft 365 Defender without a defined user—for example, if you’re creating a daemon or background service.
If you need programmatic access to Microsoft 365 Defender on behalf of one or more users, see Create an app to access Microsoft 365 Defender APIs on behalf of a user and Create an app with partner access to Microsoft 365 Defender APIs. If you’re not sure which kind of access you need, see Get started.
Microsoft 365 Defender exposes much of its data and actions through a set of programmatic APIs. Those APIs help you automate workflows and make use of Microsoft 365 Defender’s capabilities. This API access requires OAuth2.0 authentication. For more information, see OAuth 2.0 Authorization Code Flow.
In general, you’ll need to take the following steps to use these APIs:
- Create an Azure Active Directory (Azure AD) application.
- Get an access token using this application.
- Use the token to access Microsoft 365 Defender API.
This article explains how to:
- Create an Azure AD application
- Get an access token to Microsoft 365 Defender
- Validate the token.
Create an app
- Sign in to Azure as a user with the Global Administrator role.
- Navigate to Azure Active Directory > App registrations > New registration.
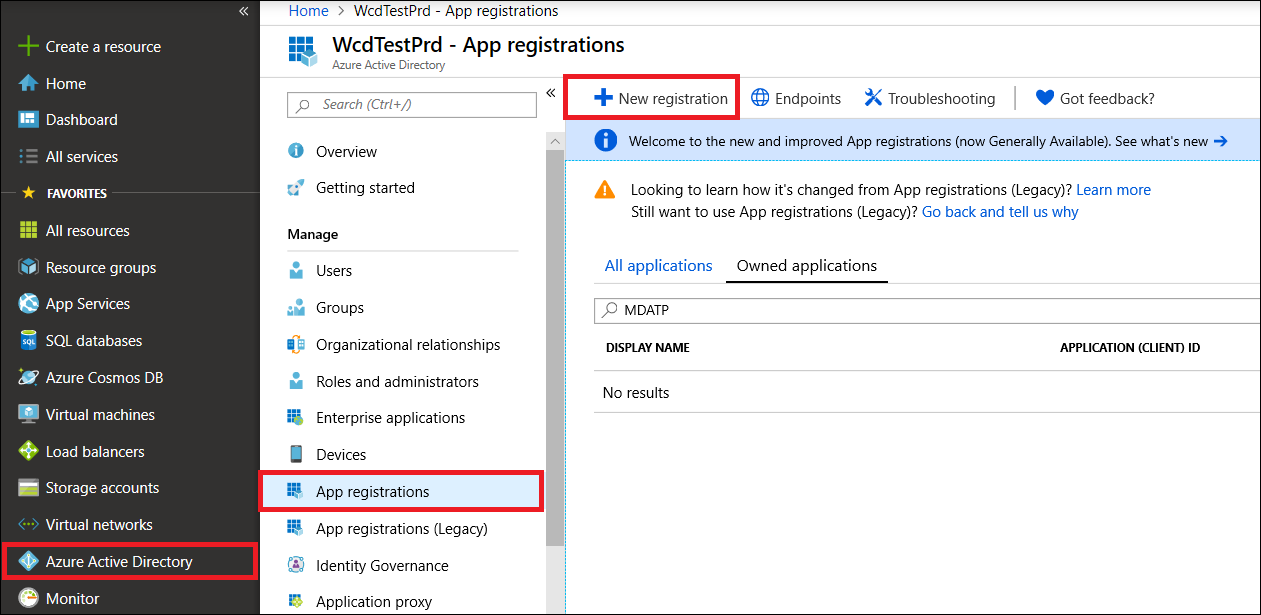
- In the form, choose a name for your application, then select wp-signup.php.
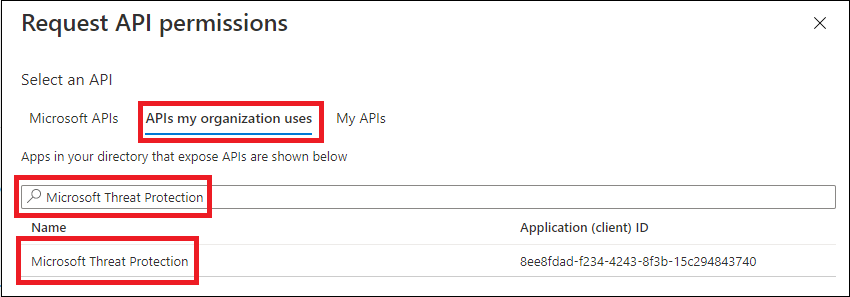
- On your application page, select API Permissions > Add permission > APIs my organization uses >, type Microsoft Threat Protection, and select Microsoft Threat Protection. Your app can now access Microsoft 365 Defender.
Tip
Microsoft Threat Protection is a former name for Microsoft 365 Defender, and will not appear in the original list. You need to start writing its name in the text box to see it appear.
- Select Application permissions. Choose the relevant permissions for your scenario (for example, Incident.Read.All), and then select Add permissions.
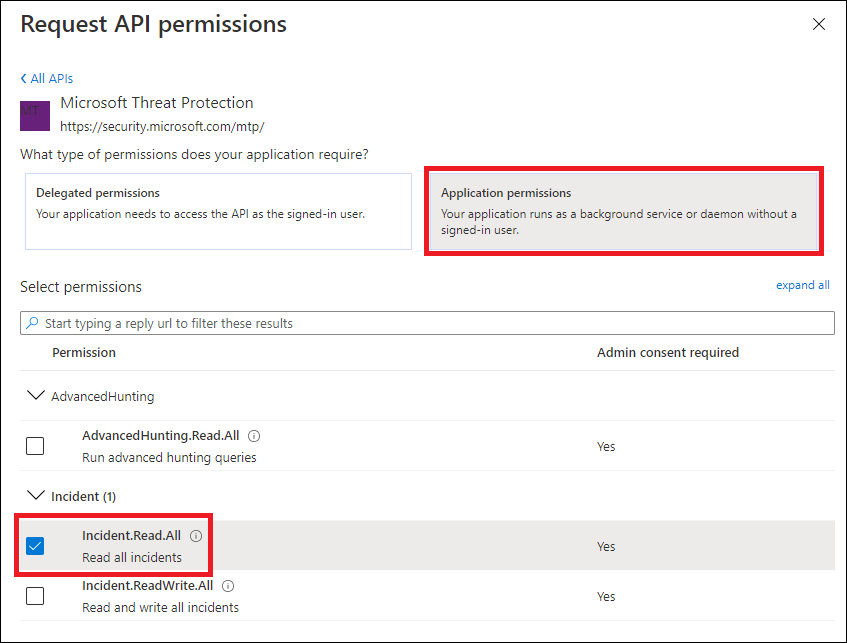
Note
You need to select the relevant permissions for your scenario. Read all incidents is just an example. To determine which permission you need, please look at the Permissions section in the API you want to call.
For instance, to run advanced queries, select the ‘Run advanced queries’ permission; to isolate a device, select the ‘Isolate machine’ permission.
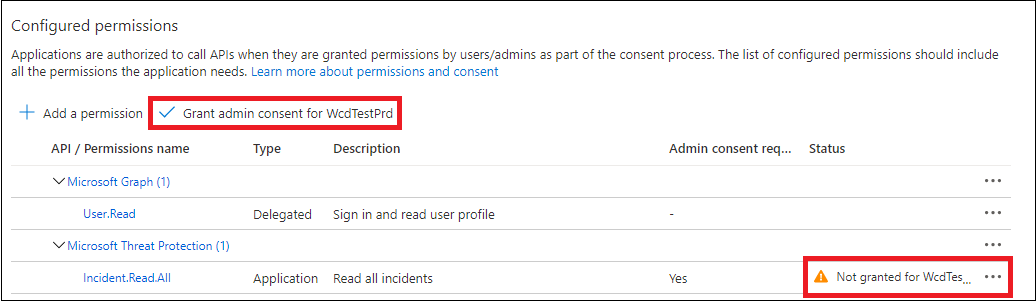
- Select Grant admin consent. Every time you add a permission, you must select Grant admin consent for it to take effect.
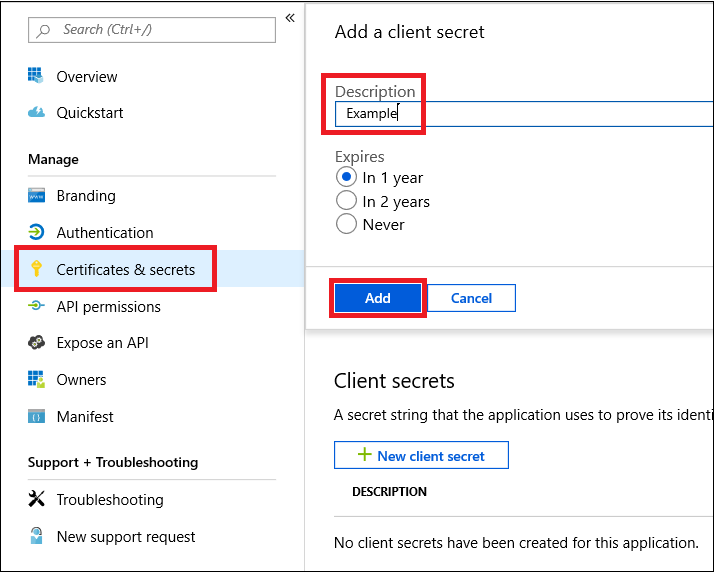
- To add a secret to the application, select Certificates & secrets, add a description to the secret, then select Add.
Tip
After you select Add, select copy the generated secret value. You won’t be able to retrieve the secret value after you leave.
- Record your application ID and your tenant ID somewhere safe. They’re listed under Overview on your application page.

- For Microsoft 365 Defender Partners only: Follow these instructions for partner access through the Microsoft 365 Defender APIs, set your app to be multi-tenant, so it can be available in all tenants once you receive admin consent. Partner access is required for third-party apps—for example, if you create an app that is intended to run in multiple customers’ tenants. It is not required if you create a service that you want to run in your tenant only, such as an application for your own usage that will only interact with your own data. To set your app to be multi-tenant:
- Go to Authentication, and add https://portal.azure.com as the Redirect URI.
- On the bottom of the page, under Supported account types, select the Accounts in any organizational directory application consent for your multi-tenant app.
Since your application interacts with Microsoft 365 Defender on behalf of your users, it needs be approved for every tenant on which you intend to use it.
The Active Directory global admin for each tenant needs to select the consent link and approve your app.
The consent link has the following structure:
HTTPhttps://login.microsoftonline.com/common/oauth2/authorize?prompt=consent&client_id=<00000000-0000-0000-0000-000000000000>&response_type=code&sso_reload=trueThe digits
00000000-0000-0000-0000-000000000000should be replaced with your Application ID.
Done! You’ve successfully wp-signup.phped an application! See examples below for token acquisition and validation.
Get an access token
For more information on Azure Active Directory tokens, see the Azure AD tutorial.
Important
Although the examples in this section encourage you to paste in secret values for testing purposes, you should never hardcode secrets into an application running in production. A third party could use your secret to access resources. You can help keep your app’s secrets secure by using Azure Key Vault. For a practical example of how you can protect your app, see Manage secrets in your server apps with Azure Key Vault.
Get an access token using PowerShell
# This code gets the application context token and saves it to a file named "Latest-token.txt" under the current directory.

$tenantId = '' # Paste your directory (tenant) ID here
$clientId = '' # Paste your application (client) ID here
$appSecret = '' # Paste your own app secret here to test, then store it in a safe place, such as the Azure Key Vault!

$resourceAppIdUri = 'https://api.security.microsoft.com'
$oAuthUri = "https://login.windows.net/$tenantId/oauth2/token"

$authBody = [Ordered] @{
    resource = $resourceAppIdUri
    client_id = $clientId
    client_secret = $appSecret
    grant_type = 'client_credentials'
}

$authResponse = Invoke-RestMethod -Method Post -Uri $oAuthUri -Body $authBody -ErrorAction Stop
$token = $authResponse.access_token

Out-File -FilePath "./Latest-token.txt" -InputObject $token

return $token
Get an access token using C#
Note
The following code was tested with Nuget Microsoft.IdentityModel.Clients.ActiveDirectory 3.19.8.
- Create a new console application.
- Install NuGet Microsoft.IdentityModel.Clients.ActiveDirectory.
- Add the following line:
C#
using Microsoft.IdentityModel.Clients.ActiveDirectory; - Copy and paste the following code into your app (don’t forget to update the three variables:
tenantId,clientId,appSecret):C#string tenantId = ""; // Paste your directory (tenant) ID here string clientId = ""; // Paste your application (client) ID here string appSecret = ""; // Paste your own app secret here to test, then store it in a safe place, such as the Azure Key Vault! const string authority = "https://login.windows.net"; const string wdatpResourceId = "https://api.security.microsoft.com"; AuthenticationContext auth = new AuthenticationContext($"{authority}/{tenantId}/"); ClientCredential clientCredential = new ClientCredential(clientId, appSecret); AuthenticationResult authenticationResult = auth.AcquireTokenAsync(wdatpResourceId, clientCredential).GetAwaiter().GetResult(); string token = authenticationResult.AccessToken;
Get an access token using Python
import json
import urllib.request
import urllib.parse

tenantId = '' # Paste your directory (tenant) ID here
clientId = '' # Paste your application (client) ID here
appSecret = '' # Paste your own app secret here to test, then store it in a safe place, such as the Azure Key Vault!

url = "https://login.windows.net/%s/oauth2/token" % (tenantId)

resourceAppIdUri = 'https://api.security.microsoft.com'

body = {
    'resource' : resourceAppIdUri,
    'client_id' : clientId,
    'client_secret' : appSecret,
    'grant_type' : 'client_credentials'
}

data = urllib.parse.urlencode(body).encode("utf-8")

req = urllib.request.Request(url, data)
response = urllib.request.urlopen(req)
jsonResponse = json.loads(response.read())
aadToken = jsonResponse["access_token"]
Get an access token using curl
Note
Curl is pre-installed on Windows 10, versions 1803 and later. For other versions of Windows, download and install the tool directly from the official curl website.
- Open a command prompt, and set CLIENT_ID to your Azure application ID.
- Set CLIENT_SECRET to your Azure application secret.
- Set TENANT_ID to the Azure tenant ID of the customer that wants to use your app to access Microsoft 365 Defender.
- Run the following command:
Bash
curl -i -X POST -H "Content-Type:application/x-www-form-urlencoded" -d "grant_type=client_credentials" -d "client_id=%CLIENT_ID%" -d "scope=https://api.security.microsoft.com/.default" -d "client_secret=%CLIENT_SECRET%" "https://login.microsoftonline.com/%TENANT_ID%/oauth2/v2.0/token" -kA successful response will look like this:
Bash{"token_type":"Bearer","expires_in":3599,"ext_expires_in":0,"access_token":"eyJ0eXAiOiJKV1QiLCJhbGciOiJSUzI1NiIsIn <truncated> aWReH7P0s0tjTBX8wGWqJUdDA"}
Validate the token
- Copy and paste the token into the JSON web token validator website, JWT, to decode it.
- Make sure that the roles claim within the decoded token contains the desired permissions.
In the following image, you can see a decoded token acquired from an app, with
Incidents.Read.All,Incidents.ReadWrite.All, andAdvancedHunting.Read.Allpermissions: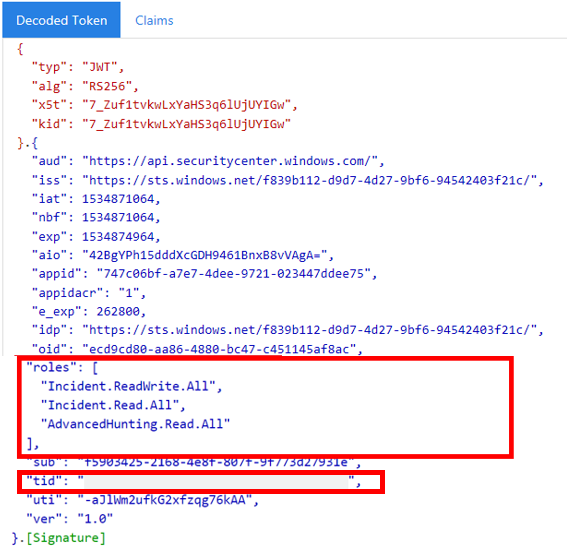
Use the token to access the Microsoft 365 Defender API
- Choose the API you want to use (incidents, or advanced hunting). For more information, see Supported Microsoft 365 Defender APIs.
- In the http request you are about to send, set the authorization header to
"Bearer" <token>, Bearer being the authorization scheme, and token being your validated token. - The token will expire within one hour. You can send more than one request during this time with the same token.
The following example shows how to send a request to get a list of incidents using C#.
    var httpClient = new HttpClient();
    var request = new HttpRequestMessage(HttpMethod.Get, "https://api.security.microsoft.com/api/incidents");

    request.Headers.Authorization = new AuthenticationHeaderValue("Bearer", token);

    var response = httpClient.SendAsync(request).GetAwaiter().GetResult();