Antivirus settings
To reach this section click on the  drop down button in the Antivirus section and select Settings.
In this section, you can:
– configure the On Access module (real-time file monitor)
– choose what items are scanned automatically on your computer
– change advanced detection options
– decide what the Antivirus should do when a piece of malware is encounteredThe On demand engine uses predefined profiles for running a single scan at a specific date (manually started by you or according to the scheduling).
The On Access engine runs in the background and actively checks all the files for potential threats just before they are accessed by the running processes on the computer. To do so, the real-time scan engine will monopolize a small part of the computer processing resources to watch over the used files. This can result in a slight slowdown when accessing folders with large file numbers or when opening applications that need access to many resources.
Altering the On Access settings will directly influence both the computer and application performance and can result in lowering the security level of your computer. Running regular system scans can compensate for a more lax and permissive real-time scan engine.
Clicking on the Antivirus option allows you to tick the On Access engine on or off. Keeping the real-time monitor turned off will leave your computer exposed to viruses, spyware, malicious websites and various exploits.
Antivirus
Like all other BullGuard Settings, for the Antivirus plugin you have two levels of settings: Basic and Advanced.
Basic settings
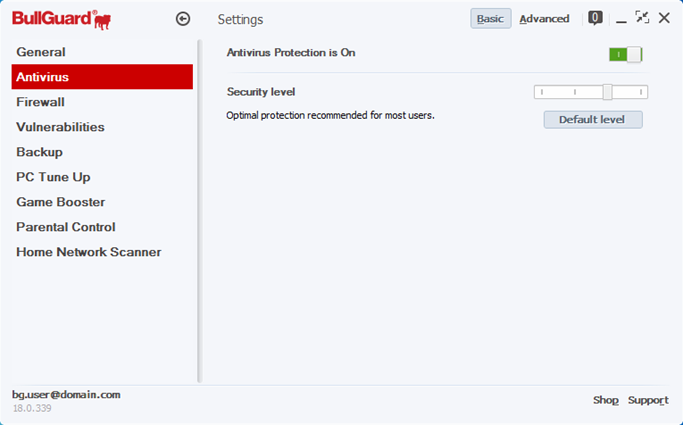
Here you can disable or enable the entire Antivirus plugin and you can choose from one of the predefined Security levels.
The default Security level is the Optimal protection, which has been set by our security experts. You can also choose Maximum protection when you are connecting from an unsecure connection, such as a public wireless network, or Minimum protection if you are connecting from home and only using secure sites.
Advanced settings
When you choose advanced settings, you will immediately see several more options, although the Security leves are still available. Here you can enable or disable specific parts of the Antivirus plugin, depending on your security needs.
Scan files: allows the On Access engine to scan all files prior to being accessed by the running programs. It also scans all files displayed in a folder when accessing it via Windows Explorer.
Scan behavioural: this feature adds another layer of defence against an ever increasing volume of malware. It will enable the Antivirus engine to detect threats not by relying on definitions files, but by closely monitoring processes and files’ access to sensitive operating system areas such as Windows registry or installation folders.
Allowing false-positive detection cases
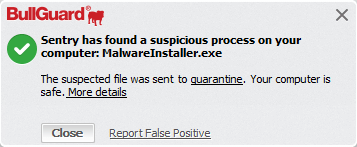
A Behavioural scan engine may include a slightly increased rate of “false positive” detection cases. Even so, you can still run your program by allowing the blocked application from the alert pop-up message. We recommend that you report such cases in order to have them analysed and, depending on the results, whitelisted.
Click on Report False Positive to continue using the application if you consider it was a “false positive” detection case. You can report any “false positive” cases to us and we will whitelist any legitimate programs. Otherwise, you can Quarantine the file until further notice to prevent any damage to your computer.
Scan web traffic: allows BullGuard to scan the information coming in to your computer from the Internet. This feature is designed to stop any attacker trying to exploit vulnerabilities present in your Internet browser or operating system.
Scan e-mail: the On Access engine will scan e-mails received in your e-mail client. BullGuard can scan both incoming (received) and outgoing (sent) e-mails from email applications such as Microsoft Outlook, Windows (Live) Mail or Mozilla Thunderbird.
Antivirus Profiles: you can configure the scanning profiles by clicking on Manage Profiles. You can read more about that in the Scan profiles guide.
The Advanced settings of the Antivirus also include four sublevels of customization that you can choose from the left menu, Actions, Tuning, Misc (Miscellaneous) and Safe Browsing. See the sections below for more information.
Actions
Here you can choose how you would like the Antivirus module to react when an infection is intercepted or discovered by the On Access module.
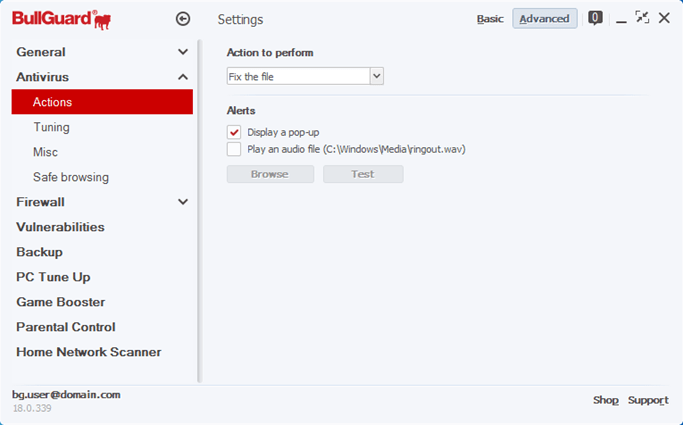
When dealing with an infected file, BullGuard can:
Fix the file: with this option enabled, BullGuard will first try to disinfect the file and, if it is not possible, will quarantine and delete it from its original location.
Block the file: with this option, the On Access engine will prevent all access to the infected file.
Display a pop-up: when enabled, a notification message will appear to let you know that an infected file was dealt with by the Antivirus.
Play an audio file: when enabled, BullGuard will play a specific sound whenever an infection is dealt with. Use Browse to select an audio file and Test to hear how it sounds.
Tuning
In this section you can choose exactly how the On Access protection works and choose where you wish to exclude something from the scan.
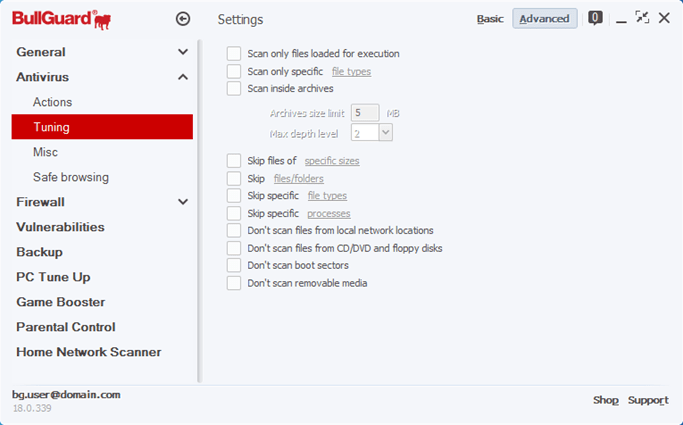
Scan only files loaded for execution: the real-time monitor will only scan executable files (files performing actions based on encoded instructions – exe, bat, com, dll, sys etc). It is a recommended option for slower computers or if you notice a significant slowdown in your computer’s performance.
Scan only specific file types: if you check this box, you will be able to click on file types to select which type of extensions will be scanned. Only the selected files types will be scanned by the On Access protection.
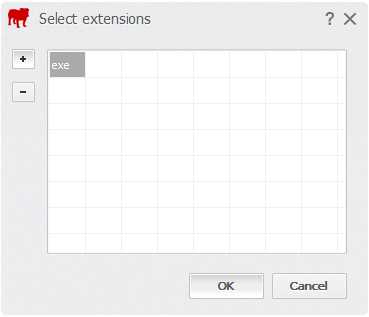
Click on the “+” button to add a new extension, type in the name of the extension without the dot and press Enter. To remove a file type, select it and press the “-” button. Press OK when you are finished.
Scan inside archives: enable this option if you want to allow the On Access monitor to scan all archive types (such as zip, rar, tar, gz etc) or packed files (program installation files such as msi packages or .exe installers).
You can choose how big the scanned archive can be (a lower size means the scan will skip larger archives that can take a long time to complete).
Skip files of specific sizes: you can increase or decrease the file size you wish to have scanned from specific areas such as “Local files” (files from the hard disk installed on the computer) and “Remote files” (files shared on any local network you have access to).
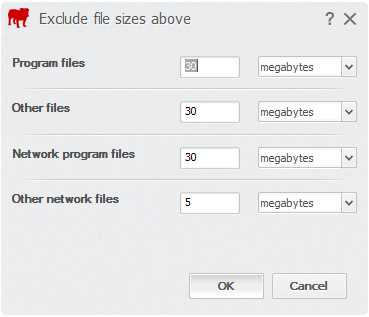
Program files: this option refers to executable files alone and the default size is 30 MB.
Other files: refers to other types of files (multimedia files, documents, some application/operating system resources).
Network program files and Other network files: targets shared files on the Local Area Network (LAN). To improve transfer rates between local network computers you can use lower values for the Network files. We advise you to lower them only if you have visible slowdowns when accessing shared folders or if the computer is located in a controlled environment (office local networks) where most resources are available on the LAN’s servers.
Skip files/folders: the folders whitelist is used to exclude specific folders from the real-time scan engine. This option is used mostly to increase performance for applications accessing a very high number of resources. However, it can be a security risk if you can’t be sure whether the files are clean or not. If you do not trust the application provider or source, we recommend excluding that folder from the real time file scanning white list.
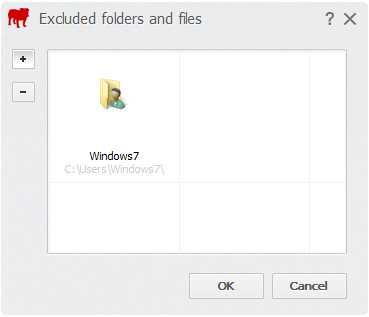
Clicking on the + button will open a browse window. To add a folder, you need to navigate to the folder location, select it and then click on OK. To remove a folder, select it and click on the – button.
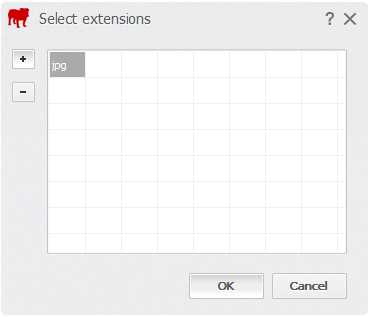
Skip specific file types: specifies what file types can be skipped by the real-time monitor based on their extensions. To add extensions to the white list click on the + button. To remove them, click on the – button. This option is used mostly for the popular multimedia extensions such as jpg or mp3.
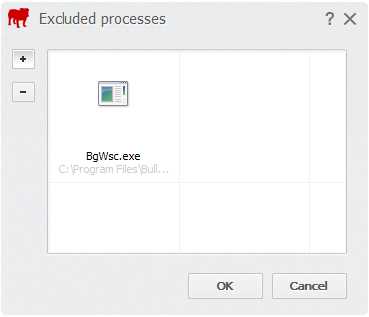
Skip specific processes: the whitelist will prevent BullGuard from scanning specific executable files.
Clicking on the + button will open a browse window. To add a process, you will need to navigate to the application location, select it and then click on OK. To remove it, select it and click on the – button.
Don’t scan files from network locations: denies BullGuard from automatically scanning shared network resources when accessed by your computer.
Don’t scan files from CD/DVD, memory drives and floppy discs: disables BullGuard from scanning files from removable storage media.
Don’t scan boot sectors: disables the On Access engine from scanning boot sectors for the local hard drives.
Don’t scan removable media: checking this box disables the real-time monitor to actively scan any removable devices that you plug-in, the moment you start using them.
Misc
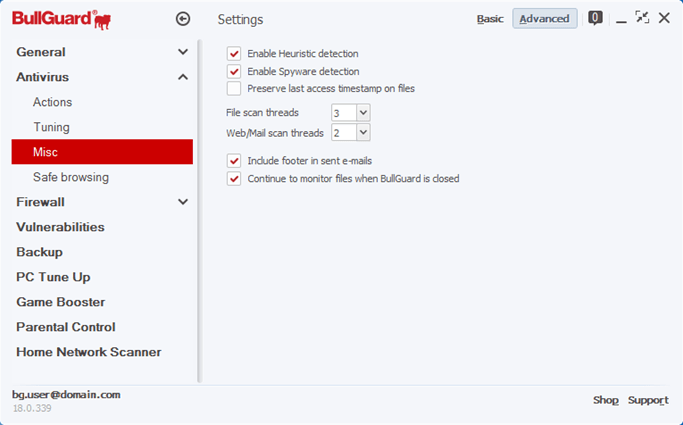
Enable Heuristic detection: an important feature of the Antivirus engine is that, by using behaviour and code pattern analysis, it helps detect newly-created viruses or new strains of older viruses. This is an essential feature of any Antivirus application as it will enable the application to detect new threats without relying only on virus definitions.
Enable Spyware detection: enables the On Access engine to scan for spyware.
Preserve files ‘last access’ timestamp: with this option enabled, BullGuard will not modify the Last Accessed date for the files scanned by the On Access engine. The Last Accessed date is visible in the file’s General tab from the Properties window. If the option is disabled, the Last Accessed date will be changed when the file is scanned by the Antivirus real-time scanner.
File scan threads & Web/mail scan threads: these options allow you to decide how much processing power you want to allocate to the real-time scan engine for scanning these items.
Continue to monitor files when BullGuard is closed: this option will keep the on-access scan engine enabled, even if you decide to close BullGuard, thus keep you protected in real-time.
Include footer in sent e-mails: will attach footer to all the e-mails you send to certify the message has been checked by BullGuard Antivirus.
Safe Browsing
Ticking the Safe Browsing option in this subsection enables BullGuard to check the hyperlinks present on a webpage for possible threats. It will then place an icon next to each link notifying you whether it is safe or not to access it.
This section allows the real-time protection to block access to web pages known to be phishing sites, thus protecting you from identity theft, or known to contain malware.
Phishing is one of the techniques used in identity theft. Phishing websites impersonate legitimate ones with the sole purpose of tricking you into disclosing private information or various login details.
Safe links that do not present any security issues will always have the green checkmark.
Unsafe links that are known to contain threats to your computer, data or private information will be marked with a red exclamation sign.
Access to any of the blacklisted websites is blocked automatically. Trying to access such a page will bring up the BullGuard warning screen notifying you that the page is known to pose threats to the system’s security such as links leading to malware hosting websites, scripts exploiting Internet browsers vulnerabilities, pages that install unwanted software without your consent, or phishing attempts.
Clicking Manage Lists opens an Antivirus: Safe Browsing window, where you can manually add websites to the whitelist, the blacklist or the current session.

In the Safe browsing section, you can also select the search engines where you would like BullGuard to scan the search results and show whether the links are safe.
Source : Official BullGuard Brand
Editor by : BEST Antivirus KBS Team

