Quickly respond to detected attacks by isolating devices or collecting an investigation package. After taking action on devices, you can check activity details on the Action center.
Response actions run along the top of a specific device page and include:
- Manage tags
- Initiate Automated Investigation
- Initiate Live Response Session
- Collect investigation package
- Run antivirus scan
- Restrict app execution
- Isolate device
- Consult a threat expert
- Action center

You can find device pages from any of the following views:
- Security operations dashboard – Select a device name from the Devices at risk card.
- Alerts queue – Select the device name beside the device icon from the alerts queue.
- Devices list – Select the heading of the device name from the devices list.
- Search box – Select Device from the drop-down menu and enter the device name.
Important
- These response actions are only available for devices on Windows 10, version 1703 or later, Windows 11, Windows Server 2019, and Windows Server 2022.
- For non-Windows platforms, response capabilities (such as Device isolation) are dependent on the third-party capabilities.
- For Microsoft first party agents, please refer to the “more information” link under each feature for minimum OS requirements.
Manage tags
Add or manage tags to create a logical group affiliation. Device tags support proper mapping of the network, enabling you to attach different tags to capture context and to enable dynamic list creation as part of an incident.
For more information on device tagging, see Create and manage device tags.
Initiate Automated Investigation
You can start a new general purpose automated investigation on the device if needed. While an investigation is running, any other alert generated from the device will be added to an ongoing Automated investigation until that investigation is completed. In addition, if the same threat is seen on other devices, those devices are added to the investigation.
For more information on automated investigations, see Overview of Automated investigations.
Initiate live response Session
Live response is a capability that gives you instantaneous access to a device by using a remote shell connection. This gives you the power to do in-depth investigative work and take immediate response actions to promptly contain identified threats in real time.
Live response is designed to enhance investigations by enabling you to collect forensic data, run scripts, send suspicious entities for analysis, remediate threats, and proactively hunt for emerging threats.
For more information on live response, see Investigate entities on devices using live response.
Collect investigation package from devices
As part of the investigation or response process, you can collect an investigation package from a device. By collecting the investigation package, you can identify the current state of the device and further understand the tools and techniques used by the attacker.
Important
These actions are not currently supported for macOS and Linux. Use live response to run the action. For more information on live response, see Investigate entities on devices using live response
To download the package (Zip file) and investigate the events that occurred on a device
- Select Collect investigation package from the row of response actions at the top of the device page.
- Specify in the text box why you want to perform this action. Select Confirm.
- The zip file will download
Alternate way:
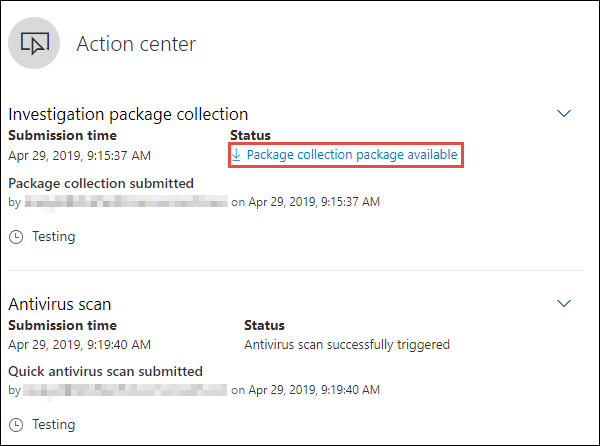
- Select Action center from the response actions section of the device page.
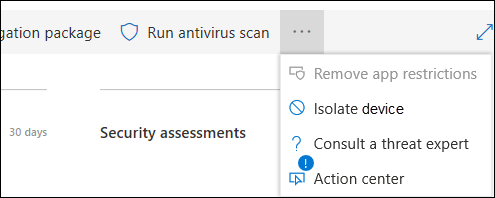
- In the Action center fly-out, select Package collection package available to download the zip file.
The package contains the following folders:
| Folder | Description |
|---|---|
| Autoruns | Contains a set of files that each represent the content of the registry of a known auto start entry point (ASEP) to help identify attacker’s persistency on the device.
NOTE: If the registry key is not found, the file will contain the following message: “ERROR: The system was unable to find the specified registry key or value.”
|
| Installed programs | This .CSV file contains the list of installed programs that can help identify what is currently installed on the device. For more information, see Win32_Product class. |
| Network connections | This folder contains a set of data points related to the connectivity information that can help in identifying connectivity to suspicious URLs, attacker’s command and control (C&C) infrastructure, any lateral movement, or remote connections.
NOTE: The pfirewall.log file must exist in %windir%\system32\logfiles\firewall\pfirewall.log, so it will be included in the investigation package. For more information on creating the firewall log file, see Configure the Windows Defender Firewall with Advanced Security Log
|
| Prefetch files | Windows Prefetch files are designed to speed up the application startup process. It can be used to track all the files recently used in the system and find traces for applications that might have been deleted but can still be found in the prefetch file list.
|
| Processes | Contains a .CSV file listing the running processes and provides the ability to identify current processes running on the device. This can be useful when identifying a suspicious process and its state. |
| Scheduled tasks | Contains a .CSV file listing the scheduled tasks, which can be used to identify routines performed automatically on a chosen device to look for suspicious code that was set to run automatically. |
| Security event log | Contains the security event log, which contains records of login or logout activity, or other security-related events specified by the system’s audit policy.
NOTE: Open the event log file using Event viewer.
|
| Services | Contains a .CSV file that lists services and their states. |
| Windows Server Message Block (SMB) sessions | Lists shared access to files, printers, and serial ports and miscellaneous communications between nodes on a network. This can help identify data exfiltration or lateral movement.Contains files for SMBInboundSessions and SMBOutboundSession.
NOTE: If there are no sessions (inbound or outbound), you’ll get a text file that tell you that there are no SMB sessions found.
|
| System Information | Contains a SystemInformation.txt file that lists system information such as OS version and network cards. |
| Temp Directories | Contains a set of text files that lists the files located in %Temp% for every user in the system.This can help to track suspicious files that an attacker may have dropped on the system.
NOTE: If the file contains the following message: “The system cannot find the path specified”, it means that there is no temp directory for this user, and might be because the user didn’t log in to the system.
|
| Users and Groups | Provides a list of files that each represent a group and its members. |
| WdSupportLogs | Provides the MpCmdRunLog.txt and MPSupportFiles.cab
NOTE: This folder will only be created on Windows 10, version 1709 or later with February 2020 update rollup or more recent installed:
|
| CollectionSummaryReport.xls | This file is a summary of the investigation package collection, it contains the list of data points, the command used to extract the data, the execution status, and the error code if there is failure. You can use this report to track if the package includes all the expected data and identify if there were any errors. |
Run Microsoft Defender Antivirus scan on devices
As part of the investigation or response process, you can remotely initiate an antivirus scan to help identify and remediate malware that might be present on a compromised device.
Important
- This action is not currently supported for macOS and Linux. Use live response to run the action. For more information on live response, see Investigate entities on devices using live response
- A Microsoft Defender Antivirus (Microsoft Defender AV) scan can run alongside other antivirus solutions, whether Microsoft Defender AV is the active antivirus solution or not. Microsoft Defender AV can be in Passive mode. For more information, see Microsoft Defender Antivirus compatibility.
One you have selected Run antivirus scan, select the scan type that you’d like to run (quick or full) and add a comment before confirming the scan.
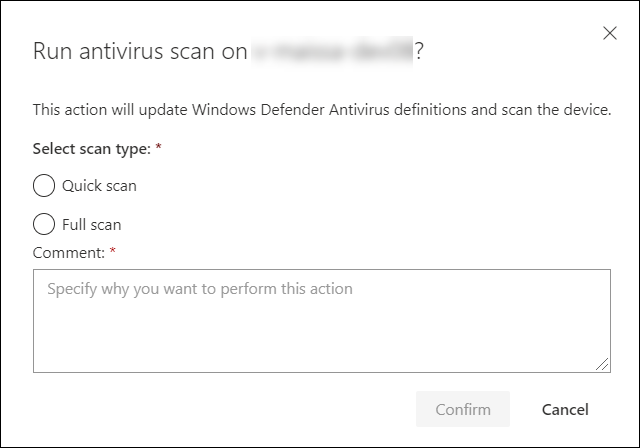
The Action center will show the scan information and the device timeline will include a new event, reflecting that a scan action was submitted on the device. Microsoft Defender AV alerts will reflect any detections that surfaced during the scan.
Note
When triggering a scan using Defender for Endpoint response action, Microsoft Defender antivirus ‘ScanAvgCPULoadFactor’ value still applies and limits the CPU impact of the scan.
If ScanAvgCPULoadFactor is not configured, the default value is a limit of 50% maximum CPU load during a scan.
For more information, see configure-advanced-scan-types-microsoft-defender-antivirus.
Restrict app execution
In addition to containing an attack by stopping malicious processes, you can also lock down a device and prevent subsequent attempts of potentially malicious programs from running.
Important
- This action is available for devices on Windows 10, version 1709 or later, Windows 11, and Windows Server 2016.
- This feature is available if your organization uses Microsoft Defender Antivirus.
- This action needs to meet the Windows Defender Application Control code integrity policy formats and signing requirements. For more information, see Code integrity policy formats and signing).
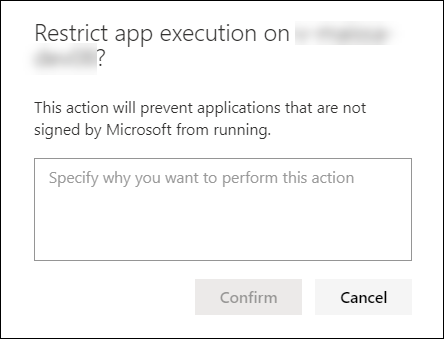
To restrict an application from running, a code integrity policy is applied that only allows files to run if they are signed by a Microsoft issued certificate. This method of restriction can help prevent an attacker from controlling compromised devices and performing further malicious activities.
Note
You’ll be able to reverse the restriction of applications from running at any time. The button on the device page will change to say Remove app restrictions, and then you take the same steps as restricting app execution.
Once you have selected Restrict app execution on the device page, type a comment and select Confirm. The Action center will show the scan information and the device timeline will include a new event.
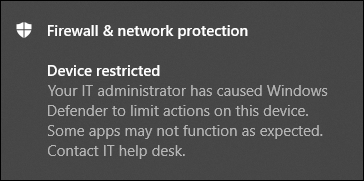
Notification on device user
When an app is restricted, the following notification is displayed to inform the user that an app is being restricted from running:
Note
The notification is not available on Windows Server 2016 and Windows Server 2012 R2.
Isolate devices from the network
Depending on the severity of the attack and the sensitivity of the device, you might want to isolate the device from the network. This action can help prevent the attacker from controlling the compromised device and performing further activities such as data exfiltration and lateral movement.
Important
- This action is not currently supported for macOS and Linux. Use live response to run the action. For more information on live response, see Investigate entities on devices using live response
- Full isolation is available for devices on Windows 10, version 1703, Windows 11, Windows Server 2019, Windows Server 2016, Windows Server 2012 R2, and Windows Server 2022.
- Selective isolation is available for devices on Windows 10, version 1709 or later, and Windows 11.
- When isolating a device, only certain processes and destinations are allowed. Therefore, devices that are behind a full VPN tunnel won’t be able to reach the Microsoft Defender for Endpoint cloud service after the device is isolated. We recommend using a split-tunneling VPN for Microsoft Defender for Endpoint and Microsoft Defender Antivirus cloud-based protection-related traffic.
This device isolation feature disconnects the compromised device from the network while retaining connectivity to the Defender for Endpoint service, which continues to monitor the device.
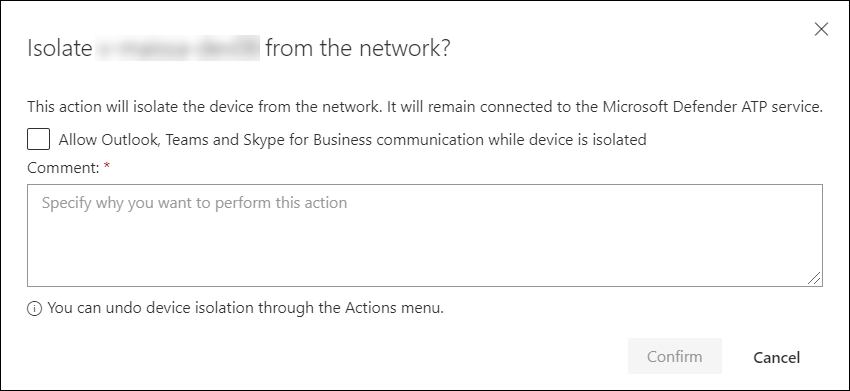
On Windows 10, version 1709 or later, you’ll have more control over the network isolation level. You can also choose to enable Outlook, Microsoft Teams, and Skype for Business connectivity (a.k.a ‘Selective Isolation’).
Note
You’ll be able to reconnect the device back to the network at any time. The button on the device page will change to say Release from isolation, and then you take the same steps as isolating the device.
Once you have selected Isolate device on the device page, type a comment and select Confirm. The Action center will show the scan information and the device timeline will include a new event.
Note
The device will remain connected to the Defender for Endpoint service even if it is isolated from the network. If you’ve chosen to enable Outlook and Skype for Business communication, then you’ll be able to communicate to the user while the device is isolated.
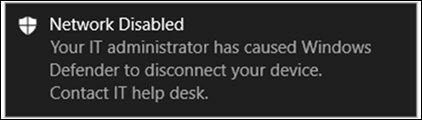
Notification on device user
When a device is being isolated, the following notification is displayed to inform the user that the device is being isolated from the network:
Consult a threat expert
You can consult a Microsoft threat expert for more insights regarding a potentially compromised device or already compromised ones. Microsoft Threat Experts can be engaged directly from within the Microsoft Defender Security Center for timely and accurate response. Experts provide insights not just regarding a potentially compromised device, but also to better understand complex threats, targeted attack notifications that you get, or if you need more information about the alerts, or a threat intelligence context that you see on your portal dashboard.
See Consult a Microsoft Threat Expert for details.
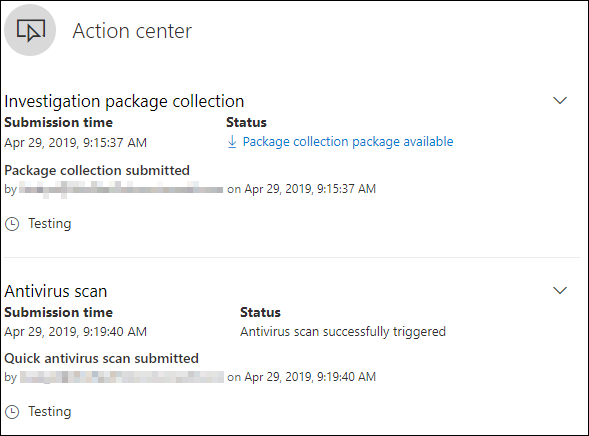
Check activity details in Action center
The Action center provides information on actions that were taken on a device or file. You’ll be able to view the following details:
- Investigation package collection
- Antivirus scan
- App restriction
- Device isolation
All other related details are also shown, for example, submission date/time, submitting user, and if the action succeeded or failed.